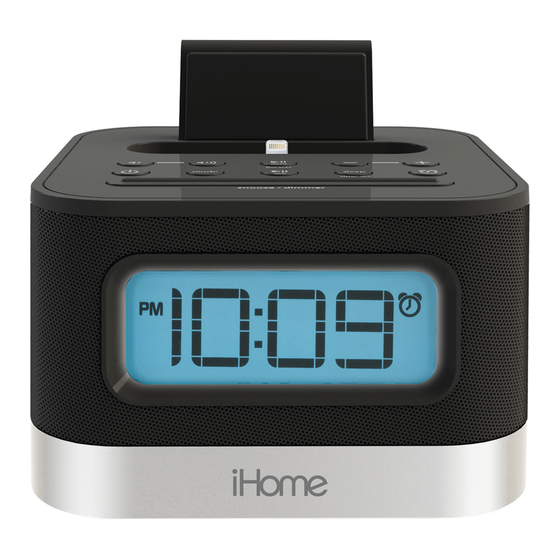
Summary of Contents for iHome iHome iPL8
- Page 1 Model iPL8 stereo alarm clock to charge your iPod or iPhone QUESTIONS? Visit www.ihomeaudio.com...
- Page 2 W E L C O M E Thank you for choosing the iPL8 from iHome. This user guide will get you up and running quickly and provide helpful hints to maximize enjoyment. For more information about this and other iHome products, please visit www.ihomeaudio.com Note that details on using iHome apps with this unit are not covered in this booklet.
-
Page 3: Features & Functions
F E A T U R E S & F U N C T I O N S Backrest Top panel Lightning Dock Lightning Dock Play/Pause/ Presets Button –/+ Settings Buttons Volume Control Buttons Time Set/Sleep button Power On/Off Alarm button Button Mode Button USB Play/Pause Button... -
Page 4: Connecting To Ac Power
C O N N E C T I N G T O A C P O W E R This unit operates on AC power using the included 100V-240V universal AC adaptor for charging and playing your iPhone or iPod . Place unit on a stable surface. - Page 5 B A C K U P B A T T E R Y ( C O N T I N U E D ) Please make sure the AC adaptor is connected. Otherwise all settings may be lost during battery replacement. 2.
-
Page 6: Setting The Time
SETTING THE TIME: TIME SYNC & MANUAL TIME SETTING TIME SYNC This unit is equipped with auto sync. By default, the unit will sync to the time on your iPhone or newer iPod (iPod touch, iPod nano and iPod Classic; older iPod models such as iPod mini do not support this feature) whenever you dock it in the Lightning dock OR connect via the USB port located on back of the unit. -
Page 7: Setting The Alarm
S E T T I N G A N D U S I N G T H E A L A R M SETTING THE ALARM This unit lets you wake to your docked iPhone, iPod (iPod), USB-connected device (USB), FM radio or to the built-in buzzer alarm. The alarm will sound for 60 minutes or until reset/turned off. -
Page 8: Listening To Iphone/Ipod
REVIEWING AND RESETTING THE ALARM Press and release the Alarm Button at any time to review the current alarm settings. To toggle the alarm on or off, press the Alarm Button as needed. When the alarm icon is displayed, the alarm is armed/on. Press the Power Button or Alarm Button when the alarm is sounding... -
Page 9: Listening To Fm Radio
U SI N G TH E US B D O CK Connect your already playing iPhone/iPod to the USB dock on back of unit using that cable that came with your device. The unit will automatically turn on and you will hear the music playing from your iPhone/iPod. - Page 10 USI NG T H E UNIT IN OT H E R CO UNT R I E S Different regions of the world use different FM radio frequency steps and ranges. You will need to select the one that matches the standards in your region (USA, EUROPE, JAPAN, AUSTRALIA, or CHINA).
-
Page 11: Maintenance
S L E E P M O D E Sleep mode lets you sleep to your playing docked or USB connected iPhone or iPod or to FM radio. Press the Sleep Button as needed to cycle to the desired sleep duration: 120, 90, 60, 30 or 15 minutes or OFF (turns sleep mode off). -
Page 12: Troubleshooting
T R O U B L E S H O O T I N G Symptom Possible reason Solution Unit won’t turn on AC adaptor isn't plugged Plug the AC adaptor into a working wall socket and plug the into a working wall socket or not plugged into the connector into the supply jack on power jack on back of the... -
Page 13: Important Safety Tips
I M P O R T A N T S A F E T Y T I P S When used in the directed manner, this unit has been designed and manufac- tured to ensure your personal safety. However, improper use can result in potential electrical shock or fire hazards. - Page 14 I M P ORTANT SAFE T Y T I PS (CO NT I NUE D) 12. Periods of Non use – If the unit is to be left unused for an extended period of time, such as a month or longer, the power cable should be unplugged from the unit to prevent damage or corrosion.
-
Page 15: Limited 1-Year Warranty
L I M I T E D 1 Y E A R W A R R A N T Y iHome Products, a division of SDI Technologies Inc. (hereafter referred to as SDI), warrants this product to be free from defects in workmanship and materials, under normal use and conditions, for a period of one (1) year from the date of original purchase.


