
Related Manuals for iHome IHOME IP97


Summary of Contents for iHome IHOME IP97
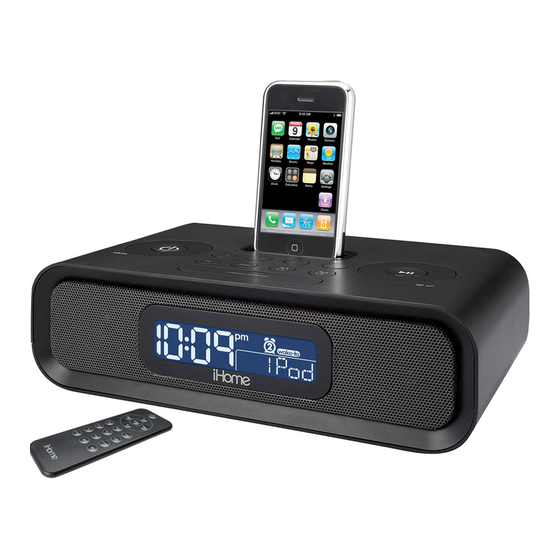
- Page 1 Model iP97 The Home System ® ® For Your iPhone or iPod Questions? Visit www.ihomeaudio.com...
-
Page 2: Table Of Contents
Quick Start ...1 Controls and Indicators / iP97 Display ...2 Using the iP97 ...3-4 Replacing iP97 Backup Batteries Using the Remote Control Unit ...5 A Consumer Guide to Product Safety ...6 Troubleshooting ...7-8 Solucionando problemas ...9-10 Warranty Information... 11 This device complies with part 15 of the FCC Rules. Operation is subject to the condition that this device does not cause harmful interference. -
Page 3: Quick Start
NOTE: If you do not have an insert for your iPhone/iPod, please visit www.ihomeaudio.com or call iHome toll free at 877-446-6301 to purchase one. 4: time zone • Move the DST switch on back... -
Page 4: Controls And Indicators / Ip97 Display
Preset Buttons 1-6 Volume Wheel Alarm Reset / Power Button EQ Button Sleep Button AC Adaptor Jack FM Antenna Time Display Controls and Indicators Dock line-in Snooze/Dimmer Button Time Zone Button Clock Adjust Button DST switch clock adj. time zone AM Loop Antenna socket iP97 Display Sleep Indicator... -
Page 5: Using The Ip97
(last selected station). * PLYLST: To wake to an iPhone/iPod playlist, you must create a playlist in iTunes called ‘iHome’ and import it to your iPhone/iPod. When PLYLST is set as your wake to source, the iP97 will wake to random songs in your iHome playlist. -
Page 6: Replacing Ip97 Backup Batteries
Radio Setting up Antennas a) Snap AM loop antenna into provided stand, then plug AM antenna cable into AM Loop Antenna socket on back of unit. Move antenna 12” away from unit for best reception. b) Extend FM Antenna (on back of unit) fully for best reception. Do not strip, alter or attach to other antennas. Tuning and Playing the Radio a) Press the Radio Button to select radio play mode. -
Page 7: Using The Remote Control Unit
The Remote Control controls basic functions on the iP97 and certain iPhone®/iPod® functions when the iPhone®/iPod® is docked in the iP97. For best results, use the remote control within 12 feet of the unit. Install/Replace the Remote Control Batteries The remote control batteries are already installed at the factory. When the remote control stops operating or its range seems reduced, replace the batteries with new ones. -
Page 8: A Consumer Guide To Product Safety
When used in the directed manner, this unit has been designed and manufactured to ensure your personal safety. However, improper use can result in potential electrical shock or fire hazards. Please read all safety and operating instructions carefully before installation and use, and keep these instructions handy for future reference. Take special note of all warnings listed in these instructions and on the unit. -
Page 9: Troubleshooting
Symptom Possible Problem iP97 does not turn on AC adaptor isn't plugged into a working wall socket or not plugged into the power supply jack on back of the unit iP97 doesn’t respond iP97 requires a reset iPhone/iPod is not docked properly Battery Low icon Batteries are weak always flashing... - Page 10 Turn unit off for awhile or lower volume Press and hold Snooze button then turn set wheel to adjust Sync iPhone/iPod to iTunes and manually label playlist iHome. Make sure to add songs to your playlist. For help in creating a playlist, please see the Help tab in iTunes or visit www.apple.com...
-
Page 11: Solucionando Problemas
Síntoma La unidad no El adaptador de corriente AC no está conectado a enciende un tomacorriente que funcione o no está conectado en la parte posterior de la unidad La unidad no La unidad debe ser reprogramada responde No ha colocado el encastre del iPhone/iPod, o está El iPhone/iPod no utilizando el encastre incorrecto. - Page 12 Mantenga oprimido el botón “Snooze” luego gire la rueda para programar la duración de tiempo deseada. nombre de la lista bajo “iHome”. Asegúrese de agregar las canciones a su lista. Ajuste la alarma según deseé que suene en hora AM o después del mediodía PM.
-
Page 13: Warranty Information
Limited 1 Year Warranty Information iHome Products, a division of SDI Technologies Inc. (hereafter referred to as SDI Technologies), warrants this product to be free from defects in workmanship and materials, under normal use and conditions, for a period of 1 Year from the date of original purchase.