Table of Contents
Advertisement
Modules described in this manual
SZ2-ST
WHSZ Series Eyepieces
Objectives
SZX-EPA
SZX-AS
SZX-STAD1
SZH-STAD1
SZ2-FO
SZH-SG
SZH-SC
This instruction manual is for the Olympus stereomicroscope system. To ensure the safety,
obtain optimum performance and to familiarize yourself fully with the use of this microscope,
we recommend that you study this manual thoroughly before operating the microscope.
Retain this instruction manual in an easily accessible place near the work desk for future
reference.
INSTRUCTIONS
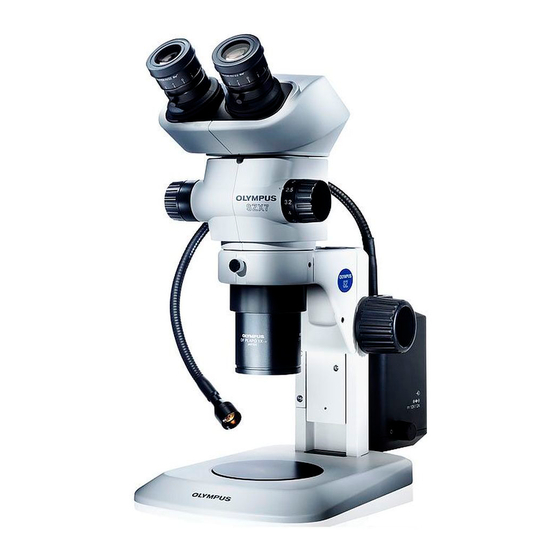
STEREOMICROSCOPE SYSTEM
SZX7
A X 6 6 3 1
Advertisement
Table of Contents

Related Manuals for Olympus SZX7


Summary of Contents for Olympus SZX7
- Page 1 SZX7 STEREOMICROSCOPE SYSTEM This instruction manual is for the Olympus stereomicroscope system. To ensure the safety, obtain optimum performance and to familiarize yourself fully with the use of this microscope, we recommend that you study this manual thoroughly before operating the microscope.
-
Page 3: Table Of Contents
SZX7 CONTENTS Correct assembly and adjustments are critical for the microscope to manifest its full performance. If you are going to assemble the microscope by yourself, please read Chapter 8, “ASSEMBLY” (pages 16 to 18). For the assem- blies of the modules for which instruction manuals are available, refer to their instruction manuals. -
Page 4: Important - Be Sure To Read This Chapter For Safe Use Of The Equipment
IMPORTANT The SZX7 stereomicroscope is provided with the ESD (Electro-Static Discharge) protection specifications. It is provided with electroconductive coating in the external finish to reduce the surface resistance and grounding lead wires in their standard stand or system to eliminate static electricity from them. -
Page 5: Maintenance And Storage
SZX7 Maintenance and Storage 1. To clean the lenses and other glass components, simply blow dirty away using a commercially available blower and wipe gently using a piece of cleaning paper (or clean gauze). If a lens is stained with fingerprints or oil smudges, wipe it gauze slightly moistened with commercially available absolute alcohol. -
Page 6: Nomenclature
* Modules marked * are given the ESD specifications. (Note) The modules shown in the following diagram are merely the typical examples. For the modules that are not shown below, please consult Olympus or the latest catalogues. Observation Tube Eyepiece ·... -
Page 7: Controls
SZX7 CONTROLS Zoom magnification indication (Page 10) Indicates 0.8, 1, 1.25, 1.6, 2, 2.5, 3.2, 4, 5 and 5.6 Eye shades (Page 8) Click stop ON-OFF screw (Page 10) Zoom adjustment knobs (Page 7) Eyepiece clamping knobs 0.8X to 5.6X... -
Page 8: Observation Procedure
OBSERVATION PROCEDURE }If you have not assembled the microscope yet, please read Chapter 8, “ASSEMBLY” (pages 16 to 18). 3-1 Preparation (Page) 1. Confirm the mounting, particularly that of the observation tube........................(P. 16 - 18) 2. Adjust the rotation tension of the focus adjustment knob..............................(P. 6) 3. -
Page 9: Operation
SZX7 OPERATION 4-1 Stand Using the Stage 1. When reflected light illumination is used, the stage plate can be placed either the white or black surface facing up depending on the specimen. However, when the ESD performance is required, always use the black surface of the stage plate. -
Page 10: Zoom Adjustment Knobs
Adjusting the Diopter (Zoom Confocality Adjustment) (Fig. 3) # Confirm that the eyepiece clamping knobs @ are tightened firmly ³ before proceeding to the adjustment. ² Eyepieces without eyepiece micrometer disk 1. Turn the diopter adjustment rings ² of the left and right eyepieces to positions “0”. -
Page 11: Eye Shades
SZX7 Using the Eye Shades (Fig. 4) # The eye shades are not provided with ESD protection performance. When ESD protection is required, do not use the eye shades. When Wearing Eyeglasses Use with the eye shades in the normal, folded-down position. This will prevent the eyeglasses from being scratched. - Page 12 Selecting the Light Path (SZX-TR30) (Fig. 7) Slide the light path selector knob @ to select the desired light path. Light Path Selector Knob Indication Light Path Ratio Pushed-in position Binocular 100% Binocular Pulled-out position TV & Photo 80% Fig. 7 Adjusting the Tilt (SZX-TBI) (Fig.
-
Page 13: Microscope Body
Fig. 9 Total magnification indication ring (Fig. 10) }An objective other than the 1X model is provided with two total magnifi- cation indication rings*. Use the ring having indication “SZX7” with the SZX7 microscope. ³ * : The indicated figures are the total magnification when the 10X eye- ²... -
Page 14: Using Auxiliary Sleeve Sz2-Et
Using Auxiliary Sleeve SZ2-ET (Fig. 11) As the 0.5X objective has a long working distance, it cannot be used in combination with the standard stand unless the auxiliary sleeve is used. # When the auxiliary sleeve is used, the microscope becomes tall and unstable. -
Page 15: Tv Observation And Photomicrography
SZX7 4-4 TV Observation and Photomicrography }When TV observation or photomicrography is required, use the SZX-TR30 trinocular tube. A TV camera and/or digital camera unit can be mounted on the SZX-TR30 trinocular tube by means of the TV adapter and/or camera mount adapter*. -
Page 16: Troubleshooting Guide
Under certain conditions, performance of the microscope may be adversely affected by factors other than defects. If problems occur, please review the following list and take remedial action as needed. If you cannot solve the problem after checking the entire list, please contact Olympus. Problem... -
Page 17: Specifications
SZX7 SPECIFICATIONS Item Specifications 1. Zoom microscope body. Zoom magnification variation: Left/right optical axis parallel method. · SZX-ZB7 Zoom drive: Horizontal knob system. Click stop for each zoom magnification: ON-OFF switching possible. Zoom ratio values: 7 values (0.8X to 5.6X) Zoom magnification indication: 0.8, 1, 1.25, 1.6, 2, 2.5, 3.2, 4, 5, 5.6... -
Page 18: Optical Performance
OPTICAL PERFORMANCE Eyepieces WHSZ10X/10X-H WHSZ15X-H WHSZ20X/20X-H WHSZ30X-H Objective Total Actual Total Actual Total Actual Total Actual Magnification Field (mm) Magnification Field (mm) Magnification Field (mm) Magnification Field (mm) DFPL 0.5X-4 4X - 28X 55 - 7.8 6X - 42X 40 - 5.7 8X - 56X 31.3 - 4.5 12X - 84X... -
Page 19: Assembly
SZX7 ASSEMBLY 8-1 Assembly Diagram The diagram below shows the sequence of assembly of the various modules. The numbers indicate the order of assembly. Assembly steps enclosed in will be detailed on the subsequent pages. # When assembling the microscope, make sure that all parts are free of dust and dirt, and avoid scratching any parts or touching glass surfaces. -
Page 20: Assembly
8-2 Detailed Assembly Procedures Installing the Microscope Body (Fig. 13) 1. Loosen the body clamping knob @ and insert the microscope body ² ² gently into the mounting hole of the standard stand. }The body clamping knob @ can be attached to any of the accessory mounting screw holes ³... - Page 21 SZX7 Mounting the Stage Plate (Figs. 16 & 17) Mounting 1. While applying the stage plate @ to the stage plate holder spring ², fit the stage plate into the stage plate mounting hole ³. }The stage plate has the milky white and black surfaces. Select the side facing up according to the specimen.
-
Page 22: Optional Modules
OPTIONAL MODULES 9-1 Eye Point Adjuster SZX-EPA External View and Nomenclature Observation tube mount Observation tube clamping screw Installation (Fig. 18) 1. Remove the observation tube @ using the Allen screwdriver provided with the SZX microscope body. 2. Attach the eye point adjuster ² to the position where the observation tube has been attached. -
Page 23: Using The Aperture Iris Diaphragm
SZX7 Using the Aperture Iris Diaphragm }Adjusting the aperture iris diaphragm makes it possible to improve the contrast of the observation image and increase the focal depth. However, the resolution is degraded when the aperture iris diaphragm is stopped down. - Page 24 Installation Mechanical stage U-FMP Rotary stage Rotary stage U-SRP U-SRG Clamping screw Allen wrench Clamping screw BX stage adapter type 1 SZX-STAD1 Mount hole Mounting screw hole Stand Mounting the polarizer (SZX-PO or SZ-POL-2) When simplified transmitted light polarized observation is required, mount the polarizer on the BX stage adapter type 1 (SZX-STAD1).
- Page 25 SZX7 9-4 Stage Adapter Type 1 SZH-STAD1 The SZH-STAD1 is an adapter providing the similar function to the BX stage adapter type 1 (SZX-STAD1). The difference is that the stage usable for the SZH-STAD1 is the BH2-SH horizontal knob stage.
- Page 26 External View and Nomenclature Focus adjustment knobs Stroke: Approx. 21 mm Rotation tension adjustable. Clamping screw holes Stage Load capacity: 1 kg Clamping knob Installation 1. Using the provided screw and Allen wrench, attach the SZ2-FO up/down moving stage into the screw hole on the stage plate mount hole of an applicable stand or that on the stage plate (SZ-STL).
- Page 27 SZX7 Adjusting the focus (Fig. 21) Bring to the center 1. Rotate the focus adjustment knob @ of the SZ2-FO up/down moving of the stroke. stage to bring the stage at the center of the focusing stroke. 2. Place a specimen on the stage and rotate the focus adjustment knob ²...
- Page 28 9-6 Gliding Stage SZH-SG External View and Nomenclature Finger hook Stage plate Gliding stage Illumination field diameter: 40 mm Seat Moving range diameter: 40 mm Installation Stage plate Note 1) Be sure to clean the friction surfaces if dirt Use the one provided or metallic power is attached on them.
- Page 29 SZX7 9-7 Cup Stage SZH-SC External View and Nomenclature # The SZH-SC can be used only with reflected light illumination. It cannot be used with transmitted light illumination. Tube Cup stage Finger hook Tilting limit angle: 30° Stage plate Specimen holder Seat Same size as the stage plate.
- Page 30 Operation (Figs. 22 & 23) Place a specimen on the stage plate, hold the cup stage by the edge, and tilt the cup stage slowly. (Fig. 22) }If the specimen slips on the stage plate, hold the specimen with the provided specimen holder.
- Page 32 Shinjuku Monolith, 3-1, Nishi Shinjuku 2-chome, Shinjuku-ku, Tokyo, Japan Wendenstraße 14-18, 20097 Hamburg, Germany 3500 Corporate Parkway, P.O. Box 610, Center Valley, PA 18034-0610, U.S.A. One Corporate Drive, Orangeburg, NY 10962, U.S.A. 491B River Valley Road, #12-01/04 Valley Point Office Tower, Singapore 248373 31 Gilby Road, Mount Waverley, VIC., 3149, Australia 5301 Blue Lagoon Drive, Suite 290 Miami, FL 33126, U.S.A.