Olympus SZX16 Instructions Manual
Research high-class stereo microscope, modules described in this manual - szx16, szx-r, szh-p400, szh-p600, szx-2-2re16, szx-stad1, szx2-an, szx-po, szx-stad2, szh-stad1
Hide thumbs
Also See for SZX16:
- Overview (24 pages) ,
- Instructions manual (28 pages) ,
- Instructions manual (40 pages)
Table of Contents
Advertisement
Modules described in this manual
SZX16
SZX-R/SZH-P400/SZH-P600
SZX-2-2RE16
SZX-STAD1
SZX2-AN
SZX-PO
SZX-STAD2
SZH-STAD1
This instruction manual is for the Olympus SZX16 Research High-Class Stereo Microscope System.
To ensure the safety, obtain optimum performance and to familiarize yourself full with the use of this
microscope, we recommend that you study this manual thoroughly before operating the microscope.
Retain this instruction manual in an easily accessible place near the work desk for future reference.
RESEARCH HIGH-CLASS STEREO
INSTRUCTIONS
SZX16
MICROSCOPE
A X 7 5 0 0
Advertisement
Table of Contents

Related Manuals for Olympus SZX16


Summary of Contents for Olympus SZX16
- Page 1 RESEARCH HIGH-CLASS STEREO MICROSCOPE This instruction manual is for the Olympus SZX16 Research High-Class Stereo Microscope System. To ensure the safety, obtain optimum performance and to familiarize yourself full with the use of this microscope, we recommend that you study this manual thoroughly before operating the microscope.
- Page 2 This device complies with the requirements of directive 98/79/EC concerning in vitro diagnostic medical devices. CE marking means the conformity to the directive.
-
Page 3: Table Of Contents
SZX16 CONTENTS IMPORTANT — Be sure to read this section for safe use of the equipment. — NOMENCLATURE CONTROLS SUMMARY OF OBSERVATION PROCEDURE USING THE CONTROLS 7-13 4-1 Base ............................................Using the Stage Plate Placing the Specimen 4-2 Microscope Body and Focusing Assembly ..................7-9... - Page 4 ASSEMBLY 18-21 OPERATION OF OTHER MODULES 22-30 9-1 Drop Prevention Collar SZX-R and Auxiliary Pillar SZH-P400/SZH-P600 ..22 9-2 Revolving Nosepiece SZX2-2RE16 ......................23-25 9-3 BX Stage Adapter Type 1 SZX-STAD1 ....................26-28 9-4 BX Stage Adapter Type 2 SZX-STAD2 ....................29-30 9-5 Stage Adapter Type 1 SZH-STAD1 ........................
-
Page 5: Safety Precautions
SZX16 IMPORTANT SAFETY PRECAUTIONS 1. After the equipment has been used in an observation of a specimen that is accompanied with a potential of infection, clean the parts coming in contact with the specimen to prevent infection. · Moving this microscope is accompanied with the risk of dropping the specimen and causing infections. Be sure to remove the specimen before moving this product. - Page 6 Getting Ready 1. A microscope is a precision instrument. Handle it with care and avoid subjecting it to sudden or severe impact. 2. Do not use the microscope where it is subjected to direct sunlight, high temperature and humidity, or vibration. (For the operating environment, see Chapter 6, “SPECIFICATIONS”...
-
Page 7: Maintenance And Storage
SZX16 Maintenance and Storage 1. To clean the lenses and other glass components, simply blow dirty away using a commercially available blower and wipe gently using a piece of cleaning paper (or clean gauze). If a lens is stained with fingerprints or oil smudges, wipe it gauze slightly moistened with commercially available absolute alcohol. -
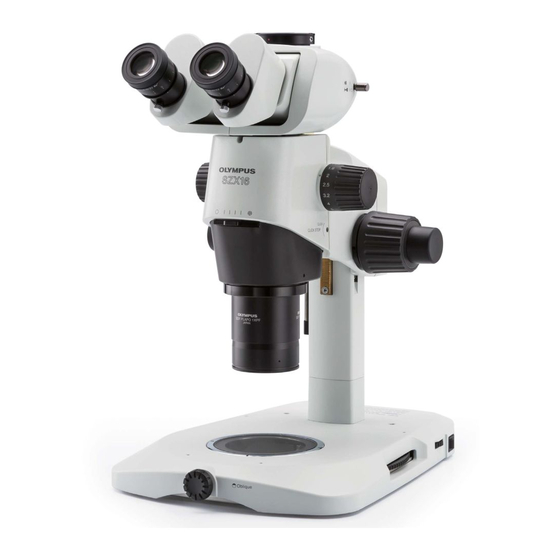
Page 8: Nomenclature
}The following illustration shows a typical system composed of modules marked with “{” in the list of each module, and other modules may also be used in place of them. For the modules that are not shown in the module lists below, please contact Olympus or the latest catalogues. Eyepieces... -
Page 9: Controls
SZX16 CONTROLS }If the microscope is not yet assembled, see Chapter 8, “ASSEMBLY” (pages 18 to 21) before the following. Light path selector knob (P. 12) Zooming knob 0.7X to 11.5X Focusing assembly clamping knob Diopter adjustment ring (P.10) Coarse focus adjustment knob tension adjustment ring (P. -
Page 10: Summary Of Observation Procedure
SUMMARY OF OBSERVATION PROCEDURE 3-1 Preparation Ref. Page 1. Check and tighten the connection of each component, especially the observation tube........... (Page 20) 2. Check that the angled formed by the microscope body with respect to the base is less than the turning-over prevention angle. -
Page 11: Using The Controls
SZX16 USING THE CONTROLS 4-1 Base Using the Stage Plate In reflected light observation, the stage plate can be placed either the white or black side facing up. # Win transmitted light observation, use the transparent glass stage plate (SP-C). -
Page 12: Engaging And Disengaging The Zooming Knob Click Stop Function
Engaging and Disengaging the Zooming (Fig. 5) Knob Click Stop Function }When the click stop knob is set to ON, the click stop function is engaged for each magnification indicated with the zooming knob. When the knob is set to OFF, the zoom magnification can be varied continuously and finely near the click groove. -
Page 13: Zoom Magnification Indication
SZX16 Zoom Magnification Indication (Fig. 7) The body zoom magnification is indicated on the zooming knob on the right side. The total magnification of observation can be calculated with the following formula: Objective Body zoom Eyepiece magnification magnification magnification Fig. 7 2X Objective Collection Collar (Fig. -
Page 14: Observation Tube
4-3 Observation Tube Adjusting the Interpupillary Distance (Fig. 9) # Be sure to hold the binocular assembly @ with both hands to make this adjustment. To prevent damaging the mechanism, do not apply an excessive force beyond the stop position. While looking through the eyepieces, hold the left and right of the binocular assembly @ and adjust the eyepieces by opening or closing them for binocular vision until the left and right fields of view coincide completely. -
Page 15: Using The Eye Shades
SZX16 Using the Eye Shades (Fig. 11) When Wearing Eyeglasses Use with eye shades in their normal folded-down position. (This will prevent eyeglasses from being scratched by the eyepiece.) When Not Wearing Eyeglasses Extend the folded eyeshades in the direction of the arrow. This makes observation easier by preventing the inverse incidence of light from between the eyepiece and your eyes. -
Page 16: Selecting The Light Path
Selecting the Light Path (Fig. 13) }Pull out the light path selector knob @ to set the light path for the right eyepiece to the TV/photomicrography light path. (The following table shows the intensity ratio of each light path in %.) Light Path Selector Knob Pushed-in Pulled-out... -
Page 17: Tv Observation And Photomicrography
SZX16 4-4 TV Observation and Photomicrography A TV camera and/or digital camera unit can be mounted on the straight tube mount of the trinocular tube by means of the TV adapter and/or camera mount adapter*. * The camera mount adapter is not necessary if a TV adapter equipped with a camera mount is used. -
Page 18: Troubleshooting Guide
Under certain conditions, performance of this unit may be adversely affected by factors other than defects. If a problem occurs, please review the following list and take remedial action as needed. If you cannot solve the problem after checking the entire list, contact Olympus. Problem... -
Page 19: Specifications
SZX16 SPECIFICATIONS Item Specifications Left/right zoom magnification system. 1. Zoom microscope body Zoom drive system: Horizontal knob. · SZX2-ZB16 Click stop ON-OFF switchable per zoom magnification. Zoom ratio: 16.4 (0.7X to 11.5X) Magnification indications: 14 indications. 0.7, 0.8, 1, 1.25, 1.6, 2, 2.5, 3.2, 4, 5, 6.3, 8, 10, 11.5. - Page 20 Item Specifications SDFPLFL0.3X WD 141 mm* 6. Objectives SDFPLAPO0.5XPF WD 70.5 mm WD: Working distance SDFPLAPO0.8X WD 81 mm PF: Parfocal lens SDFPLAPO1XPF WD 60 mm * Auxiliary pillar is required when the SDFPLAPO1.6XPF WD 30 mm SZX2-ST is used. SDFPLAPO2XPFC WD 20 mm FN 22, diopter adjustment ring provided.
-
Page 21: Observation Magnifications And Observation Areas
SZX16 OBSERVATION MAGNIFICATIONS AND OBSERVATION AREAS · Observation magnification = Objective magnification x Zoom magnification x Eyepiece magnification · Observation area = Eyepiece FN / (Objective magnification x Zoom magnification) (mm) Eyepieces WHN10X-H WHSZ15X-H WHSZ20X-H WHSZ30X-H Objective FN 22 FN 16 FN 12.5... -
Page 22: Assembly
ASSEMBLY 8-1 Assembly Diagram The diagram below shows how to assemble the various modules. The numbers indicate the order of assembly. # When assembling the microscope, make sure that all parts are free of dust and dirt, and avoid scratching any part. -
Page 23: Detailed Assembly Procedure
SZX16 8-2 Detailed Assembly Procedure Installing the Pillar (Fig. 16) ³ 1. Using the Allen wrench provided with the base, loosen the two clamping ² screws @ on the pillar support sleeve completely. 2. Hold the pillar ² so that the Allen screwdriver storage hole comes cap at the top, and insert the pillar into the pillar support sleeve until it reaches the bottom. - Page 24 Mounting the Microscope Body (Fig. 19) 1. Remove the cap @ on the focusing assembly by inserting a thin object into the notch. 2. Using the provided Allen wrench, loosen the dovetail mount clamping screw inside the cap on the focusing assembly by rotating it by 2 or 3 turns (counterclockwise).
- Page 25 SZX16 Mounting the Eyepiece (Fig. 22) }When using the micrometer eyepiece disk, insert it in the right eyepiece. (It may be inserted in the left eyepiece but the description in this manual assumes that it is inserted in the right eyepiece.) 1.
-
Page 26: Operation Of Other Modules
OPERATION OF OTHER MODULES Drop Prevention Collar SZX-R and Auxiliary Pillar SZH-P400/SZH-P600 }The auxiliary pillar is to be used when observing a large specimen or when it is required to move the microscope body upward for using a low-magnification objective with long WD. }The drop prevention collar prevents the zoom microscope body from dropping when installed at a high position using the auxiliary pillar and the clamping knob on the focusing assembly is loosened carelessly. -
Page 27: Revolving Nosepiece Szx2-2Re
SZX16 9-2 Revolving Nosepiece SZX2-2RE16 }The revolving nosepiece allows two objectives to be mounted (deviation in focusing due to switching between the objectives can be minimized provided that both of them are of the PF series). This makes objective switching easy by simply rotating the revolving nosepiece and expands the range of observation magnifications. - Page 28 4. Place the revolving nosepiece mount ³ (with its objective mounts | … ƒ facing upward) where the objective mount has been by aligning the screw holes. Using the Allen wrench (for M3 screws), clamp the revolver mount with ³ the provided three clamping screws (M3, 6 mm long) ƒ.
- Page 29 SZX16 2. Return the microscope body to the illumination light path by loosening the focusing module clamping knob ², rotating the microscope body gently in the direction of the arrow, aligning visually the objective with the illumination light path and tightening the clamping knob ² again.
-
Page 30: Bx Stage Adapter Type 1 Szx-Stad
9-3 BX Stage Adapter Type 1 SZX-STAD1 }This adapter is for installation of a U-SRG or U-SRP rotary stage on the SZX2 standard base or a SZX2/SZX series illumination base. When the U-SRP rotary stage is used together with the U-FMP mechanical stage, X-Y directional movement becomes possible, which is convenient for framing during photomicrography. - Page 31 SZX16 Assembly Mechanical stage U-FMP Rotary stage Rotary stage U-SRG U-SRP Allen screwdriver (provided with the microscope Clamping screws body) BX stage adapter type 1 SZX-STAD1 Clamping screw Mounting holes Mounting threaded holes Base Mounting the Polarizer (SZX-PO) When simplified transmitted polarized light observation is required, install the SZX-PO polarizer on the SZX-STAD1 BX stage adapter type 1.
- Page 32 Simplified Transmitted Polarized Light Observation ² }The SZX2-AN analyzer is required additionally. The SDPlApo1.6XPF/2XPFC objectives cannot be used in the polarized light observation. 1. Loosen the two analyzer clamping knobs @, fit the analyzer into the objective tip ² and tighten the clamping knobs (by positioning them on both sides).
-
Page 33: Bx Stage Adapter Type 2 Szx-Stad
SZX16 9-4 BX Stage Adapter Type 2 SZX-STAD2 }This adapter is for installing the U-SIC4R2/SIC4L2 large stage* on the SZX2-STL/SZX-STL large stand**. When this stage adapter is used, the SZH-P400 auxiliary pillar should be used to cover the height of the stage adapter (about 125 mm). In addition, when a low-magnification objective with a long working distance (SDFPLFL0.3X) is used, the SZH-P600 auxiliary... -
Page 34: Stage Adapter Type 1 Szh-Stad
Simplified Transmitted Light Observation (Fig. 33) 1. Illuminate the specimen with an external light source (LSD illuminator, Microscope light guide illuminator, etc.). body Light the external light source as shown in the figure on the left and Objective irradiate the mirror assembly. Frosted filter Stage 2. - Page 36 Shinjuku Monolith, 3-1, Nishi Shinjuku 2-chome, Shinjuku-ku, Tokyo, Japan Wendenstraße 14-18, 20097 Hamburg, Germany 3500 Corporate Parkway, P.O. Box 610, Center Valley, PA 18034-0610, U.S.A. One Corporate Drive, Orangeburg, NY 10962, U.S.A. 491B River Valley Road, #12-01/04 Valley Point Office Tower, Singapore 248373 31 Gilby Road, Mount Waverley, VIC., 3149, Australia 5301 Blue Lagoon Drive, Suite 290 Miami, FL 33126, U.S.A.