
Related Manuals for Oce TDS450


Summary of Contents for Oce TDS450
- Page 1 Océ Education Services FedEx Kinko’s Student Guide Océ Education Services Océ TDS450 Océ Customer Training...
- Page 2 Student Guide - Hardware solutions Océ TDS450 Version 2006.01 USA CEP No. 0910319...
-
Page 3: Table Of Contents
2. Océ TDS450 Introduction The Scanner Operator Panel The Printer Operator Panel 3. How to… Switch the Océ TDS450 on/off Load rolls of media Set the media type and width Make a basic copy Make a print with the Océ WPD driver... -
Page 5: Introduction
1. Introduction... -
Page 6: Use Of The Student Guide
This Student Guide contains seven (7) sections: 1. Introduction In the introduction-section we describe the outline of this guide. 2. Océ TDS450 In this section the main components of the machine and the operator panel are highlighted. 3. How to .. -
Page 7: Océ Tds450
2. Océ TDS450... -
Page 8: Introduction
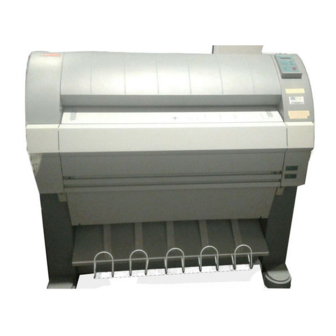
Introduction Introduction The Océ TDS450 is a wide format, multifunctional system. It offers a broad range of print, copy, and (color) scan-to-file functionality. The system includes a printer (1 or 2 rolls) a controller and an optional scanner. The Océ TDS450 scanner 1. -
Page 9: The Scanner Operator Panel
The Scanner Operator Panel The Scanner Operator Panel... -
Page 10: The Printer Operator Panel
The Printer Operator Panel The Printer Operator Panel... -
Page 11: How To
3. How to…... -
Page 12: Switch The Océ Tds450 On/Off
Switch the Océ TDS450 on/off Switch the Océ TDS450 on/off Introduction You must separately switch on and off the Océ TDS450 printer, Océ TCS4 scanner and the Océ Power Logic® Controller. Switch the Océ TDS450 printer on 1. Set the On/Off switch at the rear of the printer to position ‘1’. - Page 13 2. Click ‘System’ to open the system menu. 3. Click ‘Shutdown’. A dialogue box displays. 4. Click ‘Yes’ to confirm. The system automatically performs the shutdown procedure for the controller. Note: Wait at least 5 seconds before you restart the Océ TDS450.
-
Page 14: Load Rolls Of Media
The Océ TDS450 is available with a roll unit for one or two rolls. Each of the rolls on the Océ TDS450 can be loaded with print material of a different size or type. The size and type of the available media are indicated on the operator panel. - Page 15 Load rolls of media 2. Remove the empty core from the roll holder while pressing the knob. 3. Slide the roll holder in the new roll of material while pressing the knob. The knob must be at the right hand side and paper must be positioned as shown in the figure.
- Page 16 Load rolls of media 5. Place the roll holder with the material in the drawer. 6. Feed the material between the input guide plates against the rollers. 7. Turn the rollers until the material is visible. Also refer to the sticker inside the drawer.
- Page 17 Load rolls of media How to load roll 2 1. Open the cover to get access to roll 2 2. Remove the roll holder 3. Remove the empty core from the roll holder while pressing the knob (see page 15). 4.
- Page 18 Load rolls of media 5. Align the roll with the appropriate lines on the roll holder while you press the knob. 6. Place the roll holder with the material in the lower paper compartment. 7. Feed the material between the input guide plates against the rollers. Turn the rollers until the material is visible.
-
Page 19: Set The Media Type And Width
Set the media type and width Set the media type and width Set the media width 1. Press the On-line key to put the printer off-line. 2. Select the ‘Media settings’ item with the key. ◄ ► 3. Press Next/select to enter the ‘Media settings’ menu. 4. -
Page 20: Make A Basic Copy
Every other type of copy job is called an extended copy job. An extended copy job takes one additional step, define the copy job settings at the scanner operator panel. When you turn the Océ TDS450 on or when you select 'Copy', the scanner operator panel shows five copy job templates. - Page 21 Make a basic copy Procedure 1. Feed the original. 2. Press the green start key. Result The copy job uses the settings of the first template.
-
Page 22: Make A Print With The Océ Wpd Driver
The Océ WPD driver is used to print from any Windows application to the Océ TDS450. This enables your Océ TDS450 to function as a true wide-format printer, producing monochrome drawings from Photoshop, Corel Draw, etc., as well as CAD or electronic design applications, amongst others. - Page 23 6. Use Custom Size when you want to specify a special page size. 7. Use Profiles to save or reload your settings. 8. Click ‘OK’ to close the ‘Properties’ window. 9. Click the ‘Print’ button (or OK button) in the application’s printer window to send your job to the Océ TDS450.
- Page 24 Make a print with the Océ WPD driver 10. Note: If the accounting option on the controller is enabled you first have to set the accounting information in the driver by clicking the “Accounting” button. See the following steps. 11. After clicking the “Accounting” button on the “Basic” tab, a window similar to the following will be displayed: 12.
-
Page 25: Work With The System Control Panel
Work with the System Control Panel Work with the System Control Panel Introduction The Océ System Control Panel (SCP) application provides you with status information about the system. This includes: • Machine status of the printer • Overview of the loaded media types and sizes •... - Page 26 Work with the System Control Panel Print your system configuration 1. Select the ‘Print settings’ option in the ‘System’ menu. A list is printed of the current settings on the Océ Power Logic® Controller. Clear the system 1. Select the ‘Clear system’ option in the ‘System’ menu to delete all jobs.
-
Page 27: Work With The Queue Manager
Work with the Queue Manager Work with the Queue Manager Introduction Use the Océ Queue Manager to view the print queue and the status of the print jobs as well as to manage the jobs in the queue. With the Océ Queue Manager you can: •... -
Page 28: Make A Basic Scan-To-File Job
Make a basic scan-to-file job Make a basic scan-to-file job Introduction A basic scan-to-file job takes three steps. Feed the original, select 'Scan- to-file' and press the start key. When you select 'Scan-to-file', the scanner operator panel shows five scan-to-file job templates. The scan- to-file job templates provide access to the different settings per scan-to- file job template. - Page 29 Make a basic scan-to-file job How to scan to file 1. Feed the original. 2. Select ‘Scan-to-file’. 3. Press the green start key.
-
Page 30: Work With Océ Scan Manager
The right part displays a table view containing the content of the folder currently selected. Note: Not all options are available to all users. You must log on as a particular user to perform specific tasks with Océ TDS450 Océ Scan Manager. - Page 31 Work with Océ Scan Manager Create a destination on the controller 1. Select ‘Destinations’ in the tree view. 2. Open the ‘File’ menu and select ‘New’ or click on the ‘New’ button on the toolbar. The Destination properties window opens. 3.
- Page 32 Work with Océ Scan Manager Delete a destination (Only available in Key Operator or Repro Operator mode) 1. Select a destination. 2. Open the file menu and select Delete or click the Delete button on the toolbar. Lock a destination (Only available in Key Operator mode) 1.
-
Page 33: Work With The Settings Editor
Introduction Use the Océ Settings Editor to set the default settings of the Océ TDS450 according to your companies requirements. You can log on as either Key Operator or System Administrator. Key Operators and System Administrators have different rights to determine settings. - Page 34 Work with the Settings Editor 5. Update the setting in the update area, as required. 6. Click on the ‘Apply’ button. The new value is now applied for the setting. 7. Log off from log off the Key Operator mode when you have finished updating the settings.
-
Page 35: Use Remote Logic
Use Remote Logic Use Remote Logic Introduction Océ Remote Logic® enables you to: • View system status (Océ System Control Panel). • Manage print jobs (Océ Queue Manager). • Change settings (Océ Settings Editor). Start Remote Logic 1. Select 'Océ Remote Logic' via the ‘Start’ menu. 2. - Page 36 Add an Océ TDS system 1. Open the ‘File’ menu and select ‘Connect to’. A dialogue box will appear with a drop-down list box containing the already added Océ TDS systems. 2. Click ‘Edit...’. The ‘Edit systems’ dialogue box appears. 3.
-
Page 37: Correct The Errors
Correct the errors Correct the errors Introduction In case of an error: 1. Read the error message. 2. Follow the instructions. Clear a paper jam A paper jam can occur in the following sections: • The scanner (original jam) • The fuser section •... -
Page 38: Add Toner
Add toner Add toner Introduction If the ‘Refill toner’ message appears on the printer panel, you must refill toner immediately. Attention: Use only Océ B5 toner. How to add toner 1. Unscrew the knurled nut at the left hand side of the printer and open the left cover 2. - Page 39 Add toner 5. Tap the bottle to remove the toner from the bottle. 6. Return the bottle to its original position when the toner bottle is empty. 7. Unscrew the toner bottle anti-clockwise and close it. Replace the waste toner bag 1.
-
Page 41: Exercises
4. Exercises 1.1.1. -
Page 42: Exercises
Exercises Exercises 1.1.2. Exercises Exercise 1 Make standard copy • Use an original with a size that matches one of the loaded paper rolls • Insert the original into the scanner, face down and right aligned (use the magnetic or painted guide on right side of the scanner) •... - Page 43 Exercises Exercise 3 Copy to different size, with scaling • Take a standard size original • Make sure scanner panel is in Home mode • Use upper-left softkey to select Copy • Select and open a template to Copy • Make sure Media selection is set to ‘Automatic’ and Original Width is set to ‘by scanner’.
- Page 44 Exercises Exercise 5 Non-standard sized originals • Take a non-standard size original (22”) • Make sure scanner panel is in Home mode • Use upper-left softkey to select Copy • Select and open a template to Copy • Select Original width: By scanner •...
- Page 45 Exercises Exercise 7 Copy with a stamp (Optional) • Take a standard size original • Make sure scanner panel is in Home mode • Use upper-left softkey to select Copy • If installed, select and open the template to Copy •...
- Page 46 Print documents with Print Exec Workgroup LT • Open Print Exec Workgroup LT (Open Explorer and enter the name or ip-address of the TDS printer, e.g. //TDS450) • Open the submission tab • Add two drawings to the job • Select the first drawing and specify 2 copies (only for the first drawing!) •...
- Page 47 Exercises Exercise 11 Create a template for scan-to-file (Optional) • Open the Setting Editor, and login as Key Operator • Select View KO Settings > Jobs > Scan-to-file • Open the folder ‘Template 5’ • Select Template Description, and change the Template name into ‘Scan to file’.
- Page 48 Exercises Exercise 12 Create a template for set copy • Open the Setting Editor, and login as Key Operator • Select View KO Settings > Jobs > Copy • Open the folder ‘Template 5’ • Select Template Description, and change the Template name into ‘Set Copy’.
- Page 49 Exercises Exercise 13 Handling Jobs in queue • Put the printer Off-line • Send 6 times a small print job to the printer – Each job should have a different name – • Open the Queue Manager, and login as Key Operator •...
- Page 50 Exercises Exercise 14 Scan and check quality (Optional) • Make sure scanner panel is in Home mode • Use upper-left softkey to select scan-to-file • Select and open a template to Scan • Select: - Destination = On controller - File type: - Color = Black&White - File type = TIFF - Compression = Group4...
- Page 51 Exercises Exercise 15 Folded Copies (Optional) • Switch the lever on the folder downward • Feed a standard A0 / 36”size original into the scanner (Make sure to feed the original face down, with the legend at the right side) •...
- Page 52 • Open the drawer with the empty paper roll • Put in a new paper roll • Close the drawer • Set the correct media size & type • Put the printer on-line (See: User Manual: ‘Maintain the Océ TDS450)
-
Page 53: Frequently Asked Questions
5. Frequently asked questions 1.1.3. 1.1.4. -
Page 54: The 10 Most Frequently Asked Questions
When possible, use the new Océ WPD (Windows Printer Driver) You can not use the Océ WPD driver on older TDS systems: - Océ TDS450 systems with version numbers prior to 1.4.3 - Océ TDS600 systems with version numbers prior to 3.2.3... - Page 55 The 10 most frequently asked questions When you can not use the WPD driver: - AutoCAD R14: Océ TDS ADI driver - AutoCAD 2000 series: Océ TDS HDI driver 4. I press the red Stop button on the Scanner operator panel, but the job doesn’t stop…...
- Page 56 Account Logic is configured to ask for accounting information before you can use the scanner Go to the PLC to unlock the scanner: - Click ‘Oce Account Logic’ in the small Launcher window - If needed, maximize the window - Fill in the required accounting information...
-
Page 57: Safety Instructions
6. Safety instructions... -
Page 58: Instructions For Safe Use
Instructions for safe use Instructions for safe use Instructions for safe use Accident and Damage Prevention Operating the Printing System • The printing system may only be operated by operators and service. • The printing system must not be operated by persons under the influence of alcohol or drugs, or by persons taking medication such as psychotropic drugs. -
Page 59: About Océ
1.1.6. 7. About Océ... -
Page 60: About Océ
About Océ About Océ 1.1.7. About Océ Océ is one of the world’s leading suppliers of high-quality products, services and complete solutions for use by professionals in print and document management, primarily in environments where large numbers of documents are processed. In its own R&D centers Océ develops advanced machines and systems for document production, distribution and management. -
Page 61: Océ Philosophy On Education Services
Océ philosophy on Education Services Océ philosophy on Education Services 1.1.8. Océ philosophy on Educati on Services Mission statement Océ enables its customers to manage their documents efficiently and effectively by offering innovative print and document management products and services for professional environments. Education Services @ Océ... - Page 62 Océ-Technologies B.V. Venlo, The Netherlands Printing for Professionals For Océ information © 2004 Océ-Technologies B.V.. Illustrations and specifications do not necessarily apply to the standard version and services, visit us at of machines in all local markets. Technical specifications subject to change without prior notice. All product www.Océ.com names mentioned in this brochure are claimed a trademark or registered trademark of their respective owners.