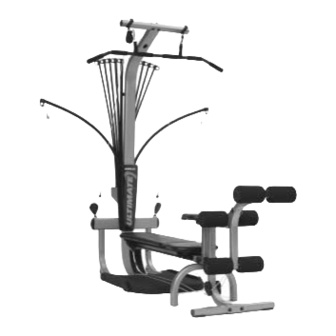
Bowflex Ultimate Assembly Manual
Hide thumbs
Also See for Ultimate:
- Owner's manual (83 pages) ,
- Owner's manual (110 pages) ,
- Owner's manual (83 pages)

Related Manuals for Bowflex Ultimate


Summary of Contents for Bowflex Ultimate
-
Page 1: Assembly Manual
Assembly Manual FOR THE BOWFLEX ULTIMATE Includes Instructions for Assembling Bowflex Ultimate Machines... - Page 2 Basic Assembly Principles/Tools You Will Need Basic Assembly Principles Here are a few basic assembly tips that can make your assembly of the Bowflex Ultimate quick and easy. By using these principles, you can simplify the process and save yourself some extra time and effort.
- Page 3 BOWFLEX Ultimate Parts Reference Guide ® ® BOWFLEX Ultimate Parts Reference Guide Lat Tower Assembly (if so equipped) Bent Lat Bar Pulley Rod Cap Special features unique to the BOWFLEX ULTIMATE are the special cable storage areas. When the lat cables are not in...
-
Page 4: Parts List
BOWFLEX Ultimate Parts Reference Guide Base Unit Assembly Parts List Item No. Qty. Part No. Description Item No. Qty. Part No. Description 10001 LOWER LAT TOWER 90640 T-BAR w/ STRAP 10002 LEFT MAIN FRAME ASSEMBLY 90149 SCREW, 1/4" X 1-1/2" PHILLIPS HEAD... - Page 5 BOWFLEX Ultimate Parts Reference Guide Item #: 1 Item #: 2 Item #: 3 Item #: 4 Item #: 5 Item #: 6 Qty.: Qty.: Qty.: Qty.: Qty.: Qty.: Part #: 10001 Part #: 10002 Part #: 10003 Part #: 10004...
- Page 6 BOWFLEX Ultimate Parts Reference Guide Note: Drawings are actual size. Item #: 45 Qty.: Item #: 49 Item #: 41 Item #: 44 Item #: 48 Part #: 10183 Qty.: Qty.: Qty.: Qty.: Descr: #10 X 1” Part #: 90193...
- Page 7 Assembling Your BOWFLEX Ultimate Step 1: LOWER MAIN FRAME ASSEMBLY Locate the following for this step: • Lower lat tower (Item #1) • Left main frame (Item #2) • Right main frame (Item #3) • Two (2) 3/8X3" bolts (Item #51) •...
- Page 8 Assembling Your BOWFLEX Ultimate Step 3: SQUAT PLATFORM & FRAME ASSEMBLY Locate the following parts for this step: • Large plastic squat platform (Item #5) • Squat frame (Item #4) • Four (4) 3/8"X4-3/4" bolts (Item #52) • Six (6) 3/8" washers (Item #54) •...
- Page 9 Assembling Your BOWFLEX Ultimate Step 5: REAR LEG Locate the following parts for this step: • Rear leg (Item #13) • Seat rail (Item #10) • Four (4) 3/8” nylon lock nuts (Item #57) • Four (4) 3/8" washers (Item #54) Find the four bolts in the channels on the bottom of the seat rail assembly closest to the warning sticker.
- Page 10 Assembling Your BOWFLEX Ultimate Step 7: SEAT RAIL INSTALLATION The following parts are required for this step: • Seat Rail (Item #10) • One (1) 3/8"X5" bolt (Item #53) • Two (2) 3/8" washers (Item #54) Figure F • One (1) 3/8" nylon lock nut (Item #57) •...
- Page 11 Assembling Your BOWFLEX Ultimate Step 9: RAIL END CAP INSTALLATION Locate the following parts for this step: • Rail End Cap (Item #58) • Two (2) #10X3/4" self tapping screw (Item #44) Place the end cap (Item #58) on the end of the rail with arrow inside end cap facing up.
- Page 12 Assembling Your BOWFLEX Ultimate Step 11: ROD BOX INSTALLATION Locate the following parts for this step: • Rod box with Power Rods (Item #23) • Rod box frame (Item #24) • Three (3) #10X1" self tapping screw (Item #45) • Three (3) 1/4" washers (Item #55)
- Page 13 Assembling Your BOWFLEX Ultimate Step 13: LOWER LAT CROWN INSTALLATION Locate the following parts for this step: • Lower lat crown (Item #76) Press Lower Lat Tower Crown (Item #76) into open end of lower lat tubing to finish off. Bottom surface of lower lat crown should be in contact with incline bench rest.
- Page 14 BOWFLEX Ultimate Lat Assembly Parts Reference Guide Lat Assembly The Lat Assembly is an optional attachment which, depending on the machine you ordered, may or may not be part of your Bowflex Lat Assembly Parts List Item No. Qty. Part No.
- Page 15 Assembling Your BOWFLEX Ultimate Lat Assembly Step 1: LAT TOWER ASSEMBLY Locate the following parts for this step: • Lat cross bar w/ pulleys (Item #17) • Upper lat tower (Item #19) • Two (2) 3/8"X2-3/4" bolts (Item #50) • Four (4) 3/8" washers (Item #54) •...
- Page 16 BOWFLEX Ultimate Leg Assembly Parts Reference Guide Leg Assembly The Leg Assembly is an optional attachment which, depending on the machine you ordered, may or may not be part of your Bowflex Leg Assembly Parts List 90153 1/4” WASHER 90189...
- Page 17 Assembling Your BOWFLEX Ultimate Leg Assembly Step 1: LEG EXTENSION FOOT TUBE INSTALLATION Locate the following parts: • Leg extension main frame (Item #62) • Leg extension foot tube (Item #63) • Two (2) 3/8"X3" bolt (Item #51) • Two (2) 3/8" nylon lock nuts (Item #57) Figure P •...
- Page 18 Assembling Your BOWFLEX Ultimate Leg Assembly Hinges Step 3: LEG EXTENSION SEAT INSTALLATION Locate the following parts: • Leg extension assembly (from previous step) • Leg extension seat assembly (Item #61) • Two (2) 1/4"X2-3/4" bolt (Item #71) • Two (2) 1/4" nylon lock nuts (Item #72) •...
- Page 19 Assembling Your BOWFLEX Ultimate Leg Assembly Step 5: INSTALLING THE LEG EXTENSION ATTACHMENT Unit appears like this following this Place the leg extension on the end of the rail and tighten assembly step the two small star knobs (Item #68) through the sides of...
- Page 20 Expanding Your BOWFLEX Ultimate With Extra Power Rods Expanding your Bowflex Ultimate from 310 pounds to 410 pounds Step 1: Simply slide the new rods into the back of the Ultimate’s rod pack. Make sure the new Power Rods are secure and fully seated into the base before using them.
- Page 21 Assembling Your BOWFLEX Ultimate Please fold over and tape before mailing Please fold over and tape before mailing Place Stamp Here The Nautilus Group, Inc.
- Page 22 What We Will Do The Nautilus Group, Inc. will repair any Bowflex that proves to be a defect in materials or workmanship. In the event repair is not possible, The Nautilus Group, Inc. at its option, will either replace your Bowflex or refund your purchase price.
- Page 23 Assemb ing Your BOWFLEX U timate BOWFLEX 6 WEEK SATISFACTION GUARANTEE Please note: You are responsible for return shipping and any damage or loss to merchandise which occurs during return shipment to The Nautilus Group, Inc. We highly recommend that insure your shipment.