Table of Contents
Advertisement
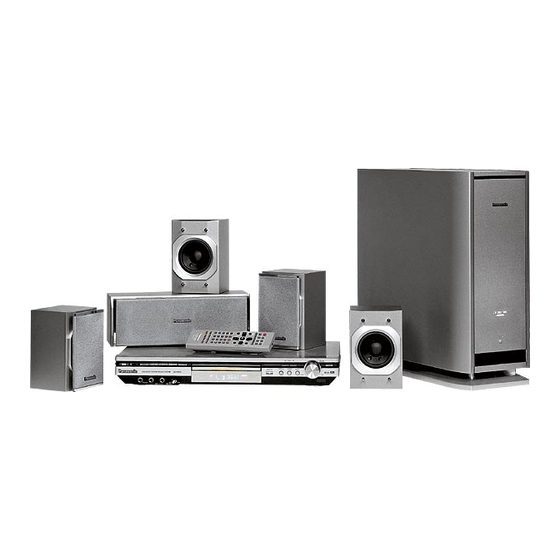
DVD Home Theater Sound System
Operating Instructions
SC HT600
Model No.
SC HT860
(The iIIustration shows the SC-HT600)
GCS
GCU
EE
Region number supported by this
player
Region numbers are allocated to DVD players
and software according to where they are sold.
For Asia
The region number of this player is 3 .
The player will play DVD-Video marked
with labels containing 3 or ALL .
Example
3
ALL
For Russia
The region number of this player is 5 .
The player will play DVD-Video marked
with labels containing 5 or ALL
Example:
5
ALL
Dear customer
Thank you for purchasing this product.
For optimum performance and safety,
please read these instructions carefully
before connecting,operating or adjusting
this product.
®
2
3 5
1
3 5
RQTC0019-1
Advertisement
Table of Contents

Related Manuals for Panasonic SC-HT600


Summary of Contents for Panasonic SC-HT600
-
Page 1: Operating Instructions
DVD Home Theater Sound System Operating Instructions SC HT600 Model No. SC HT860 (The iIIustration shows the SC-HT600) Region number supported by this player Region numbers are allocated to DVD players and software according to where they are sold. For Asia The region number of this player is 3 . -
Page 2: Accessories
CAUTION! The operation instruction is applicable to SC-HT600 and SC-HT860. THIS PRODUCT UTILIZES A LASER. Unless otherwise indicated,illustrations in these operating USE OF CONTROLS OR ADJUSTMENTS OR instuctions are of SC-HT600 for Asia. The operation in these instructions are described for use with PERFORMANCE OF PROCEDURES OTHER THAN the remote control. -
Page 3: Table Of Contents
IMPORTANT SAFETY INSTRUCTIONS Table of contents Placement Getting started The unit should be placed on a flat surface,away from direct Accessories ................2 sunshine, high temperature, humidity and frequent vibration. IMPORTANT SAFETY INSTRUCTIONS........3 Otherwise, the case and other internal parts will be damaged Disc information.............. -
Page 4: Disc Information
C l ean w i th an opt i onal DV D -RA M / P D di sc cl eaner DVD-R discs (LF-K200DCA1,where available). Never use cloths or cleaners for CDs etc. Panasonic DVD-R recorded and finalized on a Panasonic DVD video recorder or DVD video camera are played as DVD-Video Handling precautions on this unit. -
Page 5: Handy Setting
Handy setting Layout Step Front speaker Front speaker (left) (right) Active Active Subwoofer Subwoofer Surround Surround Surround Front Surround Front speaker speaker speaker speaker speaker speaker (right) (left) Center Center (right) (right) (left) (left) speaker speaker SB-FS600 SB-PC600 SB-WA600 SB-FS860 SB-FS600 SB-PC600 SB-WA600... -
Page 6: Step 2: Connect The Speakers
Step Connect the speakers Speaker cables Stickers for 5m cable x3 speaker cables 10m cable x2 Stick the peeled-off stickers onto speaker cables Sticking peeled-off stickers on speaker cables may facilitate connection. 5m cable 10m cable Brassy silvery Connect the speakers Keep the numbers on peeled-off stickers for speaker cables to be consistent with those on the terminals. -
Page 7: Other Methods For Installation Of Center Speakers And Surround Speakers
Other methods for installation of center speakers and surround speakers Attaching to a wall Note The walls or beams for hanging speakers should be capable of bearing a weight of 10kg. 2. Fix the speakers upon the screws through the 1. -
Page 8: Step 3: Connect To Television
S-VIDEO IN terminals. main unit, and the display of the base unit shows: PROG. Page 12). All Panasonic televisions applying Line-by-Line Scanning technology and with 480P input connectors are compatible. If you own another brand of television, please consult the manufacturer. -
Page 9: Step 4: Connect The Active Subwoofer, Antenna And Ac Power Cord
Connect the Active subwoofer, antenna and AC Step power cord AC power supply cord 25 pin connection wire AM loop aerial FM indoor aerial For Asia Connect the AC power supply cord after all other connections are finished. Active subwoofers Before you connect FM indoor aerial the AC power supply... -
Page 10: Step6: Quick Setup
Step Quick setup Preparation Turn on the television and select the appropriate video input on the television to suit the connections for the player. Press [ ] to turn on the unit. Press [SELECTOR] to select DVD/CD for signal source. Press [SETUP] to show the QUICK SETUP screen. -
Page 11: Control Reference Guide
Control reference guide Remote control Standby/on button [ ] .............10 Basic operating buttons ............12,13 Direct Navigator top menu button [ DIRECT NAVIGATOR TOP MENU] ..................13,16,17 Cursor button [ ] / Enter button [ENTER]....13 Display , group button [DISPLAY GROUP] ......13,15,18 Setup button [SETUP] ............ -
Page 12: Disc Basic Play
Disc Basic Play Press [ ] (Play). Disc tray closes and play starts (CD text only) TV screen displays content information Open or close this display Page 18, Disc Information) Navigation menus can be also used to control the TOP MENU MENU play ( Page 16) -
Page 13: Selecting Groups To Play
Selecting groups to play When menu screen appears on the television e.g. Press [SHIFT] + Press the numbered buttons to select an item. [GROUP] at the same To select 1 or 2-digit number time. group track number e.g. 23:[ [ 2 ] [ 3 ]. -
Page 14: Disc Convenient Functions
Disc Convenient functions Random play e.g. Random Playback Press the numbered buttons to select a group or a title. Title Press PLAY to start Some items cannot be selected. ENTER DISPLAY ALL PGM You can select more than one group. PLAY MODE To select all groups, select ALL using [ ] and press... - Page 15 Changing soundtracks, subtitles and angles Subtitles In Disc where no language is recorded, - or -- is displayed in place. (Moving pictures) (For SVCD only) (For SVCD only): You can change the subtitle language and turn the subtitles on and Soundtrack and subtitle number can be changed even if the off.
-
Page 16: Navigation Menus
Navigation menus Track title search (CD text only) e.g. : finding a track including the word LOVE . While the menu is displayed Press [ ] to select Another Pineapple SELECT NUMBER Board The Golden Ship Fall In The Frozen Season Find and press SELECT Violet Sky... -
Page 17: Playing A Play List
Note Playing the programs on DVD-RAM You cannot play WMA files that are copy protected. Use the program list to find programs to play. WMA files must have the extension .WMA or .wma . Press [DIRECT NAVIGATOR]. This unit is not compatible with ID3 tags. DIRECT NAVIGATOR If you play an MP3 track that includes still picture data, it will take some time before the music itself starts playing and the... -
Page 18: Using On-Screen Menu Lcons
Using On-Screen Menu lcons Disc information PG: Program number PL: Play list number e.g. T: Title number C: Chapter number T: Track number ENTER G: Group number T: Track number in group RETURN, G: Group number P: Picture number in group DISPLAY QUICK REPLAY Time... -
Page 19: Unit Information
Unit information Play Menu Display Menu A-B repeat 4:3 Aspect (When the elapsed play time is displayed) Select how to show images made for 4:3 aspect screens Repeat a section between points A and B within an item. on a 16:9 aspect television. [ENTER](start point) [ENTER](finish point) Normal: Laterally stretches images made for a 4:3 screen. -
Page 20: Progress Indicator
Using On-Screen Menu lcons Unit information Audio Menu Picture Menu Advanced virtual surround Picture mode N: normal mode (only 2 sound tracks or more) S: soft mode If you use two front speakers or wear a headphone (to F: fine mode (Details are sharper) connect this unit onto a device with earphone plughole), C1 (Cinema 1): Mellows images and enhances detail in you can resort to high-end virtual surround sound to... -
Page 21: Radio
Radio AM frequency-step-setting (only for Asia) TUNER/BAND Before leaving the factory, the unit is preset to be 9 kHz, SELECTOR but it can be changed to receive the radio programs that are distributed within the step of 10kHz. To change the step(9kHz 10kHz) Press [SELECTOR] on the main unit to select FM. -
Page 22: Sound Field
Sound field SOUND FIELD CONTROL Press [SFC] to select a setting. SELECTOR Each time you press the button, the settings varies as follows: HEAVY: to increase the forcefulness of rock music. CLEAR: to obtain distinct treble zone. ENTER SOFT: for background FLAT: to cancel (no effects added) (factory preset). -
Page 23: Dolby Pro Logic
When you enjoy a singnal source in double channel , press Volume control of speaker [SURROUND], Each time when you press, the screen on the main When you enjoy a certain signal source, please adjust and align the unit will display by the following order: speaker levels if you feel an appearance of nonconformity. -
Page 24: Sound Quality
Sound quality Adjust the woofer Press [SUBWOOFER]. GRP TTL TRCK CHAP ALL PGM D.MIX Each time you press the button, the settings vary as follow: SUB W 1 SUB W 2 SUB W 3 SUB W 4 (factory preset) Bass effect will increase as per the level order. Double re-master enjoying more natural sound D.RE MASTER... -
Page 25: Convenient Functions
Convenient functions Use headphones Reduce volume and connect to the SLEEP headphones (not included). Specifications of the headphones plug: 6.3mm stereo Use [-VOLUME+] or volume knob to adjust the headphone volume. Sound will automatically switch to stereo (2-channel). If there is distorted sound, just turn on the dynamic range compression page26, Audio-Dynamic Range Compression) Note... -
Page 26: Change Settings
Change settings Various settings of the unit are listed in the table. You can change these settings to suit your preferences and requirements. These settings are stored in the unit and do not change even if you shut down the unit. For details, see common operation procedures on page 27. Options Menus Items... -
Page 27: Common Procedures
Change the delay time (speaker setting) (For central-placed speakers and surround speakers only) For optimum listening with 5.1-channel sound, all the speakers, except for the Active subwoofer, should be the same distance from the seating position. If you have to place the central or surround speakers closer to the seating position, adjust the delay time to make up for the difference. -
Page 28: Appreciate External Signal Source/Record Into Other Equipment
Appreciate external signal source/record into other equipment Turn off the unit before connection. For specific details, refer to operating instructions of other equipment. (Cables and equipment are not included). SELECTOR Audio cable White(L) Red(R) If you want to receive TV audio signals by the unit, SELECTOR connect the unit to the AUDIO OUTPUT terminal of television. -
Page 29: Connection Of The Optional Antenna
Connection of the optional antenna If the receiving effect of radio is bad, use outdoor aerial. 5-12 m Note When the unit is not in use, open the connection with outdoor aerial. Never use outdoor aerial during a lightning storm. AM outdoor aerial (use polythene sheathing) Leave the loop aerial Horizontally lay a section of wire with polythene sheathing through... -
Page 30: Troubleshooting Guide
Troubleshooting guide Before requesting service, make the following checks. Perform simple check of the parts or fine adjustment, and maybe the problem will be solved and the unit can restore normal operation. If you are in doubt about some of the check points, or if the remedies indicated in the table do not solve the problem, consult the dealer for instruction. -
Page 31: Maintenance
Picture Picture distorted. Some distortion is normal during SEARCH. Check the connection. No picture. Make sure the television is on. Ensure that the television's video input settings (e.g. VIDEO 1) is correct. The picture shown on the Go to Video in the SETUP menus, and change TV Aspect to suit your television. televiion is not normal. -
Page 32: Specifications
1.The Specifications are subject to change without prior notice. Wavelength The Weight and Dimension are approximate values. 2. Distortion of full harmonic wave is measured by digital harmonic CD/VCD 790nm analyzer 658nm Matsushita Electric lndustrial Co.,Ltd. RQTC0019-1 Web Site:http://www.panasonic.co.jp/global/ C0803LX1083...