Table of Contents
Advertisement
Before connecting, operating or adjusting this product, please read
these instructions completely.
Please keep this manual for future reference.
E
S
®
As an
NERGY
TAR
Partner, Panasonic has
determined that this product meets the
S
®
TAR
guidelines for energy efficiency.
P
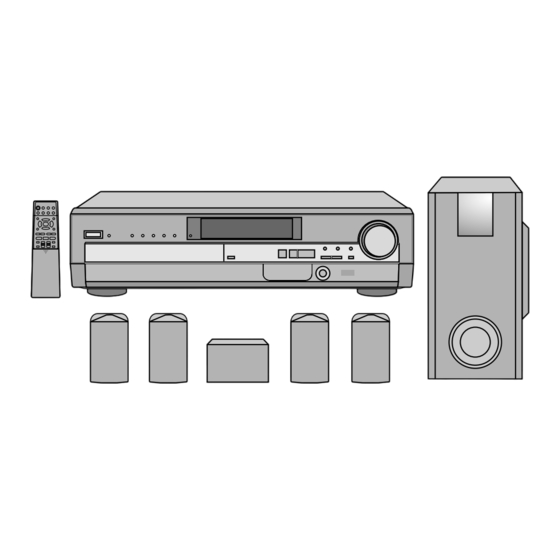
DVD Home Theater Sound System
E
NERGY
Operating Instructions
Model No.
The region number of this unit is "1".
You can play DVD-Video marked "1", "ALL", or with a re-
gion number including "1".
Example:
1
1
2
ALL
See page 5 for details.
The servicenter list and warranty can be
found on pages 34 and 35.
SC-HT67
4
RQT6191-P
Advertisement
Table of Contents

Related Manuals for Panasonic SC-HT67


Summary of Contents for Panasonic SC-HT67
-
Page 1: Operating Instructions
Before connecting, operating or adjusting this product, please read these instructions completely. Please keep this manual for future reference. ® As an NERGY Partner, Panasonic has determined that this product meets the NERGY ® guidelines for energy efficiency. DVD Home Theater Sound System The region number of this unit is “1”. - Page 2 SICHTBARE UND UNSICHTBARE LASERSTRAHLUNG, WENN ABDECKUNG VORSICHT GEÖFFNET. NICHT DEM STRAHL AUSSETZEN. RQLS0233 RQT6191 SC-HT67 Operations in these instructions are described mainly with the remote control, but you can do the operations on SA-HT67 the main unit if the controls are the same.
-
Page 3: Table Of Contents
Accessories Please check and identify the supplied accesso- ries. Use numbers indicated in parentheses when asking for replacement parts. To order accessories contact 1-800-332-5368 or web site (http://www.panasonic.com). ∏ 1 Remote control ∏ 1 AC power supply cord (EUR7502XD0) (RJA0065-1D) ∏... -
Page 4: Important Safety Instructions
IMPORTANT SAFETY INSTRUCTIONS Read these operating instructions carefully before using the unit. Follow the safety instructions on the unit and the safety precautions listed below. Keep these operating instructions handy for future reference. Safety 1. Power source—Connect the unit to a power source of the type described in these instructions or as marked on the unit. -
Page 5: Disc Information
∫ DVD-R discs Panasonic DVD-R recorded and finalized on a Panasonic DVD video recorder are played as DVD-Video on this unit. It may not be possible to play these discs in all cases due to the type of disc or condition of the recording. -
Page 6: Simple Setup
Set the speakers up on an even surface to prevent them from falling. Take proper precautions to prevent the speakers from falling if you cannot set them up on an even surface. Front speakers ( Left Panasonic ≥The left and right speakers are the same. Main unit Keep your speakers at least 10 mm ( ⁄... -
Page 7: Attaching To Speaker Stands
Speaker cords Attach the stickers to the speaker cords. ≥Attach the numbered stickers to the end of the speaker cords so the numbers match the positions of the speak- ers shown in the diagram. SUBWOOFER CENTER SURROUND SURROUND FRONT FRONT SUBWOOFER CENTER SURROUND R... -
Page 8: Supply Cord
Simple setup STEP Television, antennas and AC power supply cord Connect directly to your television. Do not connect the unit through a video cas- sette recorder, because the picture may not be played correctly due to the copy guard. Television (not included) To household VIDEO AC outlet... -
Page 9: Step 3 The Remote Control
STEP The remote control ∫ Batteries R6, AA, UM-3 ≥Insert so the poles (i and j) match those in the remote control. ≥Do not use rechargeable type batteries. STEP Quick Setup DVD/CD MAIN UNIT FL DISPLAY TUNER/BAND AUX TV/VIDEO TOP MENU MENU 3·4·5·6 ENTER... -
Page 10: Control Reference Guide
Control reference guide DVD/CD MAIN UNIT FL DISPLAY TUNER/BAND TOP MENU ENTER DISPLAY SKIP STOP PAUSE DISC SKIP CHANNEL SETUP SUB TITLE CH SELECT TEST DISC1 DISC2 DISC4 DISC5 10/ENTER DISC PLAY MODE MANAGER TV VOL CINEMA P.MEMORY How to open the remote control POWER DISC WAKE... -
Page 11: Discs-Basic Play
Discs—Basic play DVD/CD MAIN UNIT Í FL DISPLAY TUNER/BAND AUX TV/VIDEO TOP MENU MENU TOP MENU 3, 4, 2, 1 ENTER ENTER DISPLAY RETURN :, 9 SKIP SLOW /SEARCH SKIP STOP PAUSE PLAY ∫ STOP DISC SKIP CHANNEL VOLUME MUTING ;... -
Page 12: Using Menus To Play Mp3 Discs
Discs—Basic play DVD/CD MAIN UNIT FL DISPLAY TUNER/BAND AUX TV/VIDEO TOP MENU TOP MENU 3, 4, 2, 1 ENTER ENTER DISPLAY :, 9 SKIP SLOW SKIP STOP PAUSE ∫ STOP DISC SKIP CHANNEL VOLUME DISC SKIP SETUP SUB TITLE AUDIO CH SELECT TEST MIX 2ch... -
Page 13: Skipping Chapters Or Tracks
Skipping chapters or tracks [DVD-V] [CD] [VCD] Press [:] or [9]. ≥Each press increases the number of skips. ≥Press [:/6, 5/9] on the main unit. Fast forward and rewind—SEARCH [DVD-V] [CD] [VCD] During play Press [6] or [5]. ≥Press and hold [:/6, 5/9] on the main unit. ≥Audio will be heard during search. -
Page 14: Discs-Convenient Functions
Discs—Convenient functions DVD/CD MAIN UNIT FL DISPLAY TUNER/BAND AUX TV/VIDEO TOP MENU ENTER DISPLAY :, 9 SKIP SKIP STOP PAUSE ∫ STOP DISC SKIP CHANNEL VOLUME SUB TITLE SETUP SUB TITLE AUDIO CH SELECT TEST MIX 2ch 1–5 DISC1 DISC2 Numbered DISC4 DISC5... -
Page 15: Using The Disc Manager
Soundtracks During play Press [AUDIO]. The number changes each time you press the button. Digital Î English 3/2.1 ch ≥You can also use this button to turn the vocals on and off on karaoke discs. Read the disc’s instructions for details. ≥Refer to [B] on page 17 for audio signal type details. -
Page 16: Using On-Screen Menu Icons
Using On-Screen Menu Icons DVD/CD MAIN UNIT FL DISPLAY TUNER/BAND TOP MENU 3, 4, 2, 1 ENTER ENTER DISPLAY DISPLAY SKIP STOP PAUSE DISC SKIP CHANNEL ACTION SUB TITLE GROUP PAGE DISC1 DISC2 Numbered DISC4 DISC5 buttons 10/ENTER DISC PLAY MODE MANAGER TV VOL CINEMA... -
Page 17: Disc Information/Unit Information
Disc information Digital Î 1 ENG 3/2.1 ch 1 : 46 : 50 Icon Title number Chapter number Time ≥Press [3, 4] to show the 1 : 46 : 50 elapsed play time or remaining time for the title. ≥Select a position to start play by specifying a time with the numbered buttons. -
Page 18: The Radio: Manual Tuning
The radio: manual tuning DVD/CD MAIN UNIT Í FL DISPLAY TUNER/BAND TUNER/BAND TOP MENU ENTER DISPLAY SKIP STOP PAUSE DISC SKIP CHANNEL SETUP SUB TITLE CH SELECT TEST DISC1 DISC2 DISC4 DISC5 10/ENTER DISC PLAY MODE MANAGER Í/I POWER TUNE MODE POWER DISC WAKE... -
Page 19: The Radio: Preset Tuning
The radio: preset tuning DVD/CD MAIN UNIT FL DISPLAY TUNER/BAND AUX TV/VIDEO TUNER/BAND TOP MENU MENU ENTER DISPLAY RETURN SKIP SLOW /SEARCH STOP PAUSE PLAY DISC SKIP CHANNEL VOLUME MUTING SUBWOOFER LEVEL SETUP SUB TITLE AUDIO ANGLE CHANNEL CH SELECT TEST MIX 2ch MARKER... -
Page 20: Sound Field
Sound field Note ≥Dolby Pro Logic and Super Surround cannot be used if headphones are connected. ≥You may experience a reduction in sound quality when these sound field systems and effects are used with some sources. If this occurs, turn the surround system or effect off. -
Page 21: Dolby Digital/Dolby Pro Logic
DVD/CD MAIN UNIT FL DISPLAY TUNER/BAND AUX TV/VIDEO TOP MENU MENU 3, 4 ENTER DISPLAY RETURN SKIP SLOW /SEARCH STOP PAUSE PLAY DISC SKIP CHANNEL VOLUME MUTING SUBWOOFER LEVEL SETUP SUB TITLE AUDIO ANGLE CH SELECT TEST MIX 2ch MARKER CH SELECT SEAT TEST... -
Page 22: Super Surround/Seat Position/Center Focus
Sound field DVD/CD MAIN UNIT FL DISPLAY TUNER/BAND AUX TV/VIDEO TOP MENU 3, 4 ENTER 2, 1 DISPLAY SKIP SLOW /SEARCH STOP PAUSE PLAY DISC SKIP CHANNEL VOLUME MUTING SUBWOOFER SETUP SUB TITLE AUDIO CH SELECT TEST MIX 2ch MARKER SELECT POSITION DISC1... -
Page 23: Convenient Functions
Convenient functions DVD/CD MAIN UNIT FL DISPLAY TUNER/BAND AUX TV/VIDEO FL DISPLAY TOP MENU MENU ENTER DISPLAY RETURN SKIP SLOW /SEARCH STOP PAUSE PLAY DISC SKIP CHANNEL VOLUME MUTING SUBWOOFER LEVEL SETUP SUB TITLE AUDIO ANGLE CH SELECT TEST MIX 2ch MARKER SEAT POSITION... -
Page 24: Changing Settings
Changing settings This chart shows the settings for this unit. Change the settings to suit your preferences and to suit the unit to the environment in which it is being used. These settings are retained in memory until they are changed, even if the unit is turned off. See page 25 for details on menu operation. ≥Underlined items are the factory preset. -
Page 25: Common Procedures
DVD/CD DVD/CD MAIN UNIT FL DISPLAY TUNER/BAND AUX TV/VIDEO TOP MENU MENU 3, 4, 2, 1 ENTER ENTER DISPLAY RETURN SKIP SLOW /SEARCH STOP PAUSE PLAY DISC SKIP CHANNEL VOLUME MUTING SUBWOOFER LEVEL SETUP SUB TITLE AUDIO ANGLE SETUP CH SELECT TEST MIX 2ch MARKER... -
Page 26: Using The Remote Control With Other Equipment
Using the remote control with other equipment DVD/CD DVD/CD MAIN UNIT Í FL DISPLAY TUNER/BAND AUX TOP MENU ENTER DISPLAY SKIP SLOW STOP PAUSE ∫ STOP DISC SKIP CHANNEL VOLUME SETUP SUB TITLE AUDIO CHANNEL CH SELECT TEST MIX 2ch DISC1 DISC2 DISC3... -
Page 27: Changing The Remote Control Code
NEC: 07, 15 Changing the remote control code This remote control can operate Panasonic and Technics audiovisu- al equipment that have remote control sensors. You may need to change the remote control code. It can also operate some other brands of televisions and video cas- sette recorders. -
Page 28: Listening To An External Source/Recording To Other Equipment
Listening to an external source/Recording to other equipment DVD/CD DVD/CD MAIN UNIT FL DISPLAY TUNER/BAND AUX TUNER/BAND TOP MENU ENTER DISPLAY SKIP STOP PAUSE DISC SKIP CHANNEL Video cassette recorder (not included) AUDIO AUDIO PLAY e.g. Tape deck (not included) When connecting a record player We recommend using a record player with a built-in phono equalizer. -
Page 29: Optional Antenna Connections
Optional antenna connections FM outdoor antenna 75 ≠ coaxial cable (not included) 1 Remove a piece of the outer insulator. 30 mm (1 ⁄ 2 Twist the shield braid. Shield braid 3 Expose the core wire. 15 mm ( ⁄ Core wire AM outdoor antenna (14–40 feet) -
Page 30: Troubleshooting Guide
Before requesting service, make the below checks. If you are in doubt about some of the check points, or if the remedies indicated in the chart do not solve the problem: Contact the Panasonic Customer Call Center at 1-800-211-7262, or e-mail consumerproducts@panasonic.com, or web site (http:// www.panasonic.com). -
Page 31: Maintenance
Picture Picture distorted. ≥Some distortion is normal during SEARCH. No picture. ≥Ensure that the television is connected properly. 8 ≥Make sure the television is on. ≥Ensure the television’s video input setting (e.g., VIDEO 1) is correct. The picture shown on the ≥Go to the Video menu in the SETUP screen, and change “TV Aspect”... -
Page 32: Glossary
Glossary Bitstream This is the digital form of multiple channel audio data (e.g., 5.1 chan- nel) before it is decoded into its various channels. Decoder A decoder restores the coded audio signals on DVDs to normal. This is called decoding. Dolby Digital This is a method of coding digital signals developed by Dolby Labo- ratories. -
Page 33: Specifications
Specifications AMPLIFIER SECTION FTC TTL POWER OUTPUT 120 Hz–20 kHz, 1.0 % total harmonic distortion FRONT CENTER SURROUND 45 Hz–120 Hz, 1.0 % total harmonic distortion SUBWOOFER RMS TTL POWER OUTPUT 1 kHz, 10 % total harmonic distortion FRONT CENTER SURROUND 100 Hz, 10 % total harmonic distortion SUBWOOFER... -
Page 34: Servicenter List
Web Site. Accessory Purchases: 1-800-332-5368 (Customer Orders Only) Panasonic Services Company 20421 84th Avenue South, Kent, WA 98032 (6 am to 5 pm Monday–Friday; 6 am to 10:30 am Saturday; PST) (Visa, MasterCard, Discover Card, American Express, Check) Factory Servicenters Locations... -
Page 35: Limited Warranty
Therefore, should service ever be necessary, be sure to bring the entire system. Product information For product information or assistance with product operation: Contact the Panasonic Customer Call Center at 1-800-211-7262, or e-mail consumerproducts@panasonic.com, or web site (http:// www.panasonic.com). Panasonic Sales Company, Division of Matsushita Electric of Puerto Rico, Inc. -
Page 36: Listening Caution
Macrovision Corporation, and is intended for home and other limited viewing uses only unless otherwise authorized by Macrovision Corporation. Reverse engineering or disassembly is prohibited. Panasonic Consumer Electronics Company, Division of Matsushita Electric Corporation of America One Panasonic Way Secaucus, New Jersey 07094 http://www.panasonic.com C 2001 Matsushita Electric Industrial Co., Ltd. Printed in Singapore...