Table of Contents
Advertisement
EJECT
/ I
REW
FF
REV MODE REC
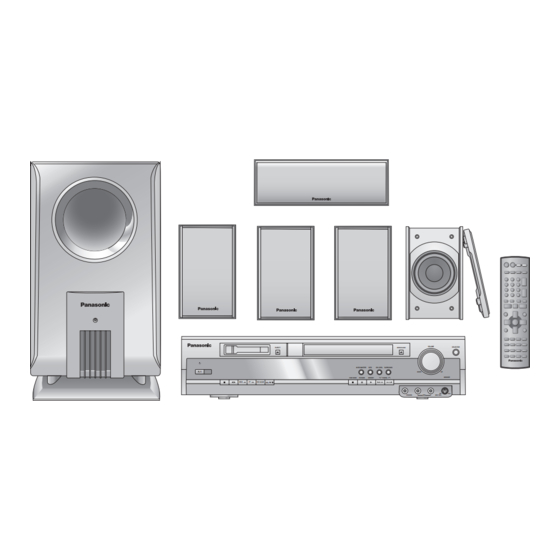
The illustration shows SC-HT623.
Before connecting, operating or adjusting this product,
please read these instructions completely.
Please keep this manual for future reference.
Region number
The player plays DVD-Video marked with labels containing the
region number or "ALL".
Region
Russia
Example: [Southeast]Asia]and]Singapore[
2
3
3
ALL
5
This manual was printed with soy based ink.
EE
GCU
GCS
GCA
VOLUME
OPEN/CLOSE
SELECTOR
M.RE-MASTER
SFC
SW LEVEL SURROUND
DOWN
UP
TUNE MODE
FM MODE
MEMORY
TUNING
KARAOKE
MIN
MAX
PHONES
1
MIC
2
MIC VOL
Number
2
3
5
Operating Instructions
DVD Home Theater Sound System
SC-HT888/SC-HT623
Model No.
Table of contents
Getting started
Accessories . . . . . . . . . . . . . . . . . . . . . . . . . . . . . . 2
Safety precautions/Maintenance . . . . . . . . . . . . . 3
Glossary . . . . . . . . . . . . . . . . . . . . . . . . . . . . . . . . . 3
STEP 1
assembly. . . . . . . . . . . . . . . . . . . . . . . 4
Other speaker setup options . . . . . . 5
Locating . . . . . . . . . . . . . . . . . . . . . . . 6
STEP 3
active subwoofer . . . . . . . . . . . . . . . . 7
Video connections . . . . . . . . . . . . . . . 8
Radio and system connection . . . . . 9
STEP 6
The remote control. . . . . . . . . . . . . . . 9
QUICK SETUP. . . . . . . . . . . . . . . . . . 10
Control reference guide . . . . . . . . . . . . . . . . . . . 10
Discs that can be played/Disc handling . . . . . . 11
Disc operations
Basic play (DISC). . . . . . . . . . . . . . . . . . . . . . . . 12
Convenient functions . . . . . . . . . . . . . . . . . . . . . 14
Position memory/Zoom/Audio/Subtitle/Quick replay/
Page skip/A-B Repeat play/Repeat play/
Using navigation menus . . . . . . . . . . . . . . . . . . . 16
Playing data discs/Playing HighMAT
the programs/Playing a play list
Using on-screen menus . . . . . . . . . . . . . . . . . . . 18
Changing the player settings . . . . . . . . . . . . . . . 20
Other operations
The radio. . . . . . . . . . . . . . . . . . . . . . . . . . . . . . . . 22
Cassette tapes . . . . . . . . . . . . . . . . . . . . . . . . . . . 24
Basic play/Recording to cassette tapes
Sound field and sound quality . . . . . . . . . . . . 26-28
Other functions . . . . . . . . . . . . . . . . . . . . . . . . . . 29
Sleep timer/Muting/Enjoying Karaoke/
Connecting to other equipment . . . . . . . . . . . . . 30
Reference
Language code list . . . . . . . . . . . . . . . . . . . . . . . 31
Specifications . . . . . . . . . . . . . . . . . . . . . . . . . . . 32
Troubleshooting guide . . . . . . . . . . . . . . . . . . . . 34
TM
discs/Playing
RQTC0047-1B
Advertisement
Table of Contents

Related Manuals for Panasonic SC-HT623


Summary of Contents for Panasonic SC-HT623
-
Page 1: Table Of Contents
MEMORY TUNING KARAOKE REV MODE REC PHONES MIC VOL SC-HT888/SC-HT623 The illustration shows SC-HT623. Model No. Before connecting, operating or adjusting this product, Table of contents please read these instructions completely. Please keep this manual for future reference. Getting started Accessories . -
Page 2: United Arab Emirates
SC-HT888 SC-HT623 ≥These operating instructions are applicable to models Main unit SA-HT888 SA-HT623 SC-HT888 and SC-HT623 for a variety of regions. ≥Unless otherwise indicated, illustrations in these Front speakers SB-FS888 SB-FS623 operating instructions are of SC-HT623 for Southeast Center speaker... -
Page 3: Glossary
Safety precautions Glossary Decoder Placement A decoder restores the coded audio signals on DVDs to normal. This is called decoding. Set the unit up on an even surface away from direct sunlight, high temperatures, high humidity, and excessive vibration. These Dolby Digital conditions can damage the cabinet and other components, thereby This is a method of coding digital signals developed by Dolby... -
Page 4: Simple Setup
Simple setup Preparation [HT623] (Front and surround speakers only) Attach the rubber feet to prevent vibration causing the speakers to move or fall over. Use 3 or 4 feet per speaker. Make sure you have all the indicated components before starting the assembly, setup, and connection. -
Page 5: Other Speaker Setup Options
∫ Preventing the front and surround speakers from falling over Preparation ≥You will need to obtain the appropriate screw eyes to match the walls to which the screw eyes are going to be fastened. String (not included) ≥The walls should be capable of supporting 30 kg per screw. Wall Approx. -
Page 6: Step 2 Locating
How you set up your speakers can affect the bass and the sound field. Note the following points. ≥Place speakers on flat secure bases. STEP Locating ≥Placing speakers too close to floors, walls, and corners can result in excessive bass. Cover walls and windows with thick curtains. -
Page 7: Step
STEP Connecting speakers with the active subwoofer Attach the speaker-cable stickers to make connection easier. \Note] ≥Never short-circuit positive (i) and negative (j) speaker wires. ≥Be sure to connect only positive (copper) wires to positive (i) terminals and negative (silver) wires to negative (j) terminals. Incorrect connection can damage the speakers. -
Page 8: Step 4 Video Connections
“480P” (➜ page 19) so “PROG.” appears on the display. order to achieve high fidelity in reproducing colors. All Panasonic televisions that have 480P input connectors are ≥The description of the component video input terminals depends compatible. Consult the manufacturer if you have another on the television or monitor (e.g. -
Page 9: Step 5 Radio And System Connection
STEP Radio and system connection System cable AM loop FM indoor AC mains lead antenna antenna ≥Connect the AC mains lead after all other connections are complete. ≥Optional antenna connections (➜ page 23). FM indoor antenna AM loop antenna \Southeast\Asia,\Singapore]and]United[ Adhesive tape [Arab\Emirates] Stand the antenna up on its base. -
Page 10: Step 7 Quick Setup
STEP QUICK SETUP The QUICK SETUP screen assists you to make necessary settings. Turn on the television and select the appropriate video input on the television. Select SETUP DVD/CD SETUP SHIFT PLAY MODE RETURN SHIFT PLAY MODE ENTER ENTER Register Turn the unit Select Shows QUICK... -
Page 11: Discs That Can Be Played/Disc Handling
To play DVD-Video content, select “Play as DVD-Video” in Other Menu (➜ page 19) — DVD-Video [DVD-V] § Panasonic DVD-R recorded and finalized on Panasonic DVD-Video recorders or DVD-Video cameras are played as DVD-Video on this unit. DVD-R — Video CD... -
Page 12: Basic Play (Disc)
Basic play (DISC) 2 Select 1 Turn the unit 3 Open the “DVD/CD”. disc tray. SELECTOR OPEN/CLOSE VOLUME SELECTOR EJECT OPEN/CLOSE M.RE-MASTER SW LEVEL SURROUND DOWN KARAOKE TUNE MODE FM MODE MEMORY TUNING REV MODE REC PHONES MIC VOL 6 Adjust the 5 Start play. - Page 13 SLEEP ECHO FL DISPLAY KARAOKE FL DISPLAY VCR/AUX TUNER/BAND TAPE DVD/CD MUTING DVD/CD Numbered buttons VOLUME WVOLUMEX CANCEL CANCEL SKIP SLOW/SEARCH SKIP SLOW/SEARCH STOP PAUSE DVD/CD DVD/CD STOP PAUSE MENU TOP MENU MENU TOP MENU DIRECT NAVIGATOR PLAY LIST 3,4,2,1 ENTER ENTER DISPLAY...
-
Page 14: Convenient Functions
Convenient functions POSITION Position memory SLEEP ECHO MEMORY FL DISPLAY KARAOKE Memorizes the position to resume play. VCR/AUX TUNER/BAND DVD/CD MUTING TAPE ZOOM Zoom SHIFT AUDIO Expands the letterbox picture to fit the screen. VOLUME ZOOM Audio AUDIO CANCEL Changes the soundtrack. SKIP SLOW/SEARCH STOP... -
Page 15: Repeat Play
Numbered REPEAT buttons SHIFT Repeat play A-B REPEAT VOLUME CANCEL CANCEL SKIP SLOW/SEARCH All group, random and program play STOP PAUSE DVD/CD STOP DVD/CD [DVD-A] [DVD-V] [WMA] [MP3] [JPEG] [VCD] [CD] (There is no on-screen display.) TOP MENU MENU Each time you press [PLAY MODE] while stopped: 3,4,2,1 DIRECT NAVIGATOR PLAY LIST... -
Page 16: Using Navigation Menus
Using navigation menus SLEEP ECHO TOP MENU MENU FL DISPLAY KARAOKE Playing data discs VCR/AUX TUNER/BAND TAPE DVD/CD MUTING TOP MENU MENU Numbered Playing HighMAT discs buttons VOLUME Playing the programs CANCEL SKIP SLOW/SEARCH DIRECT NAVIGATOR STOP PAUSE DVD/CD SLOW/SEARCH STOP TOP MENU MENU... -
Page 17: Playing The Programs
Playing the programs Playing HighMAT discs [RAM] [WMA] [MP3] [JPEG] While stopped Press [DIRECT NAVIGATOR]. Press [TOP MENU]. ≥Titles appear only if you Direct Navigator Press [3,4,2,1] to select the item have entered them ≥You cannot change following the on-screen instructions. program and disc titles. -
Page 18: Using On-Screen Menus
Using on-screen menus (Refer to page 10 for remote control button positions.) Select Select Go to the DISPLAY next menu DISPLAY ENTER ENTER Register Register Return to the previous menu Press once. Select the menu. Make the settings. Press twice to exit. (When pressed twice, the elapsed play time indicator appears ➜... - Page 19 ∫ Picture Menu ∫ Display Menu On ,------. Off Normal Information Cinema1: Mellows images and enhances ([JPEG]: Off, Date, Details) detail in dark scenes. 0 to s60 (in 2 unit steps) Subtitle Position Cinema2: Sharpens images and enhances Auto, 0 to s7 Subtitle Brightness detail in dark scenes.
-
Page 20: Changing The Player Settings
Changing the player settings (Refer to page 10 for remote control button positions.) Select Select Select SETUP SETUP ENTER SHIFT PLAY MODE ENTER SHIFT PLAY MODE ENTER Go right Register Register Shows Setup menu. Select the tab. Select the item. Make the settings. -
Page 21: Speaker Setting
∫ “Audio” tab ≥Off Dynamic Range Compression ≥On: Adjust for clarity even when the volume is low through compressing the range of the lowest sound level and the highest sound level. Convenient for late night viewing. (Only works with Dolby Digital) ≥On Audio during Search ≥Off... -
Page 22: The Radio
The radio SLEEP ECHO FL DISPLAY KARAOKE SELECTOR VCR/AUX TUNER/BAND TAPE DVD/CD MUTING TUNER/BAND FM MODE Numbered MEMORY WCHX buttons VOLUME VOLUME SELECTOR EJECT OPEN/CLOSE CANCEL M.RE-MASTER SW LEVEL SURROUND SKIP SLOW/SEARCH DOWN KARAOKE TUNE MODE FM MODE MEMORY TUNING REV MODE REC STOP PAUSE... -
Page 23: Manual Tuning
Manual tuning ∫ AM frequency step Main unit only Main unit only [Southeast\Asia,\Singapore[and[United]Arab]Emirates\ Press [SELECTOR] to select “FM” or The step is factory-set to 9 kHz, but you can change it to receive “AM”. broadcasts allocated in 10-kHz steps. Press [TUNE MODE] to select “MANUAL”. 1 Press [SELECTOR] to select “FM”. -
Page 24: Cassette Tapes
Cassette tapes VCR/AUX TUNER/BAND TAPE DVD/CD MUTING [For[cassette[tape[operations] DVD/CD TAPE Karaoke indicator Cassette compartment VOLUME EJECT VOLUME VOLUME WVOLUMEX SELECTOR EJECT OPEN/CLOSE CANCEL SKIP SLOW/SEARCH M.RE-MASTER SW LEVEL SURROUND DOWN KARAOKE STOP PAUSE DVD/CD TUNE MODE FM MODE MEMORY TUNING STOP REV MODE REC DVD/CD... -
Page 25: Karaoke Song Album-Unique Functions
Press [REV MODE] to select the reverse Karaoke Song Album mode. — Unique functions Each time you press the button: TUNED TUNED V.MUTE L R C.F D.MIX DVD AV MONO SLEEP SFC CSM S.SRND MP3 WMA JP Enjoying other recording methods Only one side is recorded on. -
Page 26: Sound Field And Sound Quality
Sound field and sound quality C.S.M Sound Field Control SLEEP ECHO KARAOKE FL DISPLAY Changes the sound quality. VCR/AUX TUNER/BAND TAPE DVD/CD MUTING C.FOCUS Super Surround SUPER SRND Adds surround effects to stereo sound. VOLUME C.FOCUS CANCEL Center Focus SUPER SRND SHIFT SLOW/SEARCH SKIP... - Page 27 SLEEP ECHO FL DISPLAY KARAOKE TEST SHIFT Adjusting the speaker levels CH SELECT VCR/AUX TUNER/BAND TAPE DVD/CD MUTING DVD/CD See below for details. VOLUME WVOLUMEX CANCEL SKIP SLOW/SEARCH STOP PAUSE DVD/CD MENU TOP MENU DIRECT NAVIGATOR PLAY LIST 3,4,2,1 ENTER DISPLAY RETURN GROUP...
-
Page 28: Sound Field And Sound Quality
Sound field and sound quality MIX 2CH SLEEP Down-mixing ECHO SHIFT KARAOKE FL DISPLAY Down-mixes multi-channel signals to 2 channels. VCR/AUX TUNER/BAND TAPE DVD/CD MUTING SUBWOOFER Subwoofer level LEVEL Adjusts the amount of bass. VOLUME CANCEL SKIP SLOW/SEARCH C.S.M Custom Sound Memory SHIFT STOP PAUSE... -
Page 29: Other Functions
Other functions ECHO SLEEP ECHO KARAOKE KARAOKE FL DISPLAY SLEEP SLEEP Sleep timer VCR/AUX Select the source. TUNER/BAND TAPE DVD/CD MUTING MUTING Turns the unit off after a set time. VOLUME WVOLUMEX MUTING Muting CANCEL SKIP SLOW/SEARCH STOP PAUSE DVD/CD See below for details. -
Page 30: Connecting To Other Equipment
Connecting to other equipment ∫ Connection example Television Video cassette recorder To show video from the video (not included) (not included) cassette recorder Select “VIDEO 2” input on your To play sound from the television television in this example. Reduce the volume on the television to its minimum and control the volume on this unit. -
Page 31: Language Code List
Language code list Windows Media, and the Windows logo Abkhazian: 6566 Lingala: 7678 Afar: 6565 Lithuanian: 7684 are trademarks, or registered trademarks of Microsoft Corporation in Afrikaans: 6570 Macedonian: 7775 Albanian: 8381 Malagasy: 7771 the United States and/or other Ameharic: 6577 Malay: 7783... -
Page 32: Specifications
Specifications ∫ AMPLIFIER SECTION ∫ DISC SECTION [HT888] Playable disc type: RMS TTL POWER OUTPUT 600 W DVD-Audio 1 kHz 10 % total harmonic distortion DVD-Video 60 W per ch (4 ≠) Front DVD-R (DVD-Video formatted discs) 120 W (4 ≠) Center DVD-RAM (DVD-VR compatible, JPEG formatted discs) 60 W per ch (4 ≠) -
Page 33: Speaker Section
∫ SPEAKER SECTION ∫ GENERAL [Front/Surround\speakers\SB-FS888] [HT888] Power consumption 185 W Type 2 way 2 speaker Bass reflex type Power consumption in standby mode Fullrange 8 cm x 2 CONE TYPE Power supply 4 ≠ [Southeast[Asia,[Singapore[and[United[Arab[Emirates] Impedance Input power IEC 60 W (MAX) 110 V/127 V/220–230 V/240 V, 50 Hz/60 Hz [Russia] Out sound pressure... -
Page 34: Troubleshooting Guide
Troubleshooting guide Before requesting service, make the following checks. If you are in doubt about some of the check points, or if the remedies indicated in the chart do not solve the problem, consult your dealer for instructions. Power Page ≥Insert the AC mains lead and system cable securely. - Page 35 Picture abnormal or un-viewable Page ≥Ensure that the unit is connected directly to the television, and is not connected through a video Picture distorted. cassette recorder. ≥Change “TV Aspect” in “Video” tab. Picture size doesn’t fit the ≥Use the television to change the aspect. If your television does not have that function, change screen.
- Page 36 Matsushita Electric Industrial Co., Ltd. Web Site: http://www.panasonic.co.jp/global/ RQTC0047-1B F0704YM1084...