
Related Manuals for Panasonic KX-TSC10FXW


Summary of Contents for Panasonic KX-TSC10FXW
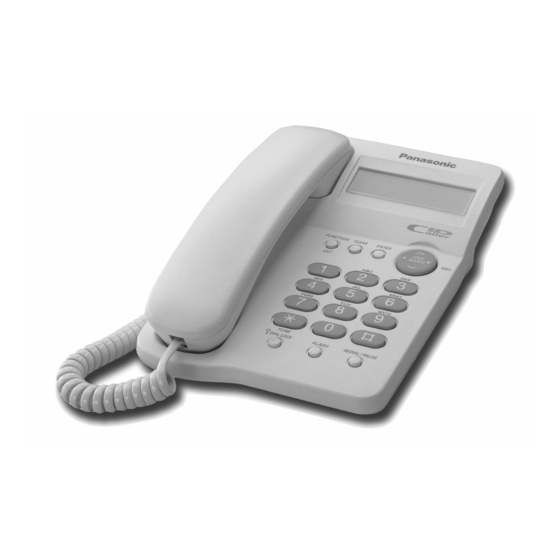
- Page 1 Integrated Telephone System Operating Instructions KX-TSC10FXW Model No. Pulse-or-tone dialing capability Caller ID Compatible PLEASE READ BEFORE USE AND SAVE.
-
Page 2: Before Initial Use
Before Initial Use Thank you for purchasing your new Panasonic integrated telephone. Caller ID, where available, is a telephone company service. After subscribing to Caller ID, this phone will display a caller’s phone number. For your future reference Serial No. -
Page 3: Table Of Contents
Contents Preparation Advanced Operation Location of Controls..4 Speed Dialer ....19 Storing Names and Phone Display ..... 5 Numbers in Speed Dial List . -
Page 4: Location Of Controls
Location of Controls [ENTER] Button (p. 7, 17, 19) [CLEAR] Button (p. 16, 18, 23) [FUNCTION/EXIT] Button (p. 7, 14, 19) Display (p. 5) [TONE] Button (p. 25) RINGER Selector (p. 11) Navigator Key [DIAL LOCK] Button (p. 28) ([ ], [ ], [ ], [ ]) (see below) [FLASH] Button (p. -
Page 5: Display
Display 1234567890123456 (This display shows all of the possible configurations.) While the unit is not in use, the display 10 NEW CALLS shows the current time and date, and the 12:34 24/11 number of new calls. If the display continuously shows “12:00 NO ITEMS STORED 1/1”... -
Page 6: Settings
Telephone Line Telephone Jack Cord • Use only Panasonic Handset for the KX-TSC10FXW. • Use only the included telephone line cord. • If your unit is connected to a PBX which does not support Caller ID services, you cannot access those services. -
Page 7: Programming Summary
Programming Summary You can program the following functions. The display shows the programming instructions. See the corresponding pages for function details. Make sure that the handset is on the cradle. Press [FUNCTION/EXIT]. <Function menu>* SAVE SPEED DIAL? ..To store names and phone numbers in memory (p. -
Page 8: Time And Date
Settings Time and Date You can select AM/PM or 24-hour clock by programming. Make sure that the handset is on the cradle. Press [FUNCTION/EXIT]. Scroll to “SET CLOCK ?” by pressing SET CLOCK ? [ ] or [ ]. Press [ENTER]. ENTER YEAR 0000 / / / /... - Page 9 Press [#] to select “AM”, “PM” or 24- #=AM/PM hour clock. (Ex. You select “PM”.) 09:30 01/01 Display Option (Blank display) 24-hour clock • Each time you press , the selection will change on the display. Press [ENTER]. ENTER DAY/MONTH 09:30 01/01 Enter the current day and month using...
-
Page 10: Dialing Mode
Settings Dialing Mode You can select the dialing mode by programming. If you have touch tone service, set to Tone. If rotary or pulse service is used, set to Pulse. Your phone comes from the factory set to Tone. Make sure that the handset is on the cradle. Press [FUNCTION/EXIT]. -
Page 11: Lcd Contrast
LCD Contrast You can select the LCD contrast level from 1 to 4 by programming. Your phone comes from the factory set to 2. Make sure that the handset is on the cradle. Press [FUNCTION/EXIT]. Scroll to “LCD CONTRAST ?” by LCD CONTRAST ? pressing [ ] or [ ]. -
Page 12: Making Calls
Making Calls Lift the handset. 12:34 24/11 Dial a phone number. 1234567890 • The dialed number is displayed. 12:34 24/11 • After a few seconds, the display will show the length of the call. 00-00-00 / / / / / / •... -
Page 13: Answering Calls
Answering Calls When a call is received, the unit rings, “INCOMING CALL” is displayed. If you subscribe to a Caller ID service, the calling party’s information will be displayed when the unit is ringing (see below). When the unit rings, lift the handset. When finished talking, hang up. -
Page 14: Using The Caller List
Caller ID Service • Caller information will not be displayed in the following cases: — If the caller dialed from an area which does not provide a Caller ID service, the display will show “ OUT OF AREA ”. — If the caller has requested not to display his/her information, the display will show “... -
Page 15: New Call
Ex. When you search from the most recent call: Press [ ] to enter the list. To return to the previous caller, press [ ]. To exit the Caller List, press 1114447777 [FUNCTION/EXIT]. 11:50 24/11 Press [ ]. Press [ ]. 1234567890 JACK SMITH 10:50... -
Page 16: Calling Back From The Caller List
Using the Caller List Calling Back from the Caller List Press [ ] or [ ] to enter the Caller List. Scroll to the desired caller by pressing JACK SMITH [ ] or [ ]. 10:50 23/11 • To exit the Caller List, press [FUNCTION/EXIT] or wait for 60 seconds. -
Page 17: Storing Caller List Information In The Speed Dial List
Storing Caller List Information in the Speed Dial List You can store numbers in the Caller List to the Speed Dial list. Make sure that the handset is on the cradle. Press [ ] or [ ] to enter the Caller List. Scroll to the caller you want to store by 1234567890 pressing [ ] or [ ]. -
Page 18: Erasing Caller List Information
Using the Caller List • If the display shows “MEMORY IS FULL” in step 4, press [FUNCTION/EXIT] to exit the list. To erase other stored items from the Speed Dial List, see page 24. • To cancel during programming, press [FUNCTION/EXIT]. Start again from step 1. •... -
Page 19: Speed Dialer
Speed Dialer Storing Names and Phone Numbers in Speed Dial List You can store up to 50 names and phone numbers in memory. Make sure that the handset is on the cradle. Press [FUNCTION/EXIT]. SAVE SPEED DIAL? Press [ENTER]. ENTER NAME Enter a name, up to 15 characters with the dialing buttons (p. - Page 20 Speed Dialer Press [ENTER]. STORED If the memory station number OVERWRITE ? selected manually is occupied, the display on the right will be shown. To overwrite, press [ENTER]. To select other empty memory station number, press [ ], enter an empty memory station number using the dialing buttons, or pressing [ ] or [ ], then press [ENTER].
-
Page 21: Selecting Characters To Enter Names
Selecting characters to enter names The dialing buttons ([0] to [9]) can be used to enter letters and symbols. Pressing each button selects a character as shown below. Number of times key is pressed Keys & ’ – Space To move the cursor to the left To move the cursor to the right If you make a mistake while entering a name Use [ ] or [ ] to move the cursor to the incorrect character, press... -
Page 22: Finding Stored Items
Speed Dialer Finding Stored Items Make sure that the handset is on the cradle. Press [ ] or [ ] to enter the Speed SPEED DIAL LIST Dial List. Scroll to the desired item by using [ ] JOHN WHITE or [ ]. -
Page 23: Editing
Editing Make sure that the handset is on the cradle. Press [ ] or [ ] to enter the Speed SPEED DIAL LIST Dial List. Scroll to the Speed Dial item you want to change by using [ ] or [ ]. •... -
Page 24: Erasing
Speed Dialer Erasing Make sure that the handset is on the cradle. Press [ ] or [ ] to enter the Speed Dial List. Scroll to the Speed Dial item you want to erase by using [ ] or [ ] •... -
Page 25: Special Features
Special Features [ENTER] [CLEAR] [FUNCTION/EXIT] [TONE] [ ], [ ] [DIAL LOCK] [REDIAL/PAUSE] [FLASH] Temporary Tone Dialing (For Rotary or Pulse Service Users) Press [TONE] before entering access numbers which require tone dialing. • The dialing mode changes to tone. You can enter numbers to access an answering service, electronic banking service, etc. -
Page 26: Flash Button
Special Features FLASH Button Pressing [FLASH] allows you to use special features of your host PBX such as transferring an extension call or accessing special telephone services (optional) such as call waiting. Selecting the flash time The flash time depends on your telephone exchange or host PBX. You can select the following flash times: “80, 90, 100, 110, 200, 250, 300, 400, 600, 700 ms (milliseconds)”. -
Page 27: Setting The Password
• The display will return to step 2. To exit the programming mode, press [FUNCTION/EXIT] or wait for 60 seconds. • You can exit the programming mode any time by pressing [FUNCTION/EXIT]. Please write down your password. If you forget your password, consult your nearest Panasonic service center. -
Page 28: Dial Lock
Special Features Dial Lock You can prevent others from making a call to any number except dialing by the Speed Dial List (#01, #02 and #03). Once you locked the dialing buttons, even emergency numbers cannot be dialed. Only incoming calls are accepted until the dial lock is canceled. -
Page 29: Call Restriction
Call Restriction You can prevent the unit from dialing phone numbers beginning with specified digit(s) (1 digit or 2 digits). Phone numbers with the restricted leading digits cannot be dialed out. To set the call restriction Make sure that the handset is on the cradle. Press [FUNCTION/EXIT]. -
Page 30: Wall Mounting
Wall Mounting This unit can be mounted on a wall. Press the tabs in the direction of the arrows ( ), then remove the wall mounting adaptor ( ). Tuck the telephone line cord inside the wall mounting adaptor, and push it in the direction of the arrow ( •... -
Page 31: Battery Replacement
Battery Replacement If “ ” flashes, the battery power is low. Install new batteries as soon as possible. Disconnect the telephone line cord from the unit. Press down in the direction of the arrow and remove the cover ( ). Replace the batteries with new ones using correct polarity (+, –) ( ), and close the cover. -
Page 32: Troubleshooting
Troubleshooting Problem Cause and Remedy The unit does not work. • Check the settings (p. 6–11). • Remove the batteries and reinstall them to reset the unit. The unit does not ring. • The ringer selector is set to OFF. Set to HIGH or LOW (p. - Page 33 Problem Cause and Remedy While programming or • To answer the call, lift the handset. Start searching, the unit starts to again from the beginning after hanging ring and stops the program/ search. The unit does not display • You need to subscribe to a Caller ID the caller’s phone number.
-
Page 34: Safety Instructions
Safety Instructions Take special care to follow the safety suggestions listed below. Installations Environment 1) Do not use this unit near water—for example, near a bathtub, washbowl, sink, etc. Damp basements should also be avoided. 2) The unit should be kept away from heat sources such as radiators, kitchen range, etc. -
Page 35: Specifications
WARNING: TO PREVENT FIRE OR SHOCK HAZARD, DO NOT EXPOSE THIS PRODUCT TO RAIN OR ANY TYPE OF MOISTURE. If there is any trouble, disconnect the unit from the telephone line and connect a known working phone. If the known working phone operates properly, do not reconnect the unit to the telephone line until the trouble has been repaired. - Page 36 Panasonic Communications (Malaysia) Sdn. Bhd. Senai Malaysia PQQX13488YA-BM F0902...