Table of Contents
Advertisement
Advertisement
Table of Contents

Related Manuals for Panasonic KX-TSC11


Summary of Contents for Panasonic KX-TSC11
- Page 1 Integrated Telephone System Operating Instructions KX-TSC11W Model No. KX-TSC11B Pulse-or-tone dialing capability KX-TSC11W Caller ID Compatible PLEASE READ BEFORE USE AND SAVE. Panasonic World Wide Web address: http://www.panasonic.com for customers in the USA or Puerto Rico...
-
Page 2: Before Initial Use
Before Initial Use Please read IMPORTANT SAFETY INSTRUCTIONS on page 37 before use. Read and understand all instructions. Thank you for purchasing your new Panasonic integrated telephone. Caller ID, Call Waiting and Voice Mail Service, where available, are telephone company services. After subscribing to Caller ID, this phone will display a caller’s name and phone number. -
Page 3: Table Of Contents
Installing the Batteries ..6 Connecting the Handset/ Telephone Line Cord ..6 Programming Summary ..7 Time and Date ....8 Dialing Mode . -
Page 4: Location Of Controls
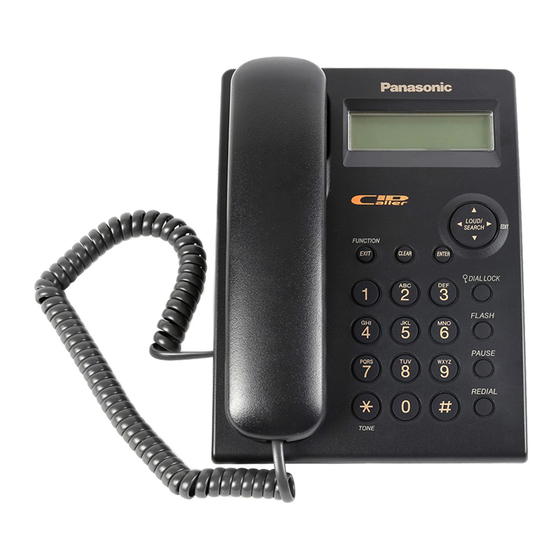
Location of Controls [FUNCTION/EXIT] Button (p. 7, 17, 22) RINGER Selector (p. 11) [TONE] Button (p. 29) How to use the Navigator key This key has four active areas that are indicated by arrows. • Pressing the up and down arrows allows you to enter the Caller List and select the function menu, the Caller List and the Phone Book List. -
Page 5: Display
Display 1234567890123456 10 MISSED CALLS 12:34 11/24 12:00 12/31 01-06-35 12:34 11/24 SMITH,JOHN 11:50 11/23 : [MUTE] was pressed during a conversation (p. 30). : The second call has been received while talking (p. 29). : The unit enters in the Phone Book List (p. 20). : [REDIAL] was pressed while the handset is on the cradle (p. -
Page 6: Settings
If you subscribe to an xDSL service Please attach a noise filter (contact your xDSL provider) to the telephone line between the base unit and the telephone line jack in the event of the following: — Noise is heard during conversations. -
Page 7: Programming Summary
• Use only a Panasonic Handset for the KX-TSC11W or KX-TSC11B. • Use only a telephone line cord included in the unit. • If your unit is connected to a PBX which does not support Caller ID services, you cannot access those services. -
Page 8: Time And Date
Settings Time and Date You can select AM/PM or 24-hour clock by programming. Make sure that the handset is on the cradle. Press [FUNCTION/EXIT]. Scroll to “SET CLOCK ?” by pressing [ ] or [ ]. Press [ENTER]. Enter the current year. (Ex. - Page 9 Press [#] to select “AM”, “PM” or 24- hour clock. (Ex. You select “PM”.) Display (Blank display) • Each time you press [#], the selection will change on the display. Press [ENTER]. Enter the current day and month using a 4-digit number. (Ex.
-
Page 10: Dialing Mode
Settings Dialing Mode You can select the dialing mode by programming. If you have touch tone service, set to Tone. If rotary or pulse service is used, set to Pulse. Your phone comes from the factory set to Tone. Make sure that the handset is on the cradle. Press [FUNCTION/EXIT]. -
Page 11: Lcd Contrast
LCD Contrast You can select the LCD contrast level from 1 to 4 by programming. Your phone comes from the factory set to 2. Make sure that the handset is on the cradle. Press [FUNCTION/EXIT]. Scroll to “LCD CONTRAST ?” by pressing [ ] or [ ]. -
Page 12: Caller Id Number Auto Edit
Settings Caller ID Number Auto Edit Once you call back an edited number (p. 19), this unit can automatically edit incoming phone numbers from the same area code in the Caller List and each time you receive a call. For example, it can ignore the area code of calls originating from your area code, so that you can call these numbers from the Caller List without dialing the area code. -
Page 13: Voice Mail Tone
Voice Mail Tone If your voice mail service sends a voice mail tone after a new message has finished recording, set to “ON”. “ message was recorded in your mailbox. You will hear a series of voice mail tones then a dial tone after lifting the handset. (Contact your service provider about your service.) Set to “OFF”... -
Page 14: Display Language
Settings Display Language You can select “English”, “French” or “Spanish” as the display language. Your phone comes from the factory set to “English”. Make sure that the handset is on the cradle. Press [FUNCTION/EXIT]. Scroll to “CHANGE LANGUAGE?” by pressing [ ] or [ ]. Press [ENTER]. -
Page 15: Making Calls
Making Calls To make a call, this unit can dial up by 2 methods as below steps. Enter a phone number, then lift the handset. Lift the handset, then dial a phone number. • The dialed number is displayed. • After a few seconds, the display will show the length of the call. -
Page 16: Answering Calls
• When the ringer volume is set to OFF (p. 11), the unit will not ring. Caller ID Service This unit is compatible with a Caller ID service offered by your telephone company. If you subscribe to a Caller ID service, the calling party’s information will be displayed when the unit is ringing. -
Page 17: Using The Caller List
• If the name and the time/date display service is available in your area, the display will show caller’s names and the time/date the calls were received. For further information, please contact your telephone company. Using the Caller List If you have received 10 new calls, the number of new calls will be displayed as shown, while the unit is not in use. - Page 18 Using the Caller List Ex. When you search from the most recent call: Press [ ] to enter the list. ROBINSON,TINA 11:50 11/24 SMITH,JOHN 10:50 11/23 12:34 11/24 ** If you receive a call from one of the same phone numbers stored in the Phone Book List, the caller’s name will be displayed (Private name display).
-
Page 19: Calling Back From The Caller List
3 patterns. Phone no. Area code – 1– Area code • The order in which patterns are displayed depends on how the telephone number is displayed in step 2. For assistance, please call: 1-800-211-PANA(7262) SMITH,JOHN 10:50 1234567890 10:50 00-00-00 10:50... -
Page 20: Storing Caller List Information In The Phone Book List
Using the Caller List After editing, you can continue with calling back or storing procedures. • To call back, lift the handset. • To store the number in the Phone book memory, follow steps 4 to 5 on page 20 to complete the operation. •... -
Page 21: Erasing Caller List Information
Press [ENTER]. • After a few seconds, the display will return to the Caller List. You can continue storing other items. To exit the Caller List, press [FUNCTION/EXIT] or wait for 60 seconds. • If the display shows “PHONEBOOK FULL” in step 4, press [FUNCTION/EXIT] to exit the list. -
Page 22: Phone Book
Phone Book Storing Names and Phone Numbers in the Phone Book List You can store up to 50 names and phone numbers in memory. Make sure that the handset is on the cradle. Press [FUNCTION/EXIT]. Press [ENTER]. • After a few second the display will change. - Page 23 Storing pauses with numbers will prevent misdialing (p. 29). The delay time necessary will depend on your telephone company. • When using the Call Restriction feature (p. 32), you cannot store the emergency number in the Phone Book.
-
Page 24: Selecting Characters To Enter Names
Phone Book Selecting characters to enter names The dialing buttons ([0] to [9]) can be used to enter letters and symbols. Pressing each button selects a character as shown below. Keys & If you make a mistake while entering a name Use [ ] or [ ] to move the cursor to the incorrect character, press [CLEAR] to delete and enter the correct character. -
Page 25: Dialing From The Phone Book
• If there is no battery, this function will not operate. For assistance, please call: 1-800-211-PANA(7262) PHONEBOOK LIST Press [ ]. Press [ ]. Space + Alphabet Alphabet Symbol (excluding # and ) Number # and Telephone number (When a name is not stored) -
Page 26: Chain Dial
Phone Book Index table Keys Index Symbols, 1 A, B, C, 2 D, E, F, 3 G, H, I, 4 J, K, L, 5 M, N, O, 6 Chain Dial You can dial a combination of the Phone Book or manual key pad entries while making a call. -
Page 27: Editing
Editing Make sure that the handset is on the cradle. Press [ ] or [ ] to enter the Phone Book List. Scroll to the Phone Book item you want to change by pressing [ ] or [ ]. • To search for the item by initial, see page 25. -
Page 28: Erasing
Voice Mail Service Voice mail service is an electronic on-line answering system offered by your telephone company. After subscribing, the voice mail system can answer calls automatically when your line is busy or if calls are not answered. Callers can leave messages by following the pre-recorded instructions. -
Page 29: Special Features
• The first call is put on hold and you can answer the second call. • To return to the first caller, press [FLASH] again. • The call waiting service cannot be used when a parallel connected telephone is in use. -
Page 30: Mute
(optional) such as call waiting. Selecting the flash time The flash time depends on your telephone exchange or host PBX. You can select the following flash times: “80, 90, 100, 110, 200, 250, 300, 400, 600, 700 ms (milliseconds)”. Your phone comes from the factory set to “600 ms”. -
Page 31: Setting The Password
[FUNCTION/EXIT] or wait for 60 seconds. • You can exit the programming mode any time by pressing [FUNCTION/EXIT]. Please write down your password. If you forget your password, consult your nearest Panasonic service center. For assistance, please call: 1-800-211-PANA(7262) CHANGE PASSWORD? CURRENT PASSWORD... -
Page 32: Call Restriction
Special Features Call Restriction You can prevent the unit from dialing phone numbers beginning with specified digit(s) (1 digit or 2 digits). Phone numbers with the restricted leading digits cannot be dialed out except the emergency numbers stored in the Phone Book. To set the call restriction Make sure that the handset is on the cradle. -
Page 33: Wall Mounting
Press the tabs in the direction of the arrows ( ), then remove the wall mounting adaptor ( ). Tuck the telephone line cord inside the wall mounting adaptor, and push it in the direction of the arrow • The word “UP WALL”... -
Page 34: Battery Replacement
( ). Replace the batteries with new ones using correct polarity (+, –) ( ), and close the battery cover. Connect the telephone line cord to the unit. 12:00 12/31 12/31 ” or “... -
Page 35: Troubleshooting
Troubleshooting Problem The unit does not work. The unit does not ring. The display is blank. You cannot dial. The other party suddenly cannot hear your voice during a conversation. You cannot program items such as the dialing mode. You cannot store a name and phone number in memory. - Page 36 • Generally caller information is displayed from the 2nd ring. • If your unit is connected to a telephone line with xDSL service, we recommend connecting a noise filter between the base unit and the telephone line jack.
-
Page 37: Important Safety Instructions
Important Safety Instructions When using this unit, basic safety precautions should always be followed to reduce the risk of fire, electric shock, or personal injury. Read and understand all instructions. Follow all warnings and instructions marked on this unit. Unplug this unit from wall outlets before cleaning. Do not use liquid or aerosol cleaners. - Page 38 Important Safety Instructions CAUTION: To reduce the risk of fire or injury to persons, read and follow these instructions. 1. Use only the battery(ies) specified. 2. Do not dispose of the battery(ies) in a fire. It (they) may explode. 3. Do not open or mutilate the battery(ies). Released electrolyte is corrosive and may cause burns or injury to the eyes or skin.
-
Page 39: Specifications
Specifications Power Source: Dimensions (H x W x D): Approx. 96 mm x 150 mm x 200 mm Mass (Weight): Dialing Mode: Operating Environment: 5 ˚C – 40 ˚C (41 ˚F – 104 ˚F) Specifications are subject to change without notice. For assistance, please call: 1-800-211-PANA(7262) From 3 AA (R6, UM-3, LR6) batteries "... -
Page 40: Fcc And Other Information
The REN is used to determine the number of devices that may be connected to a telephone line. Excessive RENs on a telephone line may result in the devices not ringing in response to an incoming call. In most but not all areas, the sum of RENs should not exceed five (5.0). - Page 41 • If there is any trouble—disconnect the unit from the telephone line and connect a known working phone. If the known working phone operates properly, have your unit repaired by one of the authorized Panasonic Factory Service Centers. If the known working phone does not operate properly, consult your telephone company.
-
Page 42: Index
Index Accessories: 2 Answering Calls: 16 Battery Installation: 6 Battery Replacement: 34 Call Restriction: 32 Call Waiting: 29 Caller ID Number Auto Edit: 12 Caller ID Service: 16 Caller List Calling Back:19 Editing: 19 Erasing: 21 Storing: 20 Viewing: 17 Dialing Mode: 10 Display: 5 FCC and Other Information: 40... -
Page 43: Warranty
Warranty For assistance, please call: 1-800-211-PANA(7262) - Page 44 Limited Warranty Limits And Exclusions This Limited Warranty ONLY COVERS failures due to defects in materials or workmanship, and DOES NOT COVER normal wear and tear or cosmetic damage. The Limited Warranty ALSO DOES NOT COVER damages which occurred in shipment, or failures which are caused by products not supplied by the warrantor, or failures which result from accidents, misuse, abuse, neglect, mishandling, misapplication, alteration, faulty installation, set-up adjustments, misadjustment of...
-
Page 45: Customer Services
Customer Services Customer services For assistance, please call: 1-800-211-PANA(7262) - Page 48 • Send the unit to an authorized servicenter, prepaid and adequately insured. • Do not send your unit to the Panasonic Consumer Electronics Company listed below or to executive or regional sales offices. These locations do not repair consumer products.