Advertisement
Model No. PFTL39921
USER'S MANUAL
Serial No.
Serial Number
Decal
QUESTIONS?
If you have questions, or if there
are missing parts, we will guar-
antee complete satisfaction
through direct assistance from
our factory.
TO AVOID DELAYS, PLEASE
CALL DIRECT TO OUR TOLL-
FREE CUSTOMER HOT LINE.
The trained technicians on our
Customer Hot Line will provide
immediate assistance, free of
charge to you.
CUSTOMER HOT LINE:
1-800-999-3756
Mon.–Fri., 6 a.m.–6 p.m. MST
CAUTION
Visit our website at
Read all precautions and instruc-
www.proform.com
tions in this manual before using
this equipment. Save this manual
new products, prizes,
for future reference.
fitness tips, and much more!
Advertisement
Table of Contents

Related Manuals for Pro-Form CrossWalk GTS


Summary of Contents for Pro-Form CrossWalk GTS
- Page 1 Model No. PFTL39921 USER'S MANUAL Serial No. Serial Number Decal QUESTIONS? If you have questions, or if there are missing parts, we will guar- antee complete satisfaction through direct assistance from our factory. TO AVOID DELAYS, PLEASE CALL DIRECT TO OUR TOLL- FREE CUSTOMER HOT LINE.
-
Page 2: Table Of Contents
TABLE OF CONTENTS IMPORTANT PRECAUTIONS ..............2 BEFORE YOU BEGIN . - Page 3 14. Never move the walking belt while the power AND MOVE THE TREADMILL on page 11.) is turned off. Do not operate the treadmill if You must be able to safely lift 45 pounds (20 the power cord or plug is damaged, or if the kg) to raise, lower, or move the treadmill.
-
Page 4: Before You Begin
Congratulations for selecting the new PROFORM ® please call our Customer Service Department toll-free CROSSWALK GTS treadmill. The CROSSWALK GTS at 1-800-999-3756, Monday through Friday, 6 a.m. until treadmill combines advanced technology with innova- 6 p.m. Mountain Time (excluding holidays). To help us... -
Page 5: Assembly
ASSEMBLY Assembly requires two persons. Set the treadmill in a cleared area and remove all packing materials. Do not dispose of the packing materials until assembly is completed. Note: The underside of the treadmill walking belt is coated with high-performance lubricant. During shipping, a small amount of lubricant may be transferred to the top of the walking belt or the shipping carton. - Page 6 3. Insert a Plastic Shim (104) into each side of the post on the right side of the Base (11). Next, orient the Right Handrail (103) as shown, and insert it into the Base. careful to avoid pinching the Handrail Wire Harness (21).
- Page 7 6. Place the Console Base (46) on the Right Handrail (103) and the Left Handrail (not shown). Attach the Console Base with four 1 1/4” Screws (81) (only two Screws are shown). Do not tighten the Screws yet. Insert the Wire Harness (21) through the two indicated plastic ties on the Console Base (46).
-
Page 8: Treadmill Operation
TREADMILL OPERATION THE PERFORMANT LUBE WALKING BELT an equipment-grounding conductor and a grounding plug. Plug the power cord into a surge suppressor, Your treadmill features a walking belt coated with and plug the surge suppressor into an appropriate PERFORMANT LUBE , a high-performance lubricant. - Page 9 CONSOLE DIAGRAM Note: If there is a thin sheet of plastic on the console, remove it. Clip CAUTION: Before operating the Insert the key fully into the console. console, read the following precautions. • Do not stand on the walking belt when turn- Stand on the foot rails of the treadmill.
- Page 10 To stop the walking belt, press the Stop button. ment. When the desired unit of measurement is The elapsed time will begin to flash in the Time/ selected, remove the key and then reinsert it. Distance display. To reset the displays, press the Stop button, re- move the key, and then reinsert the key.
-
Page 11: How To Fold And Move The Treadmill
HOW TO FOLD AND MOVE THE TREADMILL HOW TO FOLD THE TREADMILL FOR STORAGE Before folding the treadmill, unplug the power cord. CAUTION: You must be able to safely lift 45 pounds (20 kg) in order to raise, lower, or move the treadmill. 1. - Page 12 HOW TO LOWER THE TREADMILL FOR USE 1. Hold the upper end of the treadmill with your right hand as shown. Using your left thumb, press the storage latch to the left. Pivot the treadmill down until the frame and foot rail are past the storage latch.
-
Page 13: Troubleshooting
TROUBLESHOOTING Most treadmill problems can be solved by following the steps below. Find the symptom that applies, and follow the steps listed. If further assistance is needed, please call our Customer Service Department toll- free at 1-800-999-3756, Monday through Friday, 6 a.m. until 6 p.m. Mountain Time (excluding holidays). PROBLEM: The power does not turn on SOLUTION:... - Page 14 PROBLEM: The walking belt slows when walked on SOLUTION: a. Use only a single-outlet surge suppressor that meets all of the specifications described on page 8. b. If the walking belt is overtightened, treadmill perfor- mance may decrease and the walking belt may be- 2”–3”...
-
Page 15: Conditioning Guidelines
CONDITIONING GUIDELINES is activity that requires large amounts of oxygen for WARNING: prolonged periods of time. This increases the demand Before beginning this on the heart to pump blood to the muscles, and on the or any exercise program, consult your physi- lungs to oxygenate the blood. -
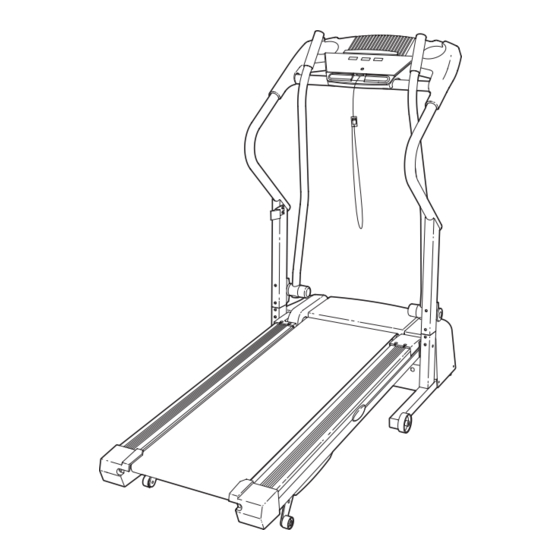
Page 16: Part Identification Chart
PART IDENTIFICATION CHART Remove this chart and use it to identify small parts during assembly. Save this chart and the EXPLODED DRAWING/PART LIST for future reference. Silver Ground 1/2” Silver Crossbar Screw 1 1/4” Screw (81)–4 Screw (109)–1 Screw (47)–2 (53)–2 1”... - Page 17 PART LIST—Model No. PFTL39921 R1003A Key No. Qty. Description Key No. Qty. Description Crossbar Releasable Tie Key/Clip Choke Incline Leg Pivot Bolt Belt Guide Battery Cover Plastic Fastener Left Foot Rail Walking Belt Lift Motor Walking Platform Rear Roller Belly Pan 1”...
- Page 18 EXPLODED DRAWING—Model No. PFTL39921 R1003A...
-
Page 19: Ordering Replacement Parts
• The NAME of the product (PROFORM ® CROSSWALK GTS treadmill) • The SERIAL NUMBER of the product (see the front cover of this manual) • The KEY NUMBER and DESCRIPTION of the desired part(s) (see the PART LIST and the EXPLODED DRAW- ING in the center of this manual) PROFORM is a registered trademark of ICON Health &...