
Related Manuals for Samsung iDCS Keyset


Summary of Contents for Samsung iDCS Keyset
- Page 1 KEYSET USER GUIDE SAMSUNG iDCS SYSTEMS April 2002 Samsung Communications ACN 073 594 537 www.samcom.com.au...
-
Page 2: Table Of Contents
TABLE OF CONTENTS ABOUT THIS BOOK ............1 THINGS YOU SHOULD KNOW ......2–10 ASSEMBLING YOUR KEYSET ........11 ADDING AN iDCS 14B KEY STRIP ......12 ADDING A KEYSET DAUGHTERBOARD MODULE ................13 OUTSIDE CALLS Making an Outside Call ..............14 Answering an Outside Call ..............14 Universal Answer ................14 Recall/Flash ..................15 Busy Line Queuing with Callback ............15... - Page 3 Forwarding Calls ................23–25 Executive/Secretary Hotline ..............38 Call Pickup ..................25 Group Listening ................39 My Group Pickup ................26 Account Codes ..................39 Privacy Release ................26 Locking Your Keyset ................40 Manual Signalling ................40 NETWORK FORWARDING Off-Hook Voice Announce ............40–41 Call Forward Unconditional ..............27 OHVA Block ..................41 OHVA Reject ..................42 Call Forward Busy ................27 In Group/Out of Group ..............42...
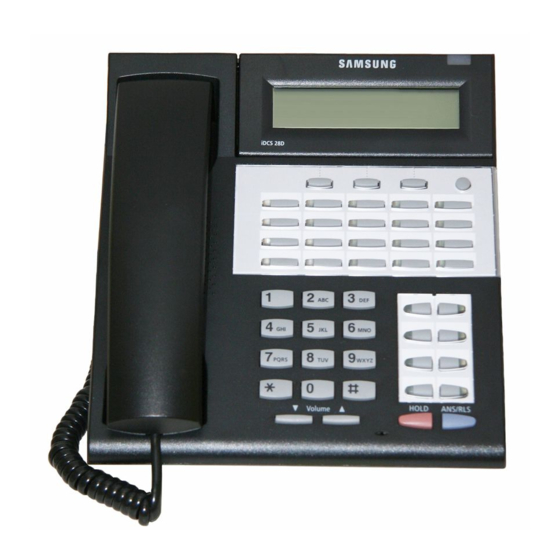
- Page 4 SVMi-8 ..................61 SVMi-8 Telephone Keypad Interface ...........62–63 Your iDCS keyset is the most visible part of your telephone system. No mat- Accessing your Mailbox ..............64 ter what model keyset you are using telephone calls are handled the same Getting Started ..................65 way.
-
Page 5: Things You Should Know
Your outside calls will light green on your keyset and red on other keysets. THINGS YOU SHOULD KNOW You never lose sight of your calls while they are on hold. They stay right where you put them and are identified with a green flashing light. USER ORIENTATION Some simple rules to remember: iDCS telephones are called “keysets.”... -
Page 6: Feature Access Codes
iDCS 28D KEYSET FEATURE ACCESS CODES This user guide is written based on the default access code for using sys- tem features. If the system numbering plan has been changed some of the 32 CHARACTER DISPLAY Two lines with 16 characters each. access codes may not be correct. - Page 7 iDCS 18D KEYSET iDCS 8D KEYSET 32 CHARACTER DISPLAY 32 CHARACTER DISPLAY Two lines with 16 characters each. Two lines with 16 characters each. TERMINAL STATUS INDICATOR TERMINAL STATUS INDICATOR Used to provide your keyset status. Used to provide your keyset status. SOFT KEYS Used to acti- vate features...
- Page 8 iDCS 64B AOM iDCS 14B AOM 14 PROGRAMMABLE KEYS WITH RED LIGHTS Used to call stations directly, to indicate busy conditions of other stations, for One Touch dialling and many other system features. 64 PROGRAMMABLE KEYS WITH RED LIGHTS Used to call stations directly, to indicate busy conditions of other stations, for One Touch dialling and many other...
-
Page 9: Assembling Your Keyset
KDB-FULL DUPLEX (FKDBF) The standard speakerphone mode of operation for a iDCS keyset is “half duplex”. This means that you cannot transmit and receive speech at the same time. Adding a FKDBF to your keyset will convert the speakerphone into full duplex mode enhancing its operation. -
Page 10: Adding A Keyset Daughterboard Module
ADDING AN ADDING A KEYSET iDCS 14 BUTTON KEY AOM DAUGHTERBOARD MODULE • Place the keyset face down on a flat surface. • Place the keyset face down on a flat surface. • Remove the base pedestal by placing your thumbs over the attachment •... -
Page 11: Outside Calls
RECALL DIAL TONE OUTSIDE CALLS Press the NEW button to disconnect your existing call, wait for dial tone and then make a new call on the same line. MAKING AN OUTSIDE CALL NOTE: If this button does not appear on your keyset, the FLASH key may •... -
Page 12: Intercom Calls
BUSY STATION CALLBACK INTERCOM CALLS When you call another station and receive a busy signal: • Press the CBK key, if programmed, or dial 44. CALLING OTHER STATIONS • When the busy station becomes free, your keyset will ring. • Dial the extension number or group number. -
Page 13: Calling Your System Operator
CALLING YOUR SYSTEM OPERATOR CALL PROCESSING • Dial 9 to call your system operator or group of operators. • If you want to call a specific operator, dial that person’s extension num- SYSTEM HOLD ber. • When you are connected to any call, press HOLD. The call will flash NOTE: If the Hot Keypad feature has been turned off, you must first lift the green at your keyset. -
Page 14: Transferring Calls
• If you do not answer this recall within a pre-programmed period of time, line when the called station hangs up or you can press TRANSFER to it will go to the system operator. return to the outside party. If you wish to send the call to another exten- sion without waiting for the first station to hang up, simply press anoth- CONSULTATION HOLD er DSS button. -
Page 15: Conference Calls
Finish the first call and hang up; the waiting call will ring. FORWARDING CALLS • Lift the handset or press the ANS/RLS key to answer. You may forward your calls to another station, group of stations or an exter- NOTE: Intercom calls will not go on Automatic Hold. nal telephone number. -
Page 16: Call Pickup
FORWARD BUSY/NO ANSWER FORWARD DND If you have both a Forward on Busy destination and a Forward No Answer To forward your phone when you activate DND. destination programmed, you may set both of these at the same time: • Dial 607 plus the extension number or group number. -
Page 17: My Group Pickup
MY GROUP PICKUP NETWORK FORWARDING If desired, a new access code can be assigned to pickup ringing calls in the same pickup group as you are in. Like “66” above except you do not need If you system is equipped with the L version of software, and your system to dial the desired group number. -
Page 18: Dialling Features
• The A key is not used. DIALLING FEATURES • The B key inserts a flash. • The C key inserts a pause. • The D key is used for pulse to tone conversion. If your system uses SPEED DIALLING rotary (or pulse) dialling C.O. -
Page 19: Manual Retry With Redial
MANUAL RETRY WITH REDIAL NOTES: [L VERSION] 1. If you make another call, auto-redial is canceled. 2. To cancel a retry, lift and replace the handset. While you are on an outside call listening to a busy signal and you want to redial the same number dialled. -
Page 20: Paging And Messaging
MEET ME PAGE PAGING AND MESSAGING • Lift the handset. • Press the Meet Me Page (MMPG) key or dial 54. MAKING AN INTERNAL PAGE • Dial the desired zone number. • After the attention tone, instruct the paged person to dial 56. To make an announcement through the keyset speakers: •... -
Page 21: Returning Messages
To retrieve an automatically parked call: • Your MESSAGE light will turn off when all messages have been re- turned. • Dial 10 plus the number that was announced. If you have a PAGPK key, press it and dial the number that was announced. If you have a PARK NOTES: key, press it and dial the announced orbit number. -
Page 22: Convenience Features
ESTABLISHED CALL PICKUP [L VERSION] CONVENIENCE FEATURES To pick up an established call in progress at a single line extension con- nected to a computer modem on your PC. DO NOT DISTURB • Press the EP key for that station on your keyset and the call is automat- Use this feature when you want to block calls to your keyset. -
Page 23: Executive/Secretary Hotline
ANSWERING THE DOOR PHONE GROUP LISTENING When you are programmed to receive calls from a door phone: When you are engaged on a call and you are using the handset, you may want other people to hear the distant party’s voice over the speaker: •... -
Page 24: Locking Your Keyset
LOCKING YOUR KEYSET OHVA is OFF then you will hear the announcement on the speaker, if you are talking on the handset. If you are using the speakerphone the You can lock your keyset to control misuse of your phone while you are announcement will always be heard through the speaker. -
Page 25: Ohva Reject
OHVA REJECT CUSTOMIZING YOUR KEYSET Your keyset can be programmed with an OHVA Reject (REJECT) key. Pressing this key while receiving an OHVA call will disconnect the voice an- AME PASSWORD nouncing party and return you to your original call. This feature allows people using the AME feature to enable password pro- IN GROUP/OUT OF GROUP tection. -
Page 26: Set Answer Mode
SET ANSWER MODE ing the C.O. line number, trunk group access code, intercom number or fea- ture access code. To activate this feature: You can receive internal calls in one of three modes (see Answering Intercom • With the handset on-hook, press TRANSFER and then dial 110. Calls under Intercom Calls for descriptions): •... -
Page 27: Display Speed Dial Name
DISPLAY SPEED DIAL NAME [L VERSION] DISPLAY FEATURES This option allows you to view the name associated with a speed dial num- ber as it is dialled. INTERACTIVE DISPLAY KEYS • With your handset on-hook, press TRANSFER and then dial 110. The three keys below the display are substitutes for dedicated feature keys •... -
Page 28: Call Log
CALL LOG CALL DURATION TIMER To view the last five outside numbers that you dialed, press the LOG key. The system can be set to automatically time outside calls. A few seconds This will display the last number that was dialed. Pressing the NEXT key will after you dial a telephone number, the timer appears in the display. -
Page 29: Personal Speed Dial Names
• Dial the alarm number 1, 2 or 3. PERSONAL SPEED DIAL NAMES • Dial the time you want the alarm to go off. Enter the time as HHMM Each personal speed dial number can have an 11 character name assigned (hours and minutes) using the 24 hour clock. -
Page 30: Lcr With Clear
PSMG ..Programmed Message 01–30 TEXT MESSAGING [L VERSION ONLY] RP ..Ring Plan ...(1–6), HOLD for none This feature allows two digital keyset users to respond to each other with SG . -
Page 31: Caller Id
GIVE THE CALL TMSG:01 SEND The Samsung DCS system supports Caller ID and in fact in the case where the number only is delivered, the system can be programmed to insert Dial 03 or press " twice a name for a specific telephone number received. Up to 250 numbers ASK THEM TO HOLD can be stored. -
Page 32: Viewing The Next Clip Call
VIEWING THE NEXT CLIP CALL In the event that you have a call waiting or a camped-on call at your keyset, you can press the NEXT key to display the Caller ID information associated with the call in queue at your keyset. Either the CID name or CID number will show in the display depending on your Name/Number selection. -
Page 33: Reviewing Past Clip Calls
INQUIRE CLIP PARK/HOLD INFO Press SCROLL and then press STORE to save this number in a person- al speed dial bin. If you are informed that an incoming call is on hold or has been parked for NOTES: you, you may view the Caller ID information before you retrieve the call. This 1. -
Page 34: Svmi-8 Telephone Keypad Interface
iDCS 64 BUTTON MODULE SVMi-8 WITH KEYSET This section describes how to setup your mailbox, and how to use the vari- ous mailbox owner features. Please review this section carefully before you The 64 button module is used when you need more programmable keys use your mailbox. -
Page 35: Main Menu
& & While Listening While Recording Messages Group Messages to Messages Save Msgs Stop Urgent Callback Reminders Save Discard Review Discard Recording, Message Request Message Messages Recording Rerecord Append Previous Msgs Schedule Call Sender Private Reply to Forward Delivery SEND, Future Messages Messages... -
Page 36: Svmi-8
ACCESSING YOUR MAILBOX GETTING STARTED Using your new SVMi-8 mailbox is as simple as following a few simple spo- Outside Callers ken instructions. First time users should read this section as a tutorial. The • Dial the phone number that will be answered by the SVMi-8. The main first things to should do are: greeting will answer. -
Page 37: Listening To Old Or New Messages
Scan. Plays first 7 seconds of a message then skips to next message. This is similar to the scan button on a radio. It will allow you to find a specific message quickly. To stop scanning press [1]. LISTENING TO OLD OR NEW MESSAGES ✱... -
Page 38: Record And Send A Message
RECORD AND SEND A MESSAGE ACCESS MANAGER The Access Manager allows the subscriber to set a number of options for This option is used to send a message to another subscriber. The steps are when, where and how the SVMi-8 contacts you when a caller dials your simple: extension number. -
Page 39: Personal Greetings
Find Me Primary No Answer Greeting This option is available only if the Administrator has assigned you this Used when in your office, away from your desk or during the time peri- feature. od you are scheduled available. Find Me, when enabled, will attempt to locate the subscriber by calling This option is available only if the Administrator has assigned you the a list of preprogrammed phone numbers. -
Page 40: Mailbox Administration
I There are 4 options available to you: Example: “Hi, this is John Smith. I'm sorry, but I just cannot speak with you at this time. Please choose from the following options.” Press [1] to toggle message alert on and off. You may also edit each one of the greetings (1-9). -
Page 41: Message Broadcast
Auto Play New Messages If this option is enabled, after you enter your password correctly any new messages will immediately begin to play. To enable this feature: PERSONAL SERVICES I From the Mailbox Main Menu press [6] for Mailbox Administration. I Press [5] to Set Auto Play of New Messages. -
Page 42: Personal Administration Settings
PERSONAL ADMINISTRATION SETTINGS KEYSET USER FEATURES The following options are available if you have a display keyset. They This menu allows you to make changes, that are rarely changed. Use these require setup by the System Administrator. when you initially set up your mailbox. You probably will not need them after that. -
Page 43: Shortcuts
If the password option is turned on, while a message is being left, press the SHORTCUTS flashing AME light and enter your station password (not your SVMi-8 pass- word). You will then hear the message being left. Calling Call Record Calling a station that is busy or does not answer you can press [#] to immediately send the call to the called parties mailbox. -
Page 44: Personal Speed Dial Numbers
PERSONAL SPEED DIAL NUMBERS PERSONAL SPEED DIAL NUMBERS CODE NAME TELEPHONE NUMBER CODE NAME TELEPHONE NUMBER _________________________ _________________________ _________________________ _________________________ _________________________ _________________________ _________________________ _________________________ _________________________ _________________________ _________________________ _________________________ _________________________ _________________________ _________________________ _________________________ _________________________ _________________________ _________________________ _________________________ _________________________ _________________________ _________________________ _________________________ _________________________ _________________________ _________________________...