Samsung 7200 User Manual
For idcs 100 release 2/officeserv idsc 500 release 2/officeserv officeserv 7200
Hide thumbs
Also See for 7200:
- Programming manual (409 pages) ,
- User instructions (368 pages) ,
- Technical manual (265 pages)
Table of Contents
Advertisement
Quick Links
iDCS KEYSET
USER GUIDE
iDCS 100 Release 2/OfficeServ
iDCS 500 Release 2/OfficeServ
OfficeServ
September 2005
Samsung Telecommunications America reserves the right without prior notice to revise information in
this guide for any reason. Samsung Telecommunications America also reserves the right without prior
notice to make changes in design or components of equipment as engineering and manufacturing
may warrant. Samsung Telecommunications America disclaims all liabilities for damages arising from
the erroneous interpretation or use of information presented in this guide.
for
™
™
7200
™
Advertisement
Table of Contents

Related Manuals for Samsung 7200


Summary of Contents for Samsung 7200
-
Page 1: User Guide
Samsung Telecommunications America reserves the right without prior notice to revise information in this guide for any reason. Samsung Telecommunications America also reserves the right without prior notice to make changes in design or components of equipment as engineering and manufacturing may warrant. -
Page 2: Table Of Contents
TABLE OF CONTENTS ABOUT THIS BOOK ...1 THINGS YOU SHOULD KNOW ASSEMBLING YOUR KEYSET ADDING AN iDCS 14B KEY STRIP ADDING A KEYSET DAUGHTERBOARD MODULE ...13 OUTSIDE CALLS Making an Outside Call ...14 Answering an Outside Call...14 Universal Answer ...14 Recall/Flash ...15 Busy Line Queuing with Callback ...15 Canceling Callback ...15... - Page 3 Off-Hook Voice Announce ...39–40 OHVA Block ...40 OHVA Reject ...40 In Group/Out of Group ...40 CUSTOMIZING YOUR KEYSET AME Password ...41 Auto Camp-On ...41 Select Ring Tone ...41 Change Your Passcode ...41 Set Answer Mode (Intercom) ...42 Set Answer Mode (CO) ...42 Automatic Hold ...42 Headset Operation ...42 Hot Keypad ...43...
-
Page 4: About This Book
ABOUT THIS BOOK Your iDCS keyset is the most visible part of your telephone system. No matter what model keyset you are using telephone calls are handled the same way. The 28D and 18D keysets have additional conveniences that are not available to 8D keyset users. -
Page 5: Feature Access Codes
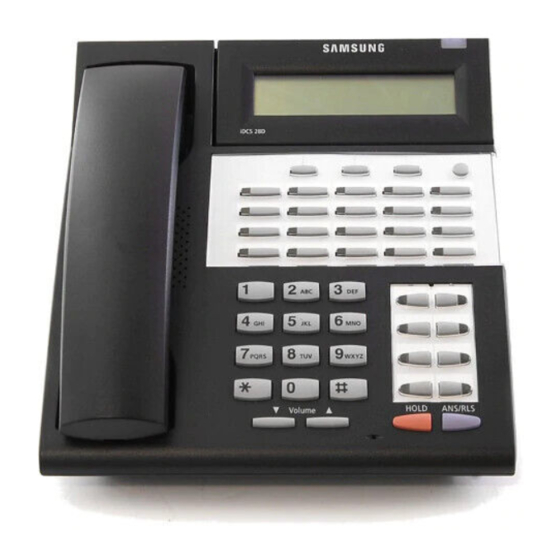
Your outside calls will light green on your keyset and red on other keysets. You never lose sight of your calls while they are on hold.They stay right where you put them and are identified with a green flashing light. Some simple rules to remember: •... - Page 6 iDCS 28D KEYSET 32 CHARACTER DISPLAY Two lines with 16 characters each. iDCS 28D Call 1 Call 2 PQRS WXYZ OPER Volume MICROPHONE For handsfree operation. 20 PROGRAMMABLE KEYS WITH VOLUME CONTROL KEYS TRI-COLORED LIGHTS Used for CALL Used to set independent buttons, intercom calls, outside lines levels for handset, speaker, and many other system features.
- Page 7 iDCS 8D KEYSET 32 CHARACTER DISPLAY Two lines with 16 characters each. iDCS 8D Scroll VOLUME Call 1 Call 2 Message Transfer Speaker PQRS WXYZ OPER HOLD ANS/RLS HOLD KEY ANSWER/ SPEAKER RELEASE KEY For handsfree operation and ringing. 8 PROGRAMMABLE KEYS WITH TRI-COLORED LIGHTS Used to call stations directly, to indicate busy conditions of other stations, for One...
- Page 8 Single Line Interface (SLI) port for connection of a stan- dard telephone device such as a cordless phone. iDCS KDB-FULL DUPLEX (FKDBF) The standard speakerphone mode of operation for a iDCS keyset is “half duplex” .
-
Page 9: Assembling Your Keyset
ASSEMBLING YOUR KEYSET • Place the keyset face down on a flat surface. • Remove the base pedestal by placing your thumbs over the attachment clips and press outward while simultaneously pressing down on the keyset body with your fingertips. •... -
Page 10: Adding A Keyset Daughterboard Module
SPEAKER, receive intercom dial tone and dial a line access code. • Dial the telephone number. • Finish the call by replacing the handset or pressing the ANS/RLS key. NOTE: You will receive No More Calls tone when you attempt to make a call and there is no key available for that line. -
Page 11: Calling Other Stations
SENDING A FLASH While on an outside call, press the FLASH key to send a flash to the telephone company. This is required for some custom calling features or CENTREX use. NOTE: Flash is not available on an ISDN circuit. -
Page 12: Busy Station Callback
BUSY STATION CALLBACK When you call another station and receive a busy signal: • Press the CBK key, if programmed, or dial 44. • When the busy station becomes free, your keyset will ring. • Lift the handset or press ANS/RLS to call the now idle station. NOTES: A callback will be canceled if not answered within 30 seconds. -
Page 13: Consultation Hold
CALL PROCESSING SYSTEM HOLD • When you are connected to any call, press HOLD. The call will flash green at your keyset. If this call appears on a line key at other keysets, it will flash red at those keysets. •... -
Page 14: Transfer To Voice Mail
first station to hang up, simply press another DSS button. OR Press the CALL button or C.O. line key to return to the outside party and begin the transfer process again. When you are transferring a call to a keyset set for Voice Announce or Auto Answer, the transferred call will always ring. -
Page 15: Forwarding Calls
You may forward your calls to another station, group of stations or an external telephone number. Program a destination for the type of forwarding you want as detailed below. If you have FWD ALL, FWD BUSY and FWD NO ANSWER keys, press one to turn that forward feature on. -
Page 16: Call Pickup
500 R2 M 01-99 iDCS 500 R2 L 01-99 OfficeServ 7200 NOTES: A group pickup key can have an extender for a specific pickup group. If the Hot Keypad feature has been turned off, you must first lift the handset or press the SPEAKER key before dialing the access code. -
Page 17: Dialing Features
NOTE: If the Hot Keypad feature has been turned off, you must first lift the handset or press the SPEAKER key before you begin dialing. LAST NUMBER REDIAL To redial the last telephone number you dialed, press the REDIAL key or dial 19. NOTES: 8D KEYSET DEFAULT... -
Page 18: Manual Retry With Redial
• While you are talking on an outside call, press SAVE. • Dial the telephone number as it is dictated to you on the key pad. • Press SAVE to store the number. To dial the number, press the SNR button. It will select the same line and dial the stored number. -
Page 19: Paging And Messaging
PAGING AND MESSAGING MAKING AN INTERNAL PAGE To make an announcement through the keyset speakers in the idle condition: • Lift the handset. • Press the PAGE key or dial 55. • Dial the desired zone number 0, 1, 2, 3 or 4. •... -
Page 20: Intercom Calls
To retrieve an automatically parked call: • Dial 10 plus the number that was announced. If you have a PAGPK key, press it and dial the number that was announced. If you have a PARK key, press it and dial the announced orbit number. •... -
Page 21: Convenience Features
CONVENIENCE FEATURES DO NOT DISTURB Use this feature when you want to block calls to your keyset. • While on-hook, press the DND key or dial 401. The DND key lights steady red to remind you of this mode. • To cancel DND, press the DND key again or dial 400. -
Page 22: Executive/Secretary Hotline
ANSWERING THE DOOR PHONE When you are programmed to receive calls from a door phone: • You will receive three short rings repeated. • Lift the handset or press ANS/RLS key. You are connected to the door phone. • If an electric door lock release is installed, dial 13 to unlock the door. CALLING THE DOOR PHONE/ ROOM MONITOR You may call the door phone and listen to what may be happening outside or in... -
Page 23: Manual Signalling
MANUAL SIGNALLING Use this feature when you want to send a brief 500ms ring burst to another sta- tion, regardless of the status of your phone (on-hook, off-hook, handsfree, DND, or ringing). To send a signal to another station: • Press the Manual Signalling (MS) key. -
Page 24: Customizing Your Keyset
CUSTOMIZING YOUR KEYSET AME PASSWORD This feature allows people using the AME feature to enable password protection. This will prevent unauthorized people from listening to your messages being left. The passcode is the same as your station passcode. This feature only applies if there is an SVM card installed in the system and your keyset has a programmed AME key. -
Page 25: Hot Keypad
Your keyset may be equipped with a Headset mode key. If it is so equipped press- ing this key while the light is out will cause the keyset to enter headset mode and the light will illuminate to indicate this. Pressing the key while the light is lit will cause the keyset to return to handset mode and the light will go out. -
Page 26: Directory Information
Press either the IN or OUT key. • View the first IN/OUT telephone number. At this point you may select one of the three options related to this number or use the UP/DOWN keys to scroll through your list of calls. -
Page 27: Call Progress Displays
The system can be set to automatically time outside calls. A few seconds after you dial a telephone number, the timer appears in the display. It appears immediately for incoming calls. The call timer continues for the duration of the call. Call dura- tion times are displayed in minutes and seconds. -
Page 28: Station Names
LCR WITH CLEAR When you are making an outside call using LCR and dial an incorrect digit, you can press the CLEAR soft key to reenter the telephone number. You do not need to redial 9 to reaccess LCR. BACKSPACE WITH LCR If you misdial while using LCR, you can delete digits shown in the display by press- ing the BSPC soft key as many times as necessary. -
Page 29: Text Messaging
TEXT MESSAGING This feature allows two digital keyset users to respond to each other with prepro- grammed text messages. After receiving an Off Hook Voice Announcement or Station Camp-On, you may respond with a text message while continuing to talk and listen to your outside party.The other station can view this message and take the appropriate action or respond back with another text message. - Page 30 Caller ID translation table. On 5ESS and NI2 PRI circuits both name and number support is provided on the iDCS 100 Release 2, iDCS 500 Release 2, and OfficeServ 7200 systems. On a DMS100 circuit only num- ber service is provided.
-
Page 31: Viewing The Next Caller Id Call
The system displays the speed dial bin in which the number was stored. NOTE: Your telephone system must have LCR correctly programmed to redial the saved number. If LCR is not being used on your system, you will not be allowed to STORE CID numbers. -
Page 32: With Keyset
• You can now CLEAR this entry, OR Use NND to view more information about this call, OR Press DIAL to call this person back, OR Press SCROLL and then press STORE to save this number in a personal speed dial bin. - Page 33 SVMi E-Series This section describes how to setup and use the various features available to a Subscriber. A Subscriber is a person that has been authorized access to the vari- ous features and services available in the SVMi E-Series. Please review this section carefully before you use your Authorized Features and Services, known as Subscriber Services.
-
Page 34: Svmi E-Series
ACCESSING YOUR MAILBOX [Also known as Subscriber Services Menu] Inside Callers [Subscriber logging in from their Desk] • Dial the SVMi E-Series access number or press the key assigned to ring SVMi E-Series [VMMSG]. • Enter your personal password when prompted (the default password is 0000). -
Page 35: Getting Started
This will allow you to leave a message in the mailbox of the sender (if the sender has a mailbox on this system). Return the call directly to the telephone number that left the message. This will work for internal and external callers, but Caller ID service is need- ed to use this feature on an outside call. -
Page 36: Group New Or Old Messages
Change playback speed of the recording. There are two levels of speed during playback. Dialing this code will toggle between the two speeds. Play options. Pressing this key will play all the menu options available to you from this point. Hear the time and date, and sender's information of the message you just heard. -
Page 37: Personal Greetings
The stored phone numbers are entered in 'Personal Services' [#][2] (if allowed by the Administrator). The stored tele- phone number list can contain up to 9 preprogrammed telephone numbers. The Find Me feature only use the first five. -
Page 38: Mailbox Administration
To hear your message at the remote location when the SVMi E-Series calls you, after you pick up the telephone and answer you will be instructed that there is a message and to enter your password. Simply enter your password... -
Page 39: Message Broadcast
Setting Up Message Alert: From the Subscriber Services Menu press [6] for Mailbox Administration. Press [1] for Message Alert. There are 4 options available to you: Press [1] to toggle message alert on and off. Press [2] to set the schedule when you would like to be notified. Press [3] to be notified on urgent messages only. -
Page 40: Personal Services
From the Subscriber Services Menu press [#][7][3]. The current Directory Name will be played as a string of digits that are equal to your name spelled out on your telephone keypad. Follow the instructions to enter a new name.You will be prompted to enter your last name and then your first name. -
Page 41: Keyset User Features
Note: Remember if you know what digits to press, you can enter them at any time you do not have to wait to be prompted. This feature can be toggled on/off at anytime. Also if it is off you will be prompted within each subscriber menu to press zero for more options. -
Page 42: Interactive Display Keys
_________________________ _________________________ _________________________ _________________________ _________________________ _________________________ _________________________ _________________________ _________________________ _________________________ _________________________ _________________________ _________________________ _________________________ _________________________ _________________________ _________________________ _________________________ _________________________ TELEPHONE NUMBER _________________________ _________________________ _________________________ _________________________ _________________________ _________________________ _________________________ _________________________ _________________________ _________________________ _________________________ _________________________ _________________________ _________________________ _________________________ _________________________ _________________________ _________________________ _________________________... -
Page 43: Personal Speed Dial Numbers
PERSONAL SPEED DIAL NUMBERS CODE NAME TELEPHONE NUMBER _________________________ _________________________ _________________________ _________________________ _________________________ _________________________ _________________________ _________________________ _________________________ _________________________ _________________________ _________________________ _________________________ _________________________ _________________________ _________________________ _________________________ _________________________ _________________________ _________________________ _________________________ _________________________ _________________________ _________________________ _________________________ _________________________ _________________________ _________________________ _________________________ _________________________ _________________________ _________________________...