Table of Contents
Advertisement
Quick Links
Advertisement
Table of Contents

Related Manuals for Johannus Ecclesia D-47


Summary of Contents for Johannus Ecclesia D-47
- Page 1 JOHANNUS revolution User Manual The church organ without compromise...
- Page 2 All rights reserved. Nothing in this publication may be reproduced, stored in a computerised data file or made public in any form or in any way either electronically, mechanically, by way of photocopying, recording or in any other manner without prior written permission from Johannus Orgelbouw b.v.
-
Page 3: Table Of Contents
Transposer General Crescendo Easy Menu Orchestrals MIDI Tuning Temperaments Keyboard Config Reset Procedures Datadump Startup settings Reverb Key Volumes JOHANNUS revolution Table of contents - 1 -... - Page 4 Table of contents Maintenance Overview Cabinet maintenance Maintenance of the manuals Problems Reposition the pedal Warranty MIDI Implementations MIDI Implementation Chart MIDI specifications JOHANNUS revolution Table of contents - 2 -...
-
Page 5: Safety
Keep this user manual with the organ. The organ may only be opened by a technician authorised by Johannus Orgelbouw b.v. The organ contains static-sensitive components. The warranty becomes null and void if the organ is opened by a non-authorised person... -
Page 6: Installation
Slide the rolltop cover upward. Closing Never leave the key in the area that can be closed. Slide the rolltop cover downward. Press the rolltop cover lock in. Turn the key a quarter turn to the right. JOHANNUS revolution Installation - 1 -... -
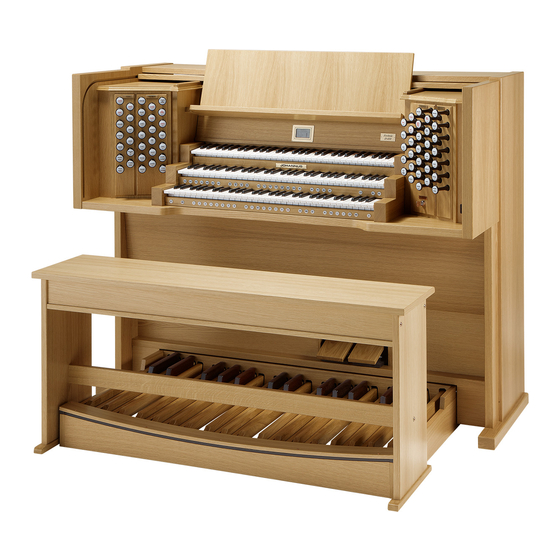
Page 7: Description Of The Organ
F Organ bench G Pedal Overview of display A Product name B Volume C Selected memory bank D Tuning setting E Transposer setting F Temperament setting G Crescendo setting H Swells indicators JOHANNUS Desciption of the organ - 1 - revolution... -
Page 8: Overview Of Controls
Manual great Accessories Manual choir +/- pistons All swell to swell piston RO piston REC piston MENU piston Great stops GG CAN piston Choir stops TUTTI piston On/Off switch Memory keylock Organ volume knob JOHANNUS Desciption of the organ ‐ 2 ‐ the revolution ... -
Page 9: Connect And Switch On The Peripherals
AUX OUT: This is an output for connecting an external (stereo) amplifier. EXT. REV.: This is an output for connecting Johannus external acoustics. This is a system that imitates the spatial effect of a concert hall or cathedral. -
Page 10: Operation
Use the + and – buttons to turn the 3D Surround on or off. Press the SET knob. The selected 3D Surround setting has now been stored in memory and will automatically appear in the main menu. Press the MENU button to leave the Easy Menu. JOHANNUS revolution Operation - 1 -... -
Page 11: Intonations
The Johannus intonation program is required for saving the intonation settings. Connect a PC to the organ. Use the MIDI SEQ. output. Save the intonation settings on the PC using the Johannus intonation program. Restore the factory intonation settings The current intonation settings will be lost if the settings are not saved on a PC. -
Page 12: Orchestrals
Pedal: Enables the stops associated with the Pedal. Choir: Enables the stops associated with the Choir. Great: Enables the stops associated with the Great. Swell: Enables the stops associated with the Swell. JOHANNUS revolution Operation - 3 -... -
Page 13: Couplers
General Crescendo pedal (CR): This is a mode for switching the General Crescendo pedal on and off. All Swells to Swell (S/S): This mode replaces all swells with one swell, being the swell of the Swell. JOHANNUS revolution Operation - 4 -... -
Page 14: Change The Registration
Press the required memory location (1-8). Release the SET button. Retrieve a capture memory location Use the - and + buttons to select the required level (1-32) on the display. Press the required memory location (1-8). The active stops light up. JOHANNUS revolution Operation - 5 -... -
Page 15: Transposer
Set the required registration for the step. Press the SET button. If necessary, select another step to be changed. Press the MENU button to switch off the programming mode. Press the CR button to switch off the General Crescendo mode. JOHANNUS revolution Operation - 6 -... -
Page 16: Easy Menu
Press the SET piston again. When data is being sent, Sending data appears on the display. As long as Sending data appears in the display, you cannot use the organ. Press the MENU piston to exit the Easy Menu. JOHANNUS revolution Easy Menu - 1 -... -
Page 17: Keyboard Config
Press the SET piston. The manual setting is now saved in the memory. Press the MENU piston to return to the main menu. Press the MENU piston again to exit the Easy Menu. JOHANNUS revolution Easy Menu - 2 -... - Page 18 Activate one stop. The display shows a prompt for confirmation. Use the - and + pistons to select No or Yes. Press the SET piston. Press the MENU piston twice to exit the Easy Menu. JOHANNUS revolution Easy Menu - 3 -...
- Page 19 Press the SET piston to save the change. Select another MIDI stops to be programmed, if required. Press the MENU piston to return to the main menu. Press the MENU piston again to exit the Easy Menu. JOHANNUS revolution Easy Menu - 4 -...
-
Page 20: Reset Procedures
Special Stop mode def. Tracker Action default Tweeter Volume default Press the SET piston. The display shows a prompt for confirmation. Use the - and + pistons to select No or Yes. JOHANNUS revolution Easy Menu - 5 -... -
Page 21: Startup Settings
Press the SET piston. The display shows the current temperament. Use the - and + pistons to select the desired temperament. You can choose from twelve temperaments: Equal: (normal or equal temperament) Young II JOHANNUS revolution Easy Menu - 6 -... - Page 22 Use the - and + pistons to select the desired pitch. Press the SET piston. The selected settings are stored in the memory and you will automatically return to the main menu. Press the MENU piston to exit the Easy Menu. JOHANNUS revolution Easy Menu - 7 -...
- Page 23 Press the SET piston, followed by the desired mode you wish to open. The following modes support QuickAccess: General Crescendo; You will be taken immediately to the Crescendo programming mode. Orchestrals; You will be taken immediately to the Orchestrals programming mode. (optional) JOHANNUS revolution Easy Menu - 8 -...
-
Page 24: Cabinet Maintenance
Reposition the pedal. poor contact with the magnetic switch at the rear of the pedalboard. Organ modes do not work The organ has not been Connect the organ to an properly earthed. earthed power socket. JOHANNUS revolution Maintenance - 1 -... -
Page 25: Reposition The Pedal
Warranty The stipulations are specified in the warranty certificate. The warranty will become null and void if changes or repairs are made to the organ by persons or organisations that are not authorised by Johannus Orgelbouw b.v. JOHANNUS revolution Maintenance - 2 -... - Page 26 * * * * * * * * See MIDI Specs See MIDI Specs System See MIDI Specs See MIDI Specs See MIDI Specs Exclusive : Song Pos Common : Song Sel : Tune JOHANNUS revolution MIDI Implementations - 1 -...
-
Page 27: Midi Specifications
Transposer, with transposer values 61 (3Dh) - 67 (43h). Transposer value 64 (40h) = A = 440 Hz. The following applies to the transposer: LSB 100 (64h) 2 (02H) and the MSB 101 (65h) 0(00h). JOHANNUS revolution MIDI Implementations - 2 -... -
Page 28: Midi Implementations
Only the value of the 8th byte varies. This is the ‘sys ex message’ that Johannus generally uses: F0 00 4A 4F 48 41 53 XX F7 (hexadecimal). The ‘sys ex messages’ described below only indicate the value of the 8th byte (XX) and the output from which it is transmitted.