
Related Manuals for RCA 25111


Summary of Contents for RCA 25111
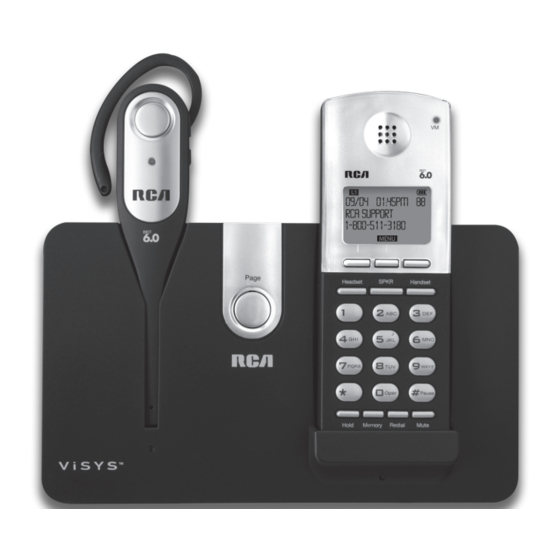
- Page 1 1.9 GHz Cordless Handset Telephone With 1.9 GHz Cordless Headset User’s Guide Model 25111...
-
Page 2: Equipment Approval Information
Equipment Approval Information Your telephone equipment is approved for connection to the Public Switched Telephone Network and is in compliance with parts 15 and 68, FCC Rules and Regulations and the Technical Requirements for Telephone Terminal Equipment published by ACTA. Notification to the Local Telephone Company On the bottom of this equipment is a label indicating, among other information, the US number and Ringer Equivalence Number (REN) for the equipment. -
Page 3: Interference Information
you the opportunity to correct the situation; and (3) inform you of your right to bring a complaint to the Commission pursuant to procedures set forth in Subpart E of Part 68, FCC Rules and Regulations. The telephone company may make changes in its communications facilities, equipment, operations or procedures where such action is required in the operation of its business and not inconsistent with FCC Rules and Regulations. -
Page 4: Fcc Rf Radiation Exposure Statement
FCC RF Radiation Exposure Statement This equipment complies with FCC RF radiation exposure limits set forth for an uncontrolled environment. This equipment should be installed and operated with a minimum distance of 20 centimeters between the radiator and your body. This transmitter must not be co-located or operated in conjunction with any other antenna or transmitter.”... -
Page 5: Parts Checklist
Introduction CAUTION: When using telephone equipment, there are basic safety instructions that should always be followed. Refer to the IMPORTANT SAFETY INSTRUCTIONS provided with this product and save them for future reference. IMPORTANT: Because cordless phones operate on electricity, you should have at least one phone in your home that isn’t cordless, in case the power in your home goes out. -
Page 6: Telephone Jack Requirements
Telephone Jack Requirements To use this phone, you need an RJ11C type modular telephone jack, which might look like the one pictured here, installed in your home. If you don’t have a modular jack, call your local phone company to find out how to get one installed. INSTALLATION Digital Security System Your cordless phone uses a digital security system to protect against false ringing, unau-... -
Page 7: Handset Layout
Handset Layout... - Page 8 Headset Layout Base Layout...
-
Page 9: Installing The Phone
INSTALLING THE PHONE Installing the Handset Battery NOTE: You must connect the handset battery before use. CAUTION: To reduce the risk of fire or personal injury, use only the Nickel-metal Hydride (Ni-MH) battery model 5-2734, which is compatible with this unit. 1. -
Page 10: Headband Attachment
2. Insert the battery into the battery compartment with the warning label facing Up. 3. Push the battery plug into the connector inside the compartment according to the color-coded label and place the wires neatly inside the compartment. 4. Insert the tab on the bottom of the battery cover into the battery compartment. Press down gently on the battery cover until it snaps into place. -
Page 11: Ear Hook Attachment
EAR HOOK ATTACHMENT To attach the ear hook to the headset. 1. Remove the headband if currently attached to the headset. 2. Insert the earpiece into the ear hook. 3. Press the ear hook onto the earpiece until it clicks into place 4. -
Page 12: Base Station
Base Station 1. Choose an area near an electrical outlet and a telephone wall jack (RJ11C), and place your cordless telephone on a level surface, such as a desktop or tabletop. If you choose to, you may also mount it on the wall. 2. -
Page 13: Phone Setting
Phone Setting 1. Make sure your phone is in standby mode (not in talk mode). 2. Press the Menu soft key on the handset to go to the main menu. 3. Press VOL (- or +) button to scroll to Phone Setting. 4. -
Page 14: Date Format
Date Format From the Date/Time Menu: 1. Use the VOL (- or +) button to scroll to Date Format. 2. Press the OK soft key. 3. Use the VOL (- or +) button to scroll to select either DD/MM or MM/DD format. 4. -
Page 15: Handset Name (Only Applicable For Handset)
4. Press the OK soft key to select. 5. A confirmation tone will indicate that your selection has been saved. Handset Name (only applicable for handset) From the Phone Setting Menu: 1. Press the VOL (- or +) button to scroll to the Handset Name sub-menu. 2. -
Page 16: Sound Setting
Sound Setting 1. Make sure your phone is in standby mode (not in talk mode). 2. Press the Menu soft key on the handset to go to the main menu. 3. Press VOL(- or +) button to scroll to Sound Setting. 4. -
Page 17: Priority Settings
Call VM From the Voice Mail Menu: 1. Press VOL (- or +) button to scroll to Call VM. 2. Press OK soft key 4. The phone will dial your voicemail access number. You may proceed to access your voice- mail per your service provider’s instructions. -
Page 18: Telephone Operation
Telephone Operation Your phone provides the convenience of accessing two separate telephone lines, each obtained from the telephone company and each having its own phone number. Making Calls with the Handset 1. Press the HANDSET button, the line will go off hook. 2. -
Page 19: Answering A Call
Answering a Call 1. Press the HANDSET button to answer the call in handset mode, OR 2. Press the SPEAKER button to answer the call in speakerphone mode, OR 3. Press the HEADSET button or Talk on/off button on headset to answer the call in headset mode. -
Page 20: Reviewing The Redial Numbers
Redial 1. Press the SPEAKER button , HANDSET button or HEADSET button, the line will go off hook. 2. Press the REDIAL button. The redial number list is shown in the display. 3. Use the VOL (- or +) button to select the number, press the dial soft key to dial the desired number. -
Page 21: Speakerphone, Handset, And Headset Volume
Speakerphone, Handset, and Headset Volume While the phone is in use, during the desired mode, press the VOLUME up or down buttons until you reach a comfortable listening level. The phone stores the setting after the last button press. Hold In Talk mode, press the HOLD button on handset to hold the line. -
Page 22: Receiving And Storing Cid Records
The summary screen shows the current time, current date, number of new CID records to be reviewed or total number of records saved to CID memory. It is displayed until any button is pressed. 09/04 01:45PM RCA SUPPORT 1-8-00-511-3180 MENU Receiving and Storing CID Records This unit receives and displays information transmitted by your local phone company. -
Page 23: Deleting All Call Records
Deleting All Call Records This feature allows you to clear all CID records at once. 1. While viewing a CID record, press the OPTION soft key. 2. Use the VOL (- or +) button to scroll to Delete All, press Select soft key to enter Delete all mode. -
Page 24: Call Waiting Caller Id
Call Waiting Caller ID This feature allows you to see who is calling when you hear the call waiting beep. The caller identification information appears in the display after you hear the tone. • Press the FLASH button to put the person to whom you’re talking on hold and answer the incoming call. -
Page 25: Deleting All Phone Book Record
enter edit mode. 3. Enter name shows in the display. You may now change the name, if desired. Please refer to section “Handset Name” for name editing method. 4. Press the Save soft key, Enter number shows in the display. 5. -
Page 26: Changing The Battery
Changing The Battery CAUTION: To reduce the risk of fire or personal injury, use only the Telefield NA Inc. approved Nickel-metal Hydride (Ni-MH) battery model T-T104, which is compatible with this unit. 1. Make sure the telephone is in standby mode (not in TALK mode) before you replace bat- tery. -
Page 27: Handset Sound Signals
Handset Sound Signals Signal Meaning A long warbling tone (with ringer on) Signals an incoming call Three short beeps (several times) Page signal One beep every 14 seconds Low battery warning Troubleshooting Guide Telephone Solutions No dial tone • Check or repeat installation steps: Make sure the base power cord is connected to a working electrical outlet. -
Page 28: Caller Id Solutions
Searching..shows in the handset display • Move the handset closer to the base. • Make sure the base power cord is connected to a working electrical outlet. Date/Time setting is restored to default setting • May be caused by power failure. Set Date/Time again. Caller ID Solutions No Display •... -
Page 29: Causes Of Poor Reception
Causes of Poor Reception • Aluminum siding. • Foil backing on insulation. • Heating ducts and other metal construction that can shield radio signals. • You ’re too close to appliances such as microwaves, stoves, computers, etc. • Atmospheric conditions, such as strong storms. •... -
Page 30: Limited Warranty
• Contact RCA Customer Care at (800) 511-3180. Our representatives will help you troubleshoot and diagnose the problem. As you may be asked to disconnect your RCA telephone from it’s power source, you must call from another telephone. If the issue cannot... -
Page 31: Product Registration
• Products purchased or serviced outside the USA • Acts of nature, such as, but not limited to lightning damage Product Registration: • Please complete and mail the Product Registration Card packed with your unit. It will make it easier to contact you should it ever be neccessary. The return of the card is not required for warranty coverage. - Page 32 This will only add delays in service for your product. Telefield NA Inc. 4915 SW Griffith Dr. #205 Beaverton, Or 97005 RCA is a trademark of RCA Trademark Management S.A., Used under license. © 2010. All rights reserved. Model: 25111 T000XXXXX(REV.00 DOM E)