
Related Manuals for RCA 2102 User 's guide


Summary of Contents for RCA 2102 User 's guide
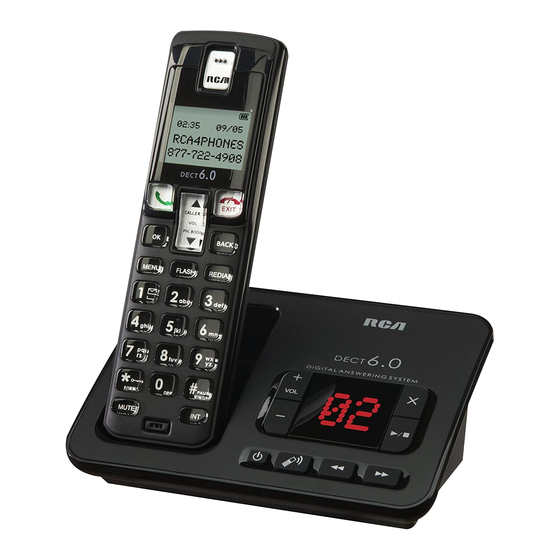
- Page 1 DECT 6.0 Multi Handset Cordless Phone Answering System User’s Guide Please read this manual before operating product for the first time. Visit the RCA web site at www.rca4phones.com Model 2102/ 2102-2/ 2102-3 / 2102-4...
-
Page 2: Equipment Approval Information
Equipment Approval Information Your telephone equipment is approved for connection to the Public Switched Telephone Network and is in compliance with parts 15 and 68, FCC Rules and Regulations and the Technical Requirements for Telephone Terminal Equipment published by ACTA. 1 Notification to the Local Telephone Company On the bottom of this equipment is a label indicating, among other information, the US number and Ringer Equivalence Number (REN) for... -
Page 3: Interference Information
2 Rights of the Telephone Company Should your equipment cause trouble on your line which may harm the telephone network, the telephone company shall, where practicable, notify you that temporary discontinuance of service may be required. Where prior notice is not practicable and the circumstances warrant such action, the telephone company may temporarily discontinue service immediately. -
Page 4: Hearing Aid Compatibility (Hac)
• Connect the telecommunications equipment into an outlet on a circuit different from that to which the receiving antenna is connected. If these measures do not eliminate the interference, please consult your dealer or an experienced radio/television technician for additional suggestions. Also, the Federal Communications Commission has prepared a helpful booklet, “How to Identify and Resolve Radio/TV Interference Problems.”... -
Page 5: Table Of Contents
Table of Contents Turn off the ringer for all Equipment Approval Information..2 incoming calls ........20 Interference Information .....3 Adjust the earpiece volume ...21 Hearing Aid Compatibility (HAC)..4 Mute the microphone ......21 FCC RF Radiation Exposure Statement ..4 Intercom Operation ....21 Information for DECT Product ....4 Make a call to another handset ..21 Industry Canada (I.C.) Notice ....7... - Page 6 Through the base ......28 Set the answering machine language ......28 Set the answer mode ......28 Announcements ........28 Incoming messages (ICM) ..29 Listen to the incoming messages ........29 Delete an incoming message ..30 Call screening ........31 Set the ring delay ......31 Remote access ........31 Default settings ......32 Frequently asked questions ..33...
-
Page 7: Industry Canada (I.c.) Notice
Industry Canada (I.C.) Notice This product meets the applicable Industry Canada technical specifications. Le présent materiel est conforme aux specifications techniques applicables d'Industrie Canada. The Ringer Equivalence Number is an indication of the maximum number of terminals allowed to be connected to a telephone interface. The termination on an interface may consist of any combination of devices subject only to the requirement that the sum of the Ringer Equivalence Numbers of all the devices does not exceed five. -
Page 8: Before You Begin
IMPORTANT: Because cordless phones operate on electricity, you should have at least one phone in your home that isn’t cordless, in case the power in your home goes out. Before You Begin Parts Checklist (for 2102 single handset model) Make sure your package includes the items listed here. AC power adaptor base... -
Page 9: Installation
Installation Digital Security System Your cordless phone uses a digital security system to protect against false ringing, unauthorized access, and charges to your phone line. INSTALLATION NOTE: Some cordless telephones operate at frequencies that may cause or receive interference with nearby TVs, microwave ovens, and VCRs. -
Page 10: Overview Of The Phone
• Do not use the product in places where there are explosive hazards. • Do not let small metal objects come into contact with the product. This can deteriorate audio quality and damage the product. • Active mobile phones in the vicinity may cause interference. •... -
Page 11: Overview Of The Base Station
Overview of the base station 1 • Increase/decrease the speaker volume 2 • Messages counter 3 • Delete messages. 4 • Play messages. • Stop messages playback. 5 • Charge/in use indicator 6 • Skip forward 7 • Skip backward 8 •... -
Page 12: Display Icons
Display Icons In standby mode, the icons shown on the main screen tell you what features are available on your handset. Icon Descriptions When the handset is off the base station/charger, the bars indicate the battery level (full, medium and low). When the handset is on the base station/charger, the bars keep scrolling until charging completes. -
Page 13: Installing The Phone
Installing the Phone Installing the Handset Battery NOTE: You must connect the handset battery before use. CAUTION: To reduce the risk of fire or personal injury, use only the. approved Nickel metal Hydride battery (Ni MH)(Brand name : SANIK, Model name: 2SN-AAA55H-S-J1, Capacity: 2.4V/550mAh; Brand name: BYD, Model name: H-AAA550BX2, Capacity: 2.4V/550mAh;... -
Page 14: Set The Date And Time Forma
2. Plug one end of the telephone line cord into the TEL LINE jack on the back of the base and the other end into a modular jack. 3. Plug the AC power converter into the electrical outlet and the DC connector into the jack on the back of the base. -
Page 15: Set The Date And Time
Set the date and time 1 P r e s s MENU. 2 S e l e c t [CLOCK] > [SET DATE/TIME], then press [OK] to confirm. 3 Press the numeric buttons to enter the date, then press [OK] to confirm. »»... -
Page 16: Personalize The Sounds
Personalize the sounds Set the handset’s melody You can select from 10 melodies 1 Press MENU. 2 Select [PERSONAL SET] > [HANDSET TONES] > [RING MELODY], then press [OK] to confirm. 3 Select a melody, then press [OK] to confirm. »»... -
Page 17: Registration
is 0000. The maximum length of the Master PIN is 8 digits. Note: If you forget your PIN code, you can reset it to its default 0000 using a handset reset. 1 Press MENU. 2 Select [ADVANCED SET] >[PIN], then press [OK]. 3 Enter the current Master PIN when prompted and then press OK key to confirm. -
Page 18: Area Code
»» The handset displays a confirmation request. 3 Press [OK] to confirm. »» All settings are reset. Area Code 1. Press MENU. 2. Select [ADVANCED SET] > [AREA CODE], then press [OK] to confirm. 3. Use the touch-tone pad to enter your 3-digit area code. 4. -
Page 19: First Ring
First ring If you have subscribed to the caller ID service with your service provider, your phone can suppress the first ring before the caller ID displays on the screen. After the phone is reset, it can detect automatically if the caller ID service is subscribed and start to suppress the first ring. -
Page 20: End A Call
3 Press [OK]. »» The most recent number is then dialed out . Call from the redial list 1 Press REDIAL. 2 Press the UP or DOWN key to select the number with your desired dial out . 3 Press the CALL. Call from the phonebook list 1 Press the PHONEBOOK. -
Page 21: Adjust The Earpiece Volume
2 W h e n the phone rings, press EXIT Adjust the earpiece volume Press to adjust the volume during a call. »» The earpiece volume is adjusted and the phone is back to the call screen. Mute the microphone 1 Press [MUTE] button during a call. -
Page 22: Make A Conference Call
2 Select a handset number, then press [OK] to confirm. 3 Press when the other side answers your call. EXIT »» The call is now transferred to the selected handset . Make a conference call A 3-way conference call is a call between you, another handset user and the outside callers. -
Page 23: Phonebook
Press 2 once: a Press 8 two times: u Press 5 three times: l Press and hold [#PAUSE/RINGER] to switch between the uppercase and lowercase letters. Phonebook This phone has a phonebook t h a t stores up to 50 records. You can access the phonebook f r o m the handset. -
Page 24: Edit A Record
•• If your phonebook memory is full, the handset displays a notification message. Delete some records to add new ones. 1 Press MENU. 2 Select [PHONEBOOK] > [NEW ENTRY], then press [OK] to confirm. 3 Enter the name then press [OK] to confirm. 4 Enter the number, then press [OK] to confirm. -
Page 25: Save A Call Record To The Phonebook
This feature is available if you have registered to the caller ID service with your service provider. Your phone can store up to 10 call records. If the caller allows the display of his identity, you can view his name or number. The call records are displayed in chronological order with the most recent received call at the top of the list. -
Page 26: Redial List
1 Press 2 Select [CALL LIST], then press [OK] to confirm. »» The incoming call log is displayed. 3 Press [OK] to enter the options menu. 4 Select [DELETE ALL], then press [OK] to confirm. »» The handset displays a confirmation request. 5 Press [OK] to confirm. -
Page 27: Keypad Lock
»» All records are deleted. Keypad lock You can lock the keypad to prevent accidental button presses. Lock the keypad 1 Press and hold [*/FORMAT] key in standby mode. »» The keypad is locked. Note • When the keypad is locked, no call can be made. You can still answer the incoming calls. -
Page 28: Through The Base
Through the base 1 Press to turn on/off the answering machine in standby mode. Note ••When the answering machine is switched on, it answers incoming calls after a certain number of rings based on the ring delay setting. Set the answering machine language Note This feature only applies to models with multiple-language support. -
Page 29: Incoming Messages (Icm)
6 Press [OK] to stop recording or the recording stops after 2 minutes. »» You can listen to the newly recorded announcement on the handset. Note •• To restore the pre-recorded announcement, delete your current announcement. Note •• Ensure that you speak close to the microphone when you record an announcement. -
Page 30: Delete An Incoming Message
From the base • Start/Stop listening: Press • Adjust the volume: Press + / -. • Skip backward: to listen to the message from the - When you listen to the messages, press beginning. to listen to the - During the first second of the current message, press previous message. -
Page 31: Call Screening
»» All old messages are permanently deleted. Note •• You can delete the read messages only. No deleted messages can be recovered. Call screening You can hear the caller while he is leaving a message. Press to pick up the call. From the base Press + / - to adjust the speaker v o l u m e during call screening. -
Page 32: Default Settings
1 Press MENU. 2 Select [ANSWER MACHINE] > [SETTINGS] > [REMOTE ACCESS], then press [OK] to confirm. 3 Select a new setting, then press [OK] to confirm. »» The setting is saved. Access the answering machine remotely 1 Make a call to your home number with a touch tone phone. 2 Enter # when you hear the announcement . -
Page 33: Frequently Asked Questions
Master pin 0000 First ring Conference Dial mode Tone H/S ringer melody Melody 1 H/S ringer volume Level 3 H/S earpiece volume Volume 3 Handset key beep Incoming call log Empty Redial list Empty Answering Machine Answer On/Off Answer mode Answer &... - Page 34 The handset on the charger does not charge. • Ensure the battery pack is inserted properly. • Ensure the handset is placed properly on the charger. The battery icon animates when charging. • Batteries are defective. Purchase new ones from your dealer. No display •...
-
Page 35: Warranty Assistance
Warranty Assistance Your sales receipt will be required to demonstrate proof of purchase in order to validate your warranty eligibility. You may want to attach either the original, or a photocopy, of your sales receipt to this booklet for future reference. If this product was received as a gift , it is suggested you jot down the date of gift receipt , as this information will be valuable should service be required during the warranty period. - Page 36 • Call Customer Care at 1-877-722-4908. Please have your product with you and please have your model number and date code available when calling us. The model number and date code can be found on the underside of the base unit . If you are within your limited warranty period and it is determined that service is required: •...
- Page 37 GIVEN BY SUPREME POWER USA LLC, ITS AGENTS, EMPLOYEES, RETAIL DEALERS OR INDEPENDENT CONTRACTORS SHALL CREATE A GUARANTY OR IN ANY WAY INCREASE THE SCOPE OF THIS WARRANTY. • REPAIR OR REPLACEMENT A S PROVIDED UNDER T H I S WARRANTY IS THE EXCLUSIVE REMEDY OF THE CONSUMER.
- Page 38 Visit the RCA web site at www.rca4phones.com Please do not send any products to the Indianapolis address listed in this manual or on the carton. This will only add delays in service for your product . 2102 Printed in China...