Table of Contents
Advertisement
Quick Links
Advertisement
Table of Contents

Related Manuals for Sirius Satellite Radio Sportster 6


Summary of Contents for Sirius Satellite Radio Sportster 6
- Page 1 User Guide Sportster 6 Satellite Radio...
- Page 3 -go with a compatible accessory (sold separately). Use this manual to familiarize yourself with all of the Sportster 6 features and capabili- ties. For the latest information about the Sportster 6 and other SIRIUS radios and ac-...
-
Page 4: Table Of Contents
ConTRolS Sportster 6 Front Panel ......48 Remote Control Buttons ......51 PowerConnect Vehicle Dock Reference Guide . - Page 5 Sirius ID ....... . 79 Settings ....... . 80 FM Transmitter .
-
Page 6: Warning And Safety Information
Warning and Safety Information Industry Canada (IC) Statement Operation is subject to the following two conditions: (1) this device may not cause in- terference, and (2) this device must accept any interference, including interference that may cause undesired operation of the device. To reduce potential radio interference to other users, the antenna type and its gain should be so chosen that the equivalent isotropically radiated power (e.i.r.p.) is not more than that permitted for successful communication. -
Page 7: Canadian Compliance
General Precautions liquid Crystal Precautions If the LCD screen on the Sportster 6 is damaged, do not to touch the liquid crystal fluid. If any of the following situations happen, take the action indicated: 1. If the liquid crystal fluid comes in contact with your skin, wipe the skin area with a cloth and then wash the skin thoroughly with soap and running water. -
Page 8: Warnings
• Be sure the unit is installed as described in these installation instructions and the instructions which accompany each accessory kit. SIRIUS Satellite Radio is not responsible for issues arising from installations which were not installed according to the instructions. - Page 9 PowerConnect Power Adapter or an equivalent DC power adapter (see your local electronics dealer). Connecting the Vehicle Dock directly to the vehicle’s 12VDC power system may result in damage to the Vehicle Dock or SIRIUS radio, or both. Warning and Safety Information...
-
Page 10: Copyrights & Trademarks
© 2010 Sirius Canada Inc. “SIRIUS”, the SIRIUS dog logo, channel names and logos are trademarks of SIRIUS XM Radio Inc. and are used under licence. “NFL” and the NFL Shield design are trademarks of the National Football League. “BBC” and “Radio One”... -
Page 11: Package Contents
Package Contents The following items are included with your Sportster 6 radio: Sportster 6 Radio Remote Control PowerConnect Vehicle dock Aux In Cable Package Contents... - Page 12 Suction Cup mount Vent mount & PowerConnect extended Vent hooks Power adapter magnetic antenna mounting alcohol antenna Cover/Tail Screws Wipe Package Contents...
- Page 13 Unpack your Sportster 6 carefully and make sure that everything shown is present. If anything is missing or damaged, or if your Sportster 6 radio fails to operate, notify your dealer immediately. It is recommended that you retain the original carton and packing materials in case you need to ship your radio in the future.
-
Page 14: Vehicle Installation
The mounting accessories necessary to install the dock in a vehicle are provided. Figure 1 shows two examples of the SIRIUS radio mounted in a vehicle: a is the suction cup mount method, and B is the vent mount method using the vent mount clip. - Page 15 figure 1 Depending upon the mounting location you select in your vehicle, the mount should be attached to the vehicle dock and installed as described in the following sections. Installation...
- Page 16 Suction Cup mount method (a) The suction cup mount may be attached to your vehicle’s windshield. To mount the dock using the suction cup mount, assemble the mount as follows: 1. Attach the dock to the suction cup mount using the provided screws. (See Figure 2.
- Page 17 3. Be sure the cam lever is up (as shown in Figure 3) and position the suction cup mount on the windshield or other location you have chosen. Press the cam lever all the way down towards the base of the mount until it locks to firmly adhere the suction cup. (To unlock the suction cup, lift the lever up.) Press Lever Down To...
- Page 18 Vent mount method (b) To mount the dock using the vent mount method, install the vent mount as follows: 1. If the vent louvers in your vehicle are recessed, you may need to use the longer vent hooks with the vent mount. Refer to Figure 4 and install the longer vent hooks into the vent mount.
- Page 19 3. Refer to Figure 6 and attach the vent mount to a heating/air conditioning vent in your vehicle. Position the two tension springs a against a vent louver B. Then push the vent mount into the vent, far enough so that the hooks C drop down and hook the rear of the vent louver (see Figure 7).
- Page 20 4. The angle of the dock may be changed by changing the position of foot D on the vent mount to a different adjustment hole. (See Figure 8.) ADJUSTMENT HOLES figure 8 Installation...
-
Page 21: Installing The Magnetic Antenna
Be sure not to cut, damage, or puncture the external jacket of the antenna cable during the installation procedure. Damage to the antenna cable can degrade the SIRIUS signal or make it unavailable, and can also cause water to intrude via the cable into the antenna causing the antenna to fail. -
Page 22: Antenna Mounting
AntennA Mounting The SIRIUS Magnetic Mount Vehicle Antenna has a strong magnetic mount designed to hold it in place during normal driving conditions (highway/city). This also makes the antenna easy to remove for transferring it to other vehicles. Figure 9 shows the optimal mounting location for the antenna on several types of vehicles. - Page 23 The SIRIUS antenna needs to have an unobstructed area of 3 inches by 3 inches around it. It is important to mount the antenna where no obstructions will block the antenna from receiving the SIRIUS signal. Objects which can obstruct the antenna could be a roof rack, a sunroof, a roof-mounted cargo container, another antenna, etc.
-
Page 24: Cable Routing
Rubber Antenna Cover/Tail. CAble Routing After you have mounted the antenna you can route the antenna cable to the SIRIUS Vehicle Dock. Separate antenna cable routing procedures are provided for each type of vehicle: Sedan/Coupe, Pickup Truck, SUV/Mini-Van and Convertible. - Page 25 Route the an- tenna cable around and down the window to the lowest point. If your rear window does not have rubber molding, SIRIUS recommends consulting with a professional installer.
- Page 26 Secure the excess cable with wire ties. 6. Bring the end of the cable out at the SIRIUS Vehicle Dock location. Leave yourself enough cable so you can easily connect it to the antenna connector on the Vehicle Dock.
- Page 27 Pickup Truck antenna Cable Routing Procedure Figure 12 shows how the antenna cable should be routed from the antenna to your SIRIUS radio in a pickup truck. NTENNA 1. Route Cable Under Rubber Molding Around Windshield 2. Continue Tucking Cable...
- Page 28 Secure the excess cable with wire ties. 5. Bring the end of the cable out at the SIRIUS Vehicle Dock location. Leave yourself enough cable so you can easily connect it to the antenna connector on the Vehicle Dock.
- Page 29 1. Feed Cable Under 4. Bring Cable Out To Rubber Seal Around SIRIUS Receiver Hatch Opening Location NTENNA 3. Route Cable Under Carpet to Dashboard 2. Route Cable Under Interior Trim, into Cabin and Towards Front of Vehicle figure 13 Follow these detailed cable installation instructions: 1.
- Page 30 Secure the excess cable with wire ties. 4. Bring the end of the cable out at the SIRIUS Vehicle Dock location. Leave yourself enough cable so you can easily connect it to the antenna connector on the Vehicle Dock.
- Page 31 Secure the excess cable with wire ties. 5. Bring the end of the cable out at the SIRIUS Vehicle Dock location. Leave yourself enough cable so you can easily connect it to the antenna connector on the Vehicle Dock.
-
Page 32: Tips
tips The following Do and do noT antenna mounting tips illustrate how to install the antenna for optimal performance, and also illustrate where the antenna should not be installed. Mount the antenna on the roof, at least 3 inches from the edge. - Page 33 3” Mount the antenna on the roof where it has at least 3 inch- es of clear space around it. supplied Rubber Tail Cover to protect the antenna cable. Installation...
- Page 34 Don’t mount antenna inside the vehicle, for example, on the dashboard. Don’t mount antenna on any of the vehicle’s front, back or side pillars. Installation...
- Page 35 Don’t mount antenna close to a roof rack. Adjust the rack so it’s further away from the an- tenna or move the antenna closer to the center of the roof. Don’t mount antenna close another antenna. Mount it at least 3 inches away.
- Page 36 Don’t mount the an- tenna closer than 3 inches from the edge of the roof. Use the supplied rubber tail/ cover as a guide for judging proper length and correct position- ing. After you’ve routed the cable to the PowerConnect Vehicle Dock, connect the antenna connection on the right side of the PowerConnect Vehicle Dock.
-
Page 37: Connecting The Powerconnect Power Adapter
(Left Side) Power Outlet AUDIO figure 15 note: do not power the PowerConnect Vehicle dock directly from your vehicle’s 12VdC power system without using the PowerConnect Power adapter This could damage the PowerConnect Vehicle dock, your SIRIUS Radio or both Installation... -
Page 38: Connecting Your Sirius Radio To Your Vehicle's Audio System
FM radio. To learn more, check with the retailer where you bought your radio, or go to shop.sirius. Follow the installation instructions in the next several sections for the audio connection option that you have selected. - Page 39 2. Plug the other end into the auxiliary input jack connection of your vehicle’s stereo system. 3. Insert your Sportster 6 into the dock, aligning the radio against the rear of the dock so that the rails on the dock fit into the mounting slots in the back of the radio. (See Figure 17.)
- Page 40 Sportster 6. figure 19 9. The audio level output of the Sportster 6 can be increased or decreased as nec- essary to match the audio levels of other sources in your vehicle. Refer to “Audio Level” on page 87.
- Page 41 3. Insert your Sportster 6 into the dock, aligning the radio against the rear of the dock so that the rails on the dock fit into the mounting slots in the back of the radio. (See Figure 21.)
- Page 42 8. You should hear SIRIUS channel 184 through your vehicle’s stereo system. You are now ready to subscribe your Sportster 6. 9. The audio level output of the Sportster 6 can be increased or decreased as nec- essary to match the audio levels of other sources in your vehicle. Refer to “Audio Level”...
- Page 43 3: PowerConnect Installation Instructions 1. Insert your Sportster 6 into the dock, align- ing the radio against the rear of the dock so that the rails on the dock fit into the mount- ing slots in the back of the radio. (See Fig- ure 24.)
- Page 44 (if you have not already done so) and tune it to this FM channel. 90. 1 MATCH FM CHANNELS figure 27 7 Set your Sportster 6 to transmit on the same FM channel that you have selected in step 4: Press and hold M until M is displayed.
- Page 45 VII. The FM channel you selected will be con- firmed on the display screen. The Sportster 6 will tune to the FM channel. 8 You should hear SIRIUS channel 184 through your vehicle’s FM radio. If you are satisfied with the sound quality, you’re done! You are now...
- Page 46 Sportster 6 to transmit on the same FM channel (steps 6 & 7). If the signal reception is good, but there is no SIRIUS audio when tuned to channel 184, verify that both the radio and your vehicle’s FM radio are tuned to the same FM channel (steps 6 &...
-
Page 47: Subscribing To The Sirius Service
You will not be able to listen to any other channels until you activate your SIRIUS subscription. 4. Use the Sportster 6 Knob to tune to channel 0 to display your Sportster 6’s unique 12-digit SIRIUS ID Number (SID). You can also tune to channel 0 by using the... -
Page 48: Controls
Controls Sportster 6 Front Panel Figure 33 and the section following identify and describe the Sportster 6’s buttons and controls. figure 33 Controls... - Page 49 1. Color LCD Display Screen: Provides information about the Sportster 6’s opera- tion, the program that is playing and other programming that is available. 2. FM Presets/M Button: Lets you select between the different FM preset frequencies used by the Sportster 6’s built-in internal FM transmitter. Press-and-hold accesses Menu options to make setup and feature changes.
- Page 50 10. Rewind Button: Used to rewind through content saved to Instant Replay. Pressing and releasing this button rewinds to the beginning of the song or program. Pressing and holding rewinds by time through the saved content. 11. Fast-Forward Button: Used to fast-forward through Instant Replay saved content.
-
Page 51: Remote Control Buttons
Figure 34 and the section following identify the remote control’s buttons. figure 34 1. Power Button: Turns the Sportster 6 ON and OFF. 2. Select Button: Selects items highlighted in a list; hold-down to jump to the previously- received channel. When not in a menu or list, pressing the Select button selects the channel entered using the number buttons. - Page 52 SIRIUS channel categories. Pressing and holding the buttons increase or decrease the display’s brightness, or lets you adjust the Auto Brightness settings, depending on the option selected in the Menu Options (see page 81) 4. FM Presets Button: Selects between the different FM preset frequencies used by the Sportster 6’s built-in internal FM transmitter.
- Page 53 Remote Control battery Installation To install the remote control battery, turn the remote control over and locate the battery cover near the bottom edge. Open the battery compartment and place the battery in the compartment with the + side of the battery facing up. Replace the battery cover on the remote control.
-
Page 54: Powerconnect Vehicle Dock Reference Guide
) Connector: Audio output for directly connecting to your ve- uDio hicle’s audio system (see pages 38 & 40). 3. Docking Rails: Fit-into slots in the back of the Sportster 6 to secure it while it is docked (page 37). 4. FM o Connector: FM output for use with the optional FM Direct Adapter (see page 45). -
Page 55: Operation
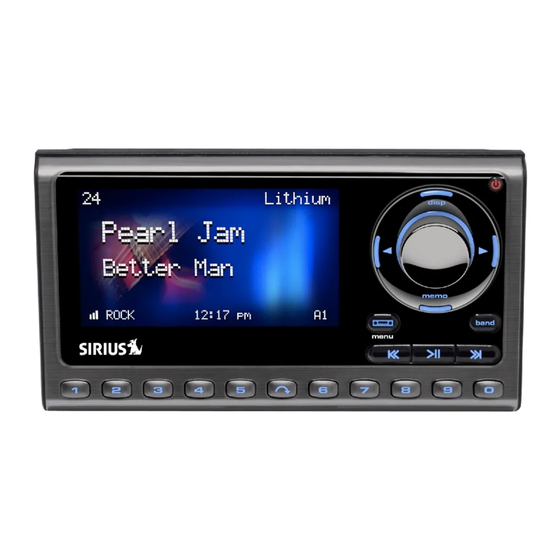
Operation Display Screen Information Your Sportster 6’s display screen provides information about the operation of the ra- dio, such as the currently tuned channel, song or show being played, artist name, time and other information. This screen is referred to as the Default screen in this manual. -
Page 56: Navigating Menus And Lists
Navigating Menus and Lists The menu and list structures in your Sportster 6 are navigated by turning the Knob to scroll through a menu or list to highlight your choice, and then pressing the Knob to select the choice. When using the remote control, menus and lists are navigated by... - Page 57 Pressing and holding the D button for 1½ seconds enters the Channel List mode. Once the Channel List mode is active, repeatedly pressing and releasing the D button will cycle the display between these four screens (see Figure 39): • Combination List Screen: Displays a list of channel numbers and names along with the currently-playing song titles and artist names on each channel.
-
Page 58: Search Modes (Preset, Category, Channel, Artist, Song Title)
Search Modes (Preset, Category, Channel, Artist, Song Title) You can search for and select music four ways on your Sportster 6: by category, by channel, by artist, and by song title. Searching Categories If you want to browse different entertainment... - Page 59 3. Pressing the D button while in the cat- egory search mode will cycle between the category’s channel names, the currently- playing artist names, and the currently- playing song titles to enable you to preview what is playing on other channels before making a selection.
- Page 60 Searching Channels (Channel list mode) It is possible to search for a different channel while listening to your current channel. Be sure that the display shows the Default display screen prior to the following steps: 1. Press and hold the D button for two seconds to activate the channel list mode.
-
Page 61: Direct Tuning
De- fault screen for the selected channel. The Sportster 6 will tune the channel immediately if three numbers are entered (for example, “0”, ”0”, “7”), but if just one or two digits are entered, the radio will tune to the new channel after three seconds. - Page 62 4. The selected preset number will flash and then remain lit on the display to show that it has been memorized. If the preset button you selected already has a channel stored in it, the preset will be replaced with the newly stored channel. Recalling Channel Presets The 10 presets in the active bank (A, B, or C) can be selected by pressing the 0 through 9 buttons.
-
Page 63: Jump Button
Default display screen, press and hold the resets button. Jump Button Your Sportster 6 features a special button called Jump. This button can be programmed to jump to a channel which is accessed frequently and temporarily such as weather, news, or sports. The J... -
Page 64: Memory (Memo) And Song Seek (S-Seek) Functions
Also, while listening to your SIRIUS radio, you will be alerted should one of the teams begin to play a game. Operation... - Page 65 Storing artist names, Song Titles, and Sports Teams to memory If you are listening to a song or other entertainment channel, or a sports team, and wish to save the artist, song, or sports team selection to memory for future S-Seek alerts, do the following: For Artist Names or Song titles: If the currently tuned-channel is a music or en- tertainment channel, momentarily press and release the M...
- Page 66 For Sports Events: If the currently-tuned channel is an NFL, NBA, NHL, NASCAR or college play-by-play sports broadcast, momentarily press and release the M button. The Sportster 6 will display a menu to choose which sports team (or for NASCAR, which car number) should be saved to memory (see Figure 48)
- Page 67 The next screen will ask which kind of alert you wish to have (see Figure 50). figure 50 will provide a pop-up alert when the team you have chosen is playing lert nitial a game; All will provide a pop-up alert when the team you have chosen is playing a game, and when the score for the game is updated.
- Page 68 Select button. If you chose to cancel saving the alert, the Sportster 6 will revert to the last active display mode. If you chose to replace an existing alert, a listing of all the alerts stored in memory will be displayed (see Figure 54).
- Page 69 /y e screen will be displayed for one and two Mpty seconds respectively (see Figure 51, on page 66). The Sportster 6 will then revert to the last active display mode. Viewing Program Information stored in memory To view the program information stored in memory: 1.
- Page 70 deleting a Song Title Stored in memory To delete a song title stored in memory: 1. Press and release the Select button while in s-s mode. A pop-up screen displaying various selectable options will be displayed (see Figure 56). figure 56 2.
- Page 71 Song (S-Seek) alert When S-Seek alerts are enabled, whenever the Sportster 6 is on it automatically searches the channels to determine if a match exists with the program information stored in radio’s memory. If one or more matches are found, a s-s...
-
Page 72: Sports Alert
AleRt Your Sportster 6 can automatically identify when your favourite sports team is playing. When a game is found, a s is displayed listing the sports events which ports lert are currently being played (see Figure 59, left). Press the Select button to tune to the event. -
Page 73: Instant Replay
Instant Replay The Sportster 6 is capable of storing the audio of the channel that you’re listening to for later playback (up to approximately 60 minutes, depending upon the channel to which you are tuned). As soon as you tune to a channel, the radio automatically begins storing the audio, enabling you to rewind at any time to replay the audio again. - Page 74 Playback begins immediately when you release the button. When you reach the end of the stored audio you will hear a beep, the Sportster 6 will exit the Instant Replay mode and resume playing the live broadcast.
- Page 75 note: When the radio is tuned to another channel, all audio stored in the Instant Replay memory is erased and the tuned channel begins to play Tuning to another channel may automatically occur if another feature of the radio has been programmed to do so •...
- Page 76 (if the Power-Up Tone option is enabled). When the memory is full, the Sportster 6 will automatically begin playback, and will continue to store the channel audio, overwriting the oldest portion of the audio previously stored.
-
Page 77: Fm Presets Button
6’s FM transmitter ‘broadcasts’ on the FM frequency shown. figure 63 2. To switch the Sportster 6’s FM transmitter to the next stored FM preset, press the FM Presets/M button again (on the remote, press the FM Presets button again). - Page 78 Menu Options Menu Options allows you to set and/or change the various features and settings of your Sportster 6. To enter the menu options, press and release the M button. The M screen will be displayed (see Figure 65). ptions...
-
Page 79: Menu Options Sirius Id
Each of these menu options is explained in the following sections. Note that if a selection is not made within 10 seconds, the Sportster 6 will exit the M ptions screen and revert back to the Default display screen. Sirius ID This displays your 12-digit SIRIUS ID (SID) number (see Figure 66). -
Page 80: Settings
Settings The Settings menu allows you access the following settings: • FM Transmitter • Jump Settings • Display Settings • S-Seek Alert Settings • Audio Levels • Channel Preview • Factory Default • Parental Control Press the M button, then highlight and select s . The s screen will ettings ettings appear (see Figure 67). figure 67 Menu Options... -
Page 81: Fm Transmitter
FM Presets Button FM tRAnsMitteR The FM t menu option allows you to enable or disable the Sportster 6’s built- rAnsMitter Knob in FM transmitter, and select up to 5 different FM transmitter frequencies. fm Presets 1. Select the FM t menu option. -
Page 82: Display Settings
DisplAy settings You can control the Sportster 6’s Auto Dimmer feature, adjust the brightness and con- trast of the Sportster 6’s color LCD display screen, and can select from 15 different color options for the screen and the Sportster 6’s buttons: Select the D menu option. - Page 83 Category < and > buttons (see pages 47 – 49) : This lets you control the Sportster 6’s auto dimmer feature. The auto dim- utoMatic mer will automatically dim the Sportster 6’s display in low-light conditions, and will automatically brighten the display when the ambient light is bright.
- Page 84 the LCD display screen. The bar graph on the display screen will move to indicate the change (see Figure 72). When you’re finished, press the M button to exit figure 72 Menu Options...
- Page 85 6’s LCD screen background and text, and the front-panel button backlight color. Select- ing c activates the c screen. Turning the Knob (on the remote, olor ptions olor ptions pressing the Channel UP/DOWN buttons) will cycle the Sportster 6 through the following color combinations: creen creen utton ackground acklight Blue...
-
Page 86: S-Seek Alert Settings
s-seek AleRt settings This menu lets you turn S-Seek ON or OFF, turn the audible alert tone ON or OFF, turn the on-screen alerts ON or OFF and browse all of the S-Seek memory entries. In addi- tion, you can clear all 50 S-Seek entries. 1. -
Page 87: Audio Level
AuDio level You can adjust the audio output level of your Sportster 6 to match the levels of the other source components in your audio system, or to fine-tune the audio level for best performance. This is important when using both the included Vehicle Dock or the optional Home Docking Station. -
Page 88: Channel Preview
6 to the next higher or lower channel. When Channel Preview is active, rotating the Knob or using the Channel UP/DOWN buttons will change the display to show what’s on the next higher or lower channel while the Sportster 6 remains tuned to the channel you’re listening to. -
Page 89: Factory Default
Menu options screen. If you choose y you will be asked to confirm your choice (see Figure 77, right). Choosing y again reverts the following Sportster 6 parameters to their original factory settings: • All presets revert to empty • Display Brightness: 80% • Alarm: Off • R eset to Normal Tuning... -
Page 90: Parental Control
ContRol Your Sportster 6 has the ability to lock channels you do not want others (such as chil- dren) to access without your permission. Locked channels will not appear when brows- ing channels with the Knob or Channel Select buttons. When the anyone tries to access... - Page 91 Changing the lock/Unlock Code The first time you access the l menu, you must enter the default lock code. nlock The default lock code is 0 0 0 0. You can keep this code or change it. To change the lock code: 1.
-
Page 92: Sports Alerts
(You may select multiple teams/cars within each sport or league.) Your Sportster 6 will constantly scan the channels and will alert you when a team or car you stored in memory is playing a game or running a race, or when there is a score update for a team, depending upon which options you have chosen for each team or car number. -
Page 93: Sports Selections
2. To select a driver’s car number, highlight and select A ?. Enter the driver’s car number on the A screen that appears (see Figure 82, * Please note NHL programming is no longer available in Canada. Visit sirius.ca for up- to-date programming. Menu Options... - Page 94 right). After you enter the number, press the Select button. Repeat this for each driver you want to follow. (You can select a maximum of 5 cars.) Selecting the a option notifies you when any NASCAR driver is racing. You can choose to be notified either by the pop-up NASCAR Alert, by the NASCAR ticker, or by both (see Figure 83, below): a) Pressing the Select button will select t (a check-mark will appear in the...
-
Page 95: Nfl, Nba, College Football, College Basketball
Note that for college teams, you will be alerted for all teams playing for that college. There are 30 college teams currently licensed for broadcast by SIRIUS. 3. For each team you select you can choose to be notified either by a pop-up Sports Alert (see Figure 59, on page 71), by the league’s ticker (see Figure 85, on page 95),... - Page 96 league Settings: The NFL screen (Figure 84 left, on page 94) lets you turn Alerts and/or the Ticker ON and OFF for all of your selected teams in the league without having to do so for each team individually: : A pop-up alert will be displayed when any of your selected teams is lert playing, and when the team(s) begin playing a game.
-
Page 97: Clock
(see Figure 87) allows you to setup the clock that appears on the lock Default Screen, based on the format desired and the time zone in which you reside. The actual time is provided via the SIRIUS satellite signal, and will automatically update your Sportster 6. figure 87 Format: Displays the time in either a 12-hour (default) or 24-hour (military) format. -
Page 98: Alarm
: This lets you set the alarm time. Use the Category < and > buttons and lArM the Knob to select the time when you want the Sportster 6 to power on. (The default time is 12:00 PM). When the desired time is displayed, press the s button. -
Page 99: Program Alert
The p rogrAM lert selected channel at a specific time. The Sportster 6 must be powered ON for this fea- ture to function. After highlighting an item, use the Select button to make your choices. figure 89 : You can set the Program Alert to activate every day, weekdays only, rogrAM weekends only, or on a specific day. -
Page 100: Auto Shutdown
Pressing the Select button will reset the Auto Shutdown for another 1-hour period. sleep MoDe The s screen (see Figure 91) lets you program the Sportster 6 to shut OFF leep after a selected period of time. figure 91 ON/OFF: Activates and de-activates the Sleep Mode function. -
Page 101: Signal Indicator
92) visually shows the strength of the satellite and terrestrial signals being received by the Sportster 6. (Refer to the Home Docking Station installation guide for more information about properly orienting the antenna.) figure 92 The SAT bar graph indicates the strength of the satellite signal strength; the TER bar graph indicates the strength of the terrestrial signal strength (if available). -
Page 102: Troubleshooting
Audio static or loss of The FM frequency contains static. clarity Locate a quiet FM frequency on your vehicle radio and set the FM transmitter frequency of the SIRIUS Sportster to match. If using the AUX audio connector, check the cable con- nections. -
Page 103: Specifications
Operating Temperature: -4°F to +140°F (-20°C to +60°C) Audio Output: 1.0 V rms (max) Sportster 6 Radio Dimensions: 4.5 in (width) x 2.5 in (height) x 0.6 in (depth) 114 mm (width) x 63mm (height) x 17 mm (depth) Weight: 3.7 oz (105 g) - Page 104 Input / Output: 9-16 V DC / 5 V DC, 1.5 A Cable Length: 4 ft 7 in (1.4 m) Vehicle Antenna Type: SIRIUS Magnetic Mount Connector: SMB female, right angle Cable Length: 21 ft (6.4 m) Aux In Cable Connectors: 1/8 in (3.5 mm) stereo male to 1/8 in (3.5 mm)
-
Page 105: Sirius Id
SIRIUS ID Write down the SIRIUS ID (SID) of your Sportster 6 in the space provided below. SID: ____________________________________ SIRIUS ID... - Page 107 SIRIUS Customer Service: 1-888-539-7474 customercare@siriuscanada.ca SIRIUS Canada Inc. 135 Liberty Street, 4th Floor toronto, ontario M6K 1A7 1-888-539-7474 http://www.sirius.ca...
- Page 108 //sirius.ca SIRIUS Canada Inc. 135 Liberty Street, 4th Floor Toronto, Ontario M6K 1A7 1-888-539-7474 Sportster 6 User Guide (082510a)