Sirius Satellite Radio 3 User Manual
Plug-n-play radio
Hide thumbs
Also See for 3:
- User manual (76 pages) ,
- Installation & user manual (100 pages) ,
- User manual (74 pages)
Advertisement
Quick Links
Advertisement

Related Manuals for Sirius Satellite Radio 3


Summary of Contents for Sirius Satellite Radio 3
- Page 1 Satellite Radio Plug & Play User Guide...
- Page 3 Congratulations on the Purchase of your new SIRIUS Sportster 3 Plug-n-Play Radio Your new SIRIUS Sportster™ 3 Plug-n-Play Radio lets you enjoy SIRIUS ® Satellite Radio’s digital entertainment anywhere you’ve installed the SUPH1 SIRIUS Universal Plug and Play Home Kit, SUPV1 SIRIUS Universal Plug and Play Vehicle Kit, or the SUBX1 SIRIUS Plug and Play Universal Boombox (each sold separately).
-
Page 4: Table Of Contents
Table of Contents Table of ConTenTS WaRnIng and SafeTy InfoRmaTIon FCC Information ....... . 4 Canadian Compliance . - Page 5 Game Alert ........37 Settings ........39 Jump Settings .
-
Page 6: Warning And Safety Information
Warning and Safety Information FCC Information This device complies with part 15 of the FCC Rules. Operation is subject to the following two conditions: This device may not cause harmful interference, and This device must accept any interference received, including interference that may cause undesired operation. -
Page 7: Canadian Compliance
• Be sure the unit is installed as described in the installation instructions which accompany each accessory kit. SIRIUS Satellite Radio is not responsible for issues arising from instal- lations which were not installed according to the instructions. Warning and Safety Information... - Page 8 • To avoid short circuits, do not open the unit, and never put or leave any metallic objects (coins, tools, etc.) inside the unit. • If the unit emits smoke or unusual odors, turn the power off immediately, and disconnect the unit from any power source.
-
Page 9: Copyrights & Trademarks
Portions of the software on this radio are licensed under the eCos License. Distribution of eCos requires that the eCos source code be made available to Sirius Satellite Radio custom- ers. The eCos License and eCos source code are available to the public at http://www.sirius. -
Page 10: Package Contents
Package Contents The following items are included with your purchase of the SIRIUS Sportster 3 radio: Package Contents Sportster 3 Radio Sportster 3 Radio Vehicle docking Station Vehicle docking Station Remote Remote Control Control... - Page 11 Unpack your SIRIUS Sportster 3 radio carefully and make sure that everything shown is pres- ent. If anything is missing or damaged, or if your SIRIUS Sportster radio fails to operate, notify your dealer immediately. It is recommended that you retain the original carton and packing materials in case you need to ship your radio in the future.
-
Page 12: Controls
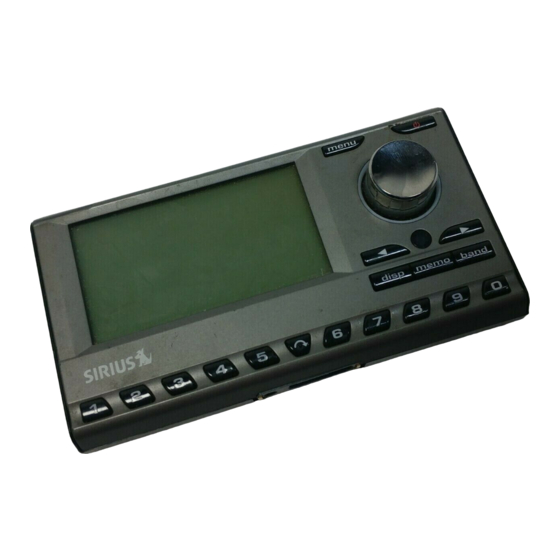
Controls SIRIUS Sportster Reference Guide Figure 1 and the section following identify and describe the buttons and controls of the SIRIUS Sportster. Category Buttons: Navigates through the category list screens which displays the SIRIUS channel categories. Menu Button: Used to access the Menu Options to make setup and feature changes. Controls figure 1 figure 1... - Page 13 Pressing and holding the MENU button accesses the FM Transmitter setup menu to change the frequency of the FM transmitter. Power Button: Turns the radio On and Off. Rotary Knob & Select Button: Navigates through display screens and makes selections of items highlighted on the display screen.
-
Page 14: Remote Control Reference Guide
Remote Control Reference Guide Figure 2 and the section following identify the buttons of the remote control. Power Button: Turns the radio On and Off. Channel Buttons: Navigates through channels and display screens. FM Frequency Button: Accesses the FM Transmitter menu to change the frequency of the FM transmitter. - Page 15 MENU Button: Used to access the Menu Options to make setup and feature changes. Pressing and holding the MENU button accesses the FM Transmitter setup menu to change the frequency of the FM transmitter. BAND Button: Pressing and releasing this button switches between the preset banks A, B, and C, which hold 10 presets each for a total of 30.
-
Page 16: Getting Started
SIRIUS retailer if they provide professional installation services, or can recommend a professional installation service. Maximizing Audio Quality From Your SIRIUS Radio There are two primary ways to connect your SIRIUS satellite radio. The following procedures will help you obtain the best performance. Wireless ConneCtion Your SIRIUS radio contains an FM transmitter. -
Page 17: Direct Connections
that is being used by a local broadcaster, it will interfere with the performance of your SIRIUS radio. Once you have located an FM channel that is not broadcasting in your area, save it as a preset on your vehicle radio. This will become your SIRIUS preset. Turn on your SIRIUS radio. - Page 18 NOTE: Refer to your vehicle radio manufacturer’s guidelines for correct installation. NOTE: If the “AUX IN” or “LINE IN” connection is on the back of your vehicle radio, you may want to consider professional installation. (Figure 3) Cassette adapter If your vehicle radio has a cassette player: Purchase a Cassette Adapter at your local electronics retailer.
- Page 19 SIRIUS fm direct adapter If your vehicle radio does not have an “AUX IN” or “LINE IN” jack, the SIRIUS FM Direct Adap- tor provides a wired connection between your SIRIUS radio and your vehicle radio, eliminating the outside static and interference you sometimes experience when using a wireless FM connection.
-
Page 20: Subscribing To The Sirius Service
When you have successfully subscribed to the SIRIUS service, and the SIRIUS Sport- ster has been updated with your subscription information, an alert will be displayed. To continue, press the Rotary Dial. You are now ready to begin enjoying SIRIUS Satellite Radio’s digital entertainment, and can tune to other channels! Getting Started... -
Page 21: Operation
This screen is referred to as the Default display screen in this manual. Figure 1 identifies the information displayed when listening to a typical broadcast. 3-Digit Channel Number Auto Sizing/Scrolling Artist Name Auto Sizing/Scrolling Song Title... -
Page 22: Navigating Menus And Lists
Navigating Menus and Lists The menu and list structures in the SIRIUS Sportster are navigated by turning the Rotary Knob to scroll through a menu or list to highlight your choice, and then pressing the Rotary Knob to select the choice. When using the remote control, menus and lists are navigated by pressing the Channel buttons, and then pressing the Select button to select the choice. -
Page 23: Search Modes (Category, Channel, Artist, Song Title)
Searching Categories If you want to browse different entertainment categories, push either Category activate the category search screen. (Figure 3) Use the Category When the category you want is displayed (for example, Rock), use the Rotary Knob to browse the available channels within the category. Pressing the DISP button while in the category search mode will change between Channel Name, Artist Name, and Song Title to enable you to preview what is playing on other channels before making a selection. - Page 24 Pressing the DISP button while in the channel list mode will change between channel name, artist name, and song title. (Figure 4) You can use this feature to search for a specific artist, song, or show that may be playing at the time. Turn the Rotary Knob to locate the channel you want.
-
Page 25: Direct Tuning
Direct Tuning Channels can be directly accessed by pressing and releasing the Rotary Knob and then using the 0–9 keys to enter the desired channel number. (Figure 5) Once the desired number has been entered, the channel will change and the display will revert to the default screen for the selected channel. -
Page 26: Jump Button
with the newly stored channel. Recalling Channel Presets The 10 presets in the active bank (A, B, or C) can be selected by pressing the 0 through 9 buttons. Press the BAND button to activate the preset bank you want. The selected bank is shown in the lower right corner of the default display screen. -
Page 27: Channel Presets (P.tune Mode)
Pressing the Jump button while the radio is searching will cancel the search. Pressing the Jump button after the radio has tuned to your traffic report will return to the channel to which you had been listening immediately prior to pressing the Jump If the jump button is set to JumpSet, pressing the Jump programmed channel. - Page 28 Preset Tune list mode While in the preset tune mode, you can view your list of presets showing channel name, artist name, or song title, just like in the channel list mode: Press and hold the BAND button to enter the preset tune mode (P.TUNE). Press the DISP button for two seconds which will bring up the preset tune mode dis- playing up to 6 preset channel names.
-
Page 29: Memory (Memo) And Song Seek (S-Seek) Functions
Memory (MEMO) and Song Seek (S-Seek) Functions This feature allows you to capture and store information about the programming (artist, song, sports team, or traffic city) on the currently tuned channel, up to a total of 30 items. The radio then continuously searches all the SIRIUS channels and alerts you when a match to a saved program is being played. - Page 30 Turn the Rotary Knob to highlight Store Artist or Store Song (when available) and press the Rotary Knob to save the current selection to memory. If both the artist and song are available to save, you will be prompted again to save which- ever one you haven’t yet saved, song title or artist name.
- Page 31 If either of the teams is not available to save, that team will be displayed as unavailable. (Figure 13) Turn the Rotary Knob to highlight the desired sports team (when available) and press the Rotary Knob to save the current selection to memory. The next screen will ask which kind of alert you wish to have.
- Page 32 The radio will then revert to the last active display mode. If the new alert was successfully stored in memory, an Artist/Song/Game Stored pop-up screen followed by an X Used/Y Empty screen will be displayed for one and two seconds respectively.
- Page 33 A Replace–Cancel screen will then be displayed which will allow you to choose whether to re- place an existing alert stored in memory, or to cancel storing the alert to memory. (Figure 18) Turn the Rotary Knob to select whether to replace an existing alert or cancel saving the alert to memory.
- Page 34 Use the Rotary Knob to scroll through the listings. This function allows you to review previously stored program information. The information will be displayed as sports league or college/team name or artist name/song title. (Figure 20) deleting a Song Title Stored in memory To delete a song title stored in memory: Press and release the Rotary Knob while in S-Seek mode.
- Page 35 To permanently delete the program from your list, highlight Yes using the Rotary Knob and press the Rotary Knob to confirm. A Deleted popup screen followed by an X Used/Y Empty screen will be displayed for one and two seconds respectively. X is the total number of listings stored in memory, and Y is the total number of memory listings still available for storage.
-
Page 36: Game Alert
can scroll through the list and select a program using the Rotary Knob. Your selection will be tuned and the display will revert to the last active display screen. If a selection is not made within 10 seconds, the screen will revert to the last active display screen and tuning mode. -
Page 37: Menu Options
Menu Options Menu options allows you to set and/or change the various features and settings of the SIRIUS Sportster. To enter the menu options, press and release the MENU button. The Menu Options screen will be displayed. (Figure 1) The menu options are navigated by turning the Rotary Knob to highlight a selection in the menu list and then press in the Rotary Knob to select the highlighted menu option. -
Page 38: Sirius Id
Sirius ID This menu option displays your 12 digit SIRIUS ID (SID) number. (Figure 2) The SID is unique to each SIRIUS Sportster radio, and is required to activate your service. It is recommended that you write this number in the space provided near the end of this user guide. No adjust- ments are allowed in this mode. -
Page 39: Game Alert
Rotary Knob adjusts in 0.2 MHz increments and the Category MHz increments. (Figure 3) Press the Rotary Knob to set the selected FM frequency. To exit FM Transmitter, press the MENU button. Note that the FM Frequency screen can be accessed directly by pressing and holding the... - Page 40 Select the league team name or college team name you wish to add. (Figure 5) Note that for college teams, you will receive an alert for all teams playing for that col- lege. There are 30 college teams currently licensed for broadcast by SIRIUS. Select the type of alert you want for that team.
-
Page 41: Settings
Settings The Settings menu allows you access the Jump Settings, Display Options, Memory Options, Audio Level, Confirmation Tone, and Parental Control menu options, which are described in the sections following. Jump settings You can access the Jump Settings menu by pressing and holding the Jump button for two seconds or by pressing the MENU button to enter Menu Options, selecting Settings, and then selecting Jump Settings. -
Page 42: Display Options
Note: If the channel list has not yet been downloaded from the SIRIUS data stream, an Updat- ing City List notification screen will be displayed. Wait 10 minutes and then try selecting a city again. Setting the Jump button to a Channel To set the jump button to any channel other than a traffic channel: Select the JumpSet menu option. -
Page 43: Confirm Tone
To exit Display Options, press the MENU button. Confirm tone The SIRIUS Sportster radio can sound an audio tone alert when the radio powers On and Off, as well as when an S-Seek Alert is activated. The default setting is On. To change the tone options: Select the Confirm Tone menu option. -
Page 44: Audio Level
auDio level The audio output level of the SIRIUS Sportster radio can be adjusted to fine tune the audio level for best performance. This is important when using either the optional Home Docking Station or the optional Mobile Docking Station. The audio level setting affects both the line output and FM transmitter output audio levels. -
Page 45: Parental Control
parental Control The SIRIUS Sportster radio has the ability to lock a channel (or channels) you do not want others to access without your permission. Like the Skip channel feature, the locked channel will not appear when browsing channels with the Rotary Knob. In addition, when the anyone tries to access the locked channel using the Direct Tuning function, an Enter Code screen will be displayed and the channel cannot be accessed until the correct code is entered. - Page 46 Changing the lock/Unlock Code The first time the Lock/Unlock menu is accessed, you must enter the default lock code. The default lock code is 0000. This code can be kept or changed. To change the lock code: Select the Lock Options menu option. Select the Edit Code menu option.
-
Page 47: Time-Based Features
(GMT-6:00) Central Time Zone (GMT-5:00) Eastern Time Zone (GMT-4:00) Atlantic Time Zone (GMT-3:30) Newfoundland Time Zone Select your particular time zone. Daylight Savings Time: You can activate this function if your area observes Daylight Sav- ings Time. Select DST Observed (default) or DST Not Observed. -
Page 48: Program Alert
Alarm Time: This menu option allows you to set the alarm time. Use the Category buttons and the Rotary Knob to select the time when you want the radio to power on. (De- fault time is 12:00 PM). When the desired time is displayed, press the Rotary Knob. program alert The Program Alert menu option allows you to program the radio to switch to a selected channel at a specific time. -
Page 49: Signal Indicator
sleep moDe The Sleep Mode menu option allows you to program the radio to shutdown after a selected period of time. When the Sleep Mode menu option is selected, the following menu options are displayed: 15 Minutes 30 Minutes 45 Minutes 60 Minutes Select the desired sleep time, or select Off to cancel a previously selected sleep time. -
Page 50: Factory Default
Factory Default The Factory Default option will restore all original factory settings in your SIRIUS Sportster radio. Note that factory default will not reset the lock code if you have changed it from the default lock code. To perform a factory default reset: Select the Factory Default menu option. - Page 51 If Yes is chosen, the radio reverts to the original factory settings for the following param- eters: • All presets revert to empty • Reset to Normal Tuning Mode • Reset to default screen (with 2-line PDT display) • Reset previous power state setting to: Off •...
-
Page 52: Troubleshooting
Troubleshooting Symptom SIRIUS Sportster Blown fuse, or the power cable is not properly connected. does not power on Check for a bad fuse and check power cable connection SIRIUS Sportster The satellite antenna is not connected to the radio dock. displays: Antenna Not Check the satellite antenna connection to the dock. -
Page 53: Optional Accessories
Optional Accessories The following optional accessories are available for purchase from your SIRIUS retailer to maximize your SIRIUS experience: SUbX1 SIRIUS Plug and Play Universal boombox The SUBX1 SIRIUS Plug and Play Universal Boombox is a portable docking station and audio system for use with the SIRIUS Sportster radio. -
Page 54: Specifications
Total Harmonic Distortion (THD) ........ -
Page 55: Warranty
Warranty 12 month Warranty SIRIUS Satellite Radio Inc. (the “Company”) warrants to the original retail purchaser of this product that should this product or any part thereof, under normal use and conditions, be proven defective in material or workmanship within 12 months from the date of original purchase, such defect(s) will be repaired or replaced with new or reconditioned product (at the Company’s option) without charge for... -
Page 56: Sirius Id
SIRIUS ID Write down the SIRIUS ID (SID) of your SIRIUS Sportster in the space provided below. SID: _______________________________________ SIRIUS ID... - Page 57 SIRIUS Customer Service: 1-888-539-7474 customercare@sirius-radio.com SIRIUS Satellite Radio Inc. 1221 Avenue of the Americas New York, NY 10020 1-888-539-7474 http://www.sirius.com...
- Page 58 SIRIUS Satellite Radio Inc. 1221 Avenue of the Americas New York, NY 10020 (800) 869-5590 http://sirius.com SIRIUS Sportster SP3-TK1 (083106a)