Table of Contents
Advertisement
Quick Links
Advertisement
Table of Contents

Related Manuals for Clevo Notebook


Summary of Contents for Clevo Notebook
- Page 2 Notice The company reserves the right to revise this publication or to change its contents without notice. Information contained herein is for reference only and does not constitute a commitment on the part of the manufacturer or any subsequent vendor. They assume no responsibility or liability for any errors or inaccuracies that may appear in this publication nor are they in anyway responsible for any loss or damage resulting from the use (or misuse) of this publication.
- Page 3 Trademarks This product incorporates copyright protection technology that is protected by method claims of certain U.S. patents and other intellectual property rights owned by Macrovision Corporation and other rights owners. Use of this copyright protection technology must be authorized by Macrovision Corporation, and is intended for home or other limited viewing uses only unless otherwise autho- rized by Macrovision Corporation.
- Page 4 Federal Communications Commission (FCC) Statement This Equipment has been tested and found to comply with the limits for a Class B digital device, pursuant to Part 15 of the FCC rules. These limits are designed to provide reasonable protection against harmful interference in a residential installation.
- Page 5 Safety Instructions As with any other piece of precision electronic equipment, proper care and op- eration of your notebook computer will prolong its use. Help your notebook computer last longer by following the advice in this section: Handling the Computer...
- Page 6 Do not expose it to strong magnetic Do not leave it in a place where fields. foreign matter or moisture may affect the system. Do not turn off any peripheral Do not turn off the power until you devices when the computer is on. properly shutdown all programs.
- Page 7 Do not place the computer on an Do not place the computer on any unstable surface. surface which will block the vents. Do not disassemble the computer Don’t use or store the computer in by yourself. a humid environment.
- Page 8 When traveling by air, follow the Do not place anything heavy on the airline’s instructions for in-flight computer. use. If there is an unusual odor, heat or Perform routine maintenance on smoke coming from your computer, your computer. unplug the cord.
- Page 9 Handling of the Power Cord & Battery Do not plug in the power cord if you Do not use the power cord if it is are wet. broken. Do not place heavy objects on the Do not touch the battery contacts power cord.
- Page 10 Keep the battery away from Affix tape to the battery contacts metal appliances. before diposing of the battery. Handling Peripheral Devices Use only approved brands of Unplug the power cord before peripheral devices. attaching any peripheral devices.
- Page 11 Other reminders Do not throw the computer or Do not touch the poisonous accessories into a fire. liquid if the LCD panel breaks. Remember to periodically save your Take periodic breaks if you are data. Data may be lost if the bat- using the computer for long peri- tery is depleted.
- Page 12 Developing Good Work Habits Developing good work habits is important if you need to work in front of the computer for long periods of time. Improper work habits can result in discom- fort or serious injury from repetitive strain to your hands, wrists or other joints. The following are some tips to reduce the strain: –...
- Page 13 Remember to: – Alter your posture frequently. – Stretch and exercise your body several times a day. – Take periodic breaks when you work at the computer for long periods of time. Frequent and short breaks are better than fewer and longer breaks.
-
Page 14: Table Of Contents
Contents Chapter 1. Getting to know your computer..1-1 Checking the Items ..........1-2 Top view with LCD display closed ......1-3 Top View with Display Open ........1-4 LCD Display ............. 1-5 Microphone .............. 1-5 LED Status Indicators ..........1-5 Three Hot-key Buttons .......... - Page 15 Parallel Port .............. 1-9 Vent ................ 1-10 External Monitor (CRT) Port ........1-10 Dual USB Ports............1-10 TV out..............1-10 IEEE 1394 .............. 1-11 LAN Jack/Phone Jack ..........1-11 Left Side View ............1-12 Microphone-in Jack ..........1-12 Speaker-out Jack ............ 1-12 Audio Volume Control ..........
- Page 16 LED Indicators ............2-5 LED Power Indicators ............2-6 LED Status Indicators ............2-7 The Hard Disk Drive (HDD) ........2-8 Removing the HDD ..........2-8 Inserting the HDD ..........2-10 The Floppy Disk Drive (FDD) ........ 2-11 Inserting \ Removing Diskettes ......2-11 The CD-ROM/DVD-ROM ........
- Page 17 Conserving power through individual components: .......... 3-2 Conserving power throughout the whole system:........... 3-2 Suspend and Resume ..........3-2 Setting the Power Management functions.... 3-4 Creating a partition on your hard drive ........3-5 Battery Information ..........3-6 Chapter 4. Upgrading the Computer ....4-1 Replacing the HDD ..........
- Page 18 Startup Menu ............... 5 - 8 Memory Menu ..............5 - 11 Disks Menu ............... 5 - 12 Components Menu ............5 - 13 Power Menu ..............5 - 16 Exit Menu ................5 - 18 SCU Screen samples .......... 5 - 19 Startup Screen ..............
- Page 19 Step 2: Installing the Audio Driver ..... 6-12 Step 3: Installing the Hot Key Driver ....6-13 Step 4: Installing the LAN Driver ....... 6-14 Step 5: Installing the Modem Driver (Optional) . 6-14 Installing Drivers in Windows 2000 ...... 6-16 Step 1: Installing the SiSIDE Utility ....
- Page 20 Hardware Installation ..........7-7 LCD Panel ............... 7-8 Microphone In-Jack ..........7-8 Memory Module ............. 7-9 PC Card ..............7-10 Power ..............7-10 Printer ..............7-11 Appendix A. Specifications ........A-1 Glossary...
-
Page 22: Chapter 1. Getting To Know Your Computer
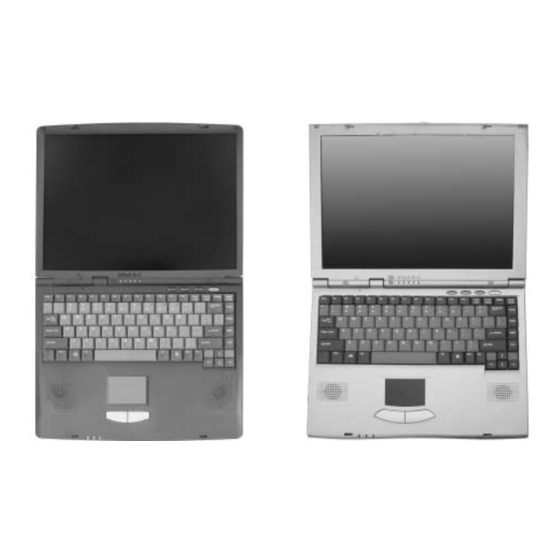
Getting to know your computer Chapter 1. Getting to know your computer In this chapter you will become familiar with the basic functions and compo- Note nents of your notebook computer and possibilities for expansion. This manual refers to the two This chapter includes: notebook models Checking the Items, Views, Peripheral devices. -
Page 23: Checking The Items
Carefully remove everything from the box and check the items one by one. If any item is missing or damaged contact your dealer immediately. You should have a: 1. Notebook Computer 2. User’s Manual 3. Driver Utilities CD 4. Power Cord 5. -
Page 24: Top View With Lcd Display Closed
Getting to know your computer Top view with LCD display closed To open the LCD display: 1) Place the computer on a stable surface. 2) Move the cover latch to the right to release the top cover. 3) Lift the top cover to reveal the LCD panel and keyboard. 4) Adjust the LCD panel to a comfortable viewing angle. -
Page 25: Top View With Display Open
User’s Manual Top View with Display Open 1. LCD display 2. Microphone (built-in) 3. LED status indicators 4. Three hot-key buttons 5. Power button 6. Keyboard 7. Stereo speakers 8. TrackPad and buttons 9. LED power indicators figure 1-3 1 - 4... -
Page 26: Lcd Display
To learn how to set the buttons refer to Chapter 2. Power Button Press this button to turn your notebook computer on or off. The Power Button can also be used as a Suspend/Resume button when pressed less than four seconds (if configured appropriately in the System Configura- tion Utility, refer to Chapter 5 for more details). -
Page 27: Keyboard
User’s Manual Keyboard An A4-Size Win98 keyboard with an embedded numeric keypad. It has many of the same features as a full-sized desktop keyboard and can easily be replaced with a non-English keyboard should you desire. Stereo Speakers Two built-in speakers provide rich, stereo sound. TrackPad and Buttons The pointing device features a sensitive glide pad for precise movements. -
Page 28: Right Side View
For more information on using the CD-ROM or DVD-ROM please refer to Chapter 2. Warning To prevent your Vent computer from Enables airflow to prevent the notebook from overheating. overheating, make sure noth- ing blocks the Security Slot vent while the computer is in To prevent possible theft a lock can be attached to this slot. -
Page 29: Attaching A Security Lock
User’s Manual Attaching a security lock To install the security lock, wrap the cable around a desk or other immovable object, then insert the locking device into the slot located on the right side of the computer. security lock cable security lock figure 1-5 1 - 8... -
Page 30: Rear View
9. LAN/Phone jack the computer. 4. Vent DC-in Jack Plug the supplied AC adapter into this jack to power your notebook. PS/2 Type Port To connect an external PS/2 type mouse or keyboard. Parallel Port This parallel port supports ECP (Extended Capabilities Port) and EPP (Enhanced Parallel Port) 1.7/1.9 modes. -
Page 31: Vent
User’s Manual Vent Enables airflow to prevent the notebook from overheating. Warning To prevent your External Monitor (CRT) Port computer from overheating, Connect an external CRT monitor to this port to allow simultaneous make sure noth- display on the LCD display and external CRT monitor. -
Page 32: Ieee 1394
Getting to know your computer IEEE 1394 Allows high speed connection to various peripheral devices, such as an external disk drive or a digital camera. LAN Jack/Phone Jack Supports integrated LAN and modem functions. 1 - 11... -
Page 33: Left Side View
5. Infrared port 3. Audio volume control 6. Floppy disk drive Microphone-in Jack A microphone can be connected to your notebook via this jack. You can Note also use this for S/PDIF (Sony/Philips Digital Interface Format) output, The S/PDIF output feature is... -
Page 34: Audio Volume Control
Getting to know your computer Audio Volume Control Adjust the audio volume with this knob. Audio volume can also be ad- justed in the operating system. PC Card Slot A Type-II PC card slot which also supports CardBus mode. Refer to Chapter 2 for more information on the PC Card slot. -
Page 35: Bottom View
User’s Manual Bottom View figure 1-8 1. RAM Cover 2. Battery Cover RAM Cover The cover secures the installed RAM modules. For further information on removing or inserting the RAM modules, please refer to Chapter 4. Battery Pack Cover The cover secures the battery pack in its bay. 1 - 14... -
Page 36: Peripheral Devices
Getting to know your computer Peripheral devices Peripheral devices can be added to the notebook through the ports, jacks and Note Because periph- slots on the back and left side of the computer. If you plan on attaching many eral devices are... - Page 37 User’s Manual Device l l i t Port Your notebook will only accept IEEE 1394 de- vices which have their own power l e l source. Audio output is only possible with S/PDIF enabled. When S/PDIF is enabled you cannot use the microphone-in for audio input.
- Page 38 Getting to know your computer Device Port Your notebook will only accept IEEE1394 de- vices which have their own power l e l source. table 1-1b 1 - 17...
- Page 39 Notes:...
-
Page 40: Chapter 2. Using The Computer
Using the computer Chapter 2. Using the Computer Your notebook computer can be used almost anywhere, in the home, office, or on the road. To learn more about your computer, please read this chapter. This chapter includes: – The Power Sources –... -
Page 41: The Power Sources
User’s Manual The Power Sources The computer can be powered by either an AC adapter or a battery pack de- pending on where you want to use it. AC Power Adapter Use only the power adapter that comes with your computer. An incorrect type of power adapter will cause damage to the computer and its components. -
Page 42: Battery
Using the computer Battery The battery allows you to use your notebook computer while you are on the road or an electrical outlet is unavailable. Battery life varies depending on the applications and the configuration you're using. To increase battery life, let the battery discharge completely before recharging. -
Page 43: Recharging By Ac Power
User’s Manual Recharging by AC Power The battery pack automatically recharges when plugged into an electrical outlet. If the computer is powered on and in use it will take several hours to fully recharge the battery. When the computer is turned off but plugged into an electrical outlet, battery charge time is less. -
Page 44: Turning On The Computer
Using the computer Turning on the Computer Now you are ready to begin using your new notebook computer. To turn it on simply press the power button in the top right of the front panel (figure 2-3) . The Power Button can also be used as a Suspend/Resume hot-key button if pressed less than four seconds and appropriately configured in the SCU. -
Page 45: Led Power Indicators
User’s Manual LED Power Indicators Note When the battery is critically low, immediately connect the AC adapter to the computer or save your work; other- wise, the unsaved figure 2-4 LED power indicators data will be lost when power is depleted. -
Page 46: Led Status Indicators
Using the computer LED Status Indicators Once your computer is on and in use, the LED status indicators will display the system's operational status. Note To enable/disable the Scroll Lock feature, press the Fn and Scr Lk key simulta- neously. figure 2-5 l l o table 2-2... -
Page 47: The Hard Disk Drive (Hdd)
User’s Manual The Hard Disk Drive (HDD) The hard disk drive is used to store your data internally in the notebook com- puter. It is mounted in a removable case and can be taken out to accommodate other 2.5” IDE hard disk drives with a height of 9.5 mm or 12.7 mm. The sys- tem supports DMA mode 2, PIO mode 4, and ATA-33/ATA-66/ATA-100 IDE HDD. - Page 48 Using the computer 3) Carefully raise and set the keyboard aside and locate the HDD (figure 2-7a). 4) Unscrew the 3 screws(A, B, C) holding the HDD on the mainboard (figure 2-7b) . 5) Lift the HDD out of the computer by pulling on the HDD tab (figure 2-8).
-
Page 49: Inserting The Hdd
User’s Manual Inserting the HDD (with no HDD currently installed) 1) Place the HDD into the computer in its appropriate spot, making sure to align the HDD connector with the socket on the mainboard (figure 2-9). 2) Connect the HDD connector securely to the mainboard by gently pressing the HDD on to the mainboard. -
Page 50: The Floppy Disk Drive (Fdd)
Using the computer The Floppy Disk Drive (FDD) The computer is equipped with a fixed 1.44 MB, 3.5” floppy disk drive module. It is usually designated drive A by default and can be used as a boot device if properly set in the SCU (please refer to Chapter 5, BIOS Utilities). Inserting \ Removing Diskettes When using the floppy drive, always insert your floppy diskette with the label-side facing up. -
Page 51: The Cd-Rom/Dvd-Rom
User’s Manual The CD-ROM/DVD-ROM The CD-ROM/DVD-ROM is a 24X speed 5.25” drive. It is usually labeled drive Warning D and may be used as a boot device if properly set in the SCU (please refer to When manually Chapter 5, BIOS Utilities). ejecting a CD disk, DO NOT use a sharpened... -
Page 52: Handling Cds Or Dvds
Using the computer Handling CDs or DVDs Proper handling of your CDs will prevent them from being damaged. Please follow the advice listed below to make sure that the data stored on your CD- ROM / DVD-ROM disks can be accessed. Remember to: - Hold the CD or DVD by the edges;... -
Page 53: The Pc Card Slot
User’s Manual The PC Card Slot The computer is equipped with one PC card slot (previously referred to as PCMCIA). The slot can support either one 3.3V/5V type II PC card or one 3.3V CardBus card (PC Card 95). For information on what devices are supported by the PC Card Slot, please refer to table 1-1 in Chapter 1. -
Page 54: Pc Card Problem In Windows 98
Using the computer PC Card Problem in Windows 98 After installation of Windows 98 or Windows 98 Second Edition, you may find that the PC cards are not working normally and you may have noticed one or more of the following: - An exclamation mark appears in the PC card driver in Device Manager - PC cards don’t work at all... -
Page 55: Hot Keys
User’s Manual Hot Keys The computer provides you with two sets of hot keys: three hot-key buttons on the com- puter and the function key combinations on the keyboard. figure 2-13 Three Hot-Key Buttons The computer offers three hot-key buttons for quick one button access to the Internet, e-mail or a user-defined application. -
Page 56: Programming The Hot Keys
Using the computer Programming the Hot Keys After installing the hot key driver, you may have to configure or change the driver settings. To configure the driver, right click the Hot key driver icon on the task bar and the following menu will appear. Hot-key Driver Menu To program the user-defined hot key, you must configure “Application 1.”... -
Page 57: Function Keys
User’s Manual Function Keys On the bottom-left of the keyboard is the Fn key or Function key. The Fn key allows you to change operational features instantly. To use the table 2-4 following functions, press and hold the Fn key; then press the appropriate function key (Esc, F3, F5, etc..) located at the top of your keyboard. -
Page 58: The Numeric Keypad
Using the computer The Numeric Keypad The keyboard has an embedded numerical keypad for easy numeric data input. The keypad stands out by its blue typeface. To use the keypad simply: • Activate the Num Lock feature by pressing the Num Lock key. •... - Page 59 Notes:...
-
Page 60: Chapter 3. Power And Battery Information
Power and Battery Information Chapter 3. Power and Battery Information Note Power Management Power manage- To conserve power, especially when using the battery, your notebook computer ment functions has two types of power management available; ACPI and APM. will vary slightly depending on... -
Page 61: Conserving Power Through Individual Components
Conserving power throughout the whole system: Note Suspend and Resume To learn more With this function you can stop the notebook’s operation and restart where you about power management left off. This system features two suspend mode levels: settings in the... - Page 62 Windows 98 or HDD. It saves the maximum power but takes the longest time to return to full Windows 98SE operation. You can set your notebook to automatically enter Hibernate mode you must first create a partition when the battery power is almost depleted. This prevents losing any data due on your hard to loss of power.
-
Page 63: Setting The Power Management Functions
User’s Manual Setting the Power Management functions You can set the power management functions either in the SCU (for APM and hard disk standby), or the operating system (for ACPI). To learn more about what power management settings are available and how to configure them it is best that you refer to your operating system’s user guide. -
Page 64: Creating A Partition On Your Hard Drive
Power and Battery Information Creating a partition on your hard drive To use Suspend to Disk or Hibernate with Windows 98 or Windows Warning If you increase the 98SE , you must create a partition on your hard disk drive (HDD). The system memory to instructions are as follows: a value larger... -
Page 65: Battery Information
User’s Manual Battery Information Please follow these simple guidelines to get the best use out of your battery. New Battery: Always use a new battery before recharging it. Battery Life: Battery life may be shortened through improper maintenance. To opti- mize the life and improve the performance of your battery, fully discharge and recharge the battery at least once every 30 days. - Page 66 Power and Battery Information How do I maintain the battery ? Completely discharge and charge the battery at least once every 30 days or after about 20 partial discharges. Conserving Battery Power Display brightness The LCD display consumes a lot of power, so setting the brightness level to low will save power.
-
Page 67: Removing The Battery
User’s Manual Removing the Battery We recommend that you don’t remove the battery, but if it is necessary you need to do the following: 1) Remove the two screws holding the battery lock in place. 2) Remove the battery cover. 3) Disconnect the battery from figure 3-1 the main computer. -
Page 68: Chapter 4. Upgrading The Computer
Upgrading the Computer Chapter 4. Upgrading the Computer This chapter contains the information on upgrading the computer. Follow the steps outlined to make the desired upgrades. If you have any trouble or prob- lems you can contact your dealer for further help. Before you begin you will need: - A small crosshead or Phillips screwdriver - A small regular screw driver... -
Page 69: Replacing The Hdd
User’s Manual Replacing the HDD 1) Remove the HDD along with its case from the computer (refer to Remov- Warning ing the HDD on pages 2-8 to 2-9 for details). Before removing 2) Remove the two screws on the HDD connector board. the HDD, please check with your 3) Gently disconnect the HDD connector board from the HDD being careful... - Page 70 Upgrading the Computer 8) Attach the HDD connector board to the HDD being careful not to bend any pins. 9) Screw the HDD connector board on to the HDD. 10) Place the HDD into the computer (refer to Inserting the HDD in Chap- ter 2 for details).
-
Page 71: Upgrading The Memory
User’s Manual Upgrading the Memory The computer has two memory sockets for 144-pin Small Outline Dual In-line Note If you are using Memory Modules (SO-DIMM) and supports both PC-100/PC-133 SDRAM. The two memory main memory can be expanded up to 512 MB with one or two memory modules modules in your using the different combinations listed below: computer we... -
Page 72: A: Removing A Memory Module
Upgrading the Computer To upgrade the memory in your notebook please perform the following steps: A: Removing a memory module (if present). B: Insert a new memory module. C: Set the SW6 jumper switch. – Remove the keyboard. – Locate and set the SW6 jumper switch. - Page 73 User’s Manual 4) Locate the memory sockets. 5) Gently pull the two latches outward on the sides of the memory socket (figure 4-3). 1. memory module 2. memory socket 3. latches figure 4-3 6) The module will pop up. 7) Remove the memory module as shown (figure 4-4).
-
Page 74: B: Installing A Memory Module
Upgrading the Computer B: Installing a Memory Module 1) Turn off the computer. Note 2) Turn the computer over. Make sure the memory connec- 3) Unscrew and remove the RAM cover (fig- tors go into the ure 4-2). memory socket when you are 4) Insert the memory module at a slight angle figure 4-5... -
Page 75: C: Setting The Sw6 Jumper Switch
2) Remove the keyboard by pressing the 4 latches at the top (figure 4-8) and Step C is only necessary if your gently lifting it out of the notebook. new memory 3) Place the keyboard as shown module is a differ- ent type than (figure 4-9). - Page 76 Upgrading the Computer 4) Locate the SW6 jumper switch (figure 4-9) or (figure 4-10). 5) Set the SW6 jumper switch accord- ing to table 4-2. figure 4-10 1. SW6 jumper switch SW6 Jumper Switch Settings table 4-2 6) Reinstall the keyboard. 4 - 9...
-
Page 77: Upgrading The Processor
User’s Manual Upgrading the Processor If you want to upgrade your computer by replacing the existing processor with a faster one you will need to contact your customer service representative. We recommend that you do not attempt to do this yourself since if done incorrectly you may damage the processor or mainboard. -
Page 78: Chapter 5. Bios Utilities
BIOS Utilities Chapter 5. BIOS Utilities In this chapter you will learn about the Power On Self Test (POST) and how to configure the system parameters using the System Configuration Utility (SCU). The chapter includes: – Power On Self Test (POST) –... -
Page 79: Power On Self Test (Post)
User’s Guide Power On Self Test (POST) SystemSoft MobilePRO BIOS Version 1.01 The system BIOS (Basic Input/Output System) (2482-00)-(R1.XX.prXX) performs a series of tests on the system memory Copyright 1983-1996 SystemSoft Corp. All Rights Reserved and key computer components every time the computer is powered on. -
Page 80: Post Message: Error Detected
BIOS Utilities POST Message: Error Detected If an error is detected, you will see the following SystemSoft MobilePRO BIOS Version 1.01 (2482-00)-(R1.XX.prXX) WARNING message. You may press the F1 key Copyright 1983-1996 SystemSoft Corp. All to continue, or press the Ctrl-Alt-S keys simulta- Rights Reserved neously to enter the System Configuration Utility. -
Page 81: System Configuration Utility
User’s Guide System Configuration Utility The System Configuration Utility (SCU) can be used to set your notebook’s system parameters. The system date and time, power settings and other func- tions are you set in the SCU. The settings are stored in a nonvolatile battery- backed CMOS RAM. -
Page 82: Initiating The System Configuration Utility
If you were unable to enter the SCU, top right corner before hitting you must reboot the system and try again. <CTRL-ALT-S> to enter the SCU. Notebook screen as it appears when you enter the SCU. 5 - 5... -
Page 83: Working With The Menu Bar
User’s Guide Working with the Menu Bar Use these keys to begin working in the SCU. g i l g i l t e l table 5-2 5 - 6... - Page 84 BIOS Utilities Working with the Pull-down Menu Once your desired menu bar item is highlighted, press Enter or the down arrow ( ) to see the pull- down menu items. You move about the pull-down menu ( ) ) . d l with these keys: .
-
Page 85: System Configuration Utility Options
User’s Guide System Configuration Utility Options Startup Menu i t i i l a c i t . s t Note y f i s ’ Sample screens of the various SCU options are shown on pages 19 to 21. y f i s ’... - Page 86 BIOS Utilities Startup Menu (continued) i t c s ’ . l e i t c i t c l l i l l i f i t n . l e table 5-5b 5 - 9...
- Page 87 User’s Guide Startup Menu (continued) Warning If you choose to set a boot pass- word, NEVER i g i . t u forget your pass- word, the conse- i g i l a t quences could be i g i .
-
Page 88: Memory Menu
BIOS Utilities Memory Menu table 5-6 Important: The value for VGA shared memory must be less than the amount of RAM in your computer! In the SCU utility you are able to set the value for the VGA Shared Memory. The default is 8MB. -
Page 89: Disks Menu
User’s Guide Disks Menu y f i t l u e l l table 5-7 5 - 12... -
Page 90: Components Menu
BIOS Utilities Components Menu y f i & y f i table 5-8a 5 - 13... - Page 91 User’s Guide Components Menu (cont’d) y f i i f e t i n l e l t i l i y f i y f i . t r table 5-8b 5 - 14...
- Page 92 BIOS Utilities Components Menu (cont’d) y f i i t t e l i i t f . t r table 5-8c 5 - 15...
-
Page 93: Power Menu
User’s Guide Power Menu s t l f i l s t l f i l s t l i n i f i l f i c table 5-9a 5 - 16... - Page 94 BIOS Utilities Power menu (cont’d) The power button . f f acts as a sus- pend/resume button for switch- ing the system f i c between a work- ing state and the suspend mode. y f i . t n In the mechani- l l i f i c...
-
Page 95: Exit Menu
User’s Guide Exit Menu t i x t i x t i x t l u f n i table 5-10 5 - 18... -
Page 96: Scu Screen Samples
BIOS Utilities SCU Screen samples Startup Screen Memory Screen 5 - 19... -
Page 97: Disks Screen
User’s Guide Disks Screen Components Screen 5 - 20... -
Page 98: Power Screen
BIOS Utilities Power Screen Exit Screen 5 - 21... - Page 99 Notes:...
-
Page 100: Chapter 6. Driver And Os Installation
Driver and OS installation Chapter 6. Driver and OS installation This chapter provides step-by-step instructions for installing device drivers and utilities, for more detailed information please refer to your operating system's manual or the product manual supplied with the device you wish to install. The information here has been designed for users with basic computer knowledge though inexperienced users may also find this section helpful. -
Page 101: Before Installing Windows Os
User’s Manual Before installing Windows Note Partitioning the HDD Before installing 1. Insert the Windows Boot Disk in the FDD before you turn on the system. Windows 98SE or 2. Choose the “Start computer with CD-ROM support” option. Windows Me you 3. -
Page 102: Installing Windows 98 Se (For Reference Only)
Driver and OS installation Installing Windows 98 SE (for reference only) Note 1. Insert the Windows Boot Disk in the FDD and turn on your computer. If your Windows 2. Choose option 1 “Start computer with CD-ROM support.” 98 SE CD-ROM disk is bootable, 3. -
Page 103: Installing Windows Me (For Reference Only)
User’s Manual Installing Windows Me (for reference only) 1. Insert the Windows Boot Disk in the FDD and turn on your computer. 2. Choose option 1 “Start computer with CD-ROM support.” 3. Place the Windows Me CD into the CD-ROM drive. 4. -
Page 104: Installing Windows 2000 (For Reference Only)
Driver and OS installation Installing Windows 2000 (for reference only) 1. Insert the Windows 2000 Installation CD disk and start your computer. Note 2. When “Windows 2000 Setup” appears, press Enter to continue. To insert the disk: 3. “Windows 2000 Professional Setup” starts copying files to your HDD. 1) open the CD 4. - Page 105 User’s Manual and performs its final tasks. 14.Click Finish to complete Windows 2000 Setup Wizard. 15.The computer will restart Windows 2000 automatically. 6 - 6...
-
Page 106: Installing Drivers In Windows 98 Se
Driver and OS installation Installing Drivers in Windows 98 SE Step 1: Installing the VGA Driver 1: Click Start. 2: Select Run. 3: Specify the path to D:\Video\Win9X\Setup.exe 4: Run Setup.exe. 5: Follow the on-screen instructions, and continue to press Next. 6: Click Finish to restart your computer. -
Page 107: Step 3: Installing The Hot Key Driver
User’s Manual 2: Reboot the computer and go to the SCU by pressing Ctrl+Alt+S. 3: Enable S/PDIF digital output feature (Startup menu) and exit SCU. 4: Start Windows, and insert the DVD utility disk to install the DVD driver and application. The installation program automatically runs when you insert the DVD disk into the DVD-ROM drive. -
Page 108: Step 4: Installing The Lan Driver
Driver and OS installation 4: Run CNK001.exe. 5: Follow the on-screen instructions, and continue to press Next. 6: Click Finish to restart your computer. Step 4: Installing the LAN Driver 1: Click Start. 2: Select Run. 3: Open the path to D:\Lan\Setup.exe. 4: Run Setup.exe. -
Page 109: Step 6: Installing The Modem Driver (Optional)
User’s Manual 8: The “Add New Hardware Wizard” dialog box appears. Press Next. 9: Select “Search for the better driver for your device” and press Next. 10: Select “Specify a location” and choose Browse to specify the location to D:\Pcmcia\PCMCIA.inf, then press OK. 11: Follow the on-screen instructions and press Next. - Page 110 Driver and OS installation 12: Click Finish to complete the setup. 13: Click Close to close the Properties window and restart your computer. 6 - 11...
-
Page 111: Installing Drivers In Windows Me
User’s Manual Installing Drivers in Windows Me Step 1: Installing the VGA Driver 1: Click Start. 2: Select Run. 3: Specify the path to D:\Video\Win9X\Setup.exe 4: Run Setup.exe. 5: Follow the on-screen instructions, and continue to press Next. 6: Click Finish to restart your computer. For more information on the driver, refer to the Readme file. -
Page 112: Step 3: Installing The Hot Key Driver
Driver and OS installation 2: Reboot the computer and go to the SCU by pressing Ctrl+Alt+S. 3: Enable S/PDIF digital output feature (Startup menu) and exit SCU. 4: Start Windows, and insert the DVD utility disk to install the DVD driver and application. -
Page 113: Step 4: Installing The Lan Driver
User’s Manual 4: Run CNK001.exe. 5: Follow the on-screen instructions, and continue to press Next. 6: Click Finish to restart your computer. Step 4: Installing the LAN Driver 1: Click Start. 2: Select Run. 3: Open the path to D:\Lan\Setup.exe. 4: Run Setup.exe. - Page 114 Driver and OS installation 9: Select “Search for a better driver than the one your device is using now” and press Next. 10: Select “Specify a location” and choose Browse to specify the location to D:\Mdc\WinMe, Press OK. 11: Follow the on-screen instructions and press Next. 12: Click Finish to complete the setup.
-
Page 115: Installing Drivers In Windows 2000
User’s Manual Installing Drivers in Windows 2000 Step 1: Installing the SiSIDE Utility 1: Click Start. 2: Select Run. 3: Open the path to D:\SiSIDE\Win2000\SISIDE.EXE 4: Run Siside.exe and then restart Windows. For more information on this, refer to the Readme file under the directory. Step 2: Installing the VGA Driver 1: Click Start. -
Page 116: Step 3: Installing The Audio Driver
Driver and OS installation Step 3: Installing the Audio Driver 1: Click Start. 2: Select Run. 3: Specify the path to D:\Audio\Setup.exe 4: Run Setup.exe. 5: Follow the on-screen instructions, and continue to press Next. 6: Click Finish to restart your computer. For more information on the driver, refer to the Readme file under the directory. -
Page 117: Step 6: Installing The Modem Driver (Optional)
User’s Manual 4: Run Setup.exe. 5: Follow the on-screen instructions, and continue to press Next. 6: Click Finish to restart the computer now. For more information on the driver, refer to the Readme file under the directory. Step 6: Installing the Modem Driver (Optional) 1: Click Start. - Page 118 Driver and OS installation 15: Click Finish to complete the setup. 16: Close the Properties window and restart your computer. For more information on the driver, refer to the Readme file under the directory. 6 - 19...
-
Page 119: Installing Drivers In Windows Nt4.0
User’s Manual Installing Drivers in Windows NT4.0 Note Step 1: Installing the VGA Driver After installing 1: Click Start. Windows NT4.0 please install 2: Select Settings and Control Panel. Service Pack 6 or 3: Double click the Display icon. above to enhance 4: Click the Settings tab. -
Page 120: Step 3: Installing The Hot Key Driver
Driver and OS installation 4: Run Setup.exe. 5: Follow the on-screen instructions, and continue to press Next. Note 6: Click Finish to restart your computer. Before installing For more information on the driver, refer to the Readme file under the directory. the LAN driver, go to the SCU by pressing... -
Page 121: Step 5: Installing The Modem Driver (Optional)
User’s Manual 9: Click OK again to accept the driver. 10: Follow the on-screen instructions and continue to click Next. Note - If you are prompted for Windows NT Setup, insert the Windows NT CD Before installing the Modem disk and specify to the CD-ROM drive. Then follow the on-screen driver, go to SCU instructions, and continue to press Continue. - Page 122 Driver and OS installation 9: Click Have Disk. 10: Choose Browse and specify the path to D:\Mdc\Nt40. Press Open. 11: Choose OK. 12: Press Next. 13: Select the same port you choose in the earlier step, and click Next. 14: Follow the on-screen instructions, and press Next. 15: Click Finish to complete the setup.
- Page 123 Notes:...
-
Page 124: Chapter 7. Troubleshooting
Troubleshooting Chapter 7. Troubleshooting Should you have any problems with your computer, before consulting the com- puter vendor, you may want to solve the problem yourself. This chapter lists some common problems and their possible solutions. The chapter includes: – Audio –... -
Page 125: Audio
User’s Manual Audio Problem: The speaker cannot be heard. Solution: The volume might be set too low, please check the volume control. Problem: The volume is too high (or too low). Solution: The volume is not correctly set, please check the volume control. Problem: The headphone doesn’t work. - Page 126 Troubleshooting Problem: The battery pack will not charge and the charge indicator light is off. Solution 1: The battery is already fully charged and the indicator light is broken. Solution 2: The battery pack is exposed to an excessively hot or cold environ- ment.
-
Page 127: Boot Password
User’s Manual Suitable operating conditions are between 32°F and 113°F (0°C and 45°C) while the ideal temperature for battery operation is between 50°F and 95°F (10°C and 35°C). Solution 2: Make sure the battery is fully discharged and recharge it com- pletely before reusing. - Page 128 Troubleshooting remove the disk using the eject hole. Problem: The compact disk cannot be read. Solution 1: The compact disk is not correctly placed in the tray. Solution 2: The compact disk is dirty. Please clean it with a CD-ROM cleaner kit.
-
Page 129: Floppy Disk Drive (Fdd)
User’s Manual to your operating system manual for more information on the software and make sure you have the proper software installed for using compact disks. If the correct software is properly installed, contact your vendor about a hardware problem. Floppy Disk Drive (FDD) Problem: The floppy disk drive will not write data to disk. -
Page 130: Hard Disk Drive (Hdd)
Troubleshooting Hard Disk Drive (HDD) Problem: The computer takes longer during START UP. Solution 1: Data saved on the hard disk drive may be lost or damaged. Please operate the disk scan or disk defragmenter to check for any lost or damaged data. -
Page 131: Lcd Panel
User’s Manual LCD Panel Problem: The fonts are too dark. Solution: The brightness is not correctly set. Use Fn + F9 or Fn + F10 to adjust the brightness. Problem: The screen is blank. Solution 1: The panel may be set for an external monitor, please reset to nor- mal display using the hot keys. -
Page 132: Memory Module
Troubleshooting Memory Module Problem: The computer will not boot. Solution: An incorrect type of memory module is installed. Make sure a cor- rect module is installed. Problem: The memory capacity is insufficient. Solution: The memory is not correctly configured for the application. Make sure the memory is correctly configured for the application. -
Page 133: Pc Card
User’s Manual PC Card Problem: The PC card cannot be configured. Solution: The PC card is not supported. Problem: The system cannot recognize the PC card. Solution 1: The PC card is not inserted into the socket or inserted incorrectly. Solution 2: The PC card driver is not installed. -
Page 134: Printer
Troubleshooting Problem: The system has automatically entered suspend mode. Solution 1: The system’s temperature is too high, let it cool before using. Solution 2: The system has entered suspend mode after a specified period of time. Press any key to wake up the computer. Printer Problem: The printer cannot be added to the system. - Page 135 User’s Manual Problem: The printer prints incorrect data. Solution 1: The printer driver is not installed or configured correctly. Solution 2: The printer connector is not correctly connected. 7 - 12...
-
Page 136: Appendix A. Specifications
Appendix A. Specifications Appendix A. Specifications Processor - Intel Celeron 566/600/633/667/700/733/766/800 MHz - Intel Pentium !!! 700/733/750/800/850/866/933 MHz - CPU Package: FC-PGA 370 (Socket 370) Memory - Two 144-pin SO-DIMM sockets - Supports PC-133/PC-100 SDRAM (3.3V) - Expandable up to 512MB, depending on 32/64/128/256 MB SO-DIMM modules BIOS - Insyde BIOS with Smart Battery - One 256KB Flash ROM... - Page 137 User’s Manual - 13.3”/14.1” XGA TFT color panel Display - UMA Architecture with 8/16/32/64 System Memory sharable as Display Memory - Ultra AGP (AGP 4X Performance) - 128-bit 2D / 3D Graphics Engine - Motion Compensation and IDCT for DVD Content Playback Accelerator - Fully DirectX 6 Compliant Graphics Engine Storage - One fixed 3.5”...
- Page 138 Appendix A. Specifications - DirectSound 3D Accelerator - Full-duplex - S/P-DIF Output - Virtual AC3 - Built in microphone - Built in 2 speakers PC Card Sockets - One Type II PCMCIA 3.3V/5V socket - Supports CardBus (PC Card 95) Pointing Device - Built in TrackPad (PS/2) Input/Output...
- Page 139 User’s Manual - One speaker-out jack - Dual USB ports - One RJ-45 jack for 100M/10M LAN or 56K MDC Modem (Option) - DC-in jack Communications - Wireless Infrared transfer IrDA 1.1, 1cm~1M operating distance, 4Mbps FIR - 56K MDC Modem with V.90 compliant (Option) or 100M/10M LAN on board Power Management - Supports APM 1.2 - Supports ACPI 1.0B...
- Page 140 Appendix A. Specifications Size & Weight - 308mm(w) x 254mm(d) x 37.5mm(h) - 3.2 kg with Lithium-Ion battery Keyboard - A4-Size Win 98 keyboard includes numeric keypad and application hot keys for E-mail, www browser and API Environment - Temperature: Operating: 5°C ~ 35°C Non-Operating:...
- Page 141 User’s Manual Notes: A - 6...
-
Page 142: Glossary
Glossary AC (Alternating Current) - The power from a standard household electrical outlet. adapter - A device that allows compatibility between different equipment. An AC adapter converts AC current to DC current which is needed to operate a computer. AGP (Accelerated Graphics Port) - A high-speed graphics port that provides a direct connection between the display adapter and memory application - A program such as a word processor, database or image editor. - Page 143 computer to another. byte (binary term) - A unit of storage capable of holding a single character. On almost all modern computers, a byte is equal to 8 bits. cache - When you cache something you improve the speed of access to it by moving it one stage closer to the CPU.
- Page 144 operating system for IBM-compatible personal computers. DRAM - The most common type of computer RAM, called D-RAM or DRAM. driver - A program that controls a device. Every device, whether it be a printer, disk drive, or keyboard, must have a driver program. DVD - Originally called Digital Video Disc since it was used mostly for video, now called Digital Versatile Disc, similar to a CD only with greater storage capacity.
- Page 145 Hot key - see function keys. interface - Something that connects two separate things. Hardware interface connects the computer to attached hardware such as a printer. I/O (Input/Ouput) - Term used when your computer needs data entered (input) or has data to go to another source such as a printer or floppy disk (output). IrDA (Infrared Data Association) - IrDA ports allow a laptop to exchange data or use a printer without a cable connection.
- Page 146 - To copy a program from some source, such as a disk or tape, into memory for execution. Lithium-Ion battery - A type of battery which is ideal for notebook computers because of its light weight and high energy density. Also, lithium-ion batteries do not use poisonous metals, such as lead, mercury or cadmium.
- Page 147 - The most popular pointing device. It was called a mouse because it more or less resembled one, with the cord being the mouse’s tail. NiMH battery - Batteries which are common in notebook computers and con- tain Nickel-Metal Hydride.
- Page 148 PC Card - See PCMCIA Card. PCMCIA Card - A credit-card sized, removable module for portable computers standardized by PCMCIA. Also known as PC Cards, they are 16-bit devices that are used to attach modems, network adapters, sound cards, radio transceivers, solid state disks and hard disks to a portable computer.
- Page 149 programs will need more or less RAM depending on what they are doing. RAM is the most common type of memory found in computers. reboot - To restart a computer. resume - To restart your computer from suspend mode. ROM (Read Only Memory) - A memory chip that permanently stores instruc- tions and data.
- Page 150 your computer for long periods of time. TFT (Thin Film Transistor) - The term typically refers to active matrix screens on laptop computers. Active matrix LCD provides a sharper screen display and broader viewing angle compared to passive matrix. USB (Universal Serial Bus) - A hardware interface for low-speed peripherals such as the keyboard, mouse, joystick, scanner, printer and telephony devices.
- Page 151 The ZV Port is built into the notebook computer and activated by plugging in an MPEG PC Card that is ZV Port-compliant. G - 10...