Panasonic KX-TG9541 Operating Instructions Manual
Link-to-cell cellular convergence solution
Hide thumbs
Also See for KX-TG9541:
- Operating instructions manual (88 pages) ,
- Quick manual (11 pages) ,
- Operating instructions manual (88 pages)
Table of Contents
Advertisement
Quick Links
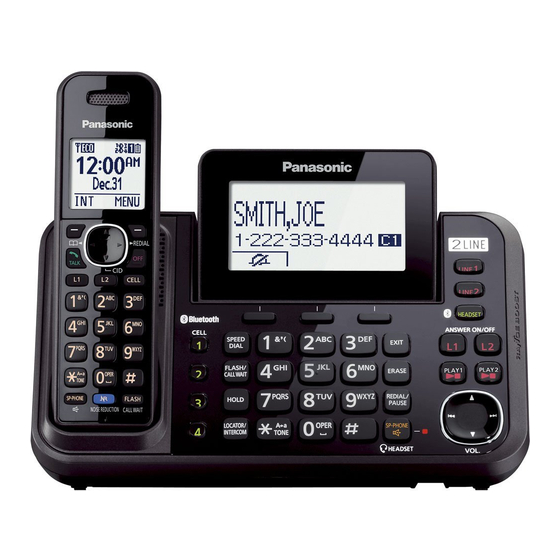
Model shown is KX-TG9541.
Before initial use, see "Getting Started" on
page 9.
Thank you for purchasing a Panasonic product.
Please read these operating instructions before using the unit and save them for future
reference.
Consulte "Guía Rápida Española", página 73.
For assistance, visit our Web site: http://www.panasonic.com/help for customers in the
U.S.A. or Puerto Rico.
Please register your product: http://www.panasonic.com/prodreg
Operating Instructions
Link-to-Cell Cellular Convergence Solution
KX-TG9541
Model No.
KX-TG9542
Advertisement
Table of Contents

Related Manuals for Panasonic KX-TG9541


Summary of Contents for Panasonic KX-TG9541
-
Page 1: Operating Instructions
Please read these operating instructions before using the unit and save them for future reference. Consulte “Guía Rápida Española”, página 73. For assistance, visit our Web site: http://www.panasonic.com/help for customers in the U.S.A. or Puerto Rico. Please register your product: http://www.panasonic.com/prodreg... -
Page 2: Table Of Contents
Table of Contents Introduction Caller ID Service Model composition ..........3 Using Caller ID service ........47 Accessory information ........3 Caller list ............47 System capabilities ..........5 Using Bluetooth Devices Important Information Copying phonebook from a cellular phone For your safety ............6 (phonebook transfer) ........50 Important safety instructions .......7 Text message (SMS) alert ........51 For best performance .........7... -
Page 3: Introduction
Desk stand/Wall mounting adaptor /PNKL1040Z1 Rechargeable batteries for handset/HHR-55AAABUG Handset cover /PNYNTGA680BR Belt clip/PNKE1268Z1 Charger/PNLC1040ZB – *1 The desk stand/wall mounting adaptor comes attached to the base unit. *2 The handset cover comes attached to the handset. For assistance, please visit http://www.panasonic.com/help... -
Page 4: Expanding Your Phone System
This product can be purchased online. Please visit our Web site: http://www.panasonic.com/RangeExtender *3 By registering the key detector (4 max.) to a Panasonic Digital Cordless Phone and attaching it to an easy-to-lose item in advance, you can locate and find the mislaid item to which the key detector is attached. -
Page 5: System Capabilities
R The Bluetooth word mark and logos are owned by the Bluetooth SIG, Inc. and any use of such marks by Panasonic Corporation is under license. All other trademarks identified herein are the property of their respective owners. System capabilities The unit can accommodate up to 2 external telephone lines and the following operations are available at the same time. -
Page 6: Important Information
These conditions can cause fire or electric shock. Battery Confirm that smoke has stopped emitting and contact R We recommend using the batteries noted on page 4. the Panasonic Call Center at 1-800-211-PANA USE ONLY rechargeable Ni-MH batteries AAA (1-800-211-7262). (R03) size. -
Page 7: Important Safety Instructions
Base unit location/avoiding noise Notice The base unit and other compatible Panasonic units use radio waves to communicate with each other. R For maximum coverage and noise-free communications, place your base unit: –... -
Page 8: Specifications
0 °C – 40 °C (32 °F – 104 °F), 20 % – 80 % relative air humidity (dry) Note: R Design and specifications are subject to change without notice. R The illustrations in these instructions may vary slightly from the actual product. For assistance, please visit http://www.panasonic.com/help... -
Page 9: Getting Started
– To connect to a 2-line telephone jack: page 9 – To connect to 2 single-line telephone jacks: n Base unit page 9 R Use only the supplied Panasonic AC adaptor – If you use the unit as a single-line telephone PNLV234. only: page 10 Connect the telephone line cord until it clicks into the base unit and telephone line jack. - Page 10 – noise is heard during conversations. – Caller ID features do not function properly. “Click” To connect to a 2-line telephone jack “GREEN” plug For this connection, please purchase a Panasonic 2-line splitter (page 4). “Transparent” plug To single-line telephone jacks (RJ11C)
-
Page 11: Battery Installation
R Use the supplied rechargeable batteries. For R Confirm correct polarities ( replacement, we recommend using the Panasonic rechargeable batteries noted on page 4, 6. Note for battery charging R It is normal for the handset to feel warm during charging. -
Page 12: Power Back-Up Operation
R It is recommended that batteries are replaced after a power outage. R Operating time may be shortened depending on usage conditions, ambient temperature, and battery quality. R Remove all the batteries when replacing. For assistance, please visit http://www.panasonic.com/help... -
Page 13: Controls
ML1N (Line 1) ML1N (Line 1: ANSWER ON/OFF) ML2N (Line 2) L1 ANSWER ON/OFF indicator MCELLN ML2N (Line 2: ANSWER ON/OFF) L2 ANSWER ON/OFF indicator n Control type N (PLAY1) (Stop) Soft keys Message indicator For assistance, please visit http://www.panasonic.com/help... -
Page 14: Display Icons/Indicators
Ready to make/receive cellular cellular phone and the base unit, you can charge a calls. cellular phone. However, the cellular phone cannot R When turned off: A cellular phone is not connected to the base unit. (page 20) For assistance, please visit http://www.panasonic.com/help... - Page 15 The LINE indicators show the status of each line, respectively, as follows. In use: Someone is using the corresponding line. Status Meaning *1 Corresponding lines (L1, L2: landline, C1-C4: Light off The line is available. cellular line) are indicated next to the item. For assistance, please visit http://www.panasonic.com/help...
-
Page 16: Date And Time
If that line is unavailable, line 2 is MMENUN#110 selected. When you call back using the caller MbN: Select the desired setting. a MSAVEN list (page 47) or while listening to a message (page 56, 57), the indicated line is used. For assistance, please visit http://www.panasonic.com/help... - Page 17 Proceed with the operation for your unit. Handset: MOFFN Base unit: MEXITN Note: R You can select a line manually regardless of the line selection mode by pressing ML1N/ML2N on the handset or MLINE 1N/MLINE 2N on the base unit. For assistance, please visit http://www.panasonic.com/help...
-
Page 18: Link To Cell
For CELL 1: MMENUN#6241 For CELL 2: MMENUN#6242 R When the cellular phone is unpaired, the For CELL 3: MMENUN#6243 CELL indicator is turned off. For CELL 4: MMENUN#6244 Proceed with the operation for your unit. Handset: MOFFN For assistance, please visit http://www.panasonic.com/help... -
Page 19: Link To Cell Settings
After pairing, your cellular phone is connected to information is announced depending on the the base unit. If you move the cellular phone out of Talking Caller ID setting (page 41). base unit range, the cellular phone is disconnected For assistance, please visit http://www.panasonic.com/help... - Page 20 Proceed with the operation for your unit. connect to the base unit (page 19). Handset: MOFFN R A disconnected cellular phone is not unpaired Base unit: MEXITN from the base unit, so pairing it to the base unit again is unnecessary. For assistance, please visit http://www.panasonic.com/help...
-
Page 21: Personal Identification Number
(when the default has been changed), enter the current 4-digit PIN. Enter the new 4-digit PIN. a MOKN Enter the new 4-digit PIN again. a MSAVEN Proceed with the operation for your unit. Handset: MOFFN Base unit: MEXITN For assistance, please visit http://www.panasonic.com/help... -
Page 22: Making/Answering Calls Using The Handset
Dial the phone number. a M MEN REDIAL Note: MbN: Select the desired phone number. a R A 3.5 second pause is inserted each time MDN MERASEN (Pause) is pressed. MbN: “Yes” a MSELECTN MOFFN For assistance, please visit http://www.panasonic.com/help... -
Page 23: Answering Calls
R After holding for 10 minutes, the call is This feature can improve sound clarity when the disconnected. handset is used in an area where there may be interference. During an outside call, this feature is turned on automatically when necessary. For assistance, please visit http://www.panasonic.com/help... -
Page 24: Transferring Calls
R To hang up only one line, press ML1N or MSELECTN ML2N for the party with which you want to continue talking. R To put both lines on hold, press MMENUN. a MbN: “Hold” a MSELECTN For assistance, please visit http://www.panasonic.com/help... - Page 25 ML1N or ML2N. beforehand. R You can also transferring a cellular call as Making/answering a landline call during a follows: conversation on a cellular line Press and hold MCELLN. Press MMENUN during a cellular call. For assistance, please visit http://www.panasonic.com/help...
- Page 26 To return to the 1st call (line 1), press ML1N. Note: R If you subscribe to Caller ID, the 2nd caller’s information is displayed when a call is being received on the other line (page 47). For assistance, please visit http://www.panasonic.com/help...
-
Page 27: Making/Answering Calls Using The Base Unit
R You can also answer the cellular call by selection mode, see page 16. pressing the desired cellular line key R You can also select the line manually by (MCELL 1N to MCELL 4N). pressing MLINE 1N or MLINE 2N. For assistance, please visit http://www.panasonic.com/help... -
Page 28: Useful Features During A Call
R MMUTEN is a soft key visible on the display extensions. (3-way conference) during a call. R To prevent other users from joining your conversations with outside callers, turn call sharing mode off (page 42). For assistance, please visit http://www.panasonic.com/help... - Page 29 During an outside call, press MINTERCOMN. To answer a 2nd call: When 2 or more handsets are registered: Press the desired cellular line key (MCELL 1N – To page a specific handset, enter the to MCELL 4N). handset number. For assistance, please visit http://www.panasonic.com/help...
- Page 30 Press MHOLDN to put the 1st call (line 1) on hold. Press MLINE 2N to make or answer a 2nd call. R To hold the 2nd call, press MHOLDN. To return to the 1st call (line 1), press MLINE For assistance, please visit http://www.panasonic.com/help...
-
Page 31: Intercom
When you finish talking, press MINTERCOMN. Answering an intercom call Handset Press M N to answer the page. When you finish talking, press MOFFN. Base unit Press MINTERCOMN to answer the page. When you finish talking, press MINTERCOMN. For assistance, please visit http://www.panasonic.com/help... -
Page 32: Phonebook
Handset: MEN REDIAL Base unit: MREDIALN – MbN: Select the desired phone number. a MSAVEN To store the name, continue from step 3, “Editing entries”, page 34. Storing caller information to the phonebook Handset MCN CID For assistance, please visit http://www.panasonic.com/help... -
Page 33: Phonebook Entry
You can narrow down the search to enter the first of the following 4 methods, make a call with your characters of a name. unit. n Using a cellular line: Handset / Base unit Proceed with the operation for your unit. Handset: MFN For assistance, please visit http://www.panasonic.com/help... -
Page 34: Erasing Entries
MSELECTN 2 times Base unit: M MEXITN MbN: Select the desired entry. Press MCALLN to dial the number. Note: R When storing a calling card access number and your PIN in the phonebook as one phonebook For assistance, please visit http://www.panasonic.com/help... -
Page 35: Speed Dial
Edit the name if necessary. a MOKN Base unit Edit the phone number if necessary. a MOKN n By entering phone numbers: MSELECTN a MEXITN MSPEED DIALN MbN: Select the desired speed dial key. a MEDITN For assistance, please visit http://www.panasonic.com/help... - Page 36 MbN: Select the desired cellular phone. a MSELECTN n Using the landline: Press and hold the desired speed dial key (1 to 0). Press ML1N or ML2N. Base unit MSPEED DIALN MbN: Select the desired entry. Press the desired line key. For assistance, please visit http://www.panasonic.com/help...
-
Page 37: Programming
(for base unit) “Answering device” a MbN: “Line1” or “Line2” Sub-menu 1 Sub-menu 2 Settings Code Unit Play new message – – #3231 #3232 Play all message – – #3241 #3242 Erase all – – #3251 message #3252 For assistance, please visit http://www.panasonic.com/help... - Page 38 1: 1 min #3051 Recording time 3: <3 min> #3052 <111> #3061 Remote code #3062 Screen call 1: <On> #3101 0: Off #3102 – – #3271 Answer on #3272 – – #3281 Answer off #3282 For assistance, please visit http://www.panasonic.com/help...
- Page 39 Talking CID)> #6142 2: On (without #6143 Talking CID) 0: Off #6144 Text message <On> #6101 alert #6102 #6103 Pair – #6241 #6242 #6243 #6244 Unpair – #6111 #6112 #6113 #6114 Phonebook – – #618 transfer For assistance, please visit http://www.panasonic.com/help...
- Page 40 – <Tone 1> Ringer tone – Line1 <Tone 2> – Line2 1: <On> #201 Interrupt tone 0: Off Silent mode 1: On #238 – On/Off 0: <Off> Silent mode <11:00 PM/06:00 #237 – Start/End AM> For assistance, please visit http://www.panasonic.com/help...
- Page 41 (Block calls without phone number) Speed dial – – #261 – 1: <On> #332 VM tone detect 0: Off (VM: Voice mail) Phonebook International – #117 code setting Country code – #118 Trunk prefix – #119 For assistance, please visit http://www.panasonic.com/help...
- Page 42 Register handset – #130 – #131 Deregistration Change language Display 1: <English> #110 2: Español 1: <English> #112 Voice prompt 2: Español Main menu: “Customer support” Operation Code Unit Displaying customer support Web address. #680 – For assistance, please visit http://www.panasonic.com/help...
-
Page 43: Alarm
Alarm can be set for each handset. Important: “Off” Turns alarm off. Go to step 7. R Make sure the unit’s date and time setting is “Once” An alarm sounds once at the correct (page 16). set time. For assistance, please visit http://www.panasonic.com/help... -
Page 44: Silent Mode
*: Select “AM” or “PM”. Storing unwanted callers MSAVEN a MOFFN You can store up to 250 phone numbers in the call block list. Base unit MMENUN#238 For assistance, please visit http://www.panasonic.com/help... - Page 45 R To exit, press MEXITN. Base unit To edit a number: MMENUN#217 a MADDN MEDITN a Edit the phone number. a MSAVEN a MEXITN Enter the phone number (24 digits max.). To erase a number: For assistance, please visit http://www.panasonic.com/help...
-
Page 46: Other Programming
2 times a MOFFN Base unit: MEXITN Registering a unit Operating additional units Additional handsets Up to 6 handsets can be registered to the base unit. Important: R See page 4 for information on the available model. For assistance, please visit http://www.panasonic.com/help... -
Page 47: Caller Id Service
When caller information is received and it matches To exit, press MOFFN. a phone number stored in the phonebook, the MbN: Select the desired cellular phone. a stored name in the phonebook is displayed and MSELECTN logged in the caller list. For assistance, please visit http://www.panasonic.com/help... -
Page 48: Caller Id Number Auto Edit Feature
Press MEDITN repeatedly until the phone edited automatically. number is shown in the desired format. This feature can be set for each unit (page 42). The default setting is “On”. For assistance, please visit http://www.panasonic.com/help... -
Page 49: Erasing Selected Caller Information
Proceed with the operation for your unit. Handset: MOFFN Base unit: MEXITN Erasing all caller information Handset / Base unit Proceed with the operation for your unit. Handset: MCN CID Base unit: MCIDN MERASEN a MbN: “Yes” a MSELECTN Handset: MOFFN For assistance, please visit http://www.panasonic.com/help... -
Page 50: Using Bluetooth Devices
Enter the desired number. a MSAVEN connection. Proceed with the operation for your unit. R Some cellular phones may require you to Handset: MOFFN perform an operation on the cellular phone Base unit: MEXITN even if you select “Auto”. For assistance, please visit http://www.panasonic.com/help... -
Page 51: Text Message (Sms) Alert
To use this text message alert feature, you may Important: need to turn on the notification of Bluetooth setting R Make sure that the Bluetooth headset is not on your cellular phone. connected to any other Bluetooth device. For assistance, please visit http://www.panasonic.com/help... - Page 52 (page 42). Handset / Base unit n While the handset is on a landline call: MMENUN#612 To join the conversation with your headset, turn on the headset referring to your headset operating instructions. For assistance, please visit http://www.panasonic.com/help...
- Page 53 To join the conversation with the handset, press R An available line is automatically selected. To change the line selection mode, see page 16. Adjusting your headset receiver volume Base unit Press MDN or MCN repeatedly while using your headset. For assistance, please visit http://www.panasonic.com/help...
-
Page 54: Answering System For Landline
You can set the combination of greeting messages For line 2: Press ML2N (ANSWER ON/OFF). and the start time of the greeting messages. The following settings are available: – “Greeting1”(default): The answering system only plays “Greeting1” for all calls. For assistance, please visit http://www.panasonic.com/help... - Page 55 Base unit: MAM/PMN: Select MAMN or MPMN. For line 1: MMENUN#3041 a MSAVEN For line 2: MMENUN#3042 Proceed with the operation for your unit. MbN: Select the desired greeting message. a Handset: MOFFN MSELECTN Base unit: MEXITN For assistance, please visit http://www.panasonic.com/help...
-
Page 56: Listening To Messages Using The Base Unit
*1 If pressed within the first 5 seconds of a answering system, MPLAY1N or MPLAY2N is message, the previous message is played. not displayed. *2 If there are new messages in both lines, MPLAYN is displayed. For assistance, please visit http://www.panasonic.com/help... -
Page 57: Advanced New Message Alerting Features
“Auto”, the indicated line ( ) is used can listen to messages from that call (page 59). for the call. If the indicated line is already This feature can be set for each line separately. For assistance, please visit http://www.panasonic.com/help... - Page 58 For line 1: MMENUN#3381 a MOKN a MSELECTN a MEXITN For line 2: MMENUN#3382 MbN: “Alert to” a MSELECTN a MERASEN MbN: “Yes” a MSELECTN a MEXITN R The new message alert setting is turned off. For assistance, please visit http://www.panasonic.com/help...
-
Page 59: Remote Operation
However, on the base unit redial list it is shown Follow the voice guidance prompts as as “Message alert”. necessary or control the unit using remote commands (page 60). When finished, hang up. For assistance, please visit http://www.panasonic.com/help... -
Page 60: Answering System Settings
(page 54). phone. R To use this unit’s answering system rather than the voice mail service provided by your service Let the phone ring 15 times. provider/telephone company, please contact R A long beep is heard. For assistance, please visit http://www.panasonic.com/help... - Page 61 Handset / Base unit For line 1: MMENUN#3051 For line 2: MMENUN#3052 MbN: Select the desired setting. a MSAVEN Proceed with the operation for your unit. Handset: MOFFN Base unit: MEXITN For assistance, please visit http://www.panasonic.com/help...
-
Page 62: Useful Information
Soon after you hang up a call or after mounting adaptor. the phone stops ringing, your unit checks the phone line to see if new voice mail messages have been recorded. Turn this feature off when: For assistance, please visit http://www.panasonic.com/help... - Page 63 R The words “UP WALL” should be facing up. Mount the unit on a wall then slide down to secure in place. 83 mm inches) 102 mm (4 inches) Wall phone plate 102 mm 83 mm (4 inches) inches) For assistance, please visit http://www.panasonic.com/help...
-
Page 64: Error Messages
Caller ID service, this message will not be displayed. Use rechargeable R A wrong type of battery such as Alkaline or Manganese was battery. inserted. Use only the rechargeable Ni-MH batteries noted on page 4, 6. For assistance, please visit http://www.panasonic.com/help... -
Page 65: Troubleshooting
If the working telephone does not operate properly, contact your service provider/telephone company. The base unit beeps. R New messages have been recorded. Listen to the new messages (page 56). For assistance, please visit http://www.panasonic.com/help... - Page 66 R You need to add your area code when making cellular calls. handset or base unit using a Store your area code in order to automatically add it to the cellular line. beginning of the 7-digit phone number when making cellular calls (page 20). For assistance, please visit http://www.panasonic.com/help...
- Page 67 Caller information is displayed or R Depending on your service provider/telephone company, the announced late. unit may display or announce the caller’s information at the 2nd ring or later. R Move closer to the base unit. For assistance, please visit http://www.panasonic.com/help...
- Page 68 I cannot have a conversation R Your Bluetooth headset is not paired. Pair it (page 51). using the headset. R Turn your headset off, then turn it on and try again. For assistance, please visit http://www.panasonic.com/help...
- Page 69 (limited)” setting. – If you prefer the same ring as the unit, select “Off” of the “Ring as cell (limited)” setting, and select “On” of the “Talking Caller ID” setting on the handset and base unit. For assistance, please visit http://www.panasonic.com/help...
- Page 70 Insert the batteries and charge fully before use. If the unit does not work properly, contact an authorized service center. Caution: R To avoid permanent damage, do not use a microwave oven to speed up the drying process. For assistance, please visit http://www.panasonic.com/help...
-
Page 71: Fcc And Other Information
This disconnect the equipment until the problem is resolved. equipment generates, uses, and can radiate radio For assistance, please visit http://www.panasonic.com/help... - Page 72 Compliance with TIA-1083 standard: Telephone handsets identified with this logo have reduced noise and interference when used with T-Coil equipped hearing aids and cochlear implants. Compatible with Hearing Aid T-Coil TIA-1083 For assistance, please visit http://www.panasonic.com/help...
-
Page 73: Guía Rápida Española
Guía Rápida Española Cómo conectar el adaptador para corriente Unidad base L Use solo el adaptador de corriente alterna Panasonic PNLV234 que se suministra. “Clic” A la toma de corriente *Se requiere un filtro DSL/ADSL (no incluido) si tiene servicio de DSL/ADSL. - Page 74 L Para usar solo la línea 1: {MENU}(25) s {r}: “Línea1” s {SAVE} s {OFF}/{EXIT} L Para borrar el mensaje “Verif. Línea 2”: {MENU}(19) Use el cable de la línea telefónica con el enchufe “transparente” (cable de 2 alambres). Para obtener ayuda, visite http://www.panasonic.com/help (solo en inglés)
- Page 75 {MENU}(1)1 Introduzca el día, mes y año actuales. s {OK} Introduzca la hora y minuto actuales (formato de reloj de 24 horas). {GUARDA} Continúe operando su unidad. Auricular: {OFF} Unidad base: {EXIT} Para obtener ayuda, visite http://www.panasonic.com/help (solo en inglés)
- Page 76 L La marca denominativa y los logotipos de Bluetooth son propiedad de Bluetooth SIG, Inc. y cualquier uso de dichas marcas por parte de Panasonic Corporation se hace bajo licencia. Todas las demás marcas comerciales que se identifican en el presente pertenecen a sus respectivos propietarios.
- Page 77 Para CELL 2: {MENU}(6252 (suena un pitido largo). Para CELL 3: {MENU}(6253 (suena un pitido largo). Para CELL 4: {MENU}(6254 (suena un pitido largo). Continúe operando su unidad. Auricular: {OFF} Unidad base: {EXIT} Para obtener ayuda, visite http://www.panasonic.com/help (solo en inglés)
- Page 78 Para ajustar el volumen del timbre (Auricular/Unidad base) Oprima {^} o {V} repetidamente para seleccionar el volumen deseado Para ajustar el volumen del timbre del auricular (línea de celular/línea terrestre) mientras timbra. Para obtener ayuda, visite http://www.panasonic.com/help (solo en inglés)
- Page 79 Para escuchar mensajes nuevos: Para escuchar mensajes Para la línea 1: {MENU}(3231 Para la línea 2: {MENU}(3232 Para escuchar todos los mensajes: Para la línea 1: {MENU}(3241 Para la línea 2: {MENU}(3242 Para obtener ayuda, visite http://www.panasonic.com/help (solo en inglés)
- Page 80 NIP (predeterminado: “0000”) de la unidad base. L Las entradas que se están copiando aparecen en el auricular. Espere a que aparezca “Completo”. Continúe operando su unidad. Auricular: {OFF} Unidad base: {EXIT} Para obtener ayuda, visite http://www.panasonic.com/help (solo en inglés)
- Page 81 − mientras escucha los mensajes grabados en el contestador de llamadas de la unidad base. N Para cambiar a su audífono: Oprima {HEADSET} en la unidad base. N Para cambiar a la unidad base: Oprima {s} en la unidad base. Para obtener ayuda, visite http://www.panasonic.com/help (solo en inglés)
- Page 82 L Si ocurre el mismo problema aunque el auricular se encuentre enseguida de la unidad base, llame a servicio a clientes de Panasonic al 1-800-211-PANA (1-800-211-7262). L Sí, puede añadir hasta 6 auriculares (incluyendo los que se venden con su ¿Es posible añadir otro auricular...
-
Page 83: Appendix
Monday - Friday 9 am to 9 pm; Saturday - Sunday 10 am to 7 pm, EST. TTY users (hearing or speech impaired users) can call 1-877-833-8855. Accessory Purchases (United States and Puerto Rico) Purchase Parts, Accessories and Instruction Books online for all Panasonic Products by visiting our Web Site at: http://www.pstc.panasonic.com or, send your request by E-mail to: npcparts@us.panasonic.com... -
Page 84: Warranty (For United States And Puerto Rico)
If your product does not work properly because of a defect in materials or workmanship, Panasonic Corporation of North America (referred to as “the warrantor”) will, for the length of the period indicated on the chart below, which starts with the date of original purchase (“Limited Warranty period”), at its option either (a) repair your product with new or refurbished parts, or... - Page 85 L Send the unit to Panasonic Exchange Center, prepaid and adequately insured. L Do not send your unit to Panasonic Corporation of North America listed on the back cover or to executive or regional sales offices. These locations do not repair consumer products.
-
Page 86: Index
Index Eco mode: 12 Index Equalizer: 24 Error messages: 64 3-way conference: 24, 28 Flash: 23, 28, 42 A Additional handset: 46 G Groups: 33 Alarm: 43 H Handset Answering calls: 23, 27 Deregistration: 46 Answering system Name: 46 Call screening: 54 Registration: 46 Erasing messages: 56, 57, 60 Hold: 23, 28... - Page 87 Index Speaker: 22, 27 W Wall mounting: 62...
- Page 88 Date of purchase (found on the bottom of the base unit) Name and address of dealer Attach your purchase receipt here. One Panasonic Way, Secaucus, New Jersey 07094 © Panasonic System Networks Co., Ltd. 2013 Printed in China *PNQX6073ZA* *PNQX6073ZA*...