Table of Contents
Advertisement
AV SURROUND RECEIVER
AVR-3311
Owner's Manual
Manuel de l'Utilisateur
Manual del usuario
v
Book 1
English Français Español
Book 2
Deutsch Italiano
Nederlands
Svenska
Version simplifiée
Simple
Versión sencilla
version
v
3
Version basique
Basic
Versión básica
version
v
12
Version avancée
Advanced
Versión avanzada
version
v
43
"Part names and functions"
Information
(vpage 95)
Informations
v
94
"Nomenclature et fonctions"
(vpage 95)
Información
"Nombres y funciones de las
piezas" (vpágina 95)
Advertisement
Table of Contents

Related Manuals for Denon AVR-3311


Summary of Contents for Denon AVR-3311
- Page 1 Version simplifiée Simple Versión sencilla version Version basique Basic Versión básica version AV SURROUND RECEIVER Version avancée AVR-3311 Advanced Versión avanzada version Owner’s Manual Manuel de l’Utilisateur Manual del usuario “Part names and functions” Information (vpage 95) Informations “Nomenclature et fonctions“...
- Page 2 ENGLISH DEUTSCH FRANCAIS ITALIANO ESPAÑOL NEDERLANDS SVENSKA IMPOTANT SAFETY SAFETY PRECAUTIONS CAUTION: INSTRUCTIONS To completely disconnect this product from the mains, disconnect CAUTION the plug from the wall socket outlet. Read these instructions. The mains plug is used to completely interrupt the power supply to RISK OF ELECTRIC SHOCK Keep these instructions.
- Page 3 SVENSKA NEDERLANDS ESPAÑOL ITALIANO FRANCAIS DEUTSCH ENGLISH NOTE ON USE / HINWEISE ZUM GEBRAUCH / OBSERVATIONS RELATIVES A L’UTILISATION / NOTE SULL’USO / NOTAS SOBRE EL USO / ALVORENS TE GEBRUIKEN / OBSERVERA ANGÅENDE ANVÄNDNINGEN WARNINGS WARNHINWEISE AVERTISSEMENTS AVVERTENZE ADVERTENCIAS WAARSCHUWINGEN VARNINGAR •...
- Page 4 Batterier får absolut inte kastas i soporna eller brännas. Kassera dem enligt lokala bestämmelser • Plaats geen andere apparatuur op het toestel. för kemiskt avfall. DENON EUROPE z För att tillförsäkra god värmeavledning får utrustningen Denna apparat och de tillbehör som levereras med den uppfyller gällande WEEE-direktiv, med Division of D&M Germany GmbH...
-
Page 5: Table Of Contents
ENGLISH Getting started Thank you for purchasing this DENON product. To ensure proper operation, please read these owner’s manual carefully before using the Accessories product. After reading them, be sure to keep them for future reference. Check that the following parts are supplied with the product. -
Page 6: Features
ENGLISH Features Cautions on handling • Before turning the power switch on Fully Discrete, identical quality and power for all Audyssey DSX™ Check once again that all connections are correct and that there are 7 channels (165 W x 7ch) This unit is equipped with an Audyssey DSX decoder. -
Page 7: Simple Version (Simple Setup Guide)
ENGLISH Simple version (Simple setup guide) Simple version Here, we explain the entire setup procedure, from unboxing the unit to using it in a home theater. The “Simple version” section provides the speaker installation, connection, and setup methods for the 7.1-channel system with surround back speakers. - Page 8 ENGLISH Install Connect This unit can perform 2.0/2.1 to 7.1-channel surround playback. NOTE Speakers • Connect so that the speaker cable core wires This page provides the speaker installation procedure for the do not protrude from the speaker terminal. 7.1-channel playback using surround back speakers as an example. Carefully check the left (L) and right (R) The protection circuit may be activated if the core wires touch the rear panel or if the + and –...
- Page 9 ENGLISH Connect Blu-ray Disc player and TV Use only an HDMI (High Definition Multimedia Interface) cable that bears the HDMI logo (a genuine HDMI product). Using a cable without the HDMI logo (a non-genuine HDMI product) may result in abnormal playback. When outputting Deep Color or 1080p, etc., we recommend you use a “High Speed HDMI cable”...
- Page 10 ENGLISH Turn on power Set up speakers (Audyssey ® Auto Setup) Turn on the TV and subwoofer power. The acoustic characteristics of the connected speakers and listening room are measured and the optimum settings are made automatically. This is called “Audyssey Auto Setup”.
-
Page 11: Setup Microphone
ENGLISH Set up speakers (Audyssey ® Auto Setup) About setup microphone placement Prepare the setup microphone Set up the remote control unit Mount the setup microphone on a tripod or stand n Set up the zone mode • Measurements are performed by placing the setup microphone and place it in the main listening position. - Page 12 ENGLISH Set up speakers (Audyssey ® Auto Setup) STEP 1 STEP 2 STEP 3 Preparation Speaker Detection Measurement • In STEP 2, you will perform measurements at the • In STEP 3, you will perform measurements at NOTE Connect the setup microphone to the main listening position.
- Page 13 ENGLISH Set up speakers (Audyssey ® Auto Setup) STEP 4 STEP 5 STEP 6 Finish Calculation Check Store Unplug the setup microphone from ENTER to select the item you want Select “Store” and then press On the screen, use STEP3 the unit’s SETUP MIC jack.
-
Page 14: Error Messages
ENGLISH Error messages Parameter Check An error message is displayed if Audyssey ® Auto Setup could not be completed due to speaker placement, the measurement environment, etc. This function enables you to check the measurement results and If this happens, check the relevant items, be sure to take the necessary measures, then perform Audyssey Auto Setup over again. equalizer characteristics after Audyssey Auto Setup. - Page 15 ENGLISH Play back disc When power is switched to standby Press to switch an input source POWER OFF Press for a player used for playback. GPower indicator status in standby modeH Play the component connected to • Normal standby : Off this unit.
-
Page 16: Basic Version
ENGLISH Basic version Basic version Here, we explain the connections and basic operation methods for this unit. F Connections vpage 13 F Playback (Basic operation) vpage 24 F Selecting a listening mode (Surround mode) vpage 40 n Refer to the pages indicated below for information on connecting and playing back the various media and external devices. -
Page 17: Connections
ENGLISH Connections Important information • Make connections as follows before using this unit. Select an appropriate connection type GFlow of video signals for ZONE2H according to the components to be connected. This unit • You may need to make some settings on this unit depending on the connection method. Refer to Monitor Video device each description for more information. -
Page 18: Connecting An Hdmi-Compatible Device
ENGLISH About HDMI cables Important information Examples of screen display • When a device supporting Deep Color signal transfer is connected, use a cable compatible “High Speed HDMI cable” or “High Speed HDMI cable with Ethernet”. • Menu screen • Status display screen •... - Page 19 ENGLISH Connecting an HDMI-compatible device Cables used for connections Audio and video cable (sold separately) • When this unit is connected to other devices with HDMI cables, connect this unit and TV also with an HDMI cable. HDMI cable • When connecting a device that supports Deep Color transmission, please use a “High Speed HDMI cable”...
-
Page 20: Connecting A
ENGLISH Connecting a TV Connecting a Blu-ray Disc player • Select the connector to use and connect the device. • You can enjoy video and audio from a Blu-ray Disc. • For video connections, see “Converting input video signals for output (Video conversion function)” •... -
Page 21: Connecting A Dvd Player
ENGLISH Connecting a DVD player Connecting a set-top box (Satellite tuner/cable TV) • You can enjoy video and audio from a DVD. • You can watch satellite or cable TV. • Select the connector to use and connect the device. •... -
Page 22: Connecting A Digital Video Recorder
ENGLISH Connecting a digital video recorder Connecting a digital camcorder • You can record video onto a Blu-ray Disc or DVD. • You can enjoy video and audio from a digital camcorder. • Select the connector to use and connect the device. •... -
Page 23: Connecting A Control Dock For Ipod
DENON control dock for iPod. • When you want to playback a video file stored on an iPod, use a DENON control dock for iPod (ASD-1R and ASD-11R, sold separately) (vpage 19 “Connecting a control dock for iPod”). • With iPods, playback is possible with iPhone, iPod touch, classic and nano released from the 5th-generation of iPods. -
Page 24: Connecting An Antenna
ENGLISH Connecting an antenna Connecting a record player • Connect the FM antenna or AM loop antenna supplied with the unit n AM loop antenna assembly You can enjoy playing records. to enjoy listening to radio broadcasts. Cables used for connections Put the stand section •... -
Page 25: Connecting A Cd Player
ENGLISH Connecting a CD player Connecting a external power amplifier • You can enjoy CD sound. • You can use this unit as a pre-amp by connecting a commercially • Select the connector to use and connect the device. available power amp to the PRE OUT connector. Adding a power amp to each of the channels provides an even greater sound presence. -
Page 26: Connecting To A Home Network (Lan)
• The types of routers that can be used depend on the ISP. Contact an • You can update by downloading the latest firmware from the Device that connects to the broadband circuit and conducts ISP or a computer shop for details. DENON website. communications on the Internet. • DENON assumes... -
Page 27: Connecting An External Control Device
ENGLISH Connecting an external control device TRIGGER OUT jacks REMOTE CONTROL jacks When a device with TRIGGER IN jack is connected, the connected If this unit is installed in a location that is out of range of the signal device’s power on/standby can be controlled through linked operation from the remote control unit, you can still operate the unit and the to this unit. -
Page 28: Playback (Basic Operation)
ENGLISH Playback (Basic operation) Selecting the input source n Selecting the input source (vpage 24) • When using with an iPod connected directly to the USB port of this Press the input source select button n Adjusting the master volume (vpage 24) unit, select “... -
Page 29: Playing A Blu-Ray Disc Player/Dvd Player
Prepare for playback. more to select the display mode. Turn on the power of the TV, Use a DENON control dock for iPod to play back. subwoofer and player. You can play back both video, photo and audio. • There are two modes for displaying the contents recorded on the... - Page 30 Function When an iPod equipped with a video function is connected to a file to be played. MENU Amp menu DENON ASD-11R control dock for iPod, image files can be played Cursor operation / in the Browse mode. ENTER Press...
- Page 31 • Depending on the type of iPod and the software version, some functions may not operate. • Note that DENON will accept no responsibility whatsoever for any problems arising with the data on an iPod when using this unit in...
-
Page 32: Tuning In Radio Stations
ENGLISH Playing an iPod ® Tuning in radio stations iPod play function n Presetting radio stations (Manual preset) Listening to FM/AM broadcasts iPod PLAY is pressed when power of this unit is on standby and a Your favorite broadcast stations can be preset so that you can tune TUNER Press to switch the input... - Page 33 ENGLISH Tuning in radio stations n Listening to preset stations RDS (Radio Data System) PTY (Program Type) Press SHIFT to select the memory PTY identifies the type of RDS program. RDS (works only on the FM band) is a broadcasting service which block (A to G).
-
Page 34: Playing A Network Audio
• Your favorite radio stations can be registered by accessing an : Program Category : Traffic Information FM *** . ** MHz exclusive DENON Internet radio URL from a Web browser on : Radio Text PS Name n TP search CH A a computer. - Page 35 Bit rate Extension frequency new music. played as slide shows. The duration each picture is displayed can be Your new DENON AV receiver is very clever. You can create a free WMA (Windows set. 32/44.1/48 kHz 48 – 192 kbps .wma...
-
Page 36: Listening To Internet Radio
ENGLISH Playing a network audio n Presetting internet radio stations Listening to internet radio Preset Internet radio stations can be selected directly. • You can specify the duration of the on-screen display to be displayed Prepare for playback. (default: 30 sec) at menu “NET/USB” (vvpage 83. Press While the Internet radio station q Check the network environment, then turn on this unit’s to return to the original screen. -
Page 37: Playing Files Stored On A Computer
ENGLISH Playing a network audio n Registering internet radio stations as your Playing files stored on a computer Press to select “Remove”. favorites The selected Internet radio station is cleared. Use this procedure to play music files, image files or playlists. Favorites are listed at the top of the menu screen, so when a •... -
Page 38: Viewing Photographs On The Flickr Site
ENGLISH Playing a network audio n Media server operation Viewing photographs on the Flickr site • To play back compressed audio with extended bass or treble Operation buttons Function You can view photographs shared by particular users, or all of the reproduction, we recommend playback in RESTORER mode CH +, –... - Page 39 ENGLISH Playing a network audio Listening to Napster Press to select the folder, and then press ENTER Press to select the folder, and then press ENTER Prepare for playback. Favorites Displays the favorite photographs of the specified q Check the network environment, then turn on this unit’s Interestingness Displays photographs that are popular from the user.
- Page 40 ENGLISH Playing a network audio n Searching from Napster menu n Registering tracks in my Napster library n Napster operation Operation buttons Function to select search item or Press while the track you wish CH +, – Preset channel selection folder, then press ENTER to register is playing.
- Page 41 ENGLISH Playing a network audio How to listen to Last.fm on this unit After inputting the username and password, select Menu items on playback screen. “OK”, then press ENTER Last.fm radio is not available in all countries. Please check www.last. If the username and password match, the top menu for Last.
-
Page 42: Playing A Usb Memory Device
ENGLISH Playing a network audio Playing a USB memory device n Last.fm operation Playing back music or still picture (JPEG) files recorded on a USB GCompatible formatsH memory device. Operation buttons Function USB memory devices MENU Amp menu Important information WMA (Windows Media Audio) Cursor operation / MP3 (MPEG-1 Audio Layer-3) -
Page 43: Playing Files Stored On Usb Memory
Return Internet Radio NOTE Playback / Pause Media Server Auto search (cue) • Note that DENON will accept no responsibility whatsoever for any Flickr Last.fm Pause problems arising with the data on a USB memory device when using Napster this unit in conjunction with the USB memory device. -
Page 44: Selecting A Listening Mode (Surround Mode)
The surround effects suitable for the source type or according to your surround mode is switched. Surround surround playback liking can be selected from the DENON original sound mode and is used Which decoder can be selected depends on (vpage 42) for playback. - Page 45 ENGLISH Standard playback Displaying the currently playing surround mode z1 This is displayed when the input signal Select the mode corresponding to the playback is “DTS-ES Matrix 6.1” and this unit’s contents with the menu “Surround Parameter” – Input signal Surround mode Display “AFDM”...
-
Page 46: Denon Original Surround Playback
NOTE remote control unit can be obtained. When the input signal is Dolby TrueHD, Dolby Digital Plus, DTS-HD or DTS Express, you cannot select DENON original surround mode. -
Page 47: Advanced Version
ENGLISH Advanced version Advanced version Here, we explain functions and operations that let you make better use of this unit. F Speaker installation/connection (Advanced connection) vpage 44 F Playback (Advanced operation) vpage 50 F Playback in ZONE2/ZONE3 (Separate room) vpage 57 F How to make detailed settings vpage 59 F Operating the connected devices by remote control unit vpage 87... -
Page 48: Speaker Installation/Connection (Advanced Connection)
ENGLISH Speaker installation/connection (Advanced connection) When 7.1ch (Surround back / Front height / Front This section provides the installation, connection, Install and setup methods of speaker systems other wide speaker) installed than the 7.1-channel system (with surround back speakers). This unit is compatible with Audyssey DSX™ (vpage 106) and Dolby Pro Logic gz (vpage 107), which offers an even wider and For the speaker installation, connection, and setup deeper surround sensation. -
Page 49: Connect
ENGLISH Install Connect When 5.1ch installed • For the method of connecting the 7.1-channel system with surround back speakers, see page 4. • For the method of connecting the TV, see page 5. 7.1-channel (Surround back / Front height / Front wide speaker) connection For 7.1-channel (Surround back / Front height / Front wide speaker) playback, set “Set up “Amp Assign””... - Page 50 ENGLISH Connect 6.1-channel (Surround back speaker) connection 5.1-channel connection If using only one surround back speaker (with a 6.1-channel connection), connect to the “L” side of the For 5.1-channel playback, set “Set up “Amp Assign”” (vpage 49) to “Normal”. SURR. BACK/AMP ASSIGN terminal. For speaker settings in this case, see “When 6.1ch (Surround back speaker) installed”...
- Page 51 ENGLISH Connect Front A/B connection 2.1-channel connection Bi-Amp connection The second set of front speakers can be connected to the SURR. A bi-amp connection is to connect separate amplifiers to the tweeter BACK/AMP ASSIGN terminals. terminals and woofer terminals of speakers compatible with the In this case, set “Set up “Amp Assign””...
-
Page 52: Set Up Speakers
ENGLISH Connect Set up speakers around items indicate the settings. 5.1-channel + 2.1-channel connection This section provides the setup methods of speaker systems other than the 7.1-channel system If front speakers for 2-channel playback are connected to the SURR. BACK/AMP ASSIGN terminals, both (with surround back speakers). - Page 53 ENGLISH Set up speakers NOTE Front B Set for connecting the second set GWhen “Front” is selected in step 6H Set up “Amp Assign” After performing Audyssey ® Auto Setup, do not of front speakers to the SURR. Press to select a front speaker. change the speaker connections or subwoofer BACK/AMP ASSIGN terminals.
-
Page 54: Playback (Advanced Operation)
ENGLISH Playback (Advanced operation) Convenient functions Set the HDMI output connector corresponding with Playback (Basic operation) (vpage 24) the HDMI control function. Set “HDMI Control” (vpage 78) to “ON“. HDMI control function Selecting a listening mode (Surround mode) Turn the power on for all the equipment connected (vpage 40) When you make an HDMI connection with a TV or player compatible by HDMI cable. -
Page 55: Sleep Timer Function
ENGLISH Convenient functions Sleep timer function Adjusting the volume of the speakers n Adjusting the volume of groups of speakers (Fader function) The power automatically goes into standby once the set time has You can adjust the channel level either according to the playback This function lets you adjust (fade) the sound all at once from the elapsed. - Page 56 ENGLISH Convenient functions Quick select function ZONE2/3 / REC SELECT SOURCE SELECT • The Quick Select function can be set separately for the different • To cancel, press , then turn All of the settings in step 1 can be memorized together. By memorizing zones (vpage 58 “Quick select function”).
- Page 57 While in the party mode, press While in the party mode, press The same network audio (Internet radio, Media server or iPod DIRECT) can be played on multiple DENON products equipped with the Party PARTY PARTY Mode function and connected in a network.
- Page 58 ENGLISH Convenient functions Operating a wireless LAN-compatible mobile terminal to play n Playing contents on a mobile terminal device music and still pictures Wireless LAN- Mobile terminal device This unit compatible router • Perform this procedure using a wireless LAN-compatible mobile terminal conforming to the DLNA (Digital Living Network Alliance) standard.
-
Page 59: Web Control Function
Tools Help We recommend registering the setting screens for the different INDEX zones in the browser’s favorites so as not to accidentally perform DENON Web Controller menu operations for zones you do not intend to operate. AVR-3311 MAIN ZONE Status -50.0dB... -
Page 60: Various Memory Functions
ENGLISH Convenient functions GExample 2H Setup menu screen GExample 4H PDA menu screen GExample 6H Dedicated iPod Touch screen SOURCE SELECT ReLoad Zone Power DENON Web Controller AVR-3311 SETUP MENU Source SAT/CBL Source Input Assign SOURCE SELECT MAIN ZONE Control... -
Page 61: Playback In Zone2/Zone3 (Separate Room)
ENGLISH Playback in ZONE2/ZONE3 (Separate room) w Zone playback by audio output (PRE OUT) • You can operate this unit so as to enjoy audio in a room (ZONE2, ZONE3) other than the MAIN ZONE (room where the unit is located). •... -
Page 62: Playback
ENGLISH Playback Quick select function Adjusting the volume It is also possible to save three settings for ZONE2. Switch ZONE SELECT “ZONE2” or “ZONE3”. VOL df n Saving the settings to adjust the volume. The remote control unit switches to the GAdjustable rangeH –... -
Page 63: How To Make Detailed Settings
ENGLISH How to make detailed settings Menu map Setting items Detailed items Description Page 1. Audio/Video Adjust Audio Adjust Adjuts various audio parameters. For menu operation, connect a TV to this unit and Picture Adjust Adjusts the picture quality. display the menu on the TV screen. For menu AUDIO/VIDEO ADJUST operations, see the following page. -
Page 64: Examples Of Menu And Front Display
ENGLISH Examples of menu and front display Below we describe typical examples of displays on the TV screen and on the set’s display window. Menu display Front display Description Top menu display q The menu items are displayed here. MENU w The selected line is displayed here. -
Page 65: Inputting Characters
ENTER • Use to input (Normal screen) w Guide for operation buttons Example: For changing the input source from “DVD” to “DENON” characters. q Place the cursor at “V”. • Operating with the remote control unit. Using the number buttons Using the keyboard •... -
Page 66: Keyboard Screen
0123456789 Repeat steps 2 and 3 to change the name then press ! “ # $ % & ’ ( ) z + , ; < = > Edit DENON:[AVR-3311] ENTER GLower case characters/Numbers/SymbolsH to register it. abcdefghijklmnopqrstuvwxyz 0123456789 ˜... -
Page 67: Input Setup
ENGLISH Items that can be set with the Input Setup procedure Input Setup Auto Preset (vpage 64) Preset Skip (vpage 64) Preset Name (vpage 64) Perform settings related to input source playback. INPUT SETUP INPUT SETUP INPUT SETUP • You do not have to change the settings to use the unit. Make settings when needed. AUTO PRESET PRESET SKIP [1/7]... -
Page 68: Auto Preset
ENGLISH Input Setup Auto Preset Input Assign Use the auto preset function to program radio stations. Examples of input assign menu screen displays Setting items Setting details Start If an FM station cannot be preset automatically, select the desired q Input Source Start the auto preset INPUT SETUP station by tuning it in manually, then preset it manually. - Page 69 ENGLISH Input Setup Setting items Setting details Setting items Setting details HDMI HDMI 1 / HDMI 2 / HDMI 3 / HDMI 4 / HDMI 5 / HDMI 6 Component 1-RCA / 2-RCA (Component video) Set this to change the HDMI None : Do not assign an HDMI input connector to the selected input Set this to change the None : Do not assign a component video input connector to the selected...
- Page 70 ENGLISH Input Setup Setting items Setting details Setting items Setting details Video Mode Auto : Process video automatically based on the HDMI content Resolution Auto : The number of pixels the TV connected to the HDMI output Make settings for video information.
-
Page 71: Input Mode
ENGLISH Input Setup Input Mode Source Level Default settings are underlined. Default settings are underlined. The input modes available for selection may vary depending on the input source. • This function corrects the playback level of the selected input source’s audio input. •... -
Page 72: Audio/Video Adjust
ENGLISH Input Setup Audio/Video Adjust n Input source : “NET/USB” The sound being played in the surround mode can be adjusted to your liking. The items (parameters) that can be adjusted depend on the signal being input and the currently set Setting items Setting details surround mode. -
Page 73: Audio Adjust
ENGLISH Audio/Video Adjust Audio Adjust Setting items Setting details Panorama ON : Set. Assign front L/R signal also OFF : Do not set. n Surround Parameter Default settings are underlined. to surround channels for Adjust surround sound parameters. It may not be possible to set this item depending on the input wider sound. - Page 74 OFF : Sound is not output from the surround back speakers, front wide optimum surround mode • To play in the DOLBY DIGITAL EX mode, set “AFDM” to “OFF” and DENON original surround speakers, and front height speakers. automatically. “Surround Parameter” – “S.Back” to “MTRX ON”.
- Page 75 ENGLISH Audio/Video Adjust Setting items Setting details Setting items Setting details Dynamic EQ ® Bass –6dB – +6dB ON : Use Dynamic EQ. Adjust low frequency range Solve the problem of OFF : Do not use Dynamic EQ. “Bass” can be set when “Tone Control” is set to “ON”. (bass).
- Page 76 ENGLISH Audio/Video Adjust n A-DSX Soundstage Setting items Setting details Default settings are underlined. Dynamic Volume ® Midnight : Most adjustment to softest and loudest sounds. Adjust Audyssey DSX™ setting and sound stage parameters. Solve the problem of large Evening : Medium adjustment to loudest and softest sound. Setting items Setting details variations in volume level...
- Page 77 ENGLISH Audio/Video Adjust n Manual EQ n RESTORER Default settings are underlined. Use the graphic equalizer to adjust the tone of each speaker. Compressed audio formats such as MP3, WMA (Windows Media Audio) and MPEG-4 AAC reduce “Manual EQ” can be set when “MultEQ XT” setting (vpage 71) is “Manual” the amount of data by eliminating signal components that are hard for the human ear to hear.
-
Page 78: Manual Setup
ENGLISH Audio/Video Adjust Manual Setup Picture Adjust Set when changing Audyssey ® Auto Setup settings, or when changing the audio, video, display Default settings are underlined. or other settings. • This item can be set when the input source is SAT/CBL GAME V.AUX... -
Page 79: Speaker Setup
ENGLISH Manual Setup Speaker Setup Setting items Setting details Default settings are underlined. Speaker Config. Subwoofer : Set the presence of a subwoofer. Perform when setting the speakers manually or when changing settings made in Audyssey Auto Setup. (Continued) • Yes : Use a subwoofer. •... - Page 80 ENGLISH Manual Setup Setting items Setting details Setting items Setting details Speaker Config. F.Wide : Set the presence and size of the front wide speakers. Distance (Continued) • Large : Use a large speaker that can adequately play back low (Continued) •...
- Page 81 ENGLISH Manual Setup HDMI Setup Setting items Setting details Default settings are underlined. Crossover Frequency Crossover : Set the crossover frequency. Set the maximum frequency • 40Hz / 60Hz / 80Hz / 90Hz / 100Hz / 110Hz / 120Hz / 150Hz / 200Hz / Make settings for HDMI video/audio output.
- Page 82 ENGLISH Manual Setup Audio Setup Setting items Setting details Default settings are underlined. HDMI Control ON : Use HDMI control function. You can link operations with OFF : Do not use HDMI control function. Make settings for audio playback. devices connected to HDMI Setting items Setting details and compatible with HDMI...
-
Page 83: Network Setup
ENGLISH Manual Setup Network Setup Setting items Setting details Default settings are underlined. 2ch Direct/Stereo Dist.FL / Dist.FR : Select the speaker. (Continued) • 0.00m – 18.00m (3.60m) / 0.0ft – 60.0ft (12.0ft) : Set the distance to Make network settings. the speaker. - Page 84 Up to 63 characters can be input. The default Friendly IP Address 192.168.100.19 Subnet Mask [255.255.255.000] Default gateway [000.000.000.000] Name on first use is “DENON:[AVR-3311]”. Primary DNS [000.000.000.000] Secondary DNS [000.000.000.000] • For character input, see page 61. Exit...
-
Page 85: Zone Setup
Hidden : Do not display Last.fm item on the menu. • You can set to the upper limit set with “Volume Limit” (vpage 82) . display Last.fm item on the Network Status : Displays up to a maximum of 10 DENON products menu. connected on the same network. - Page 86 ENGLISH Manual Setup Option Setup Setting items Setting details Default settings are underlined. Volume Level Variable : Volume adjustment is enabled by main unit and remote control Set the volume output level. unit. Make various other settings. –40dB (41) : Fix volume at –40 dB. Set when adjusting volume by external Setting items Setting details amplifier.
- Page 87 (Continued) “TUNER”. • Picture : Set the background to a picture (DENON logo). • Always : Show display continuously. • Black : Set the background to black. • 30sec : Show display for 30 seconds after operation.
- Page 88 Maintenance Mode NOTE Upgrade Status : Display a list of the additional functions provided by the Use when receiving Only use this function if so instructed by a DENON serviceperson or upgrade. maintenance from a DENON installer. service engineer or custom See the DENON website for details about updates.
- Page 89 • Information regarding the “Firmware Update” function and “Add New Feature” will be announced on the DENON web site each time related plans are defined. • When usable new firmware is released with “Firmware Update” or “Add New Feature”, a notification message is displayed on the menu screen.
-
Page 90: Information
ENGLISH Information Items Setting details Auto Surround Mode Analog/PCM 2ch / Digital 2ch / Digital 5.1ch / Multi ch Show information about receiver settings, input signals, etc. Show information about auto surround mode Items Setting details settings. n MAIN ZONE Status Quick Select Quick Select 1 / Quick Select 2 / Quick Select 3 / ZONE2 Quick Select 1 /... -
Page 91: Operating The Connected Devices By Remote Control Unit
ENGLISH Operating the connected devices by remote control unit Operating the main remote control Operate this unit or the device whose input source is Press the input source select button (vpage 24). switched. • The input source for the zone selected in step 1 is switched. unit •... - Page 92 Category : DVD Press ZONE SELECT to switch the zone mode to Select the device category Brand : Denon Code [ 1/ 3] : 30490 “MAIN”. Setup Remote 1. Press [INPUT SOURCE] button. Pressing ui, select the first The “MAIN” indicator lights.
- Page 93 Either of the screens below is displayed. MANUAL SETUP OPTION SETUP REMOTE PRESET CODES Category : DVD Brand : Denon MANUAL SETUP OPTION SETUP Code [ 1/ 3] : 30490 REMOTE PRESET CODES Setup Remote 1. Press [INPUT SOURCE] button.
- Page 94 ENGLISH Operating the main remote control unit Operating components n CD player / CD recorder operation n TV operation Operation buttons Function Operation buttons Function The supplied remote control unit can control a component other than ZONE/DEVICE ON ZONE/DEVICE ON Power onz Power onz this unit.
-
Page 95: Operating The Sub Remote Control Unit
ENGLISH Operating AV equipment Operating the main remote control unit Operating the sub remote control Specifying the zone used with the remote Use this procedure to select the zone to be operated by the sub unit remote control unit. control unit •... -
Page 96: Ipod Operation
ENGLISH Operating the sub remote control unit n iPod operation n NET/USB operation Operate this unit or the device whose input source is switched. Operation buttons Function Operation buttons Function Zone selection Zone selection • For details, refer to the operating instructions for each device. ZONE SELECT Zone operation mode selection ZONE SELECT... - Page 97 ENGLISH ENGLISH Operating the sub remote control unit n Tuner (FM/AM) operation Switching the multi-zone input source to Setting the zone for which the sub remote the same input source as used in the MAIN control unit is used Operation buttons Function ZONE (Zone select lock mode)
-
Page 98: Information
ENGLISH Operating the sub remote control unit Information Setting the remote ID When using multiple DENON AV receivers in the same room, make Information this setting so that no AV receiver other than the desired one operates. MENU While pressing , press Here, we list various information related to this unit. -
Page 99: Part Names And Functions
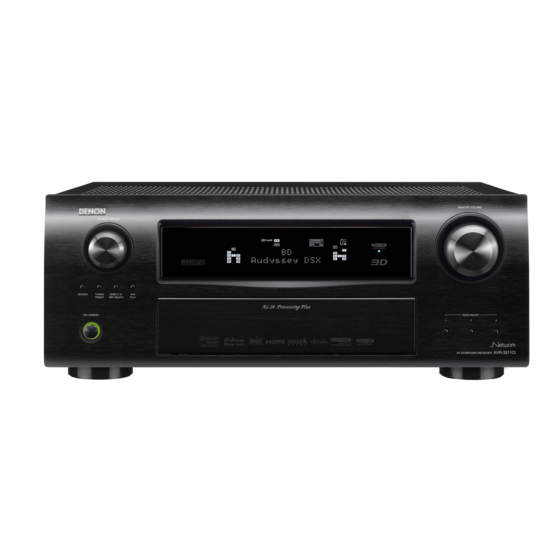
ENGLISH Part names and functions GWith the door openH Front panel For buttons not explained here, see the page indicated in parentheses ( ). Headphones jack ENTER button ····································· (60 – 63) When the headphones are plugged into this RETURN button ·································· (60 – 63) jack, audio will no longer be output from the V.AUX INPUT connectors ··························... -
Page 100: Display
ENGLISH Display r t y Input signal indicators PARTY indicators AL24 indicator These light during party mode (vpage 53 “Party Input signal channel indicators This lights when AL24 Processing Plus mode function”). These light when digital signals are input. (vpage 106) is activated. •... -
Page 101: Rear Panel
ENGLISH Rear panel See the page indicated in parentheses ( ). Q5 Q4 Q 3 RS-232C connector ·································································· (23) COMPONENT VIDEO connectors ····································· (16, 17) NOTE FM/AM antenna terminals ····················································· (20) Digital audio connectors ··················································(16 – 18) Do not touch the inner pins of the connectors on the rear panel. Electrostatic discharge may cause permanent damage to the unit. -
Page 102: Remote Control Unit
ENGLISH Remote control unit For buttons not explained here, see the page indicated in parentheses ( ). Main remote control unit (RC-1146) ZONE/DEVICE power buttons ············ (58, 87) Remote control signal transmitter ··········· (99) Zone mode indicators ·························· (58, 87) Power buttons (POWER ON / OFF) ······... -
Page 103: Sub Remote Control Unit (Rc-1148)
ENGLISH Remote control unit Sub remote control unit (RC-1148) Inserting the batteries NOTE q Slide the rear lid in the direction of the arrow Zone indicators ··········································· (91) and remove it. • Insert the specified batteries in the remote control QUICK SELECT buttons ·······················... -
Page 104: Other Information
ENGLISH Other information Trademark information “Made for iPod” and “Made for n Trademark information (vpage 100) iPhone” mean that an electronic This product uses the following technologies: n Surround (vpage 101) accessory has been designed to connect specifically iPod, Manufactured under license from n Relationship between video signals and monitor iPhone, respectively, and has been Dolby Laboratories. -
Page 105: Surround
ENGLISH Surround This unit is equipped with a digital signal processing circuit that lets you play program sources in the surround mode to achieve the same sense of presence as in a movie theater. Surround modes and parameters This table shows the speakers that can be used in each surround mode and the surround parameters adjustable in each surround mode. Symbols in the table S This indicates the audio output channels or surround parameters that can be set. - Page 106 ENGLISH Surround Surround Parameter (vpage 69) Audyssey Settings z24 (vpage 71) NEO:6 Music PRO LOGIC g/gx Music mode only Audyssey mode only Tone RESTORER DSX™ AFDM F.Height Height Gain Surround mode (vpage 40) S.Back Speaker Subwoofer Dynamic Dynamic EQ ® z24 z25 (vpage 70) MultEQ ®...
- Page 107 ENGLISH Surround n Types of input signals, and corresponding surround modes This table shows the input signal that can be played in each surround mode. Check the audio signal of the input source then select the surround mode. Symbols in the table F This indicates the default surround mode.
- Page 108 ENGLISH Surround Input signal types and formats DTS-HD DOLBY DOLBY DIGITAL DTS-HD DOLBY Surround mode (vpage 40) NOTE DTS-HD DTS ES DTS ES DOLBY DOLBY DOLBY DOLBY ANALOG LINEAR PCM LINEAR PCM High DOLBY DOLBY DIGITAL EX Master DSCRT MTRX DTS 96/24 DIGITAL EX DIGITAL DIGITAL...
-
Page 109: Relationship Between Video Signals And Monitor Output
ENGLISH Relationship between video signals and monitor output MAIN ZONE MONITOR OUT Input Signals Output Signals Menu displayed Video Convert HDMI COMPONENT S-VIDEO VIDEO HDMI COMPONENT VIDEO HDMI COMPONENT VIDEO A z2 Wall paper Only the menu is A z2 displayed A (VIDEO) z3 VIDEO... -
Page 110: Explanation Of Terms
DLNA and DLNA CERTIFIED are trademarks and/ DENON has further developed its proprietary AL24 sound components for a seamless and enveloping Audyssey Dynamic Surround Expansion is a scalable or service marks of Digital Living Network Alliance. - Page 111 ENGLISH Explanation of terms Dolby TrueHD Downmix bit rate performance provides high quality sound. compression standard. It compresses the data Dolby TrueHD is a high definition audio technology This function converts the number of channels of This format is fully compatible with conventional volume to about one eleventh its original size while developed by Dolby Laboratories, using lossless surround audio to less number of channels and...
-
Page 112: Troubleshooting
• This unit amplifier circuit has failed. Turn off the power and please – new licenses to copy, display and/or play Secure power, the power contact the DENON service adviser. Content. Revocation does not alter the WM-DRM indicator is blinking Software’s ability to play unprotected content. - Page 113 ENGLISH GAudioH GHDMIH Symptom Cause/Solution Page Symptom Cause/Solution Page Audio is not output. • Check the connections for all devices. 5, 14 – 23 No audio is • Check the connection of the HDMI connectors. • Check the speaker connections. 5, 45 –...
- Page 114 – For some radio • Station is congested or not currently broadcasting. Wait a while – This is not a malfunction. DENON does not guarantee that all USB stations, “Server before trying again. memory devices will operate or receive power.
-
Page 115: Resetting The Microprocessor
ENGLISH Resetting the microprocessor Perform this procedure if the display is abnormal or if operations cannot be performed. When the microprocessor is reset, all the settings are reset to their default values. ON/STANDBY STANDARD DSP SIMULATION ON/STANDBY Turn off the power using ON/STANDBY STANDARD Press... -
Page 116: Specifications
ENGLISH Specifications n Audio section n Tuner section [FM] [AM] • Power amplifier (Note: μV at 75 Ω, 0 dBf = 1 x 10 –15 Rated output: Front: Receiving Range: 87.5 MHz – 108.0 MHz 522 kHz – 1611 kHz 125 W + 125 W (8 Ω, 20 Hz –... - Page 117 Front wide speaker ······································ 44, 45 Decode Mode ···················································· 67 MPEG ······························································· 107 F.Wide ································································ 76 Deep Color ················································· 14, 106 MultEQ XT ·························································· 71 Delay Time ························································· 69 Mute Level ························································· 82 DENON original surround mode ························· 42 GUI ····································································· 82...
- Page 118 ENGLISH Power On Level ················································· 82 Speaker cable ······················································· 5 Preset codes ················································ 83, 87 Speaker Config. ·················································· 75 Napster ························································· 31, 35 ZONE2 ·················································· 57, 96, 108 Preset Name ······················································ 64 Speaker impedance ······································ 4, 107 Network Setup ··················································· 79 ZONE3 ··················································...
- Page 119 D&M Holdings Inc. Printed in China 5411 10430 108D...