Table of Contents
Advertisement
Quick Links
User Guide
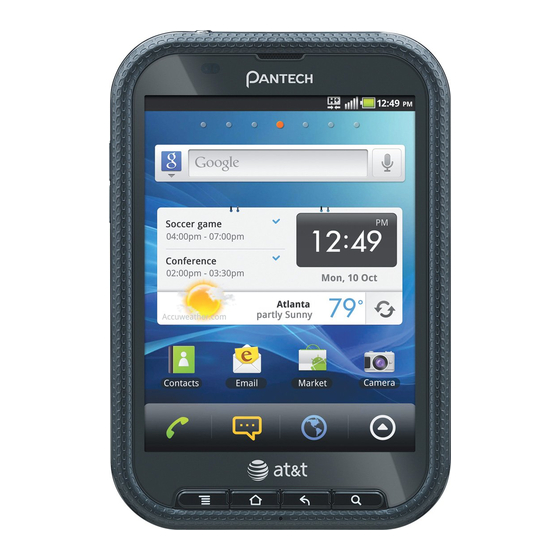
Thank you for choosing the Pantech Pocket, our latest smartphone.
The Pantech Pocket has many features designed to enhance your
mobile experience. With its unique, stylish design you will enjoy the
entire phone experience.
This User Guide contains important and useful information that will
maximize your familiarity with all that the Pantech phone has to offer.
Advertisement
Table of Contents

Related Manuals for Pantech Pocket


Summary of Contents for Pantech Pocket
-
Page 1: User Guide
The Pantech Pocket has many features designed to enhance your mobile experience. With its unique, stylish design you will enjoy the entire phone experience. This User Guide contains important and useful information that will maximize your familiarity with all that the Pantech phone has to offer. - Page 2 Service provided by AT&T Mobility. Portions © 2011 AT&T Intellectual Property. All rights reserved. AT&T, the AT&T logo and all other AT&T marks contained herein are trademarks of AT&T Intellectual Property and/or AT&T affiliated companies. All other marks contained herein are the property of their respective owners. Copyright © 2011. Pantech. All Rights Reserved.
-
Page 3: Important Safety Information
Important Safety Information Safety information Safety precautions The following list shows how to maintain your mobile phone Using a mobile phone while driving is prohibited. and precautions to take as you use the device. Using a mobile phone while driving can distract your Keep your mobile phone and its accessories out of the attention and cause an accident. -
Page 4: About The Battery Usage
Important Safety Information Switch off in dangerous areas Do not use an unauthorized charger or battery. Use the battery only for the device for which it is specified. Always switch your phone off in areas where explosive or dangerous materials (e.g. fuels or chemical products) are Use the battery with a charging device that has been located and obey relevant instructions or signals. -
Page 5: Basic Instructions
Important Safety Information Basic instructions The symbol “>” refers to the next action. For example, “Tap Settings > Language & keyboard” means that you should tap Settings first and Language & keyboard next. Useful tips "Applications" refers to the screen where all applications of To understand information contained in this user guide, please the phone appear. -
Page 6: Table Of Contents
Table of contents Important Safety Information ........3 Using Twitter ....................35 Using Facebook..................36 Safety information ..................3 S-Board .......................37 Safety precautions ..................3 Google Talk ....................38 About the battery usage ................4 Basic instructions ..................5 3. Entertainment 1. Getting Started Entertainment ..............41 Getting Started .............. - Page 7 Table of contents Using Places ....................66 Stocks ......................89 RSS Reader ....................91 Using Latitude ....................67 Searching with Google ................69 AT&T Services .....................92 News & Weather ..................69 10. Settings 7. Connectivity Settings ................94 Connectivity ..............72 Personalize ....................94 Using a Wi-Fi network ................72 Wireless &...
-
Page 8: Getting Started
Getting Started Inside the package Installing the SIM/USIM card Installing the microSD card Inserting the battery Charging the battery Turning the phone on/off Unlocking the screen Locking the screen Product overview Gripping the phone Activating the phone Using the touch screen Understanding the home screen Customizing the home screen Understanding the applications menu... -
Page 9: Getting Started
Do not bend, scratch or expose it Handset to moisture. Avoid static electricity. Battery Note Do not lose or transfer your SIM/USIM card to someone. Pantech is not responsible for damage due to theft or loss. MicroSD card Adapter Installing the microSD card USB cable... -
Page 10: Inserting The Battery
Getting Started Charging the battery applications to the SD card. You can expand the external memory up to 32GB. We recommend that you format the 1. Open the protective cover on the right side of the phone microSD card before using the phone. For more information, and connect the charger adapter to the USB connector of refer to page 77. -
Page 11: Turning The Phone On/Off
Getting Started 2. Disconnect the charger from 1. Press the LOCK/PWR key or B. the phone when the battery is 2. Drag one of the application icons fully charged. into the circle diagonally. The phone will open the corresponding application. 3. -
Page 12: Product Overview
Getting Started Product overview Touch mode Front view Rear view LOCK/POWER Earpiece Proximity Camera lens Sensor Speaker Rear internal BACK HOME MENU SEARCH Front internal MIC Function Function BACK Ends an application; returns to the previous SEARCH Searches through the Internet; searches menu applications, contacts and messages that are saved;... - Page 13 Getting Started Side view Ear jack VOLUME Micro USB connector / Charging Internal antenna area Using 3.5 Pi stereo earphones Function VOLUME Adjusts all sound volumes; adjusts the You can control your stereo earphone by inserting the stereo earphone's plug into Ear jack on the phone. ring mode Note The stereo earphones that support common call management features including making and answering calls have not been...
-
Page 14: Gripping The Phone
Getting Started Gripping the phone 5. Tap Connect to Wi-Fi network > Next if you want to establish a connection to the Wi-Fi network. Or tap Next if Hold the phone in the right position for a call as indicated you want to connect to the network later. -
Page 15: Creating A Google Account
Getting Started Creating a Google account Note Steps for connecting to Wi-Fi network and Google location service might not appear if you have already done with them. After finishing learning how to use the phone: Forgot your password for Google account? 1. -
Page 16: Using The Touch Screen
Getting Started Using the touch screen Run an application or perform functions with the touch screen. The following finger actions help you easily understand how to use the touch screen and the phone. Tap: Tap once to access a menu or an option. Double tap: Tap an item twice. -
Page 17: Understanding The Home Screen
Getting Started Understanding the home screen Home screen icons Icon Description Home screen is the starting point to use applications. Makes calls. Access shortcuts, widgets or Opens messaging. folders, and display a wallpaper according to your preference. Accesses the Internet. Opens Applications menu. - Page 18 Getting Started Screen indicators Icon Description Icon Description Strength of signal: The bar becomes bigger when the signal is strong. Connected to a Wi-Fi network Airplane mode is active. WiFi networks are available. There is no signal. An alarm has been set. A call is under way.
-
Page 19: Customizing The Home Screen
Adding a widget 1. Press and hold any empty space on the home screen. 2. Tap Widgets. 3. Tap either Pantech Widgets or Android Widgets. 4. Select and tap an item on the list to place the widget on the home screen. - Page 20 Note If you want to create a live wallpaper, tap Wallpapers > Live wallpapers, select a wallpaper and tap Set wallpaper. Remember Android Widgets Pantech Widgets that Maps consumes the battery relatively quickly. Even if you select Maps other than wallpapers, we recommend that you save Note Make sure to secure enough room on the screen for a widget.
-
Page 21: Understanding The Applications Menu
Getting Started Understanding the applications menu Deleting the user theme from the home screen 1. Press n in idle mode and tap Themes. When you download an application in the phone, it will be added to the applications menu. 2. Press n and tap Delete if your phone has the saved user themes. -
Page 22: Changing The Background Image
Getting Started Rearranging applications (User Defined Grid Adding an application shortcut to the home view only) screen 1. Tap on the bottom of the home screen. 1. Tap on the bottom of the home screen. 2. Press n and tap Rearrange. 2. -
Page 23: Communication
Communication Calling Messaging Emailing Using Gmail Using Twitter Using Facebook S-Board Google Talk... -
Page 24: Communication
Communication Calling Holding and unholding a call 1. Tap Hold during a call. The party will Making a call hear nothing. 2. Tap Unhold to resume the call. 1. Tap on the bottom of the home screen. 3. Tap End to finish the call. 2. -
Page 25: Making A Conference Call
Communication Making a conference call Checking missed calls 1. Tap on the bottom of the home 1. Tap on the bottom of the home screen. screen. 2. Tap Call log and check missed calls. 2. Enter the area code and the phone 3. -
Page 26: Messaging
Communication Saving a new contact Note The current call is held when you make a call with another party. Using Local Search 1. Tap on the bottom of the home screen. 2. Enter a telephone number. 1. Tap on the bottom of the home 3. - Page 27 Communication Entering a message using voice Creating a message using Swype 1. Tap Messaging from the applications menu. 1. Tap Messaging from the applications menu. 2. Tap New Message and tap in the body of the text. 2. Tap New message and tap on the empty space. 3.
- Page 28 Communication Inserting smileys to a message 5. Tap Vibrate on keypress if you want the phone to vibrate when you press any key. 1. Tap Messaging from the applications menu. 6. Tap Enable tip indicator if you want to see the flashing 2.
- Page 29 Communication Attaching videos to a message Attaching calendars to a message 1. Tap Messaging from the applications menu. 1. Tap Messaging from the applications menu. 2. Tap New message. 2. Tap New message. 3. Enter the recipient’s number. 3. Enter the recipient’s number. 4.
-
Page 30: Viewing Received Messages
Communication Attaching locations Viewing received messages 1. Tap Messaging from the applications menu. 1. Tap Messaging from the applications menu. Unread messages will appear in bold fonts. 2. Tap New message. 2. Tap a sender you want to read the messages. The threaded 3. -
Page 31: Deleting A Message
Communication Copying messages Sending a message using a Quick Text 1. Tap Messaging from the applications menu. 1. Tap Messaging from the applications menu. 2. Tap a sender whose message you want to copy. 2. Press n. 3. Press and hold a message that you want to copy. 3. -
Page 32: Multimedia Message Settings
Communication Adding a template 4. Enter a signature and tap Save. 5. Tap Signature auto-append if you want to add your signature 1. Tap Messaging from the applications menu. automatically, and tap either Manual/off or Append on 2. Press n and tap Templates. Compose and tap OK. -
Page 33: Emailing
Communication Adding a new email account 2. Press n and tap More > Used space. You can see the number of the messages that you have saved. Used space 1. Tap Email from the applications menu. only appears as a menu option if you have saved messages. 2. -
Page 34: Using Gmail
1. Press and hold an empty space on the home screen. 2. In the Inbox screen, press n and tap Star. 2. Tap Widgets > Pantech Widgets > Email. 3. Select and tap the message and tap Done. An orange star 3. -
Page 35: Using Twitter
Communication Using Twitter Sending an email through Gmail 1. Tap Gmail from the applications menu. Joining in Twitter 2. Press n and tap Compose. 1. Tap Twitter from the applications 3. Enter the recipient’s email address, the subject and the menu. -
Page 36: Using Facebook
Communication Using Facebook 4. Tap 5. Tap the check box next to the recipient you want to send to Joining-in Facebook and tap OK. 6. Tap Tweet. 1. Tap Facebook from the applications menu. Searching Tweets or people 2. Tap I agree for the end user license agreement screen. 3. -
Page 37: S-Board
Communication S-Board Form a group with your friends through S-Board and share contents and logs that you have created using the phone. Sharing media 1. Tap S-Board from the applications menu. 2. Tap Contents on the top left of the screen. 3. -
Page 38: Google Talk
Communication Google Talk 6. Tap Send. Deleting members from a group Setting your status 1. Tap S-Board from the applications menu. 1. Tap Talk from the applications menu. 2. Press n and tap Delete members. 2. Tap on the top of the screen where your Gmail address is 3. -
Page 39: Managing Your Friends List
Communication 5. Press n and tap More > Insert smiley, and select and tap one. 6. Press n and tap End chat if you want to stop chatting with your friend. Managing your friends list 1. Tap Talk from the applications menu. 2. - Page 40 Entertainment Using the camera Using the camcorder Using the gallery Using the video player Using the music player Enjoying YouTube...
-
Page 41: Entertainment
Entertainment The phone offers a variety of tools for entertainment purposes. Icon Name Description Changes settings: Resolution, Using the camera Setting Shutter Sound, Focus mode, Store Take pictures with the built-in camera. They can be saved and location, Save picture to sent via multimedia messages. -
Page 42: Adjusting Brightness
Entertainment Note The screen moves to Applications if you do not touch the 2. Tap and select a special screen or run the camera for two minutes. function you want to add. Adding special functions 3. Tap Done. 1. Tap on the screen or press A while in the camera mode. 2. -
Page 43: Changing Settings
Entertainment Changing settings Cropping a picture 1. Tap on the screen or press n while 1. Tap on the screen and tap while in the camera mode or in the camera mode. tap Gallery in Applications. 2. Tap 2. Select and tap a picture to crop. 3. -
Page 44: Using The Camcorder
Entertainment Using the camcorder Recording videos 1. Tap Camcorder from the applications menu. The screen Record videos with the built-in camera. They can be saved and changes to landscape mode by default. sent via multimedia messages. 2. Tap on the screen and select options if necessary. Option buttons disappear in a few seconds. -
Page 45: Sharing Videos
Entertainment Recording videos for a certain period of time Changing settings 1. Tap on the screen while in the camcorder mode. 1. Tap on the screen while in the camcorder mode. 2. Tap and tap Duration. 2. Tap 3. Select and tap a time duration and tap Done. 3. -
Page 46: Using The Gallery
Entertainment Deleting videos Viewing pictures in a slideshow 1. Tap Gallery from the applications 1. Tap on the screen and tap while in the camcorder mode menu. or tap Gallery in Applications. 2. Select and tap the pictures that 2. Tap on the first video on the screen. you want to view in a slideshow. -
Page 47: Using The Video Player
Entertainment Using the video player Icon Name Description Press if you want to move to the Viewing a video Fast- next file. Press and hold if you forward want to fast forward the current 1. Tap Video Player from the applications menu. video. -
Page 48: Using The Music Player
Entertainment Using the music player Viewing properties 1. Tap Video Player from the applications menu. Enjoy music on the phone. Make sure to insert a microSD card to transfer music to the phone and listen to it. 2. Tap All or Folder. 3. -
Page 49: Creating A New Playlist
Entertainment Creating a new playlist Icon Description 1. Tap Music Player from the applications menu. Pauses and plays a file 2. Tap Playlists and press n. 3. Tap New Playlist. Moves to the next/previous file Fast-forwards or rewinds the file if you press and 4. -
Page 50: Enjoying Youtube
4. Scroll up or down to view information. 1. Press and hold an empty space on the home screen. Sorting files by type 2. Tap Widgets > Pantech Widgets > Music. 1. Tap Music Player from the applications menu. 3. Select and tap a style. - Page 51 Entertainment 3. Select and tap a video to upload. 3. Select and tap a category. 4. Set a title for the video and tap Upload. 4. Flick the screen to scroll, select and tap a video to watch. Note To upload videos, you should login to YouTube. Watching videos by upload date Checking upload status 1.
-
Page 52: Personal Information
Personal Information Managing contacts Using the calendar Using a memo Using a voice memo... -
Page 53: Personal Information
Personal Information Editing contacts This chapter explains how to manage contacts and to communicate via memos. 1. Tap Contacts from the applications menu. Managing contacts 2. Press and hold a contact to edit, and tap Edit. Viewing contacts information 3. Edit information and tap Save. 1. -
Page 54: Deleting Contacts
Personal Information Adding to favorite contacts with phone numbers only. 4. Tap Sort list by and tap either First name or Last name. 1. Tap Contacts from the applications menu. 5. Tap View contact names as to display and tap either First name first or Last name first. -
Page 55: Using The Calendar
2. Tap a day in the calendar. (Weekly and Monthly view only) 2. Tap Widgets > Pantech Widgets > Contacts. 3. Press and hold the time that you 3. Select and tap a style. You can select Person or People. -
Page 56: Setting Reminders
Personal Information Setting reminders 1. Tap Calendar from the applications menu. 2. Press n and tap More > Settings. 3. Tap Set alerts & notifications and select and tap an option if you want to change the notification method. 4. Tap Select ringtone if you want to set a specific ringtone for calendar reminders, and select and tap one. -
Page 57: Using A Memo
2. Press n and tap Hand drawing 1. Press and hold an empty space on the home screen. memo. If there are saved memos, 2. Tap Widgets > Pantech Widgets > Memo. tap Create new > Hand drawing memo. 3. Select the text or drawing memos and tap Done. -
Page 58: Using A Voice Memo
Personal Information Listening to recorded voices 1. Tap Voice Memo from the applications menu. 2. Tap List. 3. Select and tap a memo to listen. 4. Tap Text momo Expanded view Using a voice memo Recording voice 1. Tap Voice Memo from the applications menu. Sharing a voice memo 2. -
Page 59: Documents
Documents Viewing documents Handling documents view... -
Page 60: Documents
Documents Viewing documents Icon Description Read documents that are stored in a variety of formats (pdf, Displays Document file name excel, ppt, word, and text) in the phone. Displays the current shown area Reading documents of the screen. Zooms in or out the current 1. -
Page 61: Handling Documents View
1. Press and hold an empty space on the home screen. applications menu. 2. Tap Widgets. 2. Open a document and tap on the 3. Tap Pantech Widgets. screen. 4. Tap Recent Documents. 3. Tap to move to the previous page. - Page 62 Accessing the Internet Shopping in the Android Market Using Google Maps Using Places Using Latitude Searching with Google News & Weather...
-
Page 63: Web
Changing the home page This chapter introduces useful applications that you can use through the Internet. Make sure to connect the phone to a 3G 1. Tap Web from the applications menu. or Wi-Fi network. 2. Press n and tap More. Accessing the Internet 3. -
Page 64: Setting Privacy Options
Viewing the thumbnail windows Viewing browser history 1. Tap Web from the applications 1. Tap Web from the applications menu. menu. 2. Press n and tap Bookmarks. 2. Press n and tap Windows. 3. Tap Most visited if you want to see web pages that you visit 3. -
Page 65: Shopping In The Android Market
Shopping in the Android Market Searching applications Download useful applications from the Android Market and use 1. Tap Market from the applications menu. them for your purposes. 2. Tap and enter the name or the keyword of the application that you want to install and tap Downloading applications 3. -
Page 66: Using Google Maps
Using Google Maps Note You can double-tap the screen to zoom in the map. Google Maps offers useful information based on your region. Searching directions Make sure to connect the phone to a Wi-Fi or 3G network. If 1. Tap Maps from the applications menu. you turn on the GPS function, you can obtain more accurate information. -
Page 67: Using Latitude
Viewing places at a glance 2. Tap Allow & Share if you allow your location to be informed to your friends. 1. Tap Places from the applications menu. The Latitude screen appears shortly where your personal information is 2. Select and tap a category. displayed. - Page 68 Accepting invitation from friends Adjusting privacy settings 1. Tap Latitude from the applications 1. Tap Latitude from the applications menu. menu. 2. Press n and tap Settings. 2. Tap 1 new sharing request on the 3. Tap Detect your location, Set your location or Do not top of the screen.
-
Page 69: Searching With Google
Searching with Google Managing search history 1. Tap Google Search from the applications menu. Searching for information with Google 2. Press n and tap Manage search history. 1. Tap Google Search, or press m in idle Note Make sure to tap Search history first if you want to use Manage mode. - Page 70 Reading news articles 1. Tap News & Weather from the applications menu. 2. Tap Top Stories on the top of the screen. 3. Select and tap an article if you want to see the full story. 4. Flick the screen to the left or right if you want to see articles by category.
-
Page 71: Connectivity
Connectivity Using a Wi-Fi network Connecting to a 3G network Using Bluetooth Making the phone a modem... -
Page 72: Connectivity
Connectivity Using the Easy Setting This chapter introduces useful tips on how to connect to the network available that enables applications of the phone to 1. Tap on the top of the home screen and drag it down, or run. press n in idle mode and tap Notifications. -
Page 73: Connecting To A 3G Network
Connectivity Using Bluetooth 3. Tap Wi-Fi to activate the technology. The phone scans networks automatically every six seconds. The newly found Bluetooth technology enables wireless connections between networks appear on the bottom of the list. electronic devices. Using this technology, you can send Adding a Wi-Fi network images, text, and business cards. -
Page 74: Making The Phone A Modem
Connectivity Making the phone a modem Using the Easy Setting 1. Tap on the top of the home screen and drag it down, or The phone provides other devices with an Internet connection press n in idle mode and tap Notifications. by becoming a Wi-Fi hotspot. - Page 75 Connectivity 5. Tap WPA2(AES), WPA(TKIP), WPA/WPA2 mixed, or Open for Security and enter the related items if you want to allow limited devices to access the Internet through the phone, and tap Save. Wi-Fi hotspot for Open Wi-Fi hotspot for WPA2(AES) Note The default password is an 8-digit random number.
-
Page 76: Storage
Storage Managing the memory card Connecting to a PC Using the phone as Mass Storage Transferring files through Media Transfer... -
Page 77: Storage
Storage Connecting to a PC The microSD card offers useful functions including mass storage and media file transfer. Synchronize files and exchange data with a computer using the PC data cable. Managing the memory card Selecting the USB mode You should manage the microSD card carefully. If you do not follow the steps described below to manage the memory card, 1. -
Page 78: Using The Phone As Mass Storage
Storage Transferring files through Media the USB mass storage mode. 4. Tap OK. Transfer Note Tap Turn off USB storage in the notifications screen if you want Transfer media files between your computer and the to turn off the function. microSD card in the phone. -
Page 79: Tools
Tools Clock Tools Clock Calculator Converter Sketch Pad Voice Dialer Voice Search Compass Navigation Weather Stocks RSS Reader AT&T Services... -
Page 80: Tools
Tools Deleting a city The phone offers a variety of tools that help you live a convenient life. 1. Tap Clock Tools from the applications menu. 2. Press n and tap Delete. Clock Tools 3. Select and tap the trash icon next to the city to delete. Clock Tools offers the current time in major cities and time 4. -
Page 81: Clock
Tools 4. Tap Lap > Split on the top of the screen and tap Start. This function is used when you want to measure the accumulated time. 5. Tap Reset to restart the stopwatch. Desk Clock Adding an alarm Changing an alarm 1. -
Page 82: Calculator
1. Press and hold an empty space on the home screen. 2. Enter a number and tap a mathematical sign you want to use. 2. Tap Widgets > Pantech Widgets > Integrated Clock. 3. Tap C to delete a number and hold 3. Select and tap a style. -
Page 83: Converter
Tools Saving a calculation 3. Tap on the box below the unit type and enter a value. 4. Select the original unit by flicking the wheel in the middle of 1. Tap Calculator from the applications menu. the screen. 2. Press n during a calculation. 5. - Page 84 Tools Editing a drawing 4. Select the size and color of the brush and the size of the eraser. 1. Tap Sketch Pad from the applications menu. 5. Press n and tap Background if you want to select as 2. Press and hold the drawing to edit, and tap Edit. background of the drawing.
-
Page 85: Voice Dialer
Tools Voice Dialer Compass Perform functions by speaking on the phone. Compass helps you find your location using the speed and the distance of your moving. Turn on the GPS function to use. Searching for a contact Setting the way point 1. - Page 86 Tools Creating I’mark 1. Tap Compass from the applications menu. Way point 2. Press n and tap Add to I’mark. Compass Moving speed 3. Enter the name, latitude, longitude, proximate range and Moving distance comment and tap Save. Moving time Direction Deleting I’mark Remaining...
-
Page 87: Navigation
Tools Navigation Setting the end point manually 1. Tap Maps from the application menu. Searching for the destination by voice 2. Press n and tap Directions. 1. Tap Navigation from the > Point on map if you want to set the end point. 3. -
Page 88: Weather
Tools Weather Changing the temperature unit 1. Tap Weather from the applications menu. Adding a new city 2. Press n and tap Settings. 1. Tap Weather from the applications 3. Tap . The temperature changes from Fahrenheit to menu. Celsius. 2. -
Page 89: Stocks
Tools Stocks Renaming the stock market index Check the current stock market conditions and establish your 1. Tap Stocks from the applications menu. investment strategy with the phone. Stocks is in sync with 2. Press and hold an index to rename and tap Rename. Google Finance by default. -
Page 90: Writing Notes
Tools Sharing the stock market information Writing notes 1. Tap Stocks from the applications menu. 1. Tap Stocks from the applications menu. 2. Select and tap an index to see the relevant information. 2. Select and tap an index to write notes. 3. -
Page 91: Rss Reader
Tools RSS Reader 3. Tap the star icon next to a favorite if you want to lease the favorite. RSS Reader helps check updated news from various sources. Managing categories Creating channels 1. Tap RSS Reader from the applications menu. 1. -
Page 92: At&T Services
Tools AT&T Services Make your phone do more for you with useful apps from AT&T. Kindle™: Read Kindle books, magazines, and newspapers right from your mobile phone. Live TV: Watch LIVE, on-demand & downloadable mobile TV including ESPN Mobile TV, Fox News, and more. -
Page 93: Settings
Settings Personalize Wireless & networks Call settings Sound Display Location & security Applications Accounts & sync Privacy Storage Language & keyboard Voice input & output Accessibility Date & time About phone... -
Page 94: Settings
Settings 2. Tap Airplane mode again to reactivate other functions. This chapter explains how to change the settings of the phone. Access the settings from Applications or simply do it from the Turning Wi-Fi on/off home screen by pressing n and tapping Settings. 1. -
Page 95: Call Settings
Settings Setting VPN settings Note You must enter the correct PIN2 within three attempts. If you input incorrect codes three times in a row, the PIN2 code will be 1. Tap Settings > Wireless & networks > VPN settings > Add blocked. -
Page 96: Sound
Settings Setting Call forwarding Setting volume 1. Tap Settings > Sound > Volume. 1. Tap Settings > Call settings > Call forwarding. Make sure to deselect Silent mode. 2. Tap Always forward, Forward when busy, Forward when 2. Adjust the volume for ringtone, unanswered or Forward when unreachable. -
Page 97: Display
Settings Setting screen timeout 5. Tap Haptic feedback if you want the phone to vibrate when you press soft keys. It is selected by default. 1. Tap Settings > Display > Screen timeout. Setting Sound effect 2. Select and tap the time interval to turn off the screen. 3. - Page 98 Settings Setting screen lock with a password 1. Tap Settings > Location & security > Set up screen lock > Password. 2. Enter your password and tap Continue. The password should be at least 4 characters and include at least one of alphabet letters.
-
Page 99: Applications
Settings Setting SIM card lock Setting the credential storage password 1. Tap Settings > Location & security 1. Tap Settings > Location & security > Set password. > Set up SIM card lock. 2. Enter a new password and enter it again to confirm. 2. -
Page 100: Accounts & Sync
Settings Viewing storage used by applications Allowing background data to sync automatically 1. Tap Storage use to view storage used by applications 1. Tap Settings > Accounts & sync. 2. Tap Auto-sync if you want to sync data automatically. Viewing items used the battery Adding an account 1. -
Page 101: Storage
Settings Storage Language & keyboard Selecting the USB mode Selecting the language 1. Tap Settings > Storage. 1. Tap Settings > Language & keyboard > Select language. 2. Tap USB Mode. If you turn on the USB debugging function, 2. Select and tap a language to use for the phone. tap OK to turn it off. -
Page 102: Voice Input & Output
Settings 4. Tap Show suggestions if you want to see suggestions while 4. Tap Listen to an example if you want to listen to an you are typing. The check box is selected by default. example. 5. Tap Always use my settings when you want make your Managing the user dictionary settings the default settings for the phone. -
Page 103: About Phone
Settings About phone Setting the date 1. Tap Settings > Date & time > Set date. Checking the status of the phone 2. Enter month, day and year for the phone. 1. Tap Settings > About phone. 3. Tap Set. 2. -
Page 104: Appendix
Appendix PC Suite Troubleshooting checklist Specifications FCC Hearing-Aid Compatibility Regulations for Wireless Devices FCC Regulatory Compliance Warranty Legal notice... -
Page 105: Appendix
Appendix To update software PC Suite features: You can update your software without visiting the nearest PC Suite launcher dealer. Application Management 1. Tap Settings > AT&T software update. Data Backup & Restore 2. Tap Check for updates to check whether you need to File Management update the software. -
Page 106: Specifications
Appendix When you are unable to charge the battery: Dimensions & Weight This may be the result of one of the following three cases. Weight: 132.2g (with battery pack) 1. Your charger may be out of order. Contact your nearest Dimensions: 114.7 x 78 x 10.6 mm (4.45”... - Page 107 Appendix The wireless telephone industry has developed a rating system In the above example, if a hearing aid meets the M2 level rating for wireless phones, to assist hearing device users find phones and the wireless phone meets the M3 level rating, the sum of that may be compatible with their hearing devices.
-
Page 108: Fcc Regulatory Compliance
Appendix FCC Regulatory Compliance turning the equipment off and on, the user is encouraged to try to correct the interference by one or more of the following measures: FCC Regulatory Compliance Reorient or relocate the receiving antenna. This device complies with Part 15 of the FCC Rules. Operation Increase the separation between the equipment and receiver. -
Page 109: Warranty
(d) Damage resulting from connection to, or use of any better than the Pantech product. Be careful. Some of these accessory or other product not approved or authorized by products may not be compatible to use with your Pantech the Company;... -
Page 110: Legal Notice
THE PRODUCT IS BEING REPAIRED OR REPLACED. To locate Pantech Authorized Service Center, call: (800) 962-8622 No person or representative is authorized to assume for or email HandsetHelp@Pantech.com. Please have the following...