Table of Contents
Advertisement
Quick Links
Advertisement
Table of Contents

Related Manuals for Garmin Edge 205/305


Summary of Contents for Garmin Edge 205/305
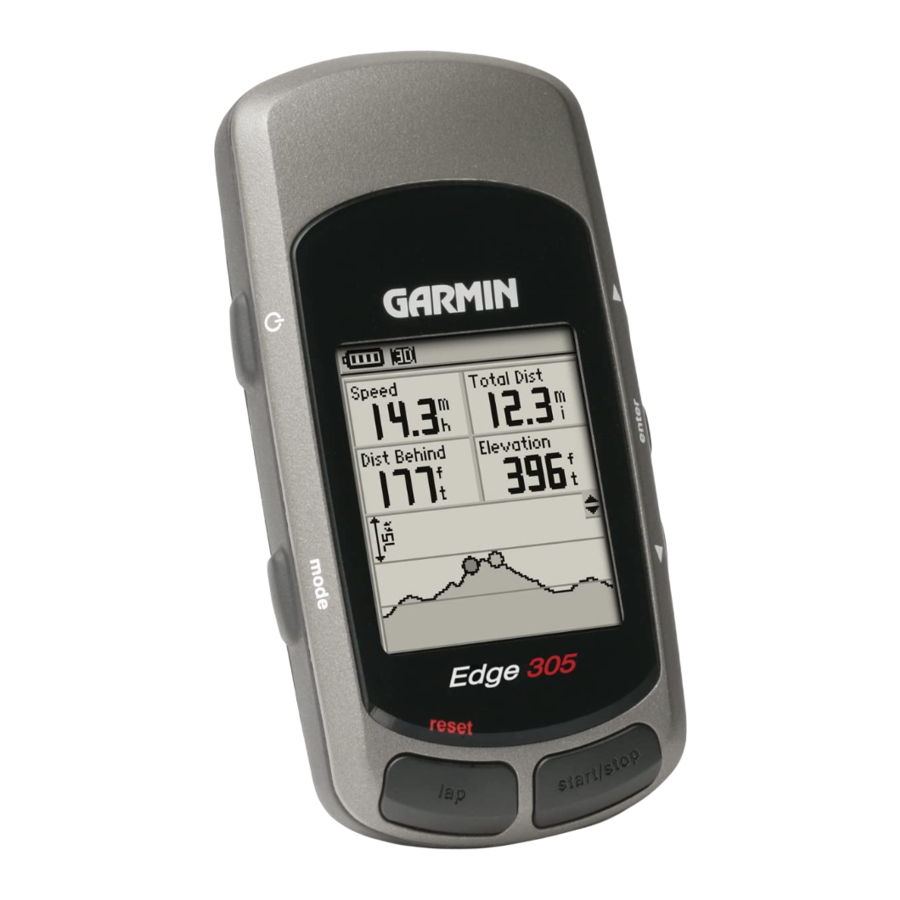
- Page 1 Owner’s Manual Edge 205/305 ™ GPS-enabled computer for cyclists...
- Page 2 Information in this document is subject to change without notice. Garmin reserves the right to change or improve its products and to make changes in the content without obligation to notify any person or organization of such changes or improvements.
-
Page 3: Table Of Contents
Introduction ... 5 About This Manual ...5 Getting Started ... 6 Charge the Battery ...6 Position the Edge ...10 Configure the Edge ...12 Acquire Satellite Signals ...13 Position the Heart Rate Monitor ...14 Position the GSC10 Sensor ...16 Set Your User Profile ...19 Set Your Bike Profile ...20 Change the Backlight and Contrast Settings ...21... - Page 4 Training with Heart Rate Zones ...71 Sensor Pairing ...74 Training with Cadence ...76 Barometric Altimeter ...76 Tire Size and Circumference ...77 Garmin Training Center ...79 Caring for the Edge ...80 Specifications ...81 Product Registration ...84 Contact Garmin ... 84 Warning ...85 Caution ...86 Limited Warranty ...87...
-
Page 5: Introduction
Customizing–configure your Edge settings to fit your training needs. Appendix–review specifications, cleaning instructions, information about Garmin Training Center and optional accessories. Be sure to read the safety information in this section to learn how to use your Edge safely and responsibly. -
Page 6: Getting Started
ETTING TARTED ETTING TARTED Follow the instructions in this section to set up and begin using your Edge. Charge the Battery The Edge is powered by a built-in lithium-ion battery that you can recharge with the A/C charger included in the product box. You can also charge the Edge with the USB cable and your personal computer. - Page 7 2. Locate the A/C charger included in the product box. Plug the mini-USB end of the charger into the mini-USB port on the Edge. Then plug the A/C charger into a standard wall outlet. NOTE: The unit will not charge outside the temperature range of 0°C–50°C (32°F–122°F).
- Page 8 ETTING TARTED Buttons power • Press and hold to turn unit on/off. • Press to turn backlight on/off. mode • Press to switch modes. • Press to return to the previous page. • Press and hold to switch bike profiles. reset/lap •...
- Page 9 up/down • Press to highlight options. • Press to scroll through menus and data fields. • Press to adjust contrast when on the Satellite page. enter Press to select options and to acknowledge messages. NOTE: Press mode and reset/lap simultaneously to reset the unit. Edge 205/305 Owner’s Manual ™...
-
Page 10: Position The Edge
ETTING TARTED Position the Edge For best results, position the Edge with the face oriented toward the sky. This position allows the GPS antenna to acquire satellite information quickly. You can install the bike mount to the stem or handlebars. The stem installation (shown here) provides a more sturdy location. - Page 11 2. Attach the bike mount securely using two cable ties. Make sure the cable ties are threaded through both parts of the bike mount. 3. Align the Edge with the bike mount so that the unit is vertical. release lever cable ties Edge 205/305 Owner’s Manual...
-
Page 12: Configure The Edge
ETTING TARTED Configure the Edge When you first turn on your Edge, the following setup screens appear. Follow the on-screen instructions: Screens 4 and 5 apply to Edge 305 only. Edge 205/305 Owner’s Manual ™... -
Page 13: Acquire Satellite Signals
Stand still in an open area, and do not begin moving until the Satellite page disappears. After the Satellite page disappears, you can begin your ride. NOTE: To turn off GPS receiver and use the Edge indoors, see TARTED page... -
Page 14: Position The Heart Rate Monitor
ETTING TARTED Position the Heart Rate Monitor NOTE: The heart rate monitor is an accessory for the Edge 305 only. Wear the heart rate (HR) monitor directly on your skin, just below the breastplate. It should be snug enough to stay in place during your workout. - Page 15 3. Place the heart rate monitor directly on your skin, just below the breastplate. Wrap the strap around your chest and attach the strap to the other side of the heart rate monitor. NOTE: If you have trouble with erratic heart rate readings, position the transmitter on your back instead of your chest, or try applying electrode gel.
-
Page 16: Position The Gsc10 Sensor
ETTING TARTED Position the GSC10 Sensor NOTE: The GSC10 is an accessory for the Edge 305 only. The Edge 305 CAD includes a wireless speed and cadence sensor. Both magnets must be aligned with their respective indication lines for the Edge to receive data. - Page 17 2. Attach the pedal magnet to the crank arm using the adhesive mount and a cable tie. Make sure the pedal magnet is within 5 mm of the GSC10 and the indication line on the pedal magnet lines up with the indication line on the GSC10.
- Page 18 ETTING TARTED 5. Press the Reset button on the GSC10. The LED light turns red, then green. Pedal to test the sensor alignment. The red LED blinks each time the crank arm passes the sensor, and the green LED blinks each time the wheel magnet passes the sensor arm.
-
Page 19: Set Your User Profile
Set Your User Profile The Edge uses information that you enter about yourself to calculate calorie consumption. Set your user profile before you begin using the Edge to ensure it is recording accurate workout data. To set your user profile: 1. -
Page 20: Set Your Bike Profile
ETTING TARTED Set Your Bike Profile You can set up to three profiles. To set your bike profile: 1. Press mode to access the Main Menu. 2. Select Settings > Bike Profile. 3. Select the bike profile you wish to use. 4. -
Page 21: Change The Backlight And Contrast Settings
Change the Backlight and Contrast Settings To change the Edge display: 1. Press mode to access the Main Menu. 2. Select Settings > System > Display. 3. Select the amount of time the backlight stays on. Use a short backlight timeout setting to conserve battery power. -
Page 22: Training
RAINING RAINING The Edge offers several training features and optional settings. Use your Edge to set goals and alerts, train with a Virtual Partner , program workouts, and ™ plan courses based on existing rides. Auto Pause ® You can set the Edge to pause the timer automatically during your ride when you stop moving or your speed drops below a... - Page 23 3. In the Auto Timer Pause field, select When Stopped or Custom Speed to enter a value. 4. In the Auto Lap Trigger field, select By Distance to enter a value or By Position to choose an option: • Lap Press only–triggers the lap counter each time you press the lap button and every time you pass...
-
Page 24: Alerts
RAINING Alerts Use Edge alerts to train toward certain time, distance, speed, heart rate, and cadence goals. Using Time and Distance Alerts Time and distance alerts are useful for long workouts when you want to train for a certain amount of time or distance. When you reach your goal, the Edge beeps and displays a message. -
Page 25: Using Speed Alerts
5. In the Distance Alert field, select Once or Repeat. 6. Enter a distance in the Alert At field. Using Speed Alerts Speed alerts notify you if you exceed or drop below a custom speed setting during your ride. The speed alert takes advantage of Speed Zones, which are ranges of speed that you can store in the Edge. -
Page 26: Using Heart Rate Alerts
RAINING Using Heart Rate Alerts NOTE: Heart rate alerts are a feature of the Edge 305 only. Similar to speed alerts, the heart rate alert notifies you if your heart rate exceeds or drops below a specific number of beats per minute (bpm). -
Page 27: Using Cadence Alerts
4. Repeat for the Max HR Alert. The maximum value allowed is 235 bpm. NOTE: When entering custom heart rate values, you must set your minimum and maximum alerts at least 5 bpm apart. Using Cadence Alerts NOTE: Cadence alerts are a feature of the Edge 305 only. -
Page 28: Virtual Partner
RAINING Virtual Partner ™ Your Virtual Partner unique tool designed to help you meet your training goals. The Virtual Partner competes with you during quick workouts and courses. The Virtual Partner “rides” alongside (top bike graphic) of you. Your current time, speed, distance, and distance from the Virtual Partner appears on the Workout page. -
Page 29: Workouts: Quick, Interval, And Advanced
Training > Workouts to choose the type of workout right for you. Quick and interval workouts are replaced each time you create a workout of the same type. Advanced workouts can be saved, edited, and transferred between Garmin Training Center and your Edge. RAINING... -
Page 30: Using Workouts
RAINING Using Workouts During your workout, press mode to see the Workout data page. When you complete all steps in your workout, the “Workout Finished!” message appears. To end a workout early: 1. Press mode to access the Main Menu. 2. - Page 31 To set up a quick workout: 1. Press mode to access the Main Menu. 2. Select Training > Workouts > Quick Workouts. 3. Select the type of quick workout. 4. Enter values in the first and second fields. 5. Check the third field to ensure that calculation seems reasonable.
-
Page 32: Interval Workouts
RAINING Interval Workouts You can create simple and challenging interval workouts with your Edge based on the following criteria: • Ride a certain distance and rest for a certain amount of time. • Ride for a certain distance and rest for a certain distance. -
Page 33: Advanced Workouts
Once you create and save a workout, you can use the Garmin Training Center software to schedule the workout for a particular day. Scheduling allows you save setup time by planning... - Page 34 “master list” of advanced workouts. If you create a workout on the Edge, be sure to transfer it to Garmin Training Center. Otherwise, the workout will be overwritten when you load workouts from Garmin Training Center to your unit.
- Page 35 5. In the Duration field, select how long you want the step to last. If you select Open, you can end the step during your workout by pressing lap. 6. Below Duration, enter the value where you want the step to end. 7.
- Page 36 RAINING 12. To enter another step, select <Add New Step>. Then repeat steps 5–11. To repeat steps: 1. Select <Add New Step>. 2. In the Duration field, select Repeat. 3. In the Back to Step field, select the step you want to return to.
- Page 37 Editing Advanced Workouts You can edit workouts within Garmin Training Center or directly in the Edge. However, if you edit workouts in the Edge, your changes may be temporary. Garmin Training Center serves as the “master list”...
- Page 38 RAINING Training Center. To make a permanent change to a workout, edit the workout in Garmin Training Center and then transfer it to your Edge. To edit an advanced workout: 1. Press mode to access the Main Menu. 2. Select Training > Workouts >...
-
Page 39: Courses
To turn on Virtual Partner, see page Creating Courses Garmin recommends that you use the Garmin Training Center software to create courses and course points. Then you can transfer them to your Edge. For more information, see the Garmin Training Center Help system. -
Page 40: Using A Course
You can mark course points, or places on your course that you want to remember, such as water stops or distance goals. You must use Garmin Training Center to add course points to any course. For more information, refer to the Garmin Training Center Help system. - Page 41 Course point Your current position Your previous performance The gray triangle shows your previous performance. The black triangle shows your current position. Press mode again to see the Compass page. If you have not entered the course, the compass points you toward the course and the fields display your current distance from the course and the estimated time to arrival.
- Page 42 RAINING If you stray away from the course, the Edge displays an “Off Course” message. The gray triangle continues on the course without you. Use the Compass page or Map page to find your way back to the course. To end a course manually: 1.
-
Page 43: History
(1000 laps) of data in memory. When the memory is full, your oldest Edge data is overwritten. Load your history into the Garmin Training Center software periodically to keep track of all of your workouts. You can view the data on your Edge... - Page 44 ISTORY About Lap Detail The Edge displays history details differently, depending on the type of training you did. Details of a quick workout appear on one summary page. Details of Virtual Partner, interval workouts, advanced workouts, and courses appear with tabs, which organize information into sections.
- Page 45 To delete laps or entire trips from history: 1. While viewing details for a history entry, select View Laps. 2. Select the lap you want to delete. 3. Select Delete Lap or Delete Entire Trip. Select Yes to confirm. NOTE: To delete more or all of your Edge history, see “Deleting History”...
-
Page 46: Deleting History
3. Select View Weeks to see a list of weeks. Deleting History After you have transferred several months of Edge data to Garmin Training Center, you may want to delete the history from your unit. To delete workout history: 1. Press mode to access the Main Menu. -
Page 47: Navigation
AVIGATION AVIGATION Use the GPS navigation features of your Edge to view your ride on a map, mark and save locations you want to remember, and create routes. Navigating with the Press mode to see the Map page. When you start the timer and begin to move, a tiny dotted line appears on the map, showing Edge... -
Page 48: Marking And Finding Locations
AVIGATION Marking and Finding Locations A location is a point on the map that you store in memory. If you want to remember landmarks or return to a certain spot, mark a location. The location appears on the map with a name and symbol. You can find, view, and return to locations at any time. - Page 49 To find and go to a location: 1. Press mode to access the Main Menu. 2. Select Navigation > Find. 3. Select List All or Nearest (locations near your current location). 4. Use the arrows to find a location in the list. Direction and distance information for each location appears below the list.
-
Page 50: Navigating With Routes
AVIGATION To stop navigating to a location: 1. Press mode to access the Main Menu. 2. Select Navigation > Stop Go To edit a location: 1. Press mode to access the Main Menu. 2. Select Navigation > Find > List All. 3. - Page 51 4. Select the dotted line, and press enter to add a location. 5. Select the location from the list, and then select Use. 6. Repeat steps 4 and 5 to add more locations to your route. 7. When you are finished adding locations, select Navigate.
-
Page 52: Viewing Gps Information
AVIGATION 3. Select the route you want to edit. A menu appears. 4. Select Edit. Then select a point to edit. Review–view it on the map. Insert–insert a point before this point. Remove–remove it from the route. Change–replace it with another point Move–move it to another place in the route. -
Page 53: About Gps
GPS works in any weather conditions, anywhere in the world, 24 hours a day. There are no subscription fees or setup charges to use GPS. For more information, visit www.garmin.com/aboutGPS. AVIGATION... -
Page 54: Customizing
USTOMIZING USTOMIZING You can customize data fields, general settings, bike and user profiles, heart rate and speed zones, and data recording. TIP: When finished selecting options or entering values on your Edge, press the mode button to exit. To open the Setup Menu page: Press mode to access the Main Menu. -
Page 55: Sample Data Field
4. Select the number of data fields you want to see on this page. 5. Use the and enter key to change the data fields. Press mode when done. 6. Repeat for each page you wish to customize. Edge 205/305 Owner’s Manual ™... -
Page 56: Changing System Settings
USTOMIZING Changing System Settings System settings you can configure to suit your training preferences include general Edge setup, display, map, units, time, and accessories. To change general setup: 1. Press mode to access the Main Menu. 2. Select Settings > System > General. - Page 57 To change display setup: 1. Press mode to access the Main Menu. 2. Select Settings > System > Display. 3. From this page, you can change the Backlight Timeout and Contrast. To change map setup: 1. Press mode to access the Main Menu.
- Page 58 USTOMIZING To change units setup: 1. Press mode to access the Main Menu. 2. Select Settings > System.> Units. 3. Select units of measure for distance and elevation. 4. (Edge 305 only). Select Beats per Minute or % Max HR for your heart rate data.
-
Page 59: Updating User Profile
To manage Edge 305 accessories: 1. Press mode to access the Main Menu. 2. Select Settings > System > Accessories. 3. From this page, you can activate accessories and select Restart Scan if you are having trouble receiving sensor data. Make sure there are no other sensors around you. -
Page 60: Setting Zones
USTOMIZING Setting Zones From the Main Menu, select Settings > Zones to set up Edge speed and heart rate zones. Speed Zones Your Edge contains several different speed zones, ranging from very slow (Climb 4) to very fast (Max Speed). The values for these speed zones are entered by default and may not match your personal abilities. -
Page 61: Heart Rate Zones
4. Repeat step 2 for each zone you want to change. 5. Press mode to exit. Heart Rate Zones (Edge 305 only.) A heart rate zone is a specified range of heart beats per minute. Heart rate zones are generally based on a percentage of your maximum heart rate. -
Page 62: Data Recording
USTOMIZING To change your heart rate zones manually: 1. Press mode to access the Main Menu. 2. Select Settings > Zones > HR Zones. 3. Select the Zones field, and select Custom. 4. Select any heart rate zone, and select a heart rate value you want to change. - Page 63 3.5 hours of detailed data. WARNING: When the history is full, older history data is overwritten automatically. Be sure to transfer history to Garmin Training Center often. To change data recording setup: 1. Press mode to access the Main Menu.
-
Page 64: Appendix
PPENDIX Edge Data Fields The following table lists all of the Edge data fields and descriptions. * Denotes a field showing statute or metric units. To change your Edge unit settings, select Main Menu > Settings > System > Unit. Data Field Description Cadence... - Page 65 Data Field Description Dist – Lap * Distance traveled in current lap. Dist – Last Distance of last completed Lap * lap. Dist – Paused * Distance covered while timer in Auto Pause. Elevation * Distance above/below sea level. GPS Accuracy * Margin of error for your exact location.
- Page 66 PPENDIX Data Field Description Grade Calculation of rise over run. For example, if for every 10 foot you climb (elevation) you travel 200 feet (distance), your grade is 5%. Heading Current direction you are traveling. Heart Rate Heart beats per minute (bpm).
- Page 67 Data Field Description Heart Rate Current range of heart Zone rate (1–5). The default zones are based on your maximum heart rate and user profile. Laps Number of laps completed. Speed * Current speed. Speed – Avg * Average speed (mph or kph) for the duration of your current ride.
- Page 68 PPENDIX Data Field Description Speed Zone Current range of speed based on default or custom settings: Climb 1–4, Flat 1–3, Descent, Sprint, and Max Speed. Sunrise Time of sunrise based on your GPS position. Sunset Time of sunset based on your GPS position.
- Page 69 Data Field Description Time – Paused Time elapsed while timer in Auto Pause. Time of Day Current time of day based on your time settings (format, time zone, and daylight saving time). Total Ascent * Total elevation gain for current ride. Total Descent * Total elevation lost for current ride.
-
Page 70: Edge Accessories
Carry case Mount replacement kit GSC10 magnet replacement kit AC wall brick charger (Americas) AC wall brick charger (Europe) USB cable replacement To purchase additional accessories for your Edge, go to the Garmin Web site: http://shop.garmin.com. Part Number 010-10644-00 010-10645-00 010-10563-00... -
Page 71: Viewing Heart Rate Data
Viewing Heart Rate Data You can configure your Edge to display different heart rate data: current heart rate, average heart rate, and heart rate zone, which can help you determine the intensity of your training. For example, you can add heart rate to your Bike Computer page or heart rate zone to your Workout page. - Page 72 PPENDIX How do heart rate zones impact your fitness goals? Knowing your heart rate zones can help you measure and improve your fitness by understanding and applying these principles: • Your heart rate is a good measure of exercise intensity. •...
- Page 73 Table 1 % of Max. Zone Heart Rate Relaxed, easy pace; 50%–60% rhythmic breathing Pace comfortable; 60%–70% slightly deeper breathing, conversation possible Pace moderate; 70%–80% more difficult to hold conversation Pace fast and a bit 80%–90% uncomfortable; breathing forceful Pace a sprinting effort, 90%–...
-
Page 74: Sensor Pairing
PPENDIX Sensor Pairing What is pairing? Pairing is the process of matching sensors, like your heart rate monitor and GSC10, with your Edge 305. This process occurs automatically when you turn on the Edge and only takes a few seconds when the sensors are on and functioning correctly. - Page 75 Pairing Tips If you have trouble pairing, or if the readings are erratic, try the following suggestions: • Position the Edge within 3 meters of the sensor while pairing. • Stay far away from any other sensors while pairing. • Restart scan if your Edge appears to be paired with another sensor (see 59).
-
Page 76: Training With Cadence
PPENDIX Training with Cadence Cadence is your rate of pedaling or “spinning” measured by the amount of revolutions of the crank arm per minute (rpm). There are two sensors on the GSC10: one for cadence and one for speed. Cadence data from the GSC10 is always recorded. -
Page 77: Tire Size And Circumference
Tire Size and Circumference The tire size is marked on both sides of the tire. To modify your bike profile, see page Tire Size 12 x 1.75 14 x 1.5 14 x 1.75 16 x 1.5 16 x 1.75 18 x 1.5 18 x 1.75 20 x 1.75 20 x 1-3/8... - Page 78 PPENDIX Tire Size 26 x 1.95 26 x 2.00 26 x 2.10 26 x 2.125 26 x 2.35 26 x 3.00 27 x 1 27 x 1-1/8 27 x 1-1/4 27 x 1-3/8 650 x 35A 650 x 38A 650 x 38B 700 x 18C 700 x 19C 700 x 20C...
-
Page 79: Garmin Training Center
The Garmin Training Center software is included in the Edge product box. Locate the Garmin Training Center installation disk and use it to install Garmin Training Center on your personal computer. Garmin Training Center software allows you to overlay your ride data onto a map. -
Page 80: Caring For The Edge
Use the USB cable from the product box to connect your Edge to your computer. From the Start menu, open Garmin Training Center. For help using Garmin Training Center, click the Help menu and select Contents, or press F1 on your keyboard. -
Page 81: Specifications
Input: 910 mAh rechargeable, built-in, lithium-ion battery Battery Life: 12 hours, typical Performance Receiver: High-sensitivity integrated GPS receiver by SiRF Acquisition Time: Hot Start: < 1 second Warm Start: < 38 seconds Cold Start: < 45 seconds Update Rate: 1/second,... -
Page 82: Heart Rate Monitor
PPENDIX GPS Position Accuracy*: < 10 meters 50%, typical GPS Velocity Accuracy*: < 0.05 m/s Dynamics: Performs to specifications to 6 g’s Operating Temperature Range: -4° F to 140° F (-20° C to 60° C) Accuracy depends on view of the sky. 99%–clear view;... -
Page 83: Replacing The Battery
Replacing the Battery The heart rate monitor and GSC10 (shown) contain a user- replaceable CR2032 battery. NOTE: Dispose of the used battery properly. To replace the battery: 1. Locate the circular battery cover on the back of the heart rate monitor or the side of the GSC10. -
Page 84: Product Registration
___ ___ ___ ___ ___ Contact Garmin If you should encounter any difficulty while using your Edge, or if you have any questions, in the U.S.A. contact Garmin Product Support by phone: 913/397.8200 or 800/800.1020, Monday–Friday, 8 am–5 pm Central Time; or go to www.garmin.com/support/. -
Page 85: Warning
The Edge has no user-serviceable parts. Should you ever encounter a problem with your unit, please take it to an authorized Garmin dealer for repairs. Always consult your physician before beginning or modifying any exercise program. If you have a pacemaker... -
Page 86: Caution
This Notice is being provided in accordance with California’s Proposition 65. If you have any questions or would like additional information, please refer to our Web site at www.garmin.com/prop65. system is subject to changes which could affect the accuracy and performance of all GPS equipment, including the Edge. -
Page 87: Limited Warranty
Limited Warranty This Garmin product is warranted to be free from defects in materials or workmanship for one year from the date of purchase. Within this period, Garmin will at its sole option repair or replace any components that fail in normal use. -
Page 88: Fcc Compliance
Units purchased in the United States or Canada must be returned to the Garmin service center in the United Kingdom, the United States, Canada, or Taiwan for service. The Edge is fastened shut with screws. - Page 89 The Edge does not contain any user- serviceable parts. Repairs should only be made by an authorized Garmin service center. Unauthorized repairs or modifications could result in permanent damage to the equipment, and void your warranty and your authority to operate this device under Part 15 regulations.
-
Page 90: Software License Agreement
Title, ownership rights, and intellectual property rights in and to the Software remain in Garmin. You acknowledge that the Software is the property of Garmin and is protected under the United States of America copyright laws and international copyright treaties. You... -
Page 91: Index
fields icon sensor training calories 46, 64 charging the battery cleaning and care Compass page 49, 50 configure the Edge contact Garmin contrast 21, 57 courses NDEX creating deleting editing starting custom pages data fields 54, 64 data recording... - Page 92 NDEX Garmin Training Center 33, 34, 37, 39 installing accuracy turning on and GPS version grade GSC10 16, 76 pairing replacing the bat- tery heart rate alert data fields icon zones 26, 61, 71 heart rate monitor pairing 15, 74...
- Page 93 register your product reset button reset Edge rest time routes creating deleting finding satellite icon Satellite page satellite signals acquiring serial number setup screens Smart Recording software license agree- ment software version specifications speed alerts Edge 205/305 Owner’s Manual ™ data fields zones 60, 68...
- Page 94 For the latest free software updates (excluding map data) throughout the life of your Garmin products, visit the Garmin Web site at www.garmin.com. © Copyright 2005–2006 Garmin Ltd. or its subsidiaries Garmin International, Inc. 1200 East 151 Street, Olathe, Kansas 66062, U.S.A.