Table of Contents
Advertisement
Quick Links
Advertisement
Table of Contents

Related Manuals for Olivetti Fax-Lab 650


Summary of Contents for Olivetti Fax-Lab 650
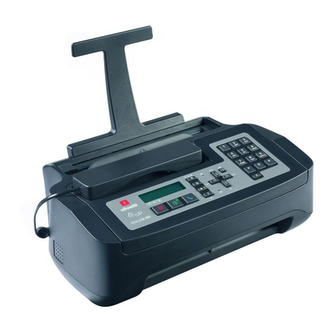
- Page 1 INK-JET FAX FAX_LAB 650/680 USER’S GUIDE...
- Page 2 Copyright © 2008, Olivetti All rights reserved. No parts of this manual may be photocopied, reproduced or translated into other languages without prior written authorization from Olivetti S.p.A. The manufacturer reserves the right to make any changes to the machine described in this manual, at any time, and without prior warning.
-
Page 3: Table Of Contents
CONTENTS BEFORE YOU START ......1-1 CONSULTING THE MANUAL ..... . ENVIRONMENTAL RECYCLING . - Page 4 SETTING SOME PARAMETERS ....ETTING THE LANGUAGE AND THE COUNTRY OF DESTINATION HANGING THE LANGUAGE AND THE COUNTRY OF DESTINATION HANGING THE COUNTRY ONLY .
- Page 5 PHONE BOOK ........5-1 PHONE BOOK .
- Page 6 TRANSFERRING MESSAGES AND MEMOS TO A REMOTE TELEPHONE ......OPERATING THE TELEPHONE ANSWERING DEVICE FROM A REMOTE LOCATION .
- Page 7 ELETING THE BLACK LIST ..... RINTING THE BLACK LIST ..... . ADVANCED TRANSMISSION SETTINGS .
- Page 8 12 MAINTENANCE OPERATIONS..... . 12-1 REPLACING THE PRINT CARTRIDGE 12-2 ....CLEANING THE PRINT CARTRIDGE AND TESTING THE NOZZLES 12-5 CLEANING THE ELECTRICAL CONTACTS OF THE PRINT...
-
Page 9: Before You Start
1BEFORE YOU START CONSULTING THE MANUAL ENVIRONMENTAL RECYCLING SAFETY PRECAUTIONS ABOUT THE INSTALLATION AND SETUP PARAMETERS BEFORE YOU START 1-1... -
Page 10: For Countries In The European Union ( Eu )
– Olivetti guarantees the activation of the treatment, collection, recycling and disposal procedures in accordance with Directive 2002/ 96/CE (and subsequent amendments). OR OTHER COUNTRIES... -
Page 11: Safety Precautions
SAFETY PRECAUTIONS ISK OF AN ELECTRIC SHOCK • Never attempt to repair the fax machine yourself. If you remove the casing, you risk getting an electric shock or suffering some other kind of injury. Repairs should be carried out by qualified technical staff only. •... -
Page 12: Operating Precautions
PERATING PRECAUTIONS • Keep the fax machine in a dust-free place away from sources of water, steam and excessive heat. Do not expose it to direct sunlight. • Ensure that no books, documents, or other objects obstruct normal ventilation in any way. - Page 13 2GETTING TO KNOW THE FAX MACHINE CONSOLE EXTERNAL COMPONENTS INTERNAL COMPONENTS GETTING TO KNOW THE FAX MACHINE 2-1...
-
Page 14: Getting To Know The Fax Machine
CONSOLE Ref. Description A two-line liquid crystal display with a capacity of 16 characters per line. Shows operator prompts and error messages. • Adjusts the resolution of the documents to be sent and copied (only with the document inserted in the ADF). •... - Page 15 Ref. Description • With tone dialling, they send a tone down the line for special network services. • They scroll "backwards" and "forwards" through characters and special symbols during the entry of names. With the handset lifted, gives access to the special functions made available by the network manager and commonly known as REGISTER RECALL (R function).
-
Page 16: External Components
Ref. Description • In "MANUAL" and "PHONE/FAX" reception modes, starts receiving a document. • After the fax number has been dialled, starts sending a document (only with the document inserted in the ADF). • Confirms the selection of menus, submenus, parameters and their values and moves on to the next condition. -
Page 17: Internal Components
Ref. Description Paper support extension Plain paper feed compartment (ASF). Maximum capacity: 40 sheets (80 gr/m Automatic feeder for documents to be sent and copied (ADF). Maximum capacity: 10 sheets of A4 size paper (80 gr/m Operator console Display, consists of two lines of 16 characters each. It shows the date and time, menu items, error messages, resolution and contrast values. - Page 18 Ref. Description Machine serial number plate (see base) Cartridge compartment Optical reader GETTING TO KNOW THE FAX MACHINE...
-
Page 19: Installation Instructions
3INSTALLATION INSTRUCTIONS PACKAGE CONTENTS INSTALLATION CONDITIONS CONNECTING TO THE TELEPHONE LINE AND POWER SUPPLY SETTING SOME PARAMETERS SETTING UP THE FAX MACHINE PRINTING THE MENU AND ITS FUNCTIONS INSTALLATION INSTRUCTIONS 3-1... -
Page 20: Connecting The Telephone Handset
PACKAGE CONTENTS In addition to the fax machine and this manual, you will find the following items in the package: • The paper support extension. • The cable for connecting the fax machine to the telephone line. • The power cable •... -
Page 21: Connecting The Fax Machine To The Telephone Line
Place the handset in its seat. ONNECTING THE FAX MACHINE TO THE TELEPHONE LINE Insert the plug on the cable for connection to the telephone line into the "LINE" socket on the rear of the fax machine (A). Insert the connector or the plug (if applicable) at the other end of the cable into the wall telephone line socket (B). -
Page 22: Connecting The Fax Machine To The Power Supply
ONNECTING THE FAX MACHINE TO THE POWER SUPPLY Insert the female connector at one end of the power cable into the male connector on the rear of the fax machine (A). Then insert the plug at the other end of the cable into the wall power socket (B). Note: The plug of the power supply cable may vary from country to country. -
Page 23: Changing The Language And The Country Of Destination
Country Country to be selected China CHINA Colombia AMERICA LATINA Denmark DANMARK Finland SUOMI France FRANCE Germany DEUTSCHLAND Holland NEDERLAND Irlanda IRELAND Italy ITALIA Luxembourg BELGIUM Mexico AMERICA LATINA New Zealand AUSTRALIA Norway NORGE Peru AMERICA LATINA Portugal PORTUGAL Rest of world INTERNATIONAL Spain ESPAÑA... -
Page 24: Changing The Language Only
Press the key. The display shows the default country. To display the other available countries, press the keys. To confirm your choice, press the key. To return the fax machine to its initial stand-by mode, press the key. If you want to move back one function, press the key. -
Page 25: Changing The Date And Time
Without the original document inserted in the ADF. For the model with a built-in TAD: automatic 00 10-may-08 12:25 For the base model: automatic 10-may-08 12:25 With the original document inserted in the ADF. document ready normal HANGING THE DATE AND TIME If the date and time shown on the display are not correct, you can change them at any time. -
Page 26: Switching From A Public Line To A Private Line ( Pbx )
ATE FORMAT OPTION If you have chosen the option, proceed as follows: DATE FORMAT The display shows DATE FORMAT DD/MM/YY If you want to select a different format from the one displayed, press the keys. To confirm the setting, press the key. -
Page 27: Setting Your Name And Fax Number
To view the available option line type - public (PSTN) line type - private (pbx) press the keys. To confirm the setting, press the key. To return the fax machine to its initial stand-by mode, press the key. If you want to move back one function, press the key. - Page 28 Insert a character in the name, move the cursor to the point where you want to insert the new character, by pressing the keys and then type the character you want to add. Delete incorrect characters, move the cursor to the right of the incorrect character by pressing the keys and then press the key.
-
Page 29: Setting Up The Fax Machine
Press the key. To select the INSIDE or OUTSIDE parameter, press the keys. To confirm the setting, press the key. To return the fax machine to its initial stand-by mode, press the key. If you want to move back one function, press the key. -
Page 30: Inserting The Print Cartridge
NSERTING THE PRINT CARTRIDGE Warning: The fax machine comes with a free starter cartridge which may, however, only be used once. If you reinsert it after the ink out message has been displayed, the following message will appear: beware! cartridge already used! the cartridge may only be used once. - Page 31 Take the cartridge out of its package and, holding it on both sides, peel off the film covering the nozzles. Insert the cartridge in its compartment with the electrical contacts facing towards the print cartridge compartment. Push the cartridge until it clicks into place. Note: The free cartridge provided with the machine allows you to print up to 60 pages*, whereas the cartridges that you will buy subsequently have...
-
Page 32: Printing The Menu And Its Functions
Enter the new date and time (eg. 13-05-08; 18:00) by pressing the keys and then press When the display shows , press the key to confirm the data entered confirm d/t or press the key to make any modification. The procedure is completed by: •... -
Page 33: Fax Transmission And Reception Operations
4FAX TRANSMISSION AND RECEPTION OPERATIONS SENDING A DOCUMENT RECEIVING A DOCUMENT RECEIVING A DOCUMENT IN POLLING MODE FAX TRANSMISSION AND RECEPTION OPERATIONS 4-1... -
Page 34: What Documents May Be Used
SENDING A DOCUMENT HAT DOCUMENTS MAY BE USED Dimensions • Width 210 mm • Length min. 105 mm - max. 600 mm • Unit weight 70 - 90 gr/m (max. 10 sheets) For documents of different sizes from those specified above, photocopy the original onto A4 sheets or another supported format and send the copy. -
Page 35: Adjusting The Contrast And Resolution
Once the document has been inserted in the automatic document feeder (ADF), the display shows on the top line document ready and on the bottom line, the default contrast value NoRMAL Note: If you do not perform any operation within about two minutes of inserting the document in the automatic document feeder (ADF), the fax machine will automatically unload the document from the feeder. -
Page 36: Ending A Document
• HALF TONES, if the document contains shaded areas. An "arrow" in line with the symbol and an "arrow" in line with the symbol printed on the console appear on the bottom line of the display. ENDING A DOCUMENT Insert the document in the automatic document feeder (ADF). The default contrast value is displayed on the bottom line. -
Page 37: Sending A Document With The Receiver Raised
ENDING A DOCUMENT WITH THE RECEIVER RAISED Insert the document in the automatic document feeder (ADF). The display shows on the top line and on the bottom line the default contrast value document ready normal The initial resolution value is (standard). -
Page 38: Changing /Repeating /Deleting A Transmission From The
Type your correspondent's number directly on the numeric keypad, by pressing keys. If you like, you can find your correspondent's number in the phone book (see "Programming the phone book" further on). To do this: Press the key. Press the keys to find the desired number. -
Page 39: Receiving A Document
To view the available options, press the keys. To confirm your choice, press the key. If you chose , follow the procedure described in "Sending tx from memory - change a document from the memory" from step 6. RECEIVING A DOCUMENT You can set up the fax machine to receive the documents sent by your correspondents in four separate modes: •... -
Page 40: Receiving Documents In The Various Reception Modes
ECEIVING DOCUMENTS IN THE VARIOUS RECEPTION MODES MANUAL RECEPTION When the telephone rings, lift the handset ( ) to engage the line. As soon as you hear the fax machine signal or if the correspondent asks you to receive a document, press the key. -
Page 41: Aking A Transmission Request
AKING A TRANSMISSION REQUEST POLLING RECEPTION Arrange with your correspondent the time at which you intend to make the transmission request so that he has time to put the document to be sent in his fax machine. Then set up your fax machine to receive the document, by programming the dialling mode to be used to call your correspondent and the time at which you wish to receive the document. -
Page 42: Deleting A Polling Reception That Has Been Set
ELETING A POLLING RECEPTION THAT HAS BEEN SET Press the key. POLLING RX Press the keys until the display shows Press the key. DELETE Press the keys until the display shows Press the key. DELETE? - YES To view the available options , press the keys. -
Page 43: Phone Book
5PHONE BOOK PHONE BOOK PHONE BOOK 5-1... -
Page 44: Phone Book
PHONE BOOK The fax can also store 100 numbers and associate a name to them, thus creating an electronic diary which not only saves time but also eliminates the risk of making mistakes in dialling numbers. The telephone number or fax number that you associated with each of the first 10 numeric keys (0 - 9) may be dialled quickly simply by pressing and holding down the relevant key for more than a second. -
Page 45: Modifying A Number From The Phone Book
ODIFYING A NUMBER FROM THE PHONE BOOK Press the key. Press the key until the display shows phone book Press the key. Press the keys until the display shows modify To confirm the setting, press the key. The display shows the number and the name associated with the first of the 100 available positions (00-99) saved previously. -
Page 46: Printing Data From The Phone Book
RINTING DATA FROM THE PHONE BOOK Press the key. Press the keys until the display shows phone book Press the key. Press the keys until the display shows PRINT PHONE B. To confirm the setting, press the key. Having printed the report, the fax machine automatically returns to its initial stand-by mode. -
Page 47: Using The Telephone
6USING THE TELEPHONE USING THE TELEPHONE USING THE TELEPHONE 6-1... -
Page 48: Using The Telephone
USING THE TELEPHONE When you engage the line by lifting the telephone handset ( ), you may use all the telephone functions available on ordinary telephones sold on the market. These also include the R function (REGISTER RECALL, activated by pressing the key) which provides access to the special services made available by the company that manages the telephone network. -
Page 49: Edialling One Of The Last 20 Incoming Numbers Or One
EDIALLING ONE OF THE LAST INCOMING NUMBERS OR ONE OF THE LAST OUTGOING NUMBERS Do not place the document in the ADF. Lift the handset to engage the line ( ). The display shows the length of the call in minutes and seconds in the top right-hand corner. - Page 50 Page intentionally left blank. USING THE TELEPHONE...
-
Page 51: The Telephone Answering Device
7THE TELEPHONE ANSWERING DEVICE THE TELEPHONE ANSWERING DEVICE TURNING ON THE TAD THE TAD CONSOLE OUTGOING MESSAGES AND MEMOS SETTING THE LENGTH OF MEMOS AND INCOMING MESSAGES LISTENING TO INCOMING MESSAGES AND MEMOS DELETING MESSAGES AND MEMOS YOU HAVE ALREADY LISTENED TO TRANSFERRING MESSAGES AND MEMOS TO A REMOTE TELEPHONE OPERATING THE TELEPHONE ANSWERING DEVICE FROM A REMOTE LOCATION... - Page 52 THE TELEPHONE ANSWERING DEVICE If you have purchased the fax machine model equipped with a built-in telephone answering device you can perform the same functions as those performed by external telephone answering devices. You can therefore: • record outgoing messages which will be played automatically when you are out, to request callers to leave a message or call back later;...
- Page 53 THE TAD CONSOLE Keys only present on model with a telephone answering device: Description To start playing new messages and memos. If there are any messages or memos that you have not heard, start with the memos from the first one you have not heard.
- Page 54 Keys required to use the telephone answering device: Description To access to the TAD configuration menu. To select submenus. To select the available options of a parameter. To start recording or playing. To confirm the selection of the menus for setting up the TAD, submenus, parameters and settings, and to switch to the next condition.
-
Page 55: Recording Ogm1 ( Outgoing Message 1)
OGM1 ( ECORDING OUTGOING MESSAGE Press the key. Press the keys until the display shows tad set-up Press the key. Press the keys until the display shows ogm # 1 Press the key. Press the keys until the display shows record Press the key. -
Page 56: Ogm2 ( 2)
OGM2 ( ISTENING TO OUTGOING MESSAGE Play back outgoing message 2 as you played back OUTGOING MESSAGE 1, modifying step 4 as follows: Press the keys until the display shows: ogm # 2 OGM2 ( RASING OUTGOING MESSAGE Press the key. -
Page 57: Setting The Length Of Memos And Incoming Messages
SETTING THE LENGTH OF MEMOS AND INCOMING MESSAGES Press the key. Press the keys until the display shows tad set-up Press the key. Press the keys until the display shows ICm REC. TIME Press the key. To view the other available value , press the ICm REC. -
Page 58: Deleting Messages And Memos You Have Already Listened To
DELETING MESSAGES AND MEMOS YOU HAVE ALREADY LISTENED TO You cannot delete a message or a memo until you have started listening to it. Incoming messages and memos that have not been played back cannot be deleted. The memory cannot therefore be completely cleared until all the messages and memos present in it have been played back. -
Page 59: Operating The Telephone Answering Device Froma Remote Location
To view the other available mode, forward msgS - delete , press the keys. forward msgs - change forward msgs - delete - To cancel the transfer of incoming messages and memos to a remote telephone. - To modify the parameters of a transfer already set: transfer forward msgs - change time, frequency and telephone number to be called. -
Page 60: Tad
The same code may also be used to: • prevent unauthorized subscribers from playing the messages left for you and from modifying the set-up parameters you have set on the telephone answering device in local mode (see "Enabling/Disabling access to the telephone answering device in local mode"). -
Page 61: Operating The Telephone Answering Device From A Remote Location
To stop unauthorized users from playing the messages received on the telephone answering device, press the keys. The display shows To confirm the setting, press the key. To return the fax machine to the initial stand-by mode, press the key. If you want to move back one function, press the key. -
Page 62: Special Functions Of The Telephone Answering Device
To perform both the remote playback and programming functions: • Dial the fax number on the remote telephone. The TAD will answer the call and play OUTGOING MESSAGE 1. • Type the access code on the remote telephone keypad. • If the code is correct, the TAD will confirm the operation by emitting a beep. -
Page 63: Outgoing Message Only
UTGOING MESSAGE ONLY Using this function, whenever an incoming call is received, the TAD plays the OGM 1 but does not record any incoming messages. You can use this function when you expect to be away for a long time and it would not be possible to record all messages received in your absence. -
Page 64: Printing The Tad Configuration Parameters
RINTING THE TAD CONFIGURATION PARAMETERS Press the key. Press the keys until the display shows tad set-up Press the key. Press the keys until the display shows print set-up To start printing, press the key. Once this operation has been completed, the fax machine automatically returns to its initial stand-by status. -
Page 65: Making Copies
8MAKING COPIES MAKING COPIES MAKING COPIES 8-1... -
Page 66: Making Copies
MAKING COPIES HAT DOCUMENTS CAN BE COPIED As for transmission, copying requires the document to be inserted in the automatic document feeder (ADF). Before making a copy, make sure that the document is correctly inserted in the feeder and that it respects the characteristics described previously (see the "Sending a document"... - Page 67 If you want to make more than one copy (max. 9), enter the desired number by pressing the keys. If you only want to make one copy, skip to the next step. To make the copy, press the key. The fax machine starts to save the document. Having done this, the fax machine starts copying.
- Page 68 Page intentionally left blank. MAKING COPIES...
-
Page 69: More Advanced Operations
9MORE ADVANCED OPERATIONS ADVANCED RECEPTION SETTINGS ADVANCED TRANSMISSION SETTINGS MORE ADVANCED OPERATIONS 9-1... -
Page 70: Reducing The Area Of A Document Received
ADVANCED RECEPTION SETTINGS EDUCING THE AREA OF A DOCUMENT RECEIVED Press the key. Press the keys until the display shows fax set-up Press the key. Press the keys until the display shows pRINTER PARAM. Press the key. Press the key to select reduction To choose one of the available reduction ratios , and... -
Page 71: Enabling /Disabling Silent Reception
NABLING ISABLING SILENT RECEPTION In the "AUTOMATIC", "PHONE/FAX" and "TAD/FAX" reception modes, you can set up the fax machine to receive documents without any rings being emitted when an incoming call is received. When this function is enabled, the behaviour of the fax machine depends on the reception mode selected and the caller: •... -
Page 72: Changing The Number Of Rings
It may however happen, if you are connected to a particular kind of telephone network, that the number of the caller is not displayed on the fax machine. If this happens, call your local customer engineering service centre. The fax machine is already set up to display the caller ID. You may however set it up not to display it, as follows: Press the key. -
Page 73: Changing The Ring Volume
HANGING THE RING VOLUME Press the key. Press the key to select recept. set-up Press the keys until the display shows RING VOLUME Press the key. The display shows the preset volume level. To turn the volume up/down, press the keys. -
Page 74: Changing The Length Of The Acoustic Signal
If you want to move back one function, press the key. Note: If the fax machine cannot detect that particular frequency, the display will RING NOT DETECT show the message . At this point, press the key and repeat the procedure. HANGING THE LENGTH OF THE ACOUSTIC SIGNAL This function is only enabled in some countries. -
Page 75: Changing The Remote Control Code
Press the key. The display shows the predefined value of 6 seconds. silence lapse - 3 secs silence lapse - 4 secs To view the other available value silence lapse - 8 secs silence lapse - 10 secs silence lapse - no , press keys: If you select... -
Page 76: Setting The Black List
ETTING THE BLACK LIST As mentioned previously, you can save a series of unwanted numbers on a black list (max. 10) so as to avoid receiving documents from the correspondents on this list. Press the key. recpt. set-up Press the key to select Press the keys until the display shows... -
Page 77: Rinting The Black List
To confirm the setting, press the key. The display shows the first number on the black list. To find the number you wish to delete, press the keys. To confirm the setting, press the key. To view the available option DELETE? - YES , press the keys. -
Page 78: Hearing The Line Signals
To return the fax machine to its initial stand-by mode, press the key. If you want to move back one function, press the key. EARING THE LINE SIGNALS The fax machine is set up so that you can hear the dialling tones during the dialling phases as well as the connection signals exchanged between your fax machine and your correspondent's fax machine. -
Page 79: Isabling The Flash Function
BUZZER VOLUME Press the keys until the display shows Press the key. The display shows the preset volume level. To turn the volume up/down, press the keys. To confirm your choice, press the key. To return the fax machine to its initial stand-by mode, press the key. -
Page 80: Isabling Ecm
NABLING ISABLING ECM The ECM (Error Correction Mode) is a system for correcting the errors caused by interference on the line. This function only has effect if it has been enabled both on your fax machine and on your correspondent's fax machine and is indicated by a letter "E"... -
Page 81: Printing Reports And Lists
10PRINTING REPORTS AND LISTS PRINTING REPORTS PRINTING LISTS PRINTING REPORTS AND LISTS 10-1... -
Page 82: Printing Reports
PRINTING REPORTS By printing out reports, the fax machine enables you to check the result of all the transactions carried out (transmission and reception), the volume of documents handled and provides a lot of other useful information. The fax machine prints the following reports: •... -
Page 83: Enabling / Disabling The Automatic Printing Of The
Item Description Remote Id Number (and, sometimes, name) of the correspondent called. This number corresponds to the number you dialled, only if the correspondent set his own fax number correctly. Otherwise, it may be different or not be present at all. Date/Time Date and time at which the transaction was carried out. -
Page 84: Printing The Transmission , Activity , Broadcast Transmission And Caller Id Reports On Request
RINTING THE TRANSMISSION ACTIVITY BROADCAST TRANSMISSION AND CALLER ID REPORTS ON REQUEST Press the key. Press the keys until the display shows print report Press the key. You can choose any of the following options: print report - LAST TX REPORT print report - LAST broadcast print report - activity report print report - caller id list To view the other available options, press the... -
Page 85: Rinting The List Of Reception Setup Parameters
RINTING THE LIST OF RECEPTION SETUP PARAMETERS Press the key. Press the key to select recept. set-up Press the keys until the display shows print set-up To confirm the setting, press the key. Having printed the report, the fax machine automatically returns to its initial stand-by mode. - Page 86 Page intentionally left blank. 10-6 PRINTING REPORTS AND LISTS...
-
Page 87: Troubleshooting Guide
11TROUBLESHOOTING GUIDE GENERAL MINOR PROBLEMS ERROR CODES SIGNALS AND MESSAGES ACOUSTIC ERROR SIGNALS TROUBLESHOOTING GUIDE 11-1... - Page 88 GENERAL Problem Description There is a power If a power failure occurs, the fax machine keeps the following failure. data in the memory: the numbers set in the phone book and the reports, while the documents present in the memory will be lost.
- Page 89 MINOR PROBLEMS The list below may be used as a guide to the solution of minor problems. Problem Solution The fax machine Check that it is connected to the power outlet and the displays no message telephone socket. at all. Check that the document respects the recommendations listed The document is not in "What documents may be used", chapter "Fax...
- Page 90 ERROR CODES The error codes printed both on the transmission report and the activity report consist of two digits indicating the cause of the error. To save space, the two-digit code without any message is printed on the activity report. Code Message Cause of error...
- Page 91 Code Message Cause of error What to do During reception, a Correct the fault and wait impossible reception printing error occurred. for the document in the memory full Reception continued in memory to be printed. the memory but the space left in the memory was filled before reception was completed.
-
Page 92: Other Acoustic Signals
THER ACOUSTIC SIGNALS Short 1-second signal • Transaction carried out successfully. Intermittent 20-second signal • Prompt to lift the handset to answer a telephone call. 11-6 TROUBLESHOOTING GUIDE... -
Page 93: Maintenance Operations
12MAINTENANCE OPERATIONS REPLACING THE PRINT CARTRIDGE CLEANING THE PRINT CARTRIDGE AND TESTING THE NOZZLES CLEANING THE ELECTRICAL CONTACTS OF THE PRINT CARTRIDGE CLEANING THE OPTICAL READER CLEANING THE CASING REMOVING JAMMED DOCUMENTS REMOVING JAMMED SHEETS OF PAPER MAINTENANCE OPERATIONS 12-1... - Page 94 REPLACING THE PRINT CARTRIDGE The print cartridge must be replaced when the ink runs out (used print cartridges cannot be used) or when you notice a deterioration in the print quality. In the former case, the fax machine automatically prints a sheet to remind you that the ink is about to run out and that you should replace the print cartridge.
- Page 95 Remove the used print cartridge from its compartment. Take the new print cartridge out of its package and, holding it on both sides, peel off the film covering the nozzles. Warning: Avoid touching the electrical contacts and the nozzles. Insert the new print cartridge in its compartment with the electrical contacts facing towards the print cartridge compartment.
- Page 96 Push the print cartridge until it clicks into place. Close the operator console and put the handset back on its support. Note: If you have replaced the cartridge because the ink ran out, when the operator console is closed, the fax machine will automatically recognize that the cartridge has been replaced and the display will show the message set data/time xx-xx-xx xx:xx...
- Page 97 CLEANING THE PRINT CARTRIDGE AND TESTING THE NOZZLES If you notice a deterioration in the print quality, you can quickly clean the print cartridge and test the nozzles by following a procedure that ends by printing out the diagnostic test result with regard to its condition. Press the key until the display shows recept.
- Page 98 CLEANING THE ELECTRICAL CONTACTS OF THE PRINT CARTRIDGE Warning: Before proceeding, the fax machine must be unplugged from the electrical outlet. Unplug the fax machine’s power cord from the electrical outlet. Lower the handset and place it on a stable surface. Lift the operator console as indicated by the arrow.
- Page 99 Release the print cartridge by pressing the lever as indicated by the arrow. Take the print cartridge out of its compartment. Clean the electrical contacts using a slightly damp cloth. Warning: Do not touch the nozzles! MAINTENANCE OPERATIONS 12-7...
- Page 100 Clean the electrical contacts of the print cartridge carriage with a slightly damp cloth. Insert the print cartridge in its compartment with the electrical contacts facing towards the print cartridge compartment. Push the print cartridge until it clicks into place. Close the operator console and put the handset back on its support.
- Page 101 Lower the handset and place it on a stable surface. Lift the operator console as indicated by the arrow. Move the print cartridge carriage to the left-hand edge of the fax machine. MAINTENANCE OPERATIONS 12-9...
- Page 102 Release the paper feed roller by pressing the lever, as indicated by the arrow. Remove the roller from its compartment. Clean the glass surface of the optical reader with a cloth dampened with a product designed specifically for cleaning glass and then dry it thoroughly. Warning: Do not pour or spray the cleaning product directly onto the glass surface.
- Page 103 Place one end of the roller on the pin situated on the left-hand side of the fax machine, as indicated by the arrow. Engage the roller by pressing the lever, as indicated by the arrow. Close the operator console and put the handset back on its support. Note: To check whether the optical reader is clean, make a copy of a blank sheet.
- Page 104 If the document is not unloaded, remove it manually as follows: Pull the document upwards, taking care not to tear it. Pull the document downwards, taking care not to tear it. Note: Never use pointed objected to remove jammed documents. REMOVING JAMMED SHEETS OF PAPER If the paper used to print received documents or to copy documents gets jammed ’...
- Page 105 Pull the sheet upwards, taking care not to tear it. Pull the sheet downwards, taking care not to tear it. Note: Never use pointed objects to remove jammed sheets of paper. Note: If you cannot manage to remove the jammed document or sheet of paper after performing the removal operations, it may be trapped inside the fax machine.
- Page 106 Page intentionally left blank. 12-14 MAINTENANCE OPERATIONS...
-
Page 107: Appendix
APPENDIX TECHNICAL SPECIFICATIONS MANUFACTURER CUSTOMER SERVICE APPENDIX A-1... -
Page 108: Technical Specifications
TECHNICAL SPECIFICATIONS ENERAL CHARACTERISTICS Model ......... Desktop transceiver Display ......... LCD, 16 + 16 char. Capacity memory ....max. 50 pages Dimensions ......Width ........340 mm Depth........220 mm - 235 mm (**) Height........133 mm - 272 mm (**) Weight......... -
Page 109: Eception Characteristics
ECEPTION CHARACTERISTICS Printing system ......Printing on plain paper, bubble ink jet printer Max. printing width ....204 mm Max. printing length ....282 mm Printing paper......A4 (210 x 297 mm) Paper feed ........Plain paper cassette (max 40 sheets of 80 gr/m ELEPHONE ANSWERING DEVICE CHARACTERISTICS ONLY MODEL WITH A BUILT IN TELEPHONE ANSWERING DEVICE •... -
Page 110: Manufacturer
MANUFACTURER Olivetti S.p.A. con unico azionista Gruppo Telecom Italia Direzione e coordinamento di Telecom Italia S.p.A. Via Jervis, 77 - 10015 IVREA (TO) ITALY CUSTOMER SERVICE If the fax machine is not working as it should, or you require information or clarification from the manufacturer, call the number indicated on the "Warranty... - Page 111 Page intentionally left blank. APPENDIX A-5...
- Page 112 ECO-FRIENDLY RESPECT YOUR HEALTH AND THE ENVIRONMENT Olivetti continues in its pursuit to improve the environmental conditions and protect the environment in which it operates. It provides its customers with safe and reliable consumables in respect of the best operating conditions, and strives to ensure the full environmental compatibility of its technologies and production processes.
- Page 113 Designs consumables and packages in such a way that they can be recycled easily. In the pursuit of this policy, Olivetti has started to manufacture, also for its new fax machines, a new generation of ECO-FRIENDLY consumables, following the implementation of complete and constant improvements in its development and production processes.
- Page 114 Page intentionally left blank. APPENDIX...
- Page 115 2) The Quality System is in compliance with the UNI EN ISO 9000 series of Standards. Olivetti S.p.A. Sede Sociale Ivrea, Via Jervis, 77 - Cap. Soc. Euro 154.000.000 - C.C.I.A.A. Torino n. 547040 - Trib. Ivrea Reg. Soc. n.1927 - Cod. Fisc. e Part. IVA 02298700010...
- Page 116 381746B-01...