Table of Contents
Advertisement
This device complies with FCC Rules part 15. Operation is subject to the following two
conditions, (1) This device may not cause harmful interference and, (2) This device must
accept any interference that may be received, including interference that may cause undesired
operation.
The manufacturer is not responsible for any radio or TV interference caused by unauthorized
modifications to this equipment. Such modifications could void the user's authority to
operate the equipment.
One or more of these patents may apply to this product:
#5,612,669 #5,654,688 #5,663,704 #5,729,191 #5,818,329 #5,612,578 #5,739,747 #382,558 #385,878
#5,750,942 #5,739,748 #5,719,551 #406,107 #701,285 #5,973,592 #5,982,277 #5,986,571 #6,011,460 #6,037,859
#6,049,268 #6,130,605 #6,130,606 #6,140,938 #6,140,939 #6,150,926 #6,144,315 #6,184,780 #6,188,326
Foreign Patent #199700312 #EP0817734B1 #98906445.6 #2,320,248 #701,285
If additional or replacement transmitters for your Excalibur ATV-1000 are desired,
please legibly fill in the order form below. Cut out the order form, enclose a check or
money order in the correct amount, (Please remit $ 35.00 for each transmitter ordered)
and mail to:
Omega Research and Development, Inc.
P. O. Box 508
Douglasville, Georgia 30133
The correct transmitter for your
Excalibur ATV-1000 is "#143-03".
Advertisement
Table of Contents

Related Manuals for Omega Excalibur ATV-1000


Summary of Contents for Omega Excalibur ATV-1000
- Page 1 #6,049,268 #6,130,605 #6,130,606 #6,140,938 #6,140,939 #6,150,926 #6,144,315 #6,184,780 #6,188,326 Foreign Patent #199700312 #EP0817734B1 #98906445.6 #2,320,248 #701,285 If additional or replacement transmitters for your Excalibur ATV-1000 are desired, please legibly fill in the order form below. Cut out the order form, enclose a check or money order in the correct amount, (Please remit $ 35.00 for each transmitter ordered)
-
Page 2: Table Of Contents
Table Of Contents Introduction ....................5 & 7 Remote Transmitter Operations ................6 Arming the System Using the Transmitter ............7 Passively Arming the System ................8 Security System Armed and Triggered ............9-11 Disarming the System ................... 11-12 Remote Panic Feature ................... 12-13 Optional 2nd Channel Output (Trunk Release) and 3rd Channel Output .. - Page 3 Please spend time reviewing this guide to become familiar with your new Excalibur ATV-1000 vehicle security and convenience system. You will find that your new system will give you years of trouble-free convenience and protection. To learn how to operate your system, please become familiar with the following three principal user components: the Remote Transmitter, the Red LED Status Light and the Valet Switch.
-
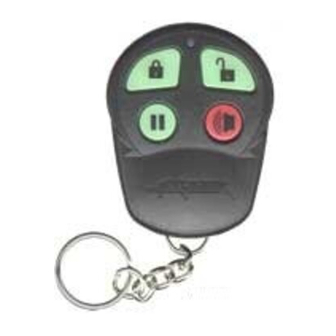
Page 4: Remote Transmitter Operations
Remote Transmitter Operations Pressing and releasing the Pressing and releasing the “disarm/ “arm/lock” button arms unlock” button disarms the system the security system and unlocks the doors unless and locks the doors. the system is activated. The Pressing and holding unlock operation may be this button for three configured so that pressing... -
Page 5: Arming The System Using The Transmitter
The Red LED Status Light: Informs you of the different conditions the security system can be in and also serves as a visual deterrent to break-ins and theft. The Valet Switch: In “every day” operation, the Valet Switch is used to place the system into "Valet Mode". -
Page 6: Passively Arming The System
Arming Bypass: Upon arming, if any sensing circuit is inoperable, that circuit only will automatically be bypassed. When an unsecured system circuit is in a bypassed state, all other operating circuits will be protected normally. For example, should the trunk be open, you can still arm the system with the transmitter. -
Page 7: Security System Armed And Triggered
When the vehicle's last door is closed the siren will chirp once, the parking and interior lights flash once and the LED Status Light will begin to flash rapidly. Thirty seconds later the siren will chirp and the lights will flash again, the doors will lock (which is separately programmable) and the LED Status Light will slow to a steady flash, confirming that the security system is fully armed. - Page 8 The siren will sound and the parking and interior lights will flash for 60 seconds unless you disarm the system with the transmitter or the Valet Switch and ignition key. If all protected entries are secure at the end of 60 seconds, the system will stop and rearm to detect further entry attempts.
-
Page 9: Disarming The System
the system require disarming due to being activated from nuisance or malicious false sensory inputs, such as typically produced by severe weather conditions. To remotely unlock the doors if the system is disarmed while activated, simply repeat the disarm operation by pressing and releasing the “disarm/unlock” transmitter button again. If disarmed from a panic mode, the normal disarm indications are present, including the unlocking of the doors. -
Page 10: Remote Panic Feature
Automatic Rearming Feature: Should you unknowingly press the transmitter button, which results in your system disarming, the system will automatically rearm itself 90 seconds later and once again lock the doors. This feature is programmable, and may be turned on if it is desired. Automatic Rearming can be paused by opening the door or stopped by turning "on"... - Page 11 “panic”, “arm/lock” or “disarm/unlock” button. When turning off Panic mode from the transmitter, pressing “arm/lock” to stop Panic will leave the system armed with locked doors, and pressing “disarm/unlock” will leave the system disarmed with unlocked doors, and pressing “panic” will leave the system in the same arm/disarm state it was in before Panic was activated, and not lock or unlock the doors.
-
Page 12: Using The Valet Switch
Using The Valet Switch The primary function of the Valet Switch is to place your Excalibur security system into Valet Mode, which prevents it from arming. You will find this useful when stopping at service stations, having your vehicle serviced, having your car valet parked or while having your car washed. - Page 13 doors will also lock when the ignition switch is turned "on" and unlock when it is turned "off"'. While the security system is in the Valet Mode, every time the ignition switch is turned "off", the siren will chirp once as a reminder. To turn off Valet Mode, simply press the Valet Switch, and instantly the security system will exit Valet Mode, and the LED Status Light will turn off.
- Page 14 Step 1 - While the system in the armed condition, enter via the driver's door. Be aware that the system will activate when the door is opened, sounding the siren, flashing the parking and dome lights, and locking the doors should the door entered be closed again before disarming the system.
-
Page 15: Red Led Status Light
Override factory setting of "stage #1, one valet switch press and stage #2, no valet switch press" is present, simply pressing the valet switch once within 10 seconds of turning the ignition switch "on" will override and disarm the system. Red LED Status Light The LED Status Light is a visual indication of what state the security system is in at any given time. - Page 16 5) Flash-2x & Pause = The security system was triggered from the hood and trunk circuit, or the current sensing circuit. 6) Flash-3x & Pause = The security system was triggered from the door circuit. 7) Flash-4x & Pause = The security system was triggered from the Auxiliary Sensor Port circuit.
-
Page 19: Audible And Visual Indications
has occurred. For 48 hours after any transmitter is programmed to operate the system, every time the ignition switch is turned "on", the siren will chirp rapidly for two seconds, and the LED Status Light will flash between pauses the number of operable transmitters for 90 seconds. - Page 20 3) One siren chirp after the arming chirp previously mentioned: The auxiliary sensor circuit is bypassed by pressing the “channel 2” transmitter button within 3 seconds of pressing the “arm/lock” transmitter button. 4) One siren chirp, and no light flash, but only at the moment the ignition switch is turned "off": The system is in Valet Mode, and will not arm actively or passively.
-
Page 21: Anti-Carjacking Protection
Auxiliary Shock Sensor With Prewarn Your Excalibur vehicle security system includes an auxiliary shock sensor which greatly increases the effectiveness of your system. A light shock or impact to the vehicle will initiate the Prewarn feature, while a heavier shock or impact will fully activate the security system. Other sensors are available, including a radar-technology sensor that can detect moving objects inside and outside the vehicle. -
Page 22: Optional Backup Battery
The Omega dealer from which you purchased your vehicle security system can provide more details on the exact operation of the system when it is equipped with this option. -
Page 23: How To Program Transmitters
How To Program Transmitters The Excalibur comes with two pre-programmed transmitters, but as many as four may be used to operate the system. Each transmitter has its own unique and ever-changing digital “code”, which is programmed to operate the system by a special “learning” procedure. When adding transmitters to operate the security system, all previous transmitter codes are deleted, so all transmitters which are to operate the system must be programmed at the same time. -
Page 24: Programmable Features
Programmable Features The Excalibur vehicle security system has 25 programmable features which allows you to customize your system to fit your personal preferences and needs. This section describes each of features in more detail, and the following section explains the programming procedure. - Page 25 disarm. With a custom-programmed Selectable Code Override of, for example, "3 and 9 presses", upon entering the vehicle and turning the ignition "on", the valet switch must be pressed three times. This causes the audible output (i.e.- horn or siren) to stop sounding and emit one chirp.
- Page 26 doors lock when the system automatically arms may added to this feature's operation. The Last Door Arming feature is independent of the Automatic Rearming Feature. #3 Automatic Rearming: Default OFF. This feature ensures that your Excalibur sys- tem is always armed. It is possible, on occasion, to accidentally and unknowingly disarm the system by having an object press the transmitter button while in a pocket or purse.
- Page 27 by pressing and holding the Valet Switch for 2 seconds to disengage it. #5 Doors Lock With Last Door Arming: Default OFF. This feature adds the locking of the doors to feature #2; when the system automatically arms 30 seconds after the vehicle's last door is closed, the doors will also lock.
- Page 28 your vehicle is configured to unlock the driver's door only upon disarming, this feature will unlock only that door upon turning the ignition "off". Please consult with the installer as to the feasibility of adding the driver's door only unlock configuration to your vehicle, as power door locking systems differ in compatibility to this feature.
- Page 29 mation chirps; the silent operation may be achieved on a onetime temporary basis by pressing and releasing the transmitter's “channel 2” button twice when arming or disarming the system. Even if this feature is used to remove the confirmation chirps, the audible Unau- thorized Transmitter Alert feature will still operate as described on page 17 and 20.
- Page 30 #15 Disarm System Upon Activating 2nd Channel: Default ON. This Feature auto- matically disarms the system when the “channel 2” button is pressed to operate the op- tional output, which is typically used for trunk release. If this feature is turned off, the channel 2 output will still operate, but the system will remain armed.
- Page 31 active arming from the transmitter, Last Door Arming, and Automatic Rearming. When programming, please note that pressing the remote transmitter's “arm/lock” button sets the 3 second arming delay, and pressing the “disarm/unlock” button sets the 45 second delay. #19 Steady Siren or Pulsed Horn Output: Default Steady Siren. This feature allows the choice of using the electronic siren for the audible output of the security system or the vehicle's horn.
- Page 32 closure feature, this programmable feature allows the installer the option of interfacing the Excalibur system to operate this feature. Typically, this option would close all windows and the sunroof, in addition to locking the doors, when arming the system. Consult with the installer on this option, as the vehicle must be properly equipped to utilize this feature.
-
Page 33: How To Program Features
by the opening of a door while the ignition switch is "on". Once the engine is running, if a door is opened the valet switch must be pressed before 60 seconds expires. Otherwise, the operation of this feature is identical to that described for "Ignition Activated Anti- Carjacking Protection". - Page 34 Step 2 - Press the valet switch the same number of times as the feature number (the system will acknowledge the valet switch entry by repeating the same number in siren chirps and the LED Status Light flashes a like amount) Step 3 - Press the transmitter's “arm/lock”...