Xerox 4590 User Manual
Enterprise printing systems
Hide thumbs
Also See for Xerox 4590:
- System administration manual (402 pages) ,
- User manual (520 pages) ,
- Getting started (72 pages)
Table of Contents
Advertisement
Quick Links
Download this manual
See also:
Operator's Manual
Advertisement
Table of Contents

Related Manuals for Xerox Xerox 4590


Summary of Contents for Xerox Xerox 4590
- Page 1 Version 3.2 January 2008 Xerox 4590 Enterprise Printing Systems Xerox 4110 Enterprise Printing Systems User Guide...
- Page 2 Xerox® and all Xerox product names and product numbers mentioned in this publication are trademarks of XEROX CORPORATION. Other company brands and product names may be trademarks or registered trademarks of the respective companies and are also acknowledged.
-
Page 3: Table Of Contents
Table of contents Product overview Related information sources....... . .1-1 Customer documentation updates . - Page 4 Tab l e of c o n te nts Load tab paper ......... .2-13 Change the size of paper trays.
- Page 5 Tab l e o f c on te n ts Replacing the staple waste container ......5-11 Emptying the punch scrap container .
- Page 6 Tab l e of c o n te nts Standard printing area ........7-10 Extended printing area .
-
Page 7: Product Overview
DocuSP Controller. Customer documentation updates You can get the latest customer documentation and information for your product by going to www.xerox.com and doing one of the following: • Enter your product number (e.g., 4110, 4595) in the Search field and select Search. -
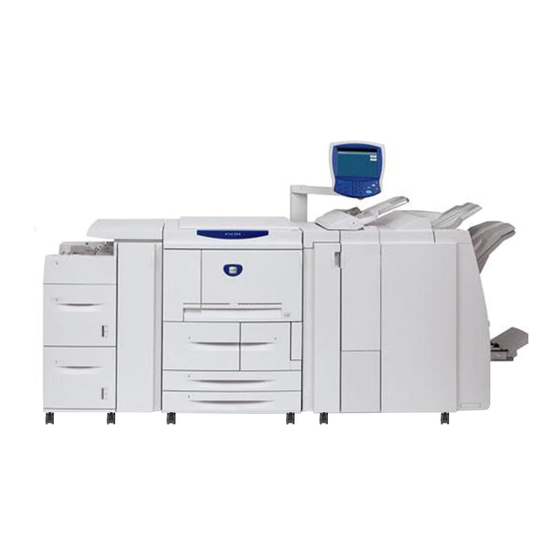
Page 8: Introducing The 4110 Eps/4590 Eps
110 pages per minute (8.5 x 11 inches/A4) while the 4590 EPS configuration prints up to 90 pages per minute. The Xerox 4110 EPS/4590 EPS can feed a variety of paper types and weights. Both heavy weight and light weight paper media can run reliably. -
Page 9: Job Submission And Workflow
1 . P r od u c t o v e r v ie w Job submission and workflow Jobs are sent to the Xerox 4110 EPS/4590 EPS network printer by way of the DocuSP Controller, which is the interface between the printer and the client workstation. -
Page 10: Machine Components
1. P r o d uc t o v er v iew Machine components WARNING: To prevent personal injury, do not touch any labeled area that indicates High Temperature. 1- 4 X e r o x 4 5 90 E P S /4 11 0 E P S Us e r G ui d e... - Page 11 1 . P r od u c t o v e r v ie w Component Function DocuSP Controller The DocuSP Print Services software that provides a graphical user interface (GUI) to the printer for setting up and printing jobs, setting up the printer, controlling system-level preferences, and managing fonts, security, accounting, and many other activities.
- Page 12 1. P r o d uc t o v er v iew 1- 6 X e r o x 4 5 90 E P S /4 11 0 E P S Us e r G ui d e...
- Page 13 1 . P r od u c t o v e r v ie w Component Function Waste toner Open this cover when removing the waste toner bottle. container cover Waste toner Collects used toner. container Lever Use in order to pull out the transfer module. Fuser Fuses the printed image on the paper.
- Page 14 1. P r o d uc t o v er v iew 1- 8 X e r o x 4 5 90 E P S /4 11 0 E P S Us e r G ui d e...
- Page 15 1 . P r od u c t o v e r v ie w Component Function Post-process inserter Loads and inserts offset and color documents, preprinted tabs, covers, or (Tray 8) transparency separators. Decurl button For lighter weight paper especially, press this button to decurl the output. Output tray Prints are delivered here when specific output features are selected, such as Automatic sorting, Collated, Uncollated or Normal.
-
Page 16: User Interface (Ui)
1. P r o d uc t o v er v iew User Interface (UI) The User Interface (UI) consists of the Control Panel and Touch Screen. The following describes the names and functions of components and indicators on the Control Panel. KEY POINT: The screens shown on the User Interface are a representation only of the type of screens that may be seen on the system. - Page 17 1 . P r od u c t o v e r v ie w Component Function Control panel Allows keypad selection of features. Touch Screen Allows selections to be made simply by touching a button on the screen. Lights when the machine is in the Power Saver mode. To Power Saver cancel the Power Saver mode, press this button.
-
Page 18: Power On/Off
1. P r o d uc t o v er v iew Power on/off WARNING: Never touch a labeled area indicating High Temperature. Contact can lead to burns. Switch on the power before operating the machine. After the power is on, the machine will take about 5 minutes to warm up before you can start printing. -
Page 19: Power Off
1 . P r od u c t o v e r v ie w Power off CAUTION: Switching off the power of the machine may cause loss of data being processed. Before turning the power off, make sure that all print jobs have completely finished. -
Page 20: Power Saver Mode
1. P r o d uc t o v er v iew Power Saver Mode The machine is installed with a Power Saver feature that will automatically shut off the electricity to the machine if no print data is received for a certain duration. Even though the Control Panel display will be off, the Power Saver button will be lit indicating that the machine is in Power Saver Mode. -
Page 21: Paper And Other Media
To ensure correct printing and make full and effective use of the performance of the machine, it is recommended that you use only the paper types approved by Xerox. Printing with paper that is a different type or size from the paper selected by the printer driver, or printing from an unsupported paper tray, can result in paper jams, reduced print quality, malfunctions, and other problems. - Page 22 2. P a p er an d o th e r m e di a Tray 3 16 lb. Bond (60 gsm) to • Plain Variable from: 5.5” x 7.2” 80 lb. Cover (216 gsm) • Recycled (140 x 182 mm) •...
-
Page 23: Storing And Handling Paper
2 . P ap er a nd o th e r m ed i a Storing and handling paper Consider the following when storing paper: • Store paper inside a cabinet or other dry place. Paper that has absorbed moisture can cause paper jams and image quality defects. -
Page 24: Paper Tray Features
2. P a p er an d o th e r m e di a Paper tray features This section provides an overview of the paper tray features and functionality on the 4590 EPS/4110 EPS printer. Automatic paper size detection feature When you load standard-sized paper in trays 3, 4, 6 and 7, the size is automatically detected by the machine. -
Page 25: Automatic Tray Switching Feature
2 . P ap er a nd o th e r m ed i a Automatic tray switching feature When the paper tray currently being used is empty, the machine automatically switches to another tray containing paper of the same size, weight, type and feeding orientation (SEF or LEF) as the tray currently being used. -
Page 26: Load Paper
2. P a p er an d o th e r m e di a Load paper NOTE: When the machine runs out of paper during printing, a message is displayed on the Printer UI. Add paper according to the displayed instructions. Printing automatically resumes when paper is added. -
Page 27: Load Paper In Trays 3 And 4
2 . P ap er a nd o th e r m ed i a Load paper in trays 3 and 4 For information about changing the paper attributes (size, weight, etc.) and orientation, refer to “Change the size of paper trays” in this chapter. -
Page 28: Load Paper In Tray 5 (Bypass)
2. P a p er an d o th e r m e di a Load paper in Tray 5 (Bypass) When printing with paper that does not match the sizes or types in trays 1 to 4 and the optional trays 6 or 7, use Tray 5 (Bypass). Specify the type of paper to load in the Printer Manager at the DocuSP Controller. -
Page 29: Load Paper In The Optional High Capacity Feeder (Trays 6 And 7)
2 . P ap er a nd o th e r m ed i a Load paper with the side to be printed on facing up, and insert the paper lightly along the paper guide on the front side of the machine until it comes to a stop. -
Page 30: Load Paper In The Optional Oversized High Capacity Feeder (Tray 6)
2. P a p er an d o th e r m e di a Push the tray in gently until it comes to a stop. Load paper in the optional Oversized High Capacity Feeder (Tray 6) Pull out the tray towards you until it stops. WARNING: When pulling out the paper tray, do it slowly. - Page 31 2 . P ap er a nd o th e r m ed i a CAUTION: For paper heavier than 256 gsm, slide both Paper Weight Switches to the heavier weight position (257 - 300 gsm). Failure to do so may result in paper jams. Move both Paper Weight Switches to their appropriate positions.
-
Page 32: Load Paper In The Optional Tray 8 (Post-Process Inserter)
2. P a p er an d o th e r m e di a Load paper in the optional Tray 8 (post-process inserter) The Post-Process Inserter is meant for loading paper (blank, copied paper, and so forth) to be used as separators and covers. Media loaded here will not be used to make copies. -
Page 33: Load Tab Paper
2 . P ap er a nd o th e r m ed i a Load tab paper Load tab paper in trays 3 and 4 Pull out the tray towards you until it stops. When pulling out the paper tray, do it slowly. If WARNING: pulled out with too much force, the tray can hit and injure your knees. - Page 34 2. P a p er an d o th e r m e di a Load tab paper in Tray 5 (Bypass) Open Tray 5 (Bypass). NOTE: If necessary, extend the extension flap. The extension flap can be extended in two stages. When pulling out the extension flap, do it gently.
- Page 35 2 . P ap er a nd o th e r m ed i a Load tab paper in Tray 8 (Post-process inserter) Hold the center of the paper guides and slide them to the desired paper size. If the paper in already printed on, load the paper with the printed side facing up and with the tab side to be fed first.
-
Page 36: Change The Size Of Paper Trays
2. P a p er an d o th e r m e di a Change the size of paper trays NOTE: If you need to change the paper size for trays 1 and 2, contact the Customer Support Center. Paper tray attributes are configurable and should match the attributes of the paper to be loaded to maintain high print quality. - Page 37 2 . P ap er a nd o th e r m ed i a While pressing the paper guide lever (2 paper guides), adjust the paper guide to match the size of your paper. Check that the paper guides fit correctly in the slots and release the paper guide lever.
-
Page 38: Change The Size In The Optional Trays 6 And 7 (Hcf)
2. P a p er an d o th e r m e di a Change the size in the optional Trays 6 and 7 (HCF) NOTE: When changing the paper size to non-standard size loaded in trays 6 and 7, contact your Customer Support Center. -
Page 39: Change The Paper Size In The Optional Ohcf (Tray 6)
2 . P ap er a nd o th e r m ed i a Load and align the edge of the paper against the right edge of the tray with the side to be printed on facing up. KEY POINT: Do not load paper exceeding the maximum fill line. Doing so might cause paper jams or machine trouble. - Page 40 2. P a p er an d o th e r m e di a Load and align the paper stack in the lower right corner of the tray as shown below. NOTE: Do not load paper exceeding the maximum fill line. Doing so might cause paper jams or machine malfunctions.
-
Page 41: Change/Verify The Paper Tray Attribute Settings
2 . P ap er a nd o th e r m ed i a Change/verify the Paper Tray Attribute settings NOTE: For information on programming paper tray attributes on the DocuSP Controller, refer to the DocuSP online Help. If paper in a tray has changed, the paper tray attribute settings associated with that tray may need to be modified. - Page 42 2. P a p er an d o th e r m e di a Paper Type names and weight Printer Paper Types & DocuSP Paper DocuSP Paper Paper can be used Weights Types in which trays: weight (g/m Full-Cut Tab 250 (or 150 if 250 is Tray 5 Tab Stock 2 (217-253 g/m...
-
Page 43: Program/Verify The Tray Settings From The All Services Screen
2 . P ap er a nd o th e r m ed i a Program/verify the tray settings from the All Services screen NOTE: The UI screens shown may or may not reflect your system configuration. The UI screens vary from system to system and from marketplace to marketplace. - Page 44 2. P a p er an d o th e r m e di a Select the desired paper tray and select Change Settings. Select Paper Size. Select either Auto Size Detect or Variable. • If you select Auto Size Detect, select save to save and close the window.
- Page 45 2 . P ap er a nd o th e r m ed i a • If you select Variable, the screen displays: Select the width and height of the paper by selecting buttons. Select Save. Select Paper Type/Color. Select the desired Paper Type and if applicable, the Paper Color, and then select Save.
- Page 46 2. P a p er an d o th e r m e di a Select Save to return to the Tray screen. Select Save to return to the Paper Tray Attributes screen. Choose one of the following: a. If you want to change the attributes for another tray, repeat Step 2.
-
Page 47: Program/Change The Default Tray Settings (System Administration)2-27
2 . P ap er a nd o th e r m ed i a Program/change the DEFAULT tray settings (System Administration) Press the Log In/Out button. Log In/Out button Enter the System Administrator Login ID (password) with the numeric keypad, and select Confirm. Select System Settings. - Page 48 2. P a p er an d o th e r m e di a Select System Settings. Select Common Settings. Select Paper Tray Settings. 2- 2 8 X e r o x 4 5 90 E P S /4 11 0 E P S Us e r G ui d e...
- Page 49 2 . P ap er a nd o th e r m ed i a Select Paper Tray Attributes. Select the desired paper tray and select Change Settings. Select Paper Size. NOTE: The Paper Size option is not available for Trays 1 and 2.
- Page 50 2. P a p er an d o th e r m e di a Select either Auto Size Detect or Variable. • If you select Auto Size Detect, select save to save and close the window. • If you select Variable, the screen displays: Select the width and height of the paper by selecting buttons.
- Page 51 2 . P ap er a nd o th e r m ed i a NOTE: The Paper Color option is available only if it is Enabled from System Settings. Refer to the System Administration Guide, Chapter 5, the section entitled “Customize the paper color screen.”...
-
Page 52: Manually Confirm/Change The Tray Settings On The Docusp
2. P a p er an d o th e r m e di a Manually confirm/change the tray settings on the DocuSP KEY POINT: You can quickly and easily check the status of the printer trays from the DocuSP by selecting Printer Status from the Printer pull-down menu. - Page 53 2 . P ap er a nd o th e r m ed i a Check the paper tray settings for the desired tray(s). • Ensure that the settings reflect any changes made to the tray (such as size, type, weight, etc.). •...
- Page 54 2. P a p er an d o th e r m e di a 2- 3 4 X e r o x 4 5 90 E P S /4 11 0 E P S Us e r G ui d e...
-
Page 55: Job Status
Job Status KEY POINT: Since jobs are managed, printed and deleted through the DocuSP Controller, it is recommended that you check the status of the print jobs at the controller. Job status overview The Job Status feature lets you check executing, pending, and completed jobs. -
Page 56: Checking Current/Pending Jobs
3. J o b Sta tu s Checking current/pending jobs This section describes how to check current or pending jobs. In the Job Status screen, you can cancel jobs, or execute jobs in the order you set. Press the Job Status button. Select the Current and Pending Jobs tab. -
Page 57: Checking Completed Jobs
3. J o b Stat u s Checking completed jobs This section describes how to check completed jobs. You can check whether a job has completed successfully as well as display more details about a selected job. Press the Job Status button. Select the Completed Jobs tab. -
Page 58: Printing Waiting Jobs
3. J o b Sta tu s Printing waiting jobs You can print pending print jobs. NOTE: If there are no pending print jobs, then you cannot select Print Waiting Jobs. Press the Job Status button. Select the Print Waiting Jobs tab. Locate and select the job to print. -
Page 59: Machine Status
Machine status Machine status overview You can check the machine status and number of printed pages on the screen. You can also print a report/list, as well as check the job history and settings/recorded values. Press the Machine Status button. Machine Status button Review the Machine Status screen;... -
Page 60: Machine Information
4. M a c hi n e s ta tu s Machine status From the Machine Status screen, you can check the configuration of the machine, the paper tray status, and set the print mode. Press the Machine Status tab. Make a selection from the Machine Status screen. - Page 61 4. M ac h i n e s tat u s Machine Configuration This displays the Machine Configuration screen, which identifies the devices associated with the machine such as feeders, print drivers and finishing equipment. Software Version This displays the Software Version screen that identifies the version of all software applications loaded on the machine.
-
Page 62: Paper Tray
4. M a c hi n e s ta tu s Software version screen You can check the software version of the IOT and finisher, for example. From the Machine Status screen, select Machine Information and then Software Version. NOTE: Select to display the previous screen and select display the next screen. -
Page 63: Overwriting The Hard Disk (Optional)
4. M ac h i n e s tat u s From the Machine Status screen, select Paper Tray. When finished examining the tray configurations, select Close. Overwriting the hard disk (optional) You can check whether the hard disk is being overwritten. When “Standby”... -
Page 64: Print Mode
4. M a c hi n e s ta tu s Print mode You can set the printer mode. NOTE: The items that appear depend on the options that are installed. From the Machine Status screen, select Print Mode. Make a selection: Off-line The printer cannot accept data. - Page 65 4. M ac h i n e s tat u s Retrieve programming You can recall and use a printer mode saved in memory. From the specified printer language screen, select Retrieve Programming. Select Factory Defaults to use the software default settings or select Custom Settings to select the custom settings memory number to use.
- Page 66 4. M a c hi n e s ta tu s Item Number Enter the item number for the feature you want to set. Current Value When you enter an Item Number, this shows the currently set value. Select Confirm. Select Change Value.
- Page 67 4. M ac h i n e s tat u s Select either Store Current Selections or Delete to identify the task you want to perform. Store Current Selections This stores the current selections. If you select a number in which information is already stored, this data is overwritten.
-
Page 68: Billing Meter/Print Report
4. M a c hi n e s ta tu s Billing meter/print report From the Billing Meter/Print Report tab on the Machine Status screen, you can check the number of pages printed for each meter or for each user. You can also print a report/list and check the job history and settings/recorded values. -
Page 69: Job Status
4. M ac h i n e s tat u s Note the current meter count. Serial Number Displays the Serial Number of the machine. Total Impressions This shows the number of pages printed. Select Close to leave this screen. Job status From the Print Report/List screen, select Job Status. -
Page 70: Print Mode Settings
4. M a c hi n e s ta tu s Print mode settings From the Print Report/List screen, select Print Mode Settings. Select the report or list to be printed. NOTE: The items displayed depend on the options that are installed. -
Page 71: Consumables
KEY POINT: If using a partly consumed toner cartridge (for example, a toner cartridge removed from another Xerox machine), the indicated status may not match the actual amount of consumable remaining. When replacing toner cartridges, it is recommended that you use new supplies. -
Page 72: Faults
4. M a c hi n e s ta tu s Faults This section describes how to check the information given with respect to a fault in the machine. The Error History Report shows the last 50 errors that occurred on the machine. -
Page 73: Maintenance
It is recommended that you use the following consumables since they have been made according to standards that match the specifications of the machine. CAUTION: Use only consumables recommended by Xerox for the machine. The use of consumables not recommended by Xerox may impair quality and performance. -
Page 74: Confirming Status Of Consumables
CAUTION: Using toner cartridges not recommended by Xerox may impair quality and performance. Use only toner cartridges recommended by Xerox for the machine. If a partially used toner cartridge is used, the number of pages that you can print after the “Please order a new xxx”... - Page 75 5. M ai n te n an c e CAUTION: When replacing toner cartridges, toner may spill and dirty the floor. It is recommended that you first lay paper on the floor before accessing the cartridge. Open the left cover of the machine. Turn the toner cartridge to the left until it aligns with the unlock sign.
- Page 76 5. M a i nt en a nc e Remove the new cartridge from the box and shake the toner cartridge to the left and right before removing it from the bag. Hold the toner cartridge with the arrow ( ) mark facing up.
-
Page 77: Replacing The Waste Toner Container
CAUTION: Using waste toner containers not recommended by Xerox may impair quality and performance. Use only waste toner containers recommended by Xerox for the machine. CAUTION: When replacing the waste toner container, toner may spill and dirty the floor. - Page 78 5. M a i nt en a nc e Grip the handle of the waste toner bottle and pull it out about half way. Hold the center part on the top of the bottle (as shown in the illustration), and then use both hands to remove the bottle. Hold the used waste toner container firmly with both hands and put it into the provided plastic bag.
-
Page 79: Replacing The Staple Cartridge
A message appears on the Control Panel screen when it is time to replace the staple cartridge. CAUTION: Using staple cartridges not recommended by Xerox may impair quality and performance. Use only staple cartridges recommended by Xerox for the machine. - Page 80 5. M a i nt en a nc e Locate the R1 area within the machine and grasp the R1 handle. Pull the staple cartridge straight out from the machine. Remove the staple cartridge from the staple case by rotating the staple cartridge up and out of the staple case.
-
Page 81: Replacing The Staple Cartridge For Booklets
When a booklet finisher (optional) is installed and it is time to replace the staple cartridge for booklets, a message appears on the Control Panel screen. CAUTION: Using staple cartridges not recommended by Xerox may impair quality and performance. Use only staple cartridges recommended by Xerox for the machine. - Page 82 5. M a i nt en a nc e Pressing the lever to the right, pull out the booklet staple cartridge. Hold the tabs of the booklet staple cartridge and then lift to remove it. Holding the tabs of a new booklet staple cartridge, return the cartridge to the original position and gently push it until it clicks.
-
Page 83: Replacing The Staple Waste Container
5. M ai n te n an c e NOTE: A message will be displayed and the machine will not operate if the right cover is even slightly open. Replacing the staple waste container The staple waste container collects the unused staple cuttings from the staple cartridge. -
Page 84: Emptying The Punch Scrap Container
5. M a i nt en a nc e Align the bottom of the new staple waste container onto the support shelf.. Push the container into the machine until you hear a click noise. After a short delay, the new staple waste container will lock automatically. - Page 85 5. M ai n te n an c e NOTE: Remove the container while the machine is powered on. If you switch the power off when emptying the scrap container, the machine will not be able to detect that the scraps have been disposed.
-
Page 86: Cleaning The Machine
5. M a i nt en a nc e CAUTION: Pulling out the container and pushing it back into place resets the punch counter setting to 0. Make sure to completely empty the container so the counter number accurately matches the state of the container. Close the right cover of the light finisher. -
Page 87: Problem Solving
Problem Solving Troubleshooting Use the following information for troubleshooting procedures to solve the problems. Power is not switched On. Is the power switch on the machine turned off? Cause Turn the power switch on. Action Refer to “Power on/off” in Chapter 2. Is the power cord plugged into the power outlet? Cause Turn the power switch off and then firmly plug in the power... - Page 88 6. P r o b le m S o l v in g A message is displayed. Has a paper jam occurred? Cause For information on paper jams, refer to “Paper Jams” in this Action chapter. An error code displayed? Cause Refer to “Error Code”...
-
Page 89: Machine Trouble
6 . P r o b le m S o l vi n g Machine trouble If you think some trouble is occurring on the machine, check the machine status again. WARNING: Precision components and high-voltage power supplies are used on the machine. Never open or remove machine covers that are screwed shut unless specifically instructed in the User Guide. - Page 90 6. P r o b le m S o l v in g Symptoms Check Remedy Online indicator Is the interface cable Turn the power switch off, unplug the power cord does not light disconnected? from the power outlet, and check the interface cable even though you connection.
- Page 91 6 . P r o b le m S o l vi n g Symptoms Check Remedy Paper is often Is paper loaded properly in the Load paper correctly. jammed or paper tray? Refer to “Loading paper in trays 1 and 2” in chapter wrinkled.
-
Page 92: Image Quality Problems
6. P r o b le m S o l v in g Image quality problems When image quality of the printed result is poor, choose the closest symptom in the following table and perform the required remedy. If image quality is not improved by performing the relevant remedy, contact the Customer Support Center. - Page 93 6 . P r o b le m S o l vi n g Symptoms Check Remedy Printing is faint Is the paper damp? Replace with paper from a new ream. (smudged, Refer to “Loading paper” in Chapter 3. unclear). The drum cartridge is depleted or Contact the Customer Support Center.
- Page 94 6. P r o b le m S o l v in g Symptoms Check Remedy White dots appear The paper in use is unsuitable. Load suitable paper. in black filled areas. Refer to “Loading paper” in Chapter 3. The drum cartridge is depleted or Contact the Customer Support Center.
- Page 95 6 . P r o b le m S o l vi n g Symptoms Check Remedy White areas or Is the paper damp? Replace with paper from a new ream. stripes appear. Refer to “Loading paper” in Chapter 3. The paper in use is unsuitable.
- Page 96 6. P r o b le m S o l v in g Symptoms Check Remedy Outline characters The drum cartridge is depleted or Contact the Customer Support Center. on a colored damaged. background longwise. Text or images are The paper guide in the paper tray Set the horizontal and vertical paper guides to the printed at an angle.
-
Page 97: Trouble During Printing
6 . P r o b le m S o l vi n g Trouble during printing Unable to print This section describes solutions when unable to print. Data remains in the Cause The printer is not powered on. printer icon Action Turn the power on. - Page 98 6. P r o b le m S o l v in g Sent to printer Cause Out of paper. Action Supply paper to the printer. Cause No paper for the specified paper size. Action Set paper for the specified paper size. Refer to “Loading paper in trays 1 and 2”...
-
Page 99: The Printed Result Is Not What Was Expected
6 . P r o b le m S o l vi n g The printed result is not what was expected This section describes solutions for situations in which the print result is different from that expected. No stapling done The number of pages to staple exceeds 100 sheets. - Page 100 6. P r o b le m S o l v in g The settings specified A print driver for another model is in use. Cause for print options do not take effect Install the print driver for this model. Action The optional apparatus cannot be attached to the Cause...
-
Page 101: Error Code
6 . P r o b le m S o l vi n g Error code If an error caused the printing to end abnormally or a malfunction occurred in the printer, then an error message code (***-***) is displayed. If an error code not described in the following tables is displayed, or the problem persists even after you have tried the following solutions, contact the Customer Support Center. -
Page 102: Other Errors
6. P r o b le m S o l v in g Other Errors Category Error Code Cause and Remedy Print/Other 003-761 The paper size of the tray selected for auto tray is Cause different from the paper size of the tray selected for Auto Repeat. - Page 103 6 . P r o b le m S o l vi n g Category Error Code Cause and Remedy Print/Other 012-400 Staple Waste Container Near Full. Cause Follow the procedures to remove and replace the staple Remedy waste container in the finisher. 012-949 Finisher Punch Scrap Container is not attached.
- Page 104 6. P r o b le m S o l v in g Category Error Code Cause and Remedy Print/Other 016-732 Unable to use registered form specified by Emulation Cause with host. Resend the form data. Remedy 016-738 Booklet Creation is not applied to the specified paper. Cause Specify the printable paper size for booklet creation.
- Page 105 6 . P r o b le m S o l vi n g Category Error Code Cause and Remedy Print/Other 016-777 A hard disk error occurred during image processing. Cause The hard disk might be defective. When replacing a hard Remedy disk, contact the Customer Support Center.
- Page 106 6. P r o b le m S o l v in g Category Error Code Cause and Remedy Print/Other 024-981 The finisher top tray is full. Cause Remove all paper from the finisher top tray. Remedy 024-982 The finisher stacker tray lower safety warning is on. Cause Remove all paper from the stacker tray and remove any Remedy...
- Page 107 6 . P r o b le m S o l vi n g Category Error Code Cause and Remedy Print/Other 075-210 Paper Tray 5 (bypass) malfunctioned. Cause 075-211 Power-cycle the machine. If the tray error is not fixed by Remedy performing the relevant remedy, contact the Customer Support Center.
- Page 108 6. P r o b le m S o l v in g Category Error Code Cause and Remedy Print/Other 116-703 An error occurred during PostScript processing. Cause Either confirm the print data or click Spool Settings on Remedy the Details tab in the print driver to set bi-directional communications to off.
- Page 109 6 . P r o b le m S o l vi n g Category Error Code Cause and Remedy Print/Other 127-210 P, O Communication error between the printer and the Cause DocuSP Controller. Error detected by the printer. Remove and reinsert the cable connection between the Remedy printer and the DocuSP Controller.
- Page 110 6. P r o b le m S o l v in g Category Error Code Cause and Remedy Print/Other A fault has P, O An auto-recoverable internal error occurred and the Cause occurred. The machine restarted automatically. machine has Select the Close button.
-
Page 111: Paper Jams
6 . P r o b le m S o l vi n g Paper jams When paper jams inside the machine, the machine stops and an alarm sounds. A message also displays on the Control Panel screen. Follow the instructions displayed and remove the jammed paper. -
Page 112: Paper Jams In Trays 1 To 4
6. P r o b le m S o l v in g Paper jams in trays 1 to 4 The following describes how to remedy paper jams that occur in trays 1 to 4. Pull out the tray where the paper jam occurred. KEY POINT: Paper is sometimes torn and remains inside the machine if you draw out a tray without checking the paper jam position. -
Page 113: Paper Jams In Transport Unit 4
6 . P r o b le m S o l vi n g Paper jams in transport unit 4 The following describes how to remedy paper jams that occur on the Transport Unit 4. Make sure that the machine has stopped before opening the front cover. -
Page 114: Paper Jams In Duplex Module 3
6. P r o b le m S o l v in g NOTE: If paper is torn, check for any torn pieces of paper inside the machine. Return lever 4a to the original position. Push tray 2 in gently until it comes to a stop. NOTE: When tray 2 is pushed, Transport Unit 4 will be inserted in simultaneously. - Page 115 6 . P r o b le m S o l vi n g Move the release lever 3a to remove the jammed paper. NOTE: If paper is torn, check for any torn pieces of paper inside the machine. Move lever 3b to the right and then remove the jammed paper. NOTE: If paper is torn, check for any torn pieces of paper inside the machine.
-
Page 116: Paper Jams In Tray 5 (Bypass)
6. P r o b le m S o l v in g Paper jams in tray 5 (Bypass) The following describes how to remedy paper jams that occur in Tray 5 (Bypass). When optional high capacity feeder tray is not installed, open the top cover of paper Tray 5 (Bypass). -
Page 117: Paper Jams In Trays 6 And 7 (Hcf)
6 . P r o b le m S o l vi n g Paper jams in Trays 6 and 7 (HCF) The following describes how to remedy paper jams that occur in trays 6 and 7 of the optional High Capacity Feeder. Pull out the tray where the paper jam occurred. -
Page 118: Paper Jams In Tray 6 (Oversized High Capacity Feeder)
6. P r o b le m S o l v in g Paper jams in Tray 6 (Oversized High Capacity Feeder) The following describes how to remedy paper jams that occur in Tray 6 of the optional Oversized High Capacity Feeder. Pull out the tray where the paper jam occurred. -
Page 119: Paper Jams In Tray 8 (Post-Process Inserter)
6 . P r o b le m S o l vi n g Paper jams in Tray 8 (Post-process inserter) The following describes how to remedy paper jams that occur in the inserter. Press the Cover button. Open the cover 1e and then remove the jammed paper and all paper loaded in the Post-Process Inserter. -
Page 120: Paper Jams In Lower Left Cover
6. P r o b le m S o l v in g Paper jams in lower left cover The following describes how to remedy paper jams that occur at the left cover of the body. NOTE: If the system includes a High Capacity Feeder, open the front cover of Trays 6 and 7 to access this area. -
Page 121: Paper Jams Inside The Body
6 . P r o b le m S o l vi n g Paper jams inside the body The following describes how to remedy paper jams that occur at the transfer module of the body. Make sure that the machine has stopped before opening the front cover. - Page 122 6. P r o b le m S o l v in g If the jam occurs at the top of the transfer module or inside the fuser unit, remove the jammed paper by pulling it out towards the left. If the jammed paper cannot be removed, lift up the lever 2c and then remove the jammed paper.
- Page 123 6 . P r o b le m S o l vi n g Shift the lever 3b on the right of the fuser unit as necessary and then remove the jammed paper. KEY POINT: If the jammed paper remains inside and it is difficult to remove, pull out the duplex module after returning the transfer module to the original position.
-
Page 124: Paper Jams Inside Finisher Left Cover
6. P r o b le m S o l v in g Paper jams inside finisher left cover This section describes how to remedy paper jams that occur at the following locations: • Paper jams at lever 1a and knob 1c •... - Page 125 6 . P r o b le m S o l vi n g Close the finisher left cover. NOTE: A message will be displayed and the machine will not operate if the Staple Finisher's left cover is even slightly open. Paper jams at lever 1d Make sure that the machine has stopped and then open the left cover on the finisher.
- Page 126 6. P r o b le m S o l v in g Paper jams at lever 1b Make sure that the machine has stopped and then open the left cover on the light finisher. Move lever 1b to the right and remove the jammed paper. NOTE: If paper is torn, check for any torn pieces of paper inside the machine.
-
Page 127: Paper Jams Inside Finisher Right Cover
6 . P r o b le m S o l vi n g Paper jams inside finisher right cover This section describes how to remedy paper jams that occur at the following locations: • Paper jams at lever 3b and 3d •... - Page 128 6. P r o b le m S o l v in g Return levers 3b and 3d the original position. Close the finisher right cover. NOTE: A message will be displayed and the machine will not operate if the staple finisher's right cover is even slightly open. Paper jams at lever 3e and knob 3c Make sure that the machine has stopped and then open the right cover on the light finisher.
- Page 129 6 . P r o b le m S o l vi n g Return lever 3e to the original position. Close the finisher right cover. NOTE: A message will be displayed and the machine will not operate if the right cover is even slightly open. Paper jams at lever 3g and knob 3f Make sure that the machine has stopped and then open the right cover on the light finisher.
- Page 130 6. P r o b le m S o l v in g Return lever 3g to the original position. Close the right cover. NOTE: A message will be displayed and the machine will not operate if the right cover is even slightly open. Paper jams at lever 4b and knob 3a Make sure that the machine has stopped and then open the right cover on the light finisher.
-
Page 131: Paper Jams At Z Folding Unit
6 . P r o b le m S o l vi n g Return lever 4b to the original position. Close the finisher right cover. NOTE: A message will be displayed and the machine will not operate if the finisher right cover is even slightly open. Paper jams at Z folding unit The following explains how to remove jammed paper from inside the Z folding unit when this optional unit is installed in a finisher D... - Page 132 6. P r o b le m S o l v in g Paper jams at lever 2a and knob 3a Make sure that the machine has stopped and then open the right cover on the light finisher. Move lever 2a up and turn knob 3a to the left. Remove the jammed paper.
- Page 133 6 . P r o b le m S o l vi n g Paper jams at lever 2b and knob 2c Make sure that the machine has stopped and then open the right cover on the light finisher. Move lever 2b, turn knob 2c to the right, and remove the jammed paper.
- Page 134 6. P r o b le m S o l v in g Paper jams at knob 2c, levers 2e/2f and tri-fold output tray 2d Make sure that the machine has stopped and then open the right cover on the light finisher. Pull out the tri-fold output tray 2d, swing lever 2e to the right, and remove the jammed paper.
- Page 135 6 . P r o b le m S o l vi n g If you cannot remove the paper in Step 2, turn knob 2c to the right, then remove the jammed paper. NOTE: If paper is torn, check for any torn pieces of paper inside the machine.
- Page 136 6. P r o b le m S o l v in g Paper jams at tri-fold output tray 2d and lever 2g Make sure that the machine has stopped and then open the right cover on the light finisher. Pull out the tri-fold output tray 2d, swing lever 2g to the right, and remove the jammed paper.
- Page 137 6 . P r o b le m S o l vi n g Paper jams at unit 4 and knob 4a Make sure that the machine has stopped and then open the right cover on the light finisher. Pull out unit 4. Turn knob 4a to the left to remove all the jammed paper from the left side of the unit 4.
- Page 138 6. P r o b le m S o l v in g If the paper cannot be removed, pull up on the green lever on the right top cover unit 4 and remove all the jammed paper. Return unit 4 to the original position. Close the finisher right cover.
-
Page 139: Paper Jams At Output Area Of Finisher
6 . P r o b le m S o l vi n g Paper jams at output area of finisher This section describes how to remedy paper jams that occur at the following locations: • Paper jams at output tray •... - Page 140 6. P r o b le m S o l v in g Paper jams at booklet output tray Make sure that the machine has stopped and then open the right cover on the light finisher. Turn knob 4a to the right to remove the jammed paper at the booklet output tray.
-
Page 141: Paper Jams At The Optional High Capacity Feeder Unit
6 . P r o b le m S o l vi n g Paper Jams at the optional High Capacity Feeder Unit This section describes how to remedy paper jams that occur at the following locations: • Paper jams in Lower Left Cover •... - Page 142 6. P r o b le m S o l v in g Close the lower left cover. Close the front cover of the high capacity feeder unit. NOTE: A message will be displayed and the machine will not operate if the High Capacity Feeder Unit front cover is even slightly open.
- Page 143 6 . P r o b le m S o l vi n g Paper jams at lever 1b Open the front cover of the high capacity feeder unit. Move lever 1b to the right and turn knob 1c to the right. Remove the jammed paper.
- Page 144 6. P r o b le m S o l v in g Paper jams at lever 1d Open the front cover of the high capacity feeder unit. Move lever 1d upwards and remove the jammed paper. NOTE: If paper is torn, check for any torn pieces of paper inside the machine.
-
Page 145: Stapler Faults
6 . P r o b le m S o l vi n g Stapler faults Perform the procedures on the following pages when prints are not stapled or when staples are bent. Contact the Customer Support Center if the problem persists after you have tried these solutions. -
Page 146: Staple Jams In The Staple Cartridge
6. P r o b le m S o l v in g Staple jams in the staple cartridge The following describes the remedy for staple jams in the staple cartridge. Make sure that the machine has stopped and then open the front cover on the finisher. - Page 147 6 . P r o b le m S o l vi n g Open the staple cartridge as shown in the illustration and remove the jammed staple. WARNING: Be careful when removing jammed staples to avoid hurting your fingers. Snap the staple cartridge back into the staple case.
-
Page 148: Staple Jams At Staple Cartridge For Booklets
6. P r o b le m S o l v in g Close the finisher right cover. NOTE: A message will be displayed and the machine will not operate if the right cover is even slightly open. If the staples cannot be removed after carrying out the above procedures, contact the Customer Support Center. - Page 149 6 . P r o b le m S o l vi n g Hold the tabs of the booklet staple cartridge and then lift to remove it. Remove the jammed staples as shown in the illustration. WARNING: Be careful when removing jammed staples to avoid hurting your fingers.
-
Page 150: Solving Curled Output
6. P r o b le m S o l v in g Solving curled output Use the De-curl button on the machine to correct curling of the output. The De-curl button functions when in operation as well as when the machine is powered on but idle. To change the curling correction mode while the machine is in operation, press the De-curl button and the change is applied immediately. -
Page 151: Mode And Function Of De-Curl Button
6 . P r o b le m S o l vi n g Mode and function of De-curl button The following describes the mode and function of the De-curl button. Downward Curling Upward Curling De-curl button Functions Indicator Mode Auto Performs curling correction automatically. - Page 152 6. P r o b le m S o l v in g 6- 6 6 X e r o x 4 5 90 E P S /4 11 0 E P S Us e r G ui d e...
-
Page 153: Specifications
Specifications Print engine specifications NOTE: This section lists the specifications of the system components. In the interest of product development, product specifications and external appearance are subject to change without prior notice. Item 4110 EPS 4590 EPS Output Resolution • 2400 × 2400 dpi (47.2 × 47.2 dots/mm) •... - Page 154 • Trays 1-4, 6, 7: 16 lb. bond - 80 lb. cover / 60 - 216 g/m • Tray 5 (Bypass): 16 lb. bond - 140 lb. index / 60 - 253 g/m Important: Use Xerox recommended papers. Otherwise, printing may not be performed correctly depending on the deployment conditions.
- Page 155 7. Sp ec i f ic a t io n s Item 4110 EPS 4590 EPS AMPV 70 - 175 K 80 - 350 K Power source 208 - 240V, 15A (dedicated) Maximum Power • Maximum Power Consumption: 2.8 - 3.1KVA Consumption •...
-
Page 156: Trays 6 And 7 (2-Drawer High Capacity Feeder) - Optional
Custom sizes: 210 - 330 mm x 182 x 488 mm Paper weight 18 lb. to 110 lb. cover / 64 - 300 g/m Paper capacity 2000 sheets Important: When using up to Xerox paper. 24 lb./90 g/m Dimensions 39” (width) × 32” (depth) × 37” (height) 988 mm (width) ×... -
Page 157: D2 Finisher/Booklet D2 Finisher
Y direction: 4-13”/100-330 mm • X direction: 5.8-19”/148-488 mm Capacity 500 sheets (unstapled) Important: When using Xerox paper. 20 lb./75 g/m X er o x 4 5 90 EP S / 4110 EP S Us e r G ui d e... - Page 158 14”/B4, 8.5 × 13", 8.5 × 14", 12 × 18", 12.6 × 19.2", 13 × 18", 13 × 19" • 8K, 16K, special A4, special A4 , special A3 Important: When using Xerox paper. 20 lb./75 g/m * When specifying staple...
- Page 159 • 200 sets maximum stacked Important: Becomes 65 sheets only for paper larger than A4 or 8.5 X 11" size. Applicable when using Xerox 20 lb./75 g/m paper. Staple position 1 place (front/inner at an angle), 2 places (parallel) Important: Angled stapling is possible only for 8.5 x 11 in./A4...
- Page 160 8K, 16K, 16K , tab paper (8.5 x 11”/A4 ) Important: You cannot print on the paper loaded in Tray Paper capacity 175 sheets Important: When using Xerox 20 lb./75 g/m paper. Paper weight 16 lb. bond - 90 lb. cover / 60 - 220g/m...
-
Page 161: Folder Module (Z And C Fold) - Optional
Specification Engineering Z- Z paper size 11 x 17”/A3, 10 x 14”/B4, 8K Fold (on large Loading capacity Max: 80 sheets (A3/11 × 17,” Xerox paper Z 20 lb./75 g/m stock) folding) Important: 20 sheets for 8K and10 x 14”/B4 Paper type 16-24 lb./60 to 90g/m... -
Page 162: Printable Area
7. Sp e c if i c at i on s Printable area The section describes the printable area available. Standard printing area The standard area that can be printed leaves a margin of 0.16 inches (0.161 in./4.1 mm) on all four edges of the paper (for SRA3, 12.6 in./320 mm wide, a margin of 0.45 in./11.5 mm left and right). -
Page 163: List Of Options
7. Sp ec i f ic a t io n s List of options The following are the principal options available. To purchase any options, contact the Customer Support Center. Product name Description High Capacity Feeder Provides additional paper capacity in trays 6 and 7. A wing (HCF) table to put documents on comes with this product. -
Page 164: Cautions And Limitations
7. Sp e c if i c at i on s Cautions and limitations This section describes notes and restrictions on the use of the machine. When the print results differ from the settings Insufficient memory for the print page buffer may cause the effects listed below to occur, giving results not expected from the settings. -
Page 165: Simple Procedures
7. Sp ec i f ic a t io n s Simple procedures This section lists those procedures that are the subject of frequently asked questions, particularly in relation to the system settings. Press the buttons in the sequence indicated by arrows. Note: Many of these settings require the System Administrator to perform the procedure. - Page 166 7. Sp e c if i c at i on s For details, refer to “Print report list” in this guide. Setting a Report/List to Automatically Print (or Not) Log In/Out UserID input System Settings System Settings Common Settings Reports Select report For details, refer to "Reports"...
-
Page 167: Safety And Notices
Safety and Notices Safety notices This Xerox product and the recommended supplies are designed and tested to meet strict safety requirements. These include safety agency approval and compliance to established environmental standards. Please read the following instructions carefully before operating the product, and refer to them as needed to ensure the continued safe operation of your product. -
Page 168: Disconnect Device
If any of the following conditions occur, immediately switch off the power to the machine and disconnect the power cord from the electrical outlet. Call an authorized Xerox service representative to correct the problem. •... -
Page 169: Laser Safety
This product contains laser warning labels. These labels are intended for use by the Xerox Service Representative and are placed on or near panels or shields that require special tools for removal. Do not remove any of the panels. There are no operator serviceable areas in these covers. -
Page 170: Europe And Other Markets
This product contains laser warning labels. These labels are intended for use by the Xerox Service Representative and are placed on or near panels or shields that require special tools for removal. Do not remove any of the panels. There are no operator serviceable areas inside these covers. -
Page 171: Safety Standards
There are no parts behind these covers that you can maintain or service. Do not perform any maintenance procedures unless you have been trained to do them by a Xerox representative, or unless a procedure is specifically described in one of the manuals included with your product. -
Page 172: Operational Safety
8. S a fe t y a nd N o ti c es Operational safety Your Xerox equipment and supplies were designed and tested to meet strict safety requirements. These include safety agency examination, approval, and compliance with established environmental standards. -
Page 173: Ozone Safety
Xerox installation procedures, ensures that concentration levels meet safe limits. If you need additional information about ozone, request the Xerox publication, OZONE by calling 1-800-828-6571 in the USA. For a French language version, call 1-800-828-6571 in the USA, then press 2. -
Page 174: Safety Extra Low Voltage Approval
Transmitter Approval requirements set forth in Public Notice DSA00-1407. Safety extra low voltage approval This Xerox product is in compliance with various governmental agencies and national safety regulations. All system ports meet the Safety Extra Low Voltage (SELV) circuits for connection to customer-owned devices and networks. -
Page 175: Certifications In Europe
8 . S a fe ty a nd No ti c e s Certifications in Europe The CE marking that is applied to this product symbolizes Xerox Declaration of Conformity with the following applicable Directives of the European Union as of the dates indicated:... -
Page 176: It's Illegal
8. S a fe t y a nd N o ti c es It’s illegal... In the USA Congress, by statute, has forbidden the reproduction of the following subjects under certain circumstances. Penalties of fine or imprisonment may be imposed on those guilty of making such reproductions. - Page 177 8 . S a fe ty a nd No ti c e s Stamps and other representatives of value, of whatever denomination, which have been or may be issued under any Act of Congress. Adjusted Compensation Certificates for Veterans of the World Wars.
-
Page 178: In Canada
8. S a fe t y a nd N o ti c es In Canada Parliament, by statute, has forbidden the reproduction of the following subjects under certain circumstances. Penalties of fines or imprisonment may be imposed on those guilty of making such copies. -
Page 179: In Other Countries
8 . S a fe ty a nd No ti c e s In other countries Copying/printing certain documents may be illegal in your country. Penalties of a fine or imprisonment may be imposed on those found guilty of making such reproductions, which include: •... -
Page 180: Environmental Notices For The Usa
Xerox ENERGY STAR equipment is preset at the factory. Your machine will be delivered with the timer for switching to Low Power Mode from the last copy/print output, set at 15 minutes. -
Page 181: Product Recycling And Disposal
Perchlorate Material devices, such as batteries. Special handling may apply, please see www.dtsc.ca.gov/hazardouswaste/perchlorate. If your product is not part of the Xerox program and you are managing its disposal, please follow the instructions provided in the above paragraph. European union... - Page 182 8. S a fe t y a nd N o ti c es 8- 1 6 X e r o x 4 5 90 E P S /4 11 0 E P S Us e r G ui d e...
- Page 183 Index Error codes 15 Error history report 11, 14 Automatic paper size detection feature 4 Error messages 15 Automatic paper tray selection feature 4 Exiting the Power Saver Mode 14 Automatic tray switching feature 5 Extension flap 8 billing meters 10 Faults 14 Booklet finisher faults 14...
- Page 184 In d ex activity report 11 Paper jams 25 overview 1 Tray 5 (Bypass) 30 Job workflow 14 paper jams Finisher 53 High Capacity Feeder 31, 32 post process inserter 33 Lever 7 Paper size specifications 1 Loading paper 4 Paper supply capacity 2 locking casters 5 paper tray configuration 4...
- Page 185 Index during printing 11 Troubleshooting 1 Replacement parts 1 printing 11 Reports error history 11, 14 job history 11 User Interface 5, 10 job status / activity 11 Warm-up time 1 Serial number 2 Waste toner container 7, 1, 5 serial number 2 replacing 5 Settings...
- Page 186 In d ex X e r o x 4 5 90 E P S /4 11 0 E P S Us e r G ui d e...