Table of Contents
Advertisement
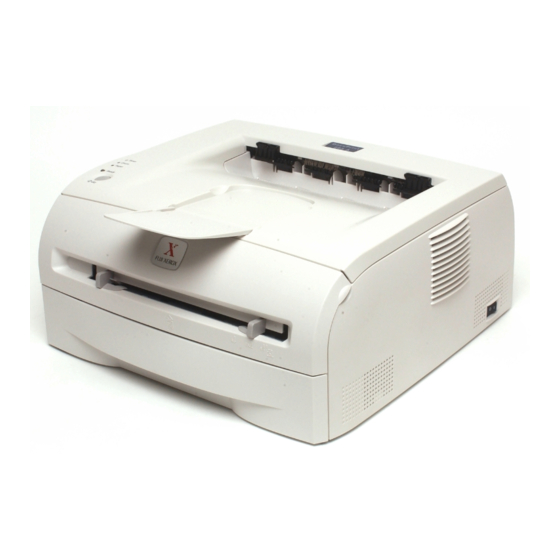
DocuPrint 203A
User's Guide
You must set up the hardware and install the driver before you can use the printer.
Please use the Quick Setup Guide to set up the printer. You can find a printed copy in the box.
Please read this User's Guide thoroughly before you use the printer. Keep the CD-ROM in a
convenient place so you can use it quickly if you need to.
Please visit our web site at http://www.fxprinters.com where you can get the latest Driver Updates.
Advertisement
Table of Contents

Related Manuals for Xerox DocuPrint 203A


Summary of Contents for Xerox DocuPrint 203A
- Page 1 DocuPrint 203A User's Guide You must set up the hardware and install the driver before you can use the printer. Please use the Quick Setup Guide to set up the printer. You can find a printed copy in the box.
- Page 2 All product/brand names are trademarks or registered trademarks of the respective holders. Damage related to computer virus Fuji Xerox is not responsible for any breakdown of machines due to infection of computer virus or computer hacking. Important (1) This manual is copyrighted with all rights reserved. Under the copyright laws, this manual may not be copied or modified in whole or part, without the written consent of the publisher.
-
Page 3: Table Of Contents
Table of Contents Before using the machine ..................1-1 Preface .............................. 1-1 Using this guide ..........................1-2 Safety notes............................1-4 The objectives of the International Energy Star Program ..............1-11 Illegal copies and printouts ......................1-12 About this printer ......................2-1 What is in the box? ..........................2-1 Interface cable .......................... - Page 4 Control panel button (Go button) ....................... 4-7 Print a test page .......................... 4-8 Using control panel button....................... 4-8 Using the print driver ....................... 4-8 Print a Printer Settings page......................4-9 Using the control panel button....................4-9 Using the print driver ....................... 4-9 Routine maintenance ....................5-1 Replacing the consumable items.......................
-
Page 5: Before Using The Machine
It will be useful in case you forget how to perform operations or if a problem occurs with the machine. As a member of the International Energy Star Program, Fuji Xerox confirms this product satisfies the requirements for International Energy Star Program standards. -
Page 6: Using This Guide
Before using the machine Using this guide This section describes the organization of this guide. Guides supplied We provide the following guides for optimum usage of the machine. Included Manuals The following manuals are included with this product. They are referred to as accompanying manuals. These accompanying manuals include descriptions on configurations and operation of the product. - Page 7 Before using the machine Conventions • In this document, “computer” refers to a personal computer or workstation. • The following indications are used in this guide: Notes tell you how you should respond to a situation that may arise or give tips about how the current operation works with other features.
-
Page 8: Safety Notes
Read these safety notes carefully before using this product to make sure you operate the equipment safely. Your Fuji Xerox product and recommended supplies have been designed and tested to meet strict safety requirements. These include safety agency approval, and compliance to established environmental standards. - Page 9 Before using the machine Do not place the machine in a hot, humid, dusty, or poorly ventilated environment. Prolonged exposure to these adverse conditions can cause fire or electric shocks. The machine has ventilation holes on both sides. Ensure that the machine is installed with a minimum clearance of 100 mm from the vent to the wall.
- Page 10 Before using the machine For power & earth connection Two power specifications are listed below. The specifications that apply to your machine depend on your machine configuration. Connect the power plug only to a properly rated power outlet. Otherwise, it can cause fire or electric shocks. If in doubt, contact our Customer Support Centre or your dealer. •...
-
Page 11: For Machine Operation
Before using the machine When unplugging the machine, grasp the plug instead of the cord. Forcibly pulling on a cord can damage it and cause fire or electric shocks. Be sure to switch off and unplug the machine before accessing the interior of the machine for cleaning, maintenance, or fault clearance. - Page 12 Before using the machine Do not play this CD-ROM using an incompatible CD-ROM player. Playing at high volume levels can cause hearing damage and speaker failure. This equipment is certified as a Class 1 laser product under [IEC60825]. This means that the machine does not emit hazardous laser radiation.
-
Page 13: For Consumables
Before using the machine For consumables Never throw a toner cartridge into an open flame. Toner remaining in the cartridge can cause an explosion and you can get burnt. Never use a vacuum cleaner when you clean spilled toner. It can cause explosion as the toner fills the vacuum cleaner and gets sparks. - Page 14 Before using the machine attached in countries where it is needed. This printer has a Class 3B laser diode which produces invisible laser radiation in the scanner unit. You should not open the scanner unit under any circumstances. Caution:Use of controls or adjustments or performance of procedures other than those specified herein may result in hazardous radiation exposure.
-
Page 15: The Objectives Of The International Energy Star Program
The objectives of the International Energy Star Program To protect the global environment and conserve energy resources, the International Energy Star Program encourages the following product features. Fuji Xerox confirms DocuPrint 203A satisfies the requirements for this program. 2 sided feature To reduce the volume of copy paper used, the 2 sided copying feature is set as a default for the machine. -
Page 16: Illegal Copies And Printouts
Before using the machine Illegal copies and printouts Copying or printing certain documents may be illegal in your country. Penalties of fines or imprisonment may be imposed on those found guilty. The following are examples of items that may be illegal to copy or print in your country. -
Page 17: About This Printer
About this printer What is in the box? When you unpack the printer, check that you have all of the following parts. Printer Drum unit and toner cartridge assembly Quick Setup Guide CD-ROM AC power cord Parts may vary from one country to another. -
Page 18: Interface Cable
About this printer Interface cable The interface cable is not a standard accessory. Please purchase the appropriate interface cable for the interface you intend to use (USB or Parallel). USB cable Do not use a USB interface cable that is longer than 2.0 meters. ®... -
Page 19: Front View
About this printer Front view Face-down Output Tray Support Flap (Support Flap) Control Panel Manual Feed slot Manual Feed Paper Guides Paper Tray Power Switch Front Cover Face-down Output Tray Back view Back Cover AC Power Connector Parallel Interface Connector Side Cover USB Interface Connector 2 - 3... -
Page 20: Positioning The Printer
About this printer Positioning the printer Please read the following before you use the printer. Power supply Use the printer within the recommended power range. Power source: 110 V model: AC 100 to 120 V, 50/60 Hz 220 V model: AC 220 to 240 V, 50/60 Hz The power cord, including extensions, should not be longer than 5 meters (16.5 feet). -
Page 21: What Kind Of Paper Can I Use
About this printer What kind of paper can I use? Type and size of paper The printer loads paper from the installed paper tray, or the manual feed slot. The names for the paper trays in the print driver and this guide are as follows: Paper tray Tray 1 Manual feed slot... -
Page 22: Recommended Paper
About this printer Recommended paper Before you buy a lot of paper, please test a small quantity to make sure that the paper is suitable. Use paper that is made for plain-paper copying. Use paper that is 80 to 90 g/m Use neutral paper. -
Page 23: Printable Area
About this printer Printable area The edges of the paper that cannot be printed on are shown below. Portrait Letter Legal B5 (ISO) Executive 4.23 mm 4.23 mm 4.23 mm 4.23 mm 4.23 mm 4.23 mm 4.23 mm 4.23 mm 6.01 mm 6.35 mm 6.35 mm... -
Page 24: Printing Methods
About this printer Printing methods Printing on plain paper, bond paper and transparencies You can print on plain paper, bond paper or transparencies from the paper tray or manual feed slot. For the paper you want to use, see What kind of paper can I use? on page 2-5. Printing on plain paper or transparencies from the paper tray Note Do not put more than 10 transparencies in the paper tray, if you print on transparencies. - Page 25 About this printer While pressing the blue paper-guide release lever, slide the paper guides to fit the paper size. Check that the guides are firmly in the slots. Put paper in the tray. Check that the paper is below the maximum paper mark ( ).
- Page 26 About this printer Lift up the support flap to prevent paper from sliding off the face-down output tray. Note If you choose not to lift up the output tray support flap, we recommend that you remove printed pages immediately after they come out of the printer.
-
Page 27: Printing On Plain Paper, Bond Paper Or Transparencies From The Manual Feed Slot
About this printer Printing on plain paper, bond paper or transparencies from the manual feed slot Note The printer automatically turns on the Manual Feed mode when you put paper in the manual feed slot. Select the Paper Size, Paper Type, Paper Source and other settings in the print driver. Select Plain, Bond or Transparency. - Page 28 About this printer Lift up the support flap to prevent paper from sliding off the face-down output tray. Note If you choose not to lift up the output tray support flap, we recommend that you remove printed pages as soon as they come out of the printer.
- Page 29 About this printer After the printed page comes out of the printer, put in the next sheet of paper or the transparency as in Step 5 above. Repeat for each page that you want to print. Note If you print on transparencies, remove each transparency immediately after printing. Stacking the printed transparencies may cause a paper jam or the transparency to curl.
-
Page 30: Printing On Heavyweight Paper, Labels And Envelopes
About this printer Printing on heavyweight paper, labels and envelopes Note The printer automatically turns on the Manual Feed mode when you put paper in the manual feed slot. When you select the paper you want to use, see What kind of paper can I use? on page 2-5. If you print on envelopes, see Types of envelopes to avoid on page 2-17. - Page 31 About this printer Send the print data to the printer. Note A No Paper Manual Feed status is shown by the control panel LEDs until you put a sheet of paper or an envelope in the manual feed slot. Lift up the support flap to prevent paper from sliding off the face-down output tray.
- Page 32 About this printer Using both hands, put one piece of paper or one envelope in the manual feed slot until the front edge of the paper or envelope touches the paper feed roller. When you feel the machine pull in the paper, let go. Note •...
-
Page 33: Types Of Envelopes To Avoid
About this printer Types of envelopes to avoid Do not use envelopes: that are damaged, curled, wrinkled, or unusual shape that are extremely shiny or textured with clasps, snaps or tie strings with self-adhesive closures that are of a baggy construction that are not sharply creased that are embossed (have raised writing on them) that were previously printed by a laser printer... -
Page 34: Sided Printing
About this printer 2 Sided Printing ® ® ® The supplied print drivers for Windows 95/98/Me, Windows NT 4.0 and Windows 2000/XP all allow 2 sided printing. For more information about how to choose the settings, see the Help text in the print driver. Guidelines for printing on both sides of the paper If the paper is thin, it may wrinkle. -
Page 35: Sided Printing From The Manual Feed Slot
About this printer The printer will now automatically print all the odd-numbered pages on the other side of the paper. Note When you put paper in the paper tray, first empty the tray then put the printed pages in the tray, with the printed side face up. -
Page 36: Paper Orientation For 2 Sided Printing
About this printer Paper orientation for 2 sided printing The printer prints the second page first. If you print 10 pages on 5 sheets of paper, it will print page 2 then page 1 on the first sheet of paper. It will print page 4 then page 3 on the second sheet of paper. -
Page 37: Driver
Driver Print driver A print driver is software that translates data from the format used by a computer to the format that a particular printer needs. Typically, this format is a printer command language or page description language. ® ® The print drivers for the following version of Windows and Macintosh are on the CD-ROM that we have... - Page 38 Driver You can change the following printer settings when you print from your computer. Paper Size Page Layout Image Orientation Copies Paper Type Paper Source Resolution Toner Save Mode 2 Sided Print Watermark Store Job Quick Print Setup Sleep Timer Status Monitor *1*2 Administrator...
-
Page 39: For Windows
Driver ® For Windows Features in the print driver You can download the latest print driver or get other information by accessing the our company’s web site at http://www.fxprinters.com You can also change settings by clicking the illustration on the left side of the Basic tab in the Properties dialog box. - Page 40 Driver Advanced tab Note ® If you are using Windows 2000 or XP, you can access the Advanced tab by clicking Printing Preferences... in the General tab of the Printer Properties screen. ® If you are using Windows NT 4.0, you can access the Advanced tab by clicking Document Defaults in the file menu of the Printers and Faxes folder.
- Page 41 Driver Toner Save Mode You can save running costs by turning on the toner save mode, which reduces the print density. Print Settings You can manually change the Print settings. • Auto Selecting the Auto button will allow automatic printing with the most suitable print settings for your print job.
- Page 42 Driver Printer Features You can set the following Printer Features in this tab: (You can jump to the pages for the Printer Features by clicking the feature names in the list below.) • Store Job • Quick Print Setup • Sleep Timer •...
- Page 43 Driver Store Job The printer saves data that you want to reprint. You can reprint a document without sending the data again from your PC. To reprint press and hold down the Go button for about 4 seconds until all the LEDs light up in order (Toner, Drum, Paper, Ready). Note •...
- Page 44 Driver Enter the password into this box. • Set Password Click here to change the password. • COPY LOCK Lock the copy pages selection to prevent multiple copy printing. • LOCK WATERMARK Lock the current settings of the Watermark option to prevent changes being made. •...
- Page 45 Driver Density Adjustment Increase or decrease the print density. Print Error Message You can choose whether the printer reports problem by printing error page or not. About the errors, see Error message printout on page 6-3. Selections are Printer Default (ON), ON and OFF. 3 - 9...
- Page 46 Driver Paper Tray Attributes tab Paper Source Settings This feature recognizes the paper size in each paper tray. 3 - 10...
- Page 47 Driver Support tab Note ® If you are using Windows 2000 or XP, you can access the Support tab by clicking Printing Preferences... in the General tab of the Printer Properties screen. ® If you are using Windows NT 4.0, you can access the Support tab by clicking Document Defaults... in the file menu of the Printers folder.
-
Page 48: For Macintosh
Driver ® For Macintosh ® ® This printer supports Mac OS 9.1 to 9.2 and Mac OS X 10.2.4 or greater. You can download the latest print driver by accessing the our company’s web site at http://www.fxprinters.com Note ® The screens on your Macintosh will vary depending on your Operating System. - Page 49 Driver Print settings Set the Resolution, Paper Type, Toner Save and other settings. You can change settings by selecting the setting in the Print Settings list: Print Mode Paper Type Toner Save Mode Print Mode You can change the resolution as follows: •...
-
Page 50: Uninstalling The Print Driver
Driver Uninstalling the print driver You can uninstall the print driver that you installed with the following steps. Note • This instruction is not available if you installed the print driver from Windows Add Printer function. • After uninstalling, we recommend that you restart your PC to remove files that were in use during uninstall. -
Page 51: Fx Laser Driver For Macintosh
Driver ® FX Laser driver for Macintosh ® For Mac OS 9.1 to 9.2 Open the Extensions folder located in the System Folder on the Macintosh HD. Drag all these following files in the Extensions folder to the trash. • BR_PrintMonitor(laser) •... -
Page 52: Control Panel
Control panel This section refers to the four Light Emitting Diodes (LEDs) (Toner, Drum, Paper, Ready) and a control panel button (Go) on the control panel. The LED indications shown in the table below are used in the illustrations in this chapter. LED is off LED is dim LED is on... - Page 53 Control panel Printer status Power-off The power switch is off. Sleep mode The printer is in Sleep mode. Pressing the Go button wakes up the printer from Sleep mode to Ready mode. Ready to print The printer is ready to print. Warming up The printer is warming up.
- Page 54 Control panel Printer status Toner low Indicates that the toner cartridge is nearly empty. Purchase a new toner cartridge and have it ready for when Toner Empty is indicated. The Toner LED alternates turning on for 2 seconds and off for 3 seconds. Toner empty Replace the toner cartridge with a new one.
- Page 55 Control panel Printer status Front cover open Close the front cover of the printer. Back cover open Close the back cover of the printer. Paper jam Clear the paper jam. See Paper jams and how to clear them on page 6-5. If the printer does not start printing, press the Go button.
-
Page 56: Service Call Indications
Control panel Service call indications If there is an error that cannot be cleared by the user, the printer will show that a service call is needed by lighting up all the LEDs as shown below. If you see the service call indication above, turn off the power switch, wait a few seconds, and then turn it back on and try to print again. - Page 57 Control panel Table 1: LED indications while pressing Go button fuser unit Laser unit Main motor Main PCB LEDs failure* failure failure failure Toner Drum Paper Ready Make a note of the indication and report the error status to your dealer or our Customer Support Centre. Note Make sure that the front cover is fully closed before you report a service call.
-
Page 58: Control Panel Button (Go Button)
Control panel Control panel button (Go button) The control panel button has the following functions: Wake-up If the printer is in Sleep mode, press the Go button to wake the printer up and go to the Ready state. Error recovery If there is an error, the printer will recover automatically from some errors. -
Page 59: Print A Test Page
Control panel Print a test page You can use the Go button or the print driver to print a test page. Using control panel button Turn off the printer. Make sure that the front cover is closed and the power cord is plugged in. Hold down the Go button as you turn on the power switch. -
Page 60: Print A Printer Settings Page
Control panel Print a Printer Settings page You can print the current settings using the control panel button or print driver. Using the control panel button Make sure that the front cover is closed and the power cord is plugged in. Turn on the printer and wait until the printer is in the Ready state. -
Page 61: Routine Maintenance
Routine maintenance You will need to replace certain parts and clean the printer regularly. CAUTION When you replace certain parts or clean the printer regularly, pay attention to the following: If your clothes are smeared with toner, wipe off the toner with a dry cloth and immediately wash the clothes in cold water to avoid stains. -
Page 62: Toner Cartridge
Routine maintenance Toner cartridge The life of the original toner cartridge that came with the printer may be either a starter or standard toner cartridge, and depends on the model and country you bought the printer in. The starter toner cartridge will print up to 1,500 A4 or Letter-size single-sided pages at 5% coverage. Standard and replacement toner cartridges print up to 2,500 A4 or Letter-size single-sided pages at 5% coverage. -
Page 63: Toner Empty Message
Routine maintenance Toner Empty message If the LED shows the message below, the printer has run out of toner or the toner is not evenly distributed inside the cartridge. Replacing the toner cartridge Note • To ensure high quality printing, make sure you use quality toner cartridges. When you want to buy toner cartridges, contact our Customer Support Centre or your dealer. - Page 64 Routine maintenance IMPORTANT • We recommend that you place the drum unit and toner cartridge assembly on a piece of disposable paper or cloth in case you accidentally spill or scatter toner. • To prevent damage to the printer from static electricity, do not touch the electrodes shown in the illustrations.
- Page 65 Routine maintenance IMPORTANT • Wait to unpack the toner cartridge until immediately before you put it in the printer. If toner cartridges are left unpacked for a long time the toner life will be shortened. • If an unpacked drum unit is put in direct sunlight or room light, the unit may be damaged.
- Page 66 Routine maintenance Put the new toner cartridge firmly into the drum unit until you hear it lock into place. If you put it in properly, the lock lever will lift automatically. IMPORTANT Make sure you insert the toner cartridge properly or it may separate from the drum unit.
-
Page 67: Drum Unit
Routine maintenance Drum unit This printer can print up to 12,000 pages with one drum unit. At 5% print coverage (A4 or Letter size). The actual number of printed pages will vary depending on the average type of print job and paper. Note •... -
Page 68: Replacing The Drum Unit
Routine maintenance Replacing the drum unit Note We recommend that you clean the printer when you replace the drum unit. See Cleaning on page 5-11. Follow these steps to replace the drum unit. Make sure that the printer is turned on and the Drum LED is blinking. - Page 69 Routine maintenance IMPORTANT • We recommend that you place the drum unit and toner cartridge assembly on a piece of disposable paper or cloth in case you accidentally spill or scatter toner. • To prevent damage to the printer from static electricity, do not touch the electrodes shown in the illustrations.
- Page 70 Routine maintenance Put the drum unit and toner cartridge assembly in the printer. IMPORTANT When installing the assembly, hold its grip. Close the front cover. Make sure that the Drum LED is now off. 5 - 10...
-
Page 71: Cleaning
Routine maintenance Cleaning Clean the outside and inside of the printer regularly with a dry, lint-free cloth. When you replace the toner cartridge or the drum unit, make sure you clean the inside of the printer. If printed pages are stained with toner, clean the inside of the printer with a dry, lint-free cloth. -
Page 72: Cleaning The Inside Of The Printer
Routine maintenance Wipe the outside of the printer with a soft cloth to remove dust. Remove anything that is stuck inside the paper tray. Wipe the inside of the paper tray with a soft cloth to remove dust. Put the paper tray firmly back in the printer. Plug the printer back in and turn on the printer power switch. - Page 73 Routine maintenance Open the front cover of the printer. Pull out the drum unit and toner cartridge assembly. CAUTION After you have just used the printer, some parts inside the printer are extremely hot. Wait for the printer to cool down before you touch the internal parts of the printer. 5 - 13...
-
Page 74: Cleaning The Corona Wire
Routine maintenance Wipe the scanner window with a dry, lint-free cloth. Put the drum unit and toner cartridge assembly back in the printer. IMPORTANT When installing the assembly, hold its grip. Close the front cover. Plug the printer back in and turn on the printer power switch. - Page 75 Routine maintenance IMPORTANT • We recommend that you place the drum unit and toner cartridge assembly on a piece of disposable paper or cloth in case you accidentally spill or scatter toner. • To prevent damage to the printer from static electricity, do not touch the electrodes shown in the illustrations.
-
Page 76: Troubleshooting
Troubleshooting You can correct most problems by yourself. If you need additional help, contact our Customer Support Centre or your dealer. Identifying your problem First, check the following: The AC power cord is connected properly and the printer is turned on. All of the protective parts have been removed. -
Page 77: Error Messages In The Status Monitor
Troubleshooting Error messages in the Status Monitor The Status Monitor will report problems with the printer. Take the corrective actions listed in the following table for the error message that the Status Monitor reports. The default setting for the Status Monitor is off. If you would like to turn the status monitor on, you can change the setting of the Status Monitor in the Printer Features of the Advanced tab. -
Page 78: Error Message Printout
Troubleshooting Error message printout The printer will report problems by printing an error message as defined in the following table. Take the corrective actions for the error message. Error message Action MEMORY FULL Press the Go button to print the data left in the printer. Cancel the print job if you want to delete the data remaining in the printer, see Cancel printing on page 4-7. -
Page 79: Paper Handling
Troubleshooting Paper handling First, make sure that you are using paper that meets recommended paper specifications. See What kind of paper can I use? on page 2-5. Problem Recommendation The printer does not feed If there is paper in the paper tray, make sure it is straight. If the paper is paper. -
Page 80: Paper Jams And How To Clear Them
Troubleshooting Paper jams and how to clear them If a paper jam occurs, the printer will tell you by flashing the paper LED as shown below. CAUTION After you have just used the printer, some parts inside the printer are extremely hot. When you open the front cover or back cover of the printer, never touch the shaded parts shown in the illustrations. - Page 81 Troubleshooting Pull the jammed paper up and out of the printer. Open the front cover. Pull out the drum unit and toner cartridge assembly slowly. The jammed paper will be pulled out with the drum unit and toner cartridge assembly. IMPORTANT To prevent damage to the printer caused by static electricity, do not touch the electrodes shown in the...
- Page 82 Troubleshooting Open the back cover. Pull the tab toward you to open the rear chute cover. Rear Chute Cover Pull the jammed paper out of the fuser unit. If the jammed paper cannot be pulled out easily, push down the tab with one hand as you gently pull the paper out with other. 6 - 7...
- Page 83 Troubleshooting CAUTION After you have just used the printer, some internal parts of the printer are extremely hot! Wait for the printer to cool down before you touch the internal parts of the printer. Close the back cover. Push the lock lever down and take the toner cartridge out of the drum unit.
- Page 84 Troubleshooting Put the drum unit and toner cartridge assembly back in the printer. Put the paper tray firmly back in the printer. Close the front cover. Make sure that the Paper LED is now off and the printer is ready. 6 - 9...
-
Page 85: Other Problems
Troubleshooting Other problems Problem Recommendation The printer cannot print. There Check that the printer cable is not damaged or broken. was an error writing to LPT1: If you have an interface-switching device, make sure the correct printer is (or BRUSB) for the printer selected. - Page 86 Troubleshooting Examples of poor print Recommendation quality Make sure that you use paper that meets the recommended specifications. See What kind of paper can I use? in Chapter 2. Check the printer’s environment - high temperatures and high humidity can ABCDEFGH increase the amount of background shading.
- Page 87 Troubleshooting Examples of poor print Recommendation quality If the problem is not solved after printing a few pages, the drum unit may have glue from label stock on the OPC drum surface. Clean the drum unit as follows: 75 mm Position the print sample in front of the drum unit, and find the exact 75 mm position of the poor print.
- Page 88 Troubleshooting Examples of poor print Recommendation quality The drum unit may be damaged. Put in a new drum unit. See page 6-12. Make sure that you use paper that meets our specifications. See What kind of paper can I use? on page 2-5. ABCDEFGH •...
- Page 89 Troubleshooting Examples of poor print Recommendation quality Wipe the scanner window with a soft cloth. See Cleaning the inside of the printer on page 5-12. The toner cartridge may be damaged. Put in a new toner cartridge. See ABCDEFGH Replacing the toner cartridge on page 5-3. abcdefghijk ABCD abcde...
-
Page 90: Solving Print Problems
Troubleshooting Solving print problems Problem Recommendation The printer prints unexpectedly Make sure the printer cable is not too long. We recommend you use a parallel or it prints garbage data. or USB cable that is less than 2 meters (6.5 feet) in length. Make sure that the printer cable is not damaged or broken. -
Page 91: Appendix
Appendix Printer specifications Engine Technology Electrophotographic Print speed Up to 20 ppm (A4 size) First print time Less than 10 sec ® Resolution Windows 95/98/Me HQ1200 ® Windows NT 600 dpi ® Windows 2000/XP 300 dpi ® Mac OS HQ1200 600 dpi 300 dpi Controller... - Page 92 Appendix Software ® ® ® Print driver GDI Driver for Windows 95/98/Me, Windows NT 4.0, Windows 2000/XP ® ® FX Laser Driver for Mac OS 9.1 to 9.2 and Mac OS X 10.2.4 or greater Utilities Interactive Help Control panel 4 LEDs Button 1 button...
- Page 93 Appendix Paper specifications Paper types Manual feed slot Plain paper, Heavyweight paper, Lightweight paper, Bond paper, Recycled paper, Envelope, Labels, and Transparencies Paper tray Plain paper, Lightweight paper, Recycled paper, and Transparencies Paper weights Manual feed slot 60 to 161 g/m Paper tray 60 to 105 g/m Paper sizes...
- Page 94 Appendix Other Power consumption Printing (average) Less than 450 W at 25 °C Standby (average) Less than 70 W at 25 °C Sleep (average) Less than 5 W Noise level Sound pressure Printing Less than 51 dB(A) Standby Less than 30 dB(A) Sound power Printing 6.2B(A)
- Page 95 Appendix Important information for choosing your paper This section provides information to help you choose paper to use with this printer. Note If you use paper other than the ones recommended, a paper jam or misfeeding may occur in the printer. See Recommended paper on page 2-6.
- Page 96 Appendix Moisture content Moisture content is the amount of water left in the paper after manufacture. It is one of the important characteristics of the paper. This can change greatly depending on the storage environment, although usually paper contains about 5% water by weight. Because paper often absorbs water, the amount of water can sometimes be about 10% in a high humidity environment.
-
Page 97: Index
Index Numerics 2 sided printing ........2-18 Macintosh® ........... 3-12 Manual feed slot ....2-11, 2-14, 2-19 Memory ...........A-1 Memory full ..........4-4 Advanced tab .......... 3-4 No paper ..........4-3, 4-4 Back view ..........2-3 Basic tab ..........3-3 Before using the machine ....... 1-1 OPC drum .......... - Page 98 Index Toner cartridge ........ 5-2, A-3 Toner empty ........4-3, 5-3 Toner low ..........4-3 Utilities .............A-2 Web site ..........3-1 Weights ...........A-3 I - 2...
- Page 99 DocuPrint 203A User’s Guide Fuji Xerox Co., Ltd. (Edition 1) ME3414E2-1 Human Interface & Design Development May 2005 © Copyright 2005 by Fuji Xerox Co., Ltd.