Table of Contents
Advertisement
Quick Links
Download this manual
See also:
User Manual
Advertisement
Table of Contents

Related Manuals for Xerox DocuPrint 3055


Summary of Contents for Xerox DocuPrint 3055
- Page 1 DocuPrint 3055/2065 Quick Reference Guide...
- Page 2 The data saved in the hard disk of the machine may be lost if there is any problem in the hard disk. Fuji Xerox is not responsible for any direct and indirect damages arising from or caused by such data loss.
-
Page 3: Preface
Preface Thank you for purchasing the DocuPrint 3055/2065. This guide explains how to operate this printer and the precautions that must be followed during operation. To get the most out of this printer and to use it effectively, be sure to read this guide before use. -
Page 4: Docuprint 3055/2065 Features
DocuPrint 3055/2065 Features High Speed, High Image Quality • Print speed DocuPrint 3055 : 35 ppm (A4) • The oil-free fusing technology produces prints you DocuPrint 2065 : 26 ppm (A4) can easily write and place sticky-notes on. (when a single document is printed continuously one-sided) •... -
Page 5: Table Of Contents
Contents Preface ..........3 Loading Paper in the Trays 1 - 4 ..39 Paper Sizes/ Paper Types of the DocuPrint 3055/2065 Features .... 4 Trays ..........41 Contents ..........5 Extending the Extension Output Tray ..42 Contents of the User Guide Changing the Paper Types of the (Reference)........ -
Page 6: Contents Of The User Guide (Reference)
Contents of the User Guide (Reference) Preface Hardware Problems (Power Failure, Abnormal Noise, etc.) DocuPrint 3055/2065 Features Printing Problems Contents Print Quality Problems Types of Manuals Paper Feeding Problems Using This Guide Error Messages and Error Codes Safety Notes Network-related Problems... -
Page 7: Types Of Manuals
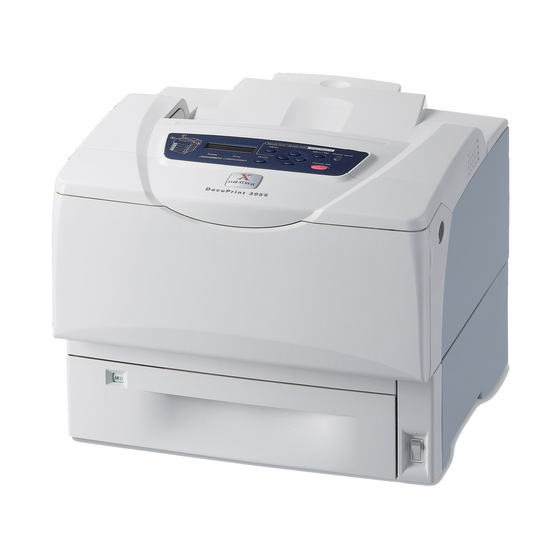
The illustrations used in this guide are those PostScript printer and the features that can be of the DocuPrint 3055. If your printer is the configured on your print driver. DocuPrint 2065, only the illustration of the •This guide is on the PostScript Driver Library CD-... - Page 8 In this guide, the control panel buttons/ lamps are presented in English. If you placed the control panel labels (included with the printer) on your control panel, use the following figure to identify the names of the buttons/lamps in your language. Conventions...
-
Page 9: Safety Notes
Read these safety notes carefully before using this product to make sure you operate the equipment safely. Your Fuji Xerox product and recommended supplies have been designed and tested to meet strict safety requirements. These include safety agency approval, and compliance to established environmental standards. - Page 10 • The cord is not cracked or frayed. contaminated connector can draw a If you notice any unusual conditions, significant amount of current that can contact your local Fuji Xerox generate heat and eventually cause fire representative. over an extended period of time.
-
Page 11: Operational Safety
Do not incline the product more than 10 degrees. Do not obstruct the ventilation openings. The machine has ventilation opening. Poor ventilation may cause overheat inside the Others machine and can lead a fire. Always locate the equipment in an area In order to use and maintain this product in that has adequate ventilation, and space a good performance and condition, make... - Page 12 Return the breaker switch to On ("|"). shock, fire or injury. If you notice any unusual condition, contact your local Fuji Xerox representative. Do not use conductive paper, e.g. carbonic paper or coated paper. When paper jam occurs, they can cause a short-circuit and fire.
- Page 13 Remaining toner in the cartridge may catch fire and cause burn injuries. If you have a used print cartridge no longer needed, contact your local Fuji Xerox representative for its disposal. Keep the print cartridge out of reach of children. Should toner be swallowed, spit it out, rinse mouth with water and drink plenty of water.
-
Page 14: Warning And Caution Labels
Warning and Caution Labels Be sure to follow the warning and caution labels placed on the machine. Do not touch areas with labels indicating high voltage or temperature. This can cause an electric shock or burn. CAUTION 00:40 CAUTION 0 0 : 4 Safety Notes... - Page 15 • Consult the dealer or an experienced radio/TV technician for help. Changes and modifications to this equipment not specifically approved by Fuji Xerox may void the user's authority to operate this equipment. Safety Notes...
-
Page 16: About License
About License Illegal Copies and Printouts RSA BSAFE (For the Models Other than those Available in China) Copying or printing certain documents may be illegal in your country. Penalties of fines or imprisonment may be imposed on those found guilty. The following are examples of items that may be illegal to copy or print in your country. -
Page 17: Printer Environment Settings
Printer Environment Settings When you are finished installing the printer using the ‘Setup Guide’, go on to set up its operating environment. Supported Operating Environments The printer can be used both as a local and a network printer. When used as a local printer, the printer is connected directly to a computer. - Page 18 *2: USB port must be set on the computer connected to the printer. On Windows 98/Me, USB Print Utility (software by Fuji Xerox Co., Ltd.) must be used. USB Print Utility can be installed from the CD-ROM of the Driver CD Kit included with the printer.
-
Page 19: Connecting A Cable
Connecting a Cable USB Connection When using USB connection, install a print driver on your computer before connecting the cable. Connect the printer to your computer using an For installation instructions, refer to “ Installing a interface cable appropriate for your connection Print Driver”... -
Page 20: Setting The Network Environment
Setting the Network Depending on your network environment, your printer also needs a subnet mask and gateway Environment address. Consult your network administrator for the settings required for your printer. This section explains how to install your printer in To Set the IP Address a TCP/IP environment. - Page 21 Press the < > button to accept the 14. Enter the rest of the fields in the same selection. manner. After entering the last (4th) field, The current setting is displayed. press the <Eject/Set> button to confirm your entry. Get IP Address IP Address DHCP/Autonet* 192.168.001.100*...
-
Page 22: Configuring The Printer Using Centreware Internet Services
Supported Operating Environments 22. Enter the gateway address in the same way you entered the IP address, and press the <Eject/Set> button to confirm your entry. Supported Web Browsers Gateway Address CentreWare Internet Services has been tested to 192.168.001.254* work on the following web browsers. On Windows 2000, Windows XP, or 23. - Page 23 CentreWare Internet Services Setting Items The followings are the main features on each tab of CentreWare Internet Services. Tab Name Feature Status • General Displays the printer's product name, IP address, and status. • Printer Status Displays the sizes and remaining volumes of the paper loaded in the paper trays, the status of the output tray, and the remaining life of the print cartridge.
-
Page 24: Using Centreware Internet Services
Installing a Print Driver Using CentreWare Internet Services To print from your computer, install a PCL print Follow these steps when accessing CentreWare driver using the CD-ROM of the Driver CD Kit. Internet Services. The installation procedure varies depending on how your computer is connected to the printer. -
Page 25: Basic Operation
(optional)) three sheet feeders (optional). Note • The trays 2, 3 and 4 can be added to the DocuPrint 3055. • The trays 2 and 3 can be added to the DocuPrint 2065. Ventilation hole Releases heat to prevent the interior of the printer from overheating. - Page 26 Name Description Front cover release lever Pulled towards you to open the front cover when replacing the print cartridge or clearing paper jams. Output tray Delivers printed output face down. Extension output tray Extended to prevent output from falling off the output tray. Right/Rear View Name Description...
- Page 27 Interior Name Description Duplex unit The unit that composes the duplex unit (optional). When the duplex unit is (Duplex unit B) installed, 2-sided printing can be performed. Fuser unit Fuses toner onto paper by means of heat and pressure. Important •...
-
Page 28: Control Panel
Control Panel Name Description Indicator In the event of an error, use this to verify the location of the button indicated in an error message displayed on the LCD display. LCD display Displays the status of the printer, menu options, and messages. Refer to •... -
Page 29: Switching On/Off The Power
Switching On/Off the About the Circuit Breaker Power The printer has a circuit breaker on its rear left side. Switching On the Power In the event of current leakage, the breaker will automatically cut off the power circuit to prevent any current leakages or fire from occurring. -
Page 30: Setting/Exiting The Power Saver Modes
Setting/Exiting the Power Cancelling a Print Job Saver Modes Print jobs can be cancelled either from your computer or on the control panel. The printer has a power saving feature which reduces power consumption during periods of Cancelling a Print Job being inactivity. -
Page 31: Printing A Report/List
Printing a Report/List • To use this feature, enable the printer’s SNMP port (default: [Enable]) on the control panel. • On Windows NT 4.0, Windows 2000, or Windows XP, only users with administrator level access can change The reports/lists can be printed using the control the settings. -
Page 32: Print
Print Printing from a Computer This section outlines the basic procedure for sending print jobs from Windows applications. The following procedure uses Windows XP WordPad as an example. (The procedure may vary depending on the application being used.) On the [File] menu of your application, click [Print]. Select the printer from the [Select Printer] list box, and then display the Properties dialog box. -
Page 33: Printing On Transparencies
Print Features in the Properties Dialog Box The following introduces some of the print features available on each tab of the print driver. For details on each feature, refer to the online help provided for the print driver. Feature Paper/Output •... -
Page 34: Paper
Paper About Paper Using paper that is not appropriate for the printer can cause paper jams, image quality problems, or printer failure. To use the printer at its best performance, we recommend you to use only the paper described in this section. -
Page 35: Loading Paper
Paper Tray Paper Size Paper Type (G.S.M.) Maximum Capacity Tray 1 • 250-sheet tray Plain 1 (60 - 80 g/m , B4 , A4 (standard), FX P paper: Plain 2 (70 - 80 g/m , B5 , A5 Trays 2 - 4 Approx. - Page 36 Supported Paper Specifications If using general paper (commercially available paper), make sure that it meets the following specifications. To achieve the best print quality, however, we recommend you to use the standard paper (introduced in this page) instead. Paper Tray Specifications (G.S.M.) Bypass tray 60 - 216 g/m...
-
Page 37: Unsupported Paper
Loading Paper Unsupported Paper Do not use the following types of paper or media. They can cause paper jams or printer failure. This section explains how to load paper in the bypass tray or trays 1 - 4. • Bond paper •... -
Page 38: Bypass Tray
Feed Orientations for Envelopes in the Load the paper with the print side facing down. Bypass Tray When loading envelopes in the bypass tray, be sure to load them in the correct orientations. Envelopes with Adhesive Flaps Example) Youkei 4 Adjust the paper guides to the size of the paper. -
Page 39: Loading Paper In The Trays 1 - 4
Loading Paper in the Trays 1 - 4 If you do not need to extend the tray, proceed to Step 4. If you need to extend the tray, release the When loading paper longer than 14" (279.4 mm) extension lock by sliding the left and right such as B4, A3, and 11 x 17"... - Page 40 Pinch the rear guide clip and slide it to the Push the tray all the way into the printer. size of paper. If the tray is extended, the extended portion Align the mark of the paper size with sticks out from the back of the printer. mark on the guide.
-
Page 41: Paper Sizes/ Paper Types Of The Trays
Feed Orientations for Envelopes in the - have deckle edges or creased corners. - have rough, cockled, or laid finishes. Trays 1 - 4 Paper Sizes/ Paper Types of the When loading envelopes in the Trays 1 - 4, be sure to load them in the correct orientations. -
Page 42: Extending The Extension Output Tray
Extending the Extension Output Press the < > button to accept the selection. Tray [Substitute Tray] is displayed. The extension output tray prevents printed output Printer Settings from falling off the printer. Substitute Tray When printing documents, extend the extension output tray. -
Page 43: Setting The Paper Sizes Of The Trays
Setting the Paper Sizes of the Press the < > button to accept the selection. Trays [Tray 1] is displayed. Use the following procedure when setting non- Paper Size standard paper sizes for the bypass tray or trays Tray 1 8.5x11* 1 - 4. - Page 44 14. Press the < > button to accept the selection. The current setting is displayed. Landscape (X) 75mm* 15. Enter the width using the < > or < > button and press the <Eject/Set> button to confirm your entry. (Example: 297 mm) Landscape (X) 297mm 16.
-
Page 45: Troubleshooting
Troubleshooting If you encounter a problem while using this printer and have trouble solving the problem, see if any of the symptoms in the following pages matches your problem. If your problem is described in the following pages, apply the suggested solution provided for the problem. If your problem is not described, or could not be solved with the suggested solution, contact our Customer Support Center or your dealers. - Page 46 • When removing jammed paper, do not try to remove paper or paper piece deep inside the machine. Also, do not try to remove paper wrapped around the heat roller. It can cause injury or burn. Switch off the machine immediately and contact your local Fuji Xerox representative. Important •...
-
Page 47: Paper Jams In The Bypass Tray
Paper Jams in the Bypass Tray Important • When closing the front cover, be careful not to get your fingers caught between (the left, right, top, or bottom edge of) the cover and the printer. Leave the jammed paper where it is and remove the rest of the paper from the bypass tray. -
Page 48: Paper Jams In The Fuser Unit
If paper is jammed in the printer, gently Close the front cover. remove the paper carefully without tearing. Important • When closing the front cover, be careful not to get your Pull the front cover release levers ("A") on fingers caught between (the left, right, top, or bottom both sides of the printer towards you and edge of) the cover and the printer. -
Page 49: Paper Jams In The Duplex Unit
Paper Jams in the Duplex Unit Open the top cover. Open the bypass tray cover. As necessary, hold the lever on the right side of the fuser cover and open the fuser cover. Open the upper cover. Important • The fuser is hot. Do not touch areas with labels indicating high temperature and those surrounding the Hold the handle on the center part of the labels. -
Page 50: Paper Jams In The Output Area
Close the inner cover, the upper cover, and Remove the jammed paper. then the bypass tray cover. Important • The fuser is hot. Do not touch areas with labels Paper Jams in the Output Area indicating high temperature and those surrounding the labels. -
Page 51: Hardware Problems
Hardware Problems (Power Failure, Abnormal Noise, etc.) Symptom Cause/Remedy The printer will not switch on. Is the power switched on? Switch the power on by pressing the power switch to the <|> position. Is the power cord firmly plugged into the power outlet? Switch the power off, plug the power cord firmly into the power connector or power outlet, and switch the power back on. -
Page 52: Printing Problems
Printing Problems Symptom Cause/Remedy The <Error> lamp is blinking. An error that cannot be resolved by users occurred. Copy down the error message or error code displayed on the control panel, switch the power off, unplug the power code from the power outlet, and contact our Customer Support Center or your dealers. The <Error>... - Page 53 Symptom Cause/Remedy Image loss occurs in the upper Are the paper guides adjusted properly? portion of the page. Slide the paper guides to the correct positions. Printing does not start from the desired position on the page. Refer to • “ Loading Paper” (P. 37) Check whether the margins are set correctly on your print driver.
-
Page 54: Print Quality Problems
Print Quality Problems Symptom Cause/Remedy Output is too light. The paper is damp. Load fresh paper. (faded or unclear) The paper is not appropriate for the printer. Load appropriate paper. Refer to • “Supported Paper” (P. 34) The print cartridge or fuser unit is damaged or deteriorated. The print cartridge or fuser unit may need replacement depending on its condition. - Page 55 Symptom Cause/Remedy Streaks appear inside or The paper that had been stored unwrapped for an extended period of time (especially in outside of halftone images. low humidity condition) may be used. Load fresh paper. Shadow is printed around The paper is not appropriate for the printer. Load appropriate paper. solid-filled images Refer to •...
- Page 56 Symptom Cause/Remedy Output is partially blanked-out. The paper is not appropriate for the printer. Load appropriate paper. Vertical white streaks appear on output. Refer to • “Supported Paper” (P. 34) The paper is damp. Load fresh paper. The print cartridge or feed rolls are not installed correctly. Correctly install the print cartridge or feed rolls.
- Page 57 Symptom Cause/Remedy The paper guides are not adjusted properly. Adjust the paper guides properly. Images are skewed. Refer to • “ Loading Paper” (P. 37) Photos are blurred. Isn't the original image blurred? Adjust the sharpness of the original image and try printing it again. If you cannot adjust the sharpness of the original image, change the sharpness setting under the [Detailed Settings] tab >...
-
Page 58: Paper Feeding Problems
Paper Feeding Problems Symptom Cause/Remedy Paper does not feed properly. Is the paper loaded correctly? Reload the paper correctly. Before loading transparencies, postcards, or envelopes, fan Paper jams occur. them to make sure that they are separated. Isn't the paper damp? Multiple sheets feed at once. -
Page 59: Error Messages And Error Codes
Error Messages and Error Codes Error Messages (in Alphabetical Order) The following table lists the error messages that appear on the control panel. Note • When a message cannot be displayed in one screen, the display switches between two or three screens to display the entire message. - Page 60 Open & Close A Refer to • “ Clearing Paper Jams” (P. 45) Open All Trays (DocuPrint 3055 only) Clear Jam A paper jam occurred in the printer. Pull out all trays to identify the jammed area, and remove the jammed paper. Then, then open and close the front cover.
- Page 61 Message Symptom/Cause/Remedy Open Tray 3, 2 A paper jam occurred in the printer. & 1. Clear Jam Pull out the tray 1, tray 2, and tray 3 to identify the jammed area, and remove the jammed paper. Then, open and close the front cover. Open the front cover even then when there is no jammed paper inside the cover.
- Page 62 Message Symptom/Cause/Remedy UnknownPaperType The printer was requested by the job to automatically select a paper tray when the [Paper Priority] setting for all paper types are set to [Off]. Press SET Cancel the print job by pressing the <Eject/Set> button on the control panel. and Cancel JOB Set the priority order of the paper trays or manually select a paper tray on the control panel.
-
Page 63: Error Codes
Error Codes Error codes are six-digit numbers that appear on the control panel when errors occur. Such errors include abnormal print jobs and printer malfunction. Error codes are important information that identifies the causes of errors. Please have error codes ready when calling our Customer Support Center or your dealers. - Page 64 Error Code Cause/Remedy 077-216 The duplex unit (optional) is not plugged into the printer properly. Switch the power off, check if the connector cable of the duplex unit is properly plugged into the printer, and then switch the power back on. Refer to ‘...
-
Page 65: Consumable
Consumable Replacing Consumable Type of Consumable The following consumable is provided for the printer. To order it, contact the dealer where you purchased the printer. Important • This printer is designed to provide the most stable performance and print quality when used with the genuine consumable. If you use consumable with specification different from that of the genuine consumable, the performance of the printer may not be at its optimum. -
Page 66: Replacing The Print Cartridge
Place the side with the Remaining toner in the cartridge may catch fire handles facing up. and cause burn injuries. If you have a used print cartridge no longer needed, contact your local Fuji Xerox representative for its disposal. 6 Consumable... -
Page 67: Replacement Procedure
Replacement Procedure Note • When removing the print cartridge, slide the cartridge towards you. Use the following procedure to replace the print cartridge and to clean inside the printer. Important • Be careful not to dirty your hands or clothes with toner. If If paper is loaded in the bypass tray, remove toner gets on your hands or clothes, wash it off the paper and close the bypass tray cover. - Page 68 Place the print cartridge on a flat surface, Hold the print cartridge by the handles as such as on a desk, with the handles facing shown in the figure. Insert the print cartridge you. Hold the end of the toner seal and into the printer, sliding the projections on slowly pull it out from the side of the both sides of the cartridge along the arrow...
-
Page 69: A Appendix
Appendix Optional Accessories The following table lists the main accessories available for the printer. To purchase them, contact the dealer where you purchased the printer. Product Product Name Description Code Internal hard disk EL300586 Must be installed to use the following features: •... -
Page 70: Life Of Consumable And Regular Replacement Part
• You can browse our web site also on the CD-ROM of the Driver CD Kit included with the printer. To access the web site, click [Fuji Xerox Web Site] on the startup window of the CD-ROM. • The URL of the driver download service page is:... -
Page 71: Installing Additional Memory
2-sided printing is performed. • Recommended capacity:Memory capacity recommended by Fuji Xerox. Values of the required memory capacity also vary depending on the usage environment of the printer. -
Page 72: Installation Procedure
Installation Procedure Remove the two screws that secure the rear cover to the printer. Additional memory goes into the controller board right underneath a network expansion card (optional). If your printer has a network expansion card, remove it to get an access to the RAM slot. For information on how to uninstall/re-install the network expansion card, refer to the installation guide provided for the network expansion card. - Page 73 If a network expansion card is installed, 10. Push the new memory card as shown in the remove it temporarily. drawing. When the card is installed correctly, it clicks into place. If another memory card is already installed, push the retaining clips on both sides in the outward direction.
-
Page 74: Installing The Internal Hard Disk
Installing the Internal Hard Note • You can check whether the memory card is installed Disk correctly by printing out the [Printer Settings] list. [Memory Capacity] under [General] shows the total memory capacity of the printer (which is the memory on the controller board (64 MB) plus the memory you just The hard disk must be installed to the printer when added). - Page 75 Installation Procedure Pull the rear cover forward and remove it from the printer. The internal hard disk goes into the controller ® board right above a font ROM or PostScript ROM. If you purchased one of these ROMs, install it before installing the internal hard disk. For information on how to install a ROM to the printer, refer to the installation guide provided for the ROM.
- Page 76 10. Re-attach the rear cover on the printer by Important • The connector at the left of the controller board is for a tightening the two screws removed in Step 2. network expansion card (optional). Do not insert the hard disk into this connector Push the hard disk by the part shown in the figure and firmly insert it into the connector.
-
Page 77: Installing The Chinese Font Kit
Installing the Chinese Font Installation Procedure The ROM of the Chinese font kit goes into the controller board right underneath an internal hard disk (optional). If your printer has an internal hard Installing the Chinese font kit (optional) to the disk, remove it to get an access to the ROM slot. - Page 78 Pull the rear cover forward and remove it If an internal hard disk is installed, remove it from the printer. temporarily. Use a screwdriver to remove the two screws from the outside of the printer. Hold the internal hard disk by the part shown in the figure and pull it out upward.
-
Page 79: Installing The Kr Font Kit
Installing the KR Font Kit If you removed an internal hard disk in a previous step, re-install it into the controller board. Installing KR font kit (optional) to the printer will 10. Re-attach the metal plate cover on the allow you to use Myungio, Gothic, Round Gothic, printer by tightening the three screws Graphic, Kungso, and Saemul fonts in PCL5 loosened in Step 4. - Page 80 Installation Procedure Pull the rear cover forward and remove it from the printer. The ROM of the KR font kit goes into the controller board right underneath an internal hard disk (optional). If your printer has an internal hard disk, remove it to get an access to the ROM slot.
- Page 81 If an internal hard disk is installed, remove it If you removed an internal hard disk in a temporarily. previous step, re-install it into the controller Use a screwdriver to remove the two screws board. from the outside of the printer. Hold the internal hard disk by the part shown in the 10.
-
Page 82: Index
Index Symbols, Numerics < >, < >, < >, and < > buttons ..28 Eject/Set button ..... . . 28 2 Sided Print . - Page 83 loading paper ..... . . 37 paper tray and paper feeding problems . . . 58 loading paper in the bypass tray ..37 power problems.
-
Page 84: Control Panel Menu Tree
Control Panel Menu Tree Contr Basic Control Panel Functions To move up and down the menus: < > or < > button To select a menu or move to the right: < > button To cancel a selection or return to the left: <... - Page 85 Administrator Menus Ready to print Password If the control panel is locked with a password, <Menu> [0000] enter the password here. button 1 Set(s) * Quantity Print Language 1 Sided * , 2 Sided Print Long Edge Flip, Short Edge Flip ESC/P See the Emulation Setting Guide for details.
- Page 86 Parallel Port Status Enable * , Network / Port Disable Auto * , ESC/P, PDF, Print Mode PS, PCL, HexDump Adobe Protocol TBCP * , Standard, BCP, Auto, Binary Bi-directional Enable * , Disable Enable * , Port Status Disable Print Mode Auto * , ESC/P, PDF, PS, PCL, HexDump...
- Page 87 From B (bottom left) ([Network / Port] continued) DHCP/Autonet * , DHCP, TCP/IP Get IP Address BOOTP, RARP, Panel IP Address, 000.000.000.000 * Enter when [Get IP Address] Subnet Mask, is [Panel] Gateway Address nnn.nnn.nnn.nnn Displays the printer’s IP address when [Get IP Address] is not [Panel] InternetServices...
- Page 88 System Settings Audio Tones Control Panel Off, On * Invalid Key Off, On * Machine Ready Off, On * Job Complete Off, On * Fault Tone Off, On * Alert Tone Off, On * Out of Paper Off, On * Low Toner Alert Off, On *...
- Page 89 From E (bottom left) ([System Settings] continued) Enable * , Secure Print ActivateFeature Disable Interrupt Print Off, On * Print Priority Disable * , Enable Normal * , Darken +1, Darken +2 Printer Settings Density Lighten +2, Lighten +1 Off * , Larger Size, Substitute Tray Closest Size, Bypass Feed Display Screen...
- Page 90 From G (previous page) ([Printer Settings] continued) 1. User 1 * - Paper Name 1 - 8 alphanumeric characters 5. User 5 * Print ID Off * , Top Left, Top Right, Bottom Left, Bottom Right DefaultPaperSize A4 * , 8.5 x 11 Force Print * , Size Conflict...