
Related Manuals for Autopage RF-420LCD


Summary of Contents for Autopage RF-420LCD
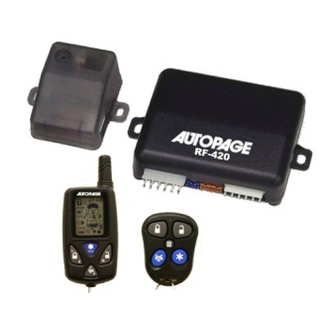
- Page 1 RF-420LCD PROFESSIONAL VEHICLE SECURITY SYSTEM INSTALLATION MANUAL (FOR AUTHORIZED DEALERS ONLY) THIS PRODUCT IS DESIGNED FOR PROFESSIONAL INSTALLATION ONLY...
-
Page 2: General Wiring
BLUE...TRUNK/HOOD TRIGGER (-) INPUT BLACK/BLUE...4TH CHANNEL OUTPUT (200mA) VIOLET...POSITIVE TRIGGER (+) INPUT R F - 4 2 0 YELLOW...IGNITION INPUT 5 - PIN 1 0 A GREEN...NEGATIVE TRIGGER (-) INPUT WHITE...(+) LIGHT FLASH ORANGE...STARTER INTERUPT OUTPUT (RELAY REQUIRED) BLACK...(-) MAIN SYSTEM GROUND PINK...2 STEP DOOR UNLOCK (RELAY REQUIRED) BROWN...(+) SIREN OUTPUT... -
Page 3: Wiring Harness
WIRING HARNESS MAIN 5 PIN WIRE HARNESS: 5 - PIN 1 0 A WHITE...(+) LIGHT FLASH BLACK...(-) MAIN SYSTEM GROUND BROWN..(+) SIREN OUTPUT 1 5 A RED...12V (+) MAIN POWER B A T T E R Y BLUE/BLACK...(-) HORN OUTPUT 10 PIN MINI CONNECTOR WIRE HARNESS: BLUE...TRUNK/HOOD TRIGGER (-) INPUT BLACK/BLUE...4TH CHANNEL OUTPUT... - Page 4 WIRING Keep wiring away from moving engine parts, exhaust pipes and high-tension cable. Tape wires that pass through holes on the firewall to prevent fraying. Be careful of sharp edges that may damage wires and causes short circuit. CAUTION: Do not connect the wire harness to the control module until all wiring to vehicle is complete.
- Page 5 10-PIN MINI CONNECTOR WIRE HARNESS. 1. BLUE WIRE -- GROUND INSTANT TRIGGER INPUT -- This wire is the ground trigger input wire for hood/trunk pin switches. 2. Black / BLUE WIRE – (-) 200mA Timer Control Channel 4 Output – This wire has a built-in user-programmable timer output that provides a ground through this wire.
- Page 6 8. WHITE/BLUE WIRE – PROGRAMMABLE OUTPUT – CHANNEL 3 OUTPUT (Factory default setting) This wire is built-in user-programmable timer output provides a ground through this wire. Press the button on the transmitter. You may program the built-in timer to send a ground signal for any time interval between 1 second and 2 minutes.
- Page 7 6 PIN DOOR LOCK CONNECTOR: 3-WIRE NEGATIVE BROWN UNLOCK SWITCH... N/C (87a) NOT USED LT. BLUE UNLOCK MOTOR... COMMON (30) VIOLET UNLOCK... N/O (87) WHITE LOCK SWITCH...N/C (87a) NOT USED LT. GREEN LOCK MOTOR... COMMON (30) VIOLET/RED LOCK... N/O (87) LOCK LOCK GROUND...
-
Page 8: Front Doors
5-WIRE REVERSE POLARITY BROWN UNLOCK SWITCH... N/C (87a) LT. BLUE UNLOCK MOTOR... COMMON (30) VIOLET UNLOCK... N/O (87) WHITE LOCK SWITCH...N/C (87a) LT. GREEN LOCK MOTOR... COMMON (30) VIOLET/RED LOCK... N/O (87) 12+ VOLTS LOCK LOCK ADDING ACTUATORS WHITE WIRE GROUND &... -
Page 9: Transmitter Programming
VACCUM DOOR LOCK SYSTEM BROWN WIRE LOCK BLUE WIRE LOCK VIOLET WIRE (12v B+) 405 6-PIN CONNECTOR WHITE WIRE BROWN FROM DOOR GREEN WIRE VIOLET / RED WIRE (GROUND) GREEN WIRE TO PUMP LOCK PUMP PROGRAMMING A. TRANSMITTER PROGRAMMING Enter: 1. - Page 10 ALARM FEATURE “A” PRORAMMING: 1. Turn the Ignition 'switch ‘ON/OFF’ 3 TIMES and stay in OFF position. 2. Push the Valet switch 3 times and hold in on the 3rd push, when a long chirp is heard then release the valet switch. You are now in the Alarm feature ‘ A ’ programming mode. 3.
- Page 11 ALARM FEATURE “C” PRORAMMING: 1 Turn the Ignition 'switch ‘ON/OFF’ 3 TIMES and stay in OFF position. 2 Push the Valet switch 7 times and hold in on the 7 push, when a long chirp is heard, then release the valet switch. You are now in the Alarm feature ‘C’ programming mode. 3 Press the transmitter button corresponding to the feature you want to program.
- Page 12 960 Knox Street, Unit B Torrance, California 90502 Main Office: 310-323-1800 Technical Support: 800-262-2527 Ext. 461 (For Authorized Dealers Only) www.autopageusa.com...