
Related Manuals for Tascam SS-CDR200


Summary of Contents for Tascam SS-CDR200
- Page 1 D01155420A SS-CDR200 Solid State/CD Stereo Audio Recorder SS-R200 SS-R100 Solid State Stereo Audio Recorder OWNER'S MANUAL...
-
Page 2: Important Safety Precautions
TEAC CORPORATION for compliance could rear panel. Please record the model number and void the user's authority to operate this equipment. serial number and retain them for your records. Model number Serial number In North America use only on 120V supply. TASCAM SS-CDR200/SS-R200/SS-R100... -
Page 3: Important Safety Instructions
TASCAM SS-CDR200/SS-R200/SS-R100... -
Page 4: Safety Information
Safety Information Notes on Laser Product (SS-CDR200) Rack-Mounting the Unit „ „ This product has been designed and manufactured Use the supplied rack-mounting kit to mount the unit in a according to FDA regulations "title 21, CFR, chapter 1, standard 19-inch rack, as shown below. - Page 5 Safety Information For China „ SS-CDR200 SS-R200/SS-R11 TASCAM SS-CDR200/SS-R200/SS-R100...
-
Page 6: Table Of Contents
Contents 1 − Introduction ..........8 Setting the play area ..........28 Selecting the current folder or current SS-CDR200, SS-R200 and SS-R100 differences ..8 playlist ................29 Features .................. 8 Playback modes ..............29 Included items ..............8 Setting the playback mode ........29 Conventions used in this manual ........ - Page 7 Moving a file within a folder .........54 Keyboard operation list ..........73 Move/copy files between folders ......55 14 − Using control I/O (SS-CDR200/SS-R200 7 – Audio CD FINDER screen (SS-CDR200 only) ............75 only) ............56 Using the RS-232C connector ........75 Opening the audio CD FINDER screen ......56 Using the parallel connector.........75...
-
Page 8: Introduction
EOM functions to the features of the SS-R100. • AC power cord ................1 The SS-CDR200 model adds a CD drive to the features of • RC-SS2 remote control unit (with 5 m cable) ....1 the SS-R200. -
Page 9: Intellectual Property Rights
Intellectual property rights TASCAM is a trademark of TEAC Corporation, registered • This product is designed to help you record and in the U.S. and other countries. -
Page 10: Connecting The Power
This unit uses USB memory, SD cards and CF cards for it carefully by the edges. playback and recording. Do not touch the signal side (the unlabeled side). • Microdrives cannot be used with this unit. Fingerprints, oils and other substances can cause errors during playback. TASCAM SS-CDR200/SS-R200/SS-R100... -
Page 11: About Cd-R And Cd-Rw Discs
To erase a track in the middle, you must erase all the tracks added after it at the same time. Finalized CD-RW discs can only be played back in CD players that support CD-RW disc playback. TASCAM SS-CDR200/SS-R200/SS-R100... -
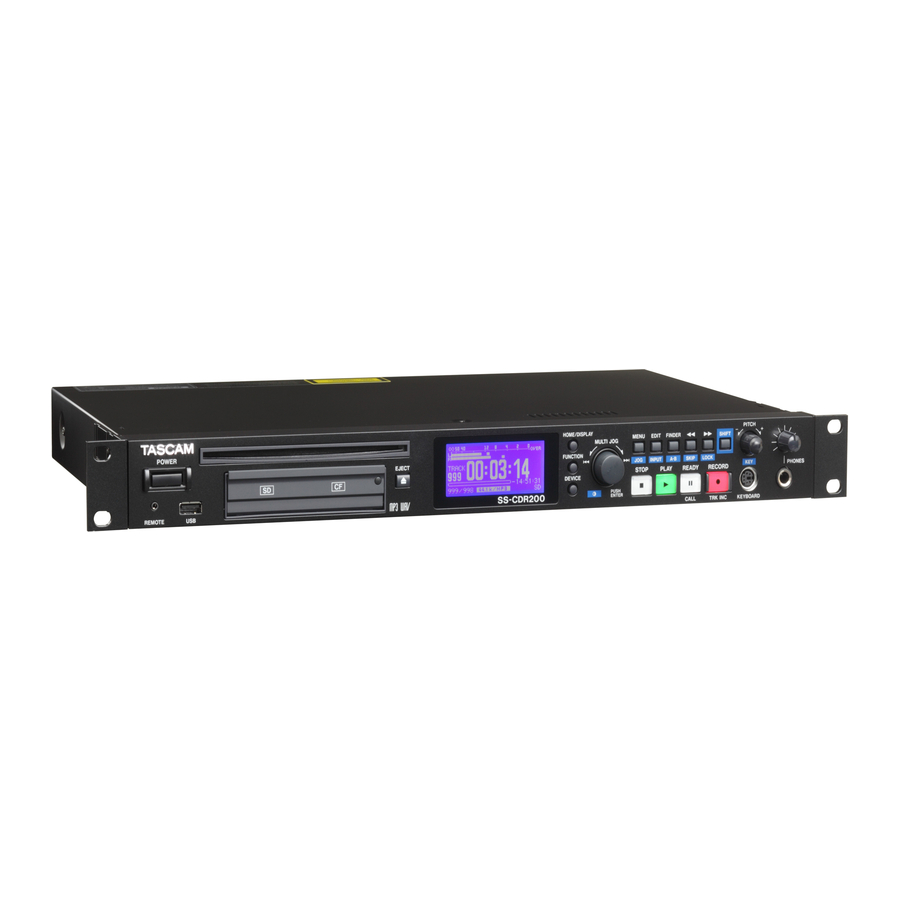
Page 12: Names And Functions Of Parts
Edit Menu pop-up. (See your hearing or result in other trouble. “Using the Edit Menu” on page 57.) 2 Disc slot (SS-CDR200 only) Press this button while pressing and holding the Insert CDs here. - Page 13 REMOTE jack (2.5 mm dia TRS) When editing names, press this button while pressing Connect a TASCAM RC-3F footswitch or TASCAM RC-20 and holding the SHIFT button to erase the character Direct Play Remote control (both designed for use with at the cursor position.
- Page 14 By default, the recorder is set to use an English keyboard. To use Japanese keyboards, which are arranged differently from English keyboards, change the setting in the menu. (See “Setting the UTILITY keyboard language” on page 73.) TASCAM SS-CDR200/SS-R200/SS-R100...
-
Page 15: Rear Panel
This digital input jack accepts inputs in IEC60958-3 (S/ PDIF) and AES3-2003/IEC60958-4 (AES/EBU) formats (detected automatically). To link two of these units together, connect the DIGITAL OUT jack of the other SS-CDR200/SS-R200/ SS-R100 to this connector. (See “Link playback connections” on page 38.) ; DIGITAL OUT (COAXIAL) -
Page 16: Tascam Rc-Ss2 Wired Remote Control
5 REPEAT button This selects the recording input source. You can choose Turns the repeat playback function ON/OFF. (See unbalanced (RCA), balanced (XLR, SS-CDR200/SS-R200 “Ordinary repeat playback” on page 33.) only) or coaxial. (See “Selecting the input source” on 6 A-B button page 40.) -
Page 17: Home Screen
: All files in the selected folder FOLDER : All files added to the playlist PLAYLIST 2 Playback mode Shows the current playback mode. : Continuous playback mode CONTINUE : Single playback mode SINGLE : Program playback mode PROGRAM : Random playback mode RANDOM TASCAM SS-CDR200/SS-R200/SS-R100... -
Page 18: Home Screen Function Status Display
When using a CD-R/CD-RW disc with MP3 or WAV • files that were recorded using a computer or other equipment besides this unit, the total time when stopped, and the total elapsed time and total remaining TASCAM SS-CDR200/SS-R200/SS-R100... -
Page 19: Recording Screen
2 GB. 5 Track recorded time Shows the recorded time (hours: minutes: seconds) of the file being recorded. 6 Track recording remaining time Shows the remaining possible recording time (hours: minutes: seconds) for the maximum file size of 2GB. TASCAM SS-CDR200/SS-R200/SS-R100... -
Page 20: Menu Structure
(or remote control ENTER button) to confirm the setting. Menu structure Press the MENU [JOG] button or the MENU button on the included TASCAM RC-SS2 remote control to open the screen. MENU MENU screen when USB/SD/CF media selected MENU screen when CD media selected (SS-CDR200 only) has three or four main items. -
Page 21: Menu Operation Basics
SS-CDR200. The SS-R200 and SS-R100 display screens The RECORDING OTHERS submenu items are as follows. are different in some cases. REC OTHERS menu 1 Use the main unit or the included TASCAM RC-SS2 Function Reference item remote control to open the screen. -
Page 22: Settings
11 Return to the Home Screen. Front panel operation: Press the HOME/DISPLAY button. 4 Set SYNC Remote control operation: Front panel operation: Press the HOME/DISP button. Turn the MULTI JOG dial to select Remote control operation: TASCAM SS-CDR200/SS-R200/SS-R100... -
Page 23: Preparations
3 − Preparations Making connections The following example shows connections with an SS-CDR200. Precautions before making connections Before making connections, read the operation manuals of the other equipment carefully and connect each one • correctly. Turn OFF (or put in standby) the power of this unit and all other devices before connecting them. -
Page 24: Turning The Power On/Off
3 − Preparations Turning the power ON/OFF Press the front panel POWER switch to turn the power NOTE The screen above is an example from an SS-CDR200 or SS-R200 unit. The SS-R100 does not have the menu item. 5.RS-232C 3 Select... -
Page 25: Adjusting The Display And Indicator Brightness
2 Open the menu. UTILITY 3 Select BRIGHTNESS 3 Close the card slot door. NOTE The screen above is an example from an SS-CDR200 or • SS-R200 unit. The SS-R100 does not have the menu item. • 5.RS-232C 4 Press the MULTI JOG dial or , [LOCK] button (or remote control ENTER or t button) to move the cursor to the right and select the value. -
Page 26: Using The Security Screw
SELECT button) to open the DEVICE SELECT Inserting and removing discs screen. (SS-CDR200 only) Inserting discs With the disc label up, insert it partway into the disc slot. Push the disc in a little further and it will be pulled in automatically just before it disappears into the slot. -
Page 27: Preparing Usb/Sd/Cf Media For Use
5 Press the MULTI JOG dial (or remote control ENTER button). A confirmation pop-up message appears. NOTE The screen above is an example from an SS-CDR200. SS-R200 and SS-R100 models do not have the menu. 6 Press the MULTI JOG dial (or remote control ENTER 2 Press the DEVICE button (or remote control DEVICE button) again to start formatting. -
Page 28: Playback
2 Open the menu. PLAY frequencies 3 Select PLAY AREA Files on CDs (SS-CDR200 only) „ Audio CD format files Commercial music CDs, and CD-R and CD-RW discs created in audio CD format MP3 format files 4 Press the MULTI JOG dial or , [LOCK] button (or Stereo and mono MP3 files at 44.1 and 48 kHz sampling... -
Page 29: Selecting The Current Folder Or Current Playlist
5 Turn the MULTI JOG dial (or press the remote The SS-CDR200 is able to play CDs with a maximum of • control 5/b buttons) to set the desired playback 99 CD audio format files. -
Page 30: Selecting Tracks
READY button, the unit will locate to 12 minutes after the You cannot use the number buttons on the remote to • beginning of track 2. The button you push will determine specify the track while in program or random mode. what happens after locating. TASCAM SS-CDR200/SS-R200/SS-R100... -
Page 31: Jog Playback
[SKIP] or , [LOCK] button (or remote control point from where playback last started and start playback SEARCH m/, buttons) to locate backward or standby. forward from the current position by the SKIP TIME. After locating, the previous state resumes. TASCAM SS-CDR200/SS-R200/SS-R100... -
Page 32: Program Playback
While adjusting the pitch control value, it is shown in a Preparing the program pop-up on the Home Screen. Use the front panel of the unit and the included TASCAM RC-SS2 remote control to prepare the program using the following procedures. -
Page 33: Setting The Pitch Step
+ buttons) to set the KEY LEVEL While adjusting the , it is shown in a KEY LEVEL pop-up on the Home Screen. You can set the in a range from ¢ –¢ KEY LEVEL (no pitch change), – TASCAM SS-CDR200/SS-R200/SS-R100... -
Page 34: A-B Repeat Playback
Auto Cue function Screen. is active. In other words, any signal higher than the Auto Cue LEVEL will be treated as “signal, ” and any signal lower than this level will be treated as “silence. ” TASCAM SS-CDR200/SS-R200/SS-R100... -
Page 35: Auto Ready Function
PLAY button during playback to start playback from the beginning of the next track, or press the front panel or remote control STOP button to start playback standby at the beginning of the next track. TASCAM SS-CDR200/SS-R200/SS-R100... -
Page 36: Mono Playback
OFF. The incremental playback function setting is retained • even after the power is turned OFF. EOM functions (SS-CDR200/SS-R200 1 Press the MENU [JOG] button (or remote control only) MENU button) to open the screen. -
Page 37: Example Of Use
7 Turn the MULTI JOG dial (or press the remote appears on the Home Screen. control 5 and b buttons) to set it to (default setting is retained even after the • POWER ON PLAY value: power is turned OFF. TASCAM SS-CDR200/SS-R200/SS-R100... -
Page 38: Link Playback Function
(SS-CDR200/SS-R200 only) Link playback connections as well as by a TASCAM RC-20 Direct Play Remote (sold separately). Connect the master DIGITAL OUT jack to the slave DIGITAL IN jack. - Page 39 PS/2 or USB keyboard connected to the front panel or from an external device connected to the parallel connector (SS-CDR200/SS-R200 only). If you are using a PS/2 or USB keyboard, you can press CTRL and a function key (F1–F12) to flash-start tracks 1–12 (see “Keyboard operation list”...
-
Page 40: Recording
These models can record to USB memory and SD and reason, you should try as much as possible to avoid CF cards. The SS-CDR200 can also record to CD-R and power interruptions during recording and playback. CD-RW discs. The following formats can be used for audio This function was not created for the purpose of use •... -
Page 41: Setting The Recording File Format
• format is set to .mp3) but using the file copy function described below, you can copy WAV files from USB/SD/CF media to CD-R/ Set the bit rate. CD-RW discs (SS-CDR200 only). (See “Copying files Options: (default value), 64kbps 128kbps 192kbps between CDs and other media”... -
Page 42: Monitoring The Input Signal
To switch from recording to recording standby: Follow the instructions in the “Monitoring the input Press the front panel or remote control READY button. signal” section above to enable monitoring of the input signal, and then follow these procedures. TASCAM SS-CDR200/SS-R200/SS-R100... -
Page 43: Finalizing Cd-R/Cd-Rw Discs (Ss-Cdr200 Only)
The recorded content will not be able to be saved correctly if you do so. Finalizing CD-R/CD-RW discs (SS-CDR200 only) 6 Press the MULTI JOG dial or , [LOCK] button (or remote control ENTER button or t button) again to start finalization. -
Page 44: Sync Recording Operation
The sync recording setting is retained even after the Time power is turned OFF. NOTE If the is set to , recording standby will not STOP TIME be entered automatically even if the input signal stays below the SYNC LEVEL. TASCAM SS-CDR200/SS-R200/SS-R100... -
Page 45: Auto Track Function
1 Press the MENU [JOG] button (or remote control created (one frame is 1/75th of a second). MENU button) to open the screen. MENU Options: – (frame, default value: –75 f +75 f 2 Open the menu. 3 Select AUTO TRACK TASCAM SS-CDR200/SS-R200/SS-R100... -
Page 46: Creating A New Track Manually
Pressing the buttons cycles through the modes in this order: LEVEL TIME 6 Press the MULTI JOG dial or , [LOCK] button (or remote control ENTER or t button) to move the cursor right to select the value. TASCAM SS-CDR200/SS-R200/SS-R100... -
Page 47: Using The Compressor When Recording
OFF (default value) The compressor is not used when recording. SOFT Light compression is applied when recording. This setting is suitable when recording music. 9 To edit the file name, follow the instructions in “Inputting and editing characters” below. TASCAM SS-CDR200/SS-R200/SS-R100... -
Page 48: Inputting And Editing Characters
(the name will not appear when the RENAME function is being used). The following symbols and punctuation marks cannot • be used in names. \ / ; : * , ? “ < > | • TASCAM SS-CDR200/SS-R200/SS-R100... -
Page 49: Media Capacities And Recording Times
The above recording times are estimates. They may differ depending on the USB/SD/CF media being used. • The above recording times are not continuous recording times. They are the total amounts of recordable time on the • USB/SD/CF media. TASCAM SS-CDR200/SS-R200/SS-R100... -
Page 50: File And Folder Operations (Finder Screen)
Navigating the FINDER screen You can manage audio files on USB/SD/CF media in a folder structure. You can also manage MP3/WAV files on a data CD in a folder structure (SS-CDR200 only). screen shows folders and music files in each FINDER folder as a list that is similar to a computer file list display. -
Page 51: File Operations
Creates a new folder. (See “Creating a new folder” on page 54.) MOVE/COPY Move the selected file to a different position in the same folder or move or copy it to another folder. (See “Moving and copying files (USB/SD/CF media)” on page 54.) TASCAM SS-CDR200/SS-R200/SS-R100... -
Page 52: Editing Folder Names (Usb/Sd/Cf Media Only)
(the name will not appear when the function is RENAME being used). The following symbols and punctuation marks cannot • be used in names. \ / ; : * , ? “ < > | TASCAM SS-CDR200/SS-R200/SS-R100... -
Page 53: Deleting Folders And Files (Usb/Sd/Cf Media Only)
FINDER screen, and turn the MULTI JOG playlist, open the screen, and turn the FINDER dial (or push remote control 5/b buttons) to MULTI JOG dial (or push remote control 5/b select buttons) to select ADD PLAYLIST ADD PLAYLIST TASCAM SS-CDR200/SS-R200/SS-R100... -
Page 54: Creating A New Folder (Usb/Sd/Cf Media Only)
3 Turn the MULTI JOG dial (or push remote control 2 Press the MULTI JOG dial (or remote control ENTER 5/b buttons) to move the selected file to the button) to open the screen. desired position. NEW FOLDER TASCAM SS-CDR200/SS-R200/SS-R100... -
Page 55: Move/Copy Files Between Folders
4 Turn the MULTI JOG dial (or push remote control 5/b buttons) to move the blinking file to the position where you want it. Press the MULTI JOG dial (or remote control ENTER button) to show the following menu items in a pop- TASCAM SS-CDR200/SS-R200/SS-R100... -
Page 56: Audio Cd Finder Screen (Ss-Cdr200 Only)
7 – Audio CD FINDER screen (SS-CDR200 only) Editing CD-Text (CD-R/CD-RW disc When working with CDs that have audio CD format files, you can use the audio CD screen to select tracks only) FINDER for playback. In addition, when working with unfinalized... -
Page 57: Using The Edit Menu (Usb/Sd/Cf Media Only)
3 Turn the MULTI JOG dial (or press the remote 3 Turn the MULTI JOG dial (or press the remote control 5 and b buttons) to select DELETE control 5 and b buttons) to select DIVIDE 4 Press the MULTI JOG dial (or remote control ENTER button). TASCAM SS-CDR200/SS-R200/SS-R100... -
Page 58: Combining Files
7 To confirm and execute the combination, press the is set to CONTINUE MULTI JOG dial (or remote control ENTER button). NOTE and a progress bar appear in a -- COMBINE -- You cannot combine MP3 files. pop-up while the files are being combined. • TASCAM SS-CDR200/SS-R200/SS-R100... -
Page 59: Undoing Edit Menu Operations
NOTE EDIT [INPUT] To cancel the undo operation, press the • button (or remote control EDIT button). If there is no file operation that can be undone, a • CAN'T warning message will appear in a pop-up. UNDO TASCAM SS-CDR200/SS-R200/SS-R100... -
Page 60: Editing The Playlist (Usb/Sd/Cf Media Only)
If the play area is set to (see “Play area” on PLAYLIST page 60), and the unit is stopped, playing or in playback standby, press the FINDER [A-B] button (or remote control FINDER button) to open the USER PLAYLIST screen. TASCAM SS-CDR200/SS-R200/SS-R100... -
Page 61: Using The Playlist Finder Menu
FINDER [A-B] button (or remote control FINDER button) to cancel removal. INFORMATION Shows the number of tracks in the playlist and its total playback time in a pop-up. TASCAM SS-CDR200/SS-R200/SS-R100... -
Page 62: Removing Files From Playlists
5 Press the MULTI JOG dial (or remote control ENTER button) to confirm the new position after moving. and a progress bar appear in a -- PLAYLIST -- pop-up while the movement completes, and then the screen reopens. Playlist XX TASCAM SS-CDR200/SS-R200/SS-R100... -
Page 63: Copying Files Between Cds And Other Media (Ss-Cdr200)
10 - Copying files between CDs and other media (SS-CDR200) You can copy (or convert and copy) files on USB/SD/CF media to a blank CD. You can also copy (or convert and copy) files on a CD to USB/SD/CF media. - Page 64 10 - Copying files between CDs and other media (SS-CDR200) remote control FUNC button) to select the first file, you will no longer be able to move to a different folder. In step 10 below, if you attempt to use •...
-
Page 65: Creating Data Cds
10 - Copying files between CDs and other media (SS-CDR200) Creating data CDs NOTE If audio format files have already been written to the This section explains how files (MP3 or WAV files) from a CD-R/CD-RW disc, the above pop-up window will not USB/SD/CF media can be copied in their current format to appear. -
Page 66: Converting Cd Files And Copying Them To Usb/Sd/Cf Media
10 - Copying files between CDs and other media (SS-CDR200) Converting CD files and copying them If the total size of the copy-source files exceeds the free • space on the copy-destination disc, to USB/SD/CF media CAPACITY OVER appears in a pop-up after step 10. -
Page 67: Copying Files On A Data Cd
10 - Copying files between CDs and other media (SS-CDR200) 7 Turn the MULTI JOG dial (or press the remote control 5 and b buttons) to select the file format to be saved to the selected device media. FILE Set the file format. - Page 68 10 - Copying files between CDs and other media (SS-CDR200) 4 Press the MULTI JOG dial (or remote control ENTER screen where you can RIP TARGET SELECT button) to open a pop-up window where you can select the copy destination.
-
Page 69: Cd-Rw Management (Ss-Cdr200 Only)
11 − CD-RW management (SS-CDR200 only) Using the CD menu to work with CD-RW discs, you can erase, unfinalize and refresh (completely erase) discs as well as erase tracks. This chapter explains these CD-RW management functions. The following explanations assume that... -
Page 70: Erasing Tracks
11 − CD-RW management (SS-CDR200 only) Erasing tracks NOTE When erasing tracks on a finalized CD-RW disc, the unit • You can erase tracks that have been recorded in audio CD will unfinalize the disc before erasing the designated format on a CD-RW disc. The specified track and all later tracks. -
Page 71: Other Settings And Media Information
Footswitch control Footswitch mode functions The functions of the footswitches in each mode are as You can operate this unit using a TASCAM RC-3F follows. footswitch (sold separately) connected to the front panel Footswitch REMOTE jack. L (press) -
Page 72: Viewing Information About The Media
12 − Other settings and media information Viewing information about the media NOTE The screen above is an example from an SS-CDR200 or You can view information about the media in the current SS-R200 unit. The SS-R100 does not have the 5.RS-232C device. -
Page 73: 13 − Operation Using A Computer Keyboard
As when using a computer, use the Shift and Caps Lock keys to change the case of characters input. To input text: Use the number, letter and symbol keys for direct input. To move the cursor: Use the ¡/Ω/a/q arrow keys. TASCAM SS-CDR200/SS-R200/SS-R100... - Page 74 Set the sampling rate converter Number keys Number input Shift + F11 Set the compressor *Ctrl + E only works with the SS-CDR200 Keyboard key(s) Operation NOTE After completing flash loading, start flash Ctrl + F1 start playback of track 1...
-
Page 75: Using Control I/O (Ss-Cdr200/Ss-R200 Only)
Using the CONTROL I/O PARALLEL connector, you can which is compliant with RS-232C standards, you can control this unit through serial connection with a TASCAM control the unit via this serial connection from a computer RC-SS20 or other external controller. The pin assignments or other external device. - Page 76 14 − Using control I/O (SS-CDR200/SS-R200 only) The following is an example of connecting for playback control of this unit using fader start/stop Pin 1 STOP PARALLEL Pin 8 START FADER START *4 Pin 22/24 (Device Select Tally 1/2) Depending on the high/low settings of pins 22 and 24, the device assignment will be as follows.
-
Page 77: Message List
If one of the following error messages appears in a pop-up, press the MULTI JOG dial (or remote control ENTER button) to close the message. Then, resolve the issue. If you are still unable correct the problem, please contact the nearest TASCAM service center. -
Page 78: Operation Messages
CD Text has been added, but you are trying to eject the disc without writing the TOC. - caution - SURE TEXT (SS-CDR200 only) An item with the same name already exists. (SS-CDR200 only) - caution - SAME NAME The media has been formatted by something other than this unit, and this can cause the following problems. -
Page 79: Troubleshooting
If the unit is not functioning properly, please check the following items before calling for service. If you are still unable to resolve the problem please contact the retailer where you purchased the unit or TASCAM customer support. Power does not turn on „... -
Page 80: 17 − Specifications
95 dB Maximum output level: +6 dBV (2.0 Vrms) Note: all ratings are for performance when recording *If you want to change the maximum balanced input and according to JEITA CP-2150 standards output levels, please contact TASCAM customer support. TASCAM SS-CDR200/SS-R200/SS-R100... -
Page 81: Backup Memory
100 V: 16 W 110–240 V: 20 W Dimensions (width × height × depth) 482.6 × 44.5 × 301 mm/19 x 1.75 x 11.85 in. Weight SS-CDR200 3.7 kg/8.16 lbs SS-R100/R200 3.4 kg/7.50 lbs Operating temperature range 5–35º C/41–95ºF TASCAM SS-CDR200/SS-R200/SS-R100... -
Page 82: Dimensional Drawings
17 − Specifications Dimensional drawings Illustrations in this manual might differ in part from actual products. • In order to improve the products, specifications and appearance could be changed without prior notice. • TASCAM SS-CDR200/SS-R200/SS-R100... - Page 83 Notes TASCAM SS-CDR200/SS-R200/SS-R100...
- Page 84 SS-CDR200 SS-R200 SS-R100 TEAC CORPORATION http://tascam.jp/ Phone: +81-42-356-9143 1-47 Ochiai, Tama-shi, Tokyo 206-8530, Japan TEAC AMERICA, INC. http://tascam.com/ Phone: +1-323-726-0303 7733 Telegraph Road, Montebello, California 90640 USA TEAC CANADA LTD. http://tascam.com/ Phone: +1905-890-8008 Facsimile: +1905-890-9888 5939 Wallace Street, Mississauga, Ontario L4Z 1Z8, Canada TEAC MEXICO, S.A.