Mitsubishi Electric DLP XD700U User Manual
Hide thumbs
Also See for DLP XD700U:
- User manual (61 pages) ,
- Reference manual (2 pages) ,
- Specification (2 pages)

Related Manuals for Mitsubishi Electric DLP XD700U


Summary of Contents for Mitsubishi Electric DLP XD700U
- Page 1 DLP™ PROJECTOR MODEL XD700U WD720U User Manual XD700U WD720U This User Manual is important to you. Please read it before using your projector.
- Page 2 CAUTION RISK OF ELECTRIC SHOCK DO NOT OPEN CAUTION : TO REDUCE THE RISK OF ELECTRIC SHOCK, DO NOT REMOVE COVER (OR BACK) NO USER-SERVICEABLE PARTS INSIDE REFER SERVICING TO QUALIFIED SERVICE PERSONNEL. The lightning flash with arrowhead symbol within an equilateral triangle is intended to alert the user to the presence of uninsulated “dangerous voltage”...
-
Page 3: Table Of Contents
Contents Important safeguards ........................4 Overview ............................6 Remote control ..........................8 Installation ............................9 Basic connections ...........................12 Preparation .............................15 Basic operation ..........................17 Menu operation ..........................21 Image adjustment ..........................31 Network settings ..........................34 Advanced display utilities ........................39 Advanced features ..........................47 Lamp replacement ..........................51 Troubleshooting ..........................53 Indicators ............................57 Specifications ..........................58 Trademark, Registered trademark... -
Page 4: Important Safeguards
Important safeguards Please read all these instructions regarding your projector and retain them for future reference. Follow This projector should be operated only from the all warnings and instructions marked on the projector. type of power source indicated on the marking label. - Page 5 Important safeguards (continued) Do not use the projector with condensation on it. WARNING: It can lead to breakdown or other failure. Unplug immediately if there is something wrong Place of installation with your projector. For safety’s sake, do not use the projector at any place Do not operate if smoke, strange noise or odor comes subjected to high temperature and high humidity.
-
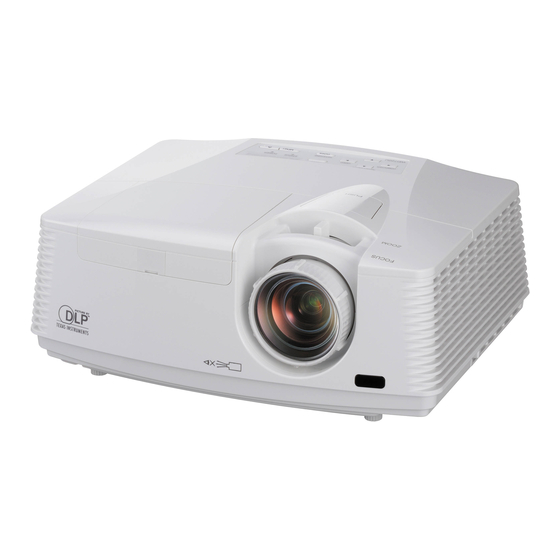
Page 6: Overview
Overview 1 Lamp cover 2 Lens 3 FOCUS ring 4 ZOOM ring 5 LENS SHIFT dial 6 Remote control sensor (front) 7 Speaker 8 Lock bar 9 Intake vent 10 Control panel 11 Exhaust vent 12 Power jack 13 Terminal panel 14 Kensington Lock 7 8 9 Caution:... - Page 7 Overview (continued) Bottom side 1 Adjustment feet Remote control 1 ON button 2 MAGNIFY button STANDBY 3 VOLUME UP, DOWN buttons MAGNIFY ASPECT 4 KEYSTONE button 5 MENU button 6 ENTER button EFFICIENT MODE 7 AV (Audio/Video) MUTE button KEYSTONE DOWN 8 VIEWER button 9 UNPLUG button...
-
Page 8: Remote Control
Remote control Battery installation Use two (AA, R6) size batteries. Inserting the batteries into the remote control 1. Remove the back cover of the remote control by pushing the battery compartment door in the direction of the arrow. 3. Replace the back cover. Removing the batteries from the remote control Remove the back cover of the remote control and take out the batteries. -
Page 9: Installation
Installation Screen size and projection distance Refer to the following tables to determine the screen size and projection distance. Screen Screen width (SW) Down side Up side For XD700U: Screen size (4:3) Projection distance (L) Lens shift height Diagonal size Width (SW) Height (SH) Shortest (Wide) Longest (Tele) inch... - Page 10 Installation (continued) Screen size and projection distance (continued) Screen Screen width (SW) Down side Up side For WD720U: (continued) SW (=W) When the aspect ratio of the screen is 4:3 Screen (4:3) When the aspect ratio of the screen is 4:3, the positional relation between the projected image and the screen is as shown on the right.
-
Page 11: Rear Projection
Installation (continued) kit. (Don’t use screw holes without arrow marks.) In Front projection, ceiling mounting this case, make sure that the screw is inserted in For ceiling mounting, you need the ceiling mount the projector at least 5 mm. The length of the screw kit designed for this projector. -
Page 12: Basic Connections
Basic connections This projector can be connected with various devices such as a VCR, video camera, videodisc player, and personal computer that have analog RGB output connectors. Important: plug. Do not pull the cord. affected by their interference. Projector + AV device S-VIDEO (option) VIDEO... - Page 13 Basic connections (continued) Connection (for video equipment having an HDMI terminal) Equipment having an HDMI terminal To HDMI terminal HDMI HDMI (with HDMI logo) cable (option) Important: and the video equipment connected to each other and then turning back on the power. When you connect this projector and a Digital device (such as a DVD player) via the HDMI terminal, black color may appear dark and deep, depending on the type of the connected device.
- Page 14 Basic connections (continued) Projector + Computer For computer with mini D-SUB Computer cable COMPUTER/ COMPONENT VIDEO IN Computer Necessary when outputting to both a PC monitor and the projector. Computer cable (option) To monitor port MONITOR OUT AUDIO AUDIO IN-1 or IN-2 Audio cable (option) PC audio cable (option)
-
Page 15: Preparation
Preparation Important: Preparation for projection 1. Attach the provided power cord to the projector. in the Installation menu is set to LAN, Speaker Out, 2. Plug the power cord in the wall outlet. or Monitor Out, the fans rotate at very low speed 3. -
Page 16: Adjustment Of The Projection Angle
Preparation (continued) Adjustment of the projection angle their adjustment ranges are limited in such For the best projection, project images on a flat screen correction. projector using the two adjustment feet on the bottom Important: of the projector. adjustment value is indicated. Note that this value Using the adjustment feet (front) doesn’t mean a projection angle. -
Page 17: Basic Operation
Basic operation STANDBY 1, 2 MAGNIFY ASPECT EFFICIENT MODE KEYSTONE DOWN AUTO MENU POSITION ENTER MUTE FREEZE VIEWER VIDEO COMPUTER UNPLUG S-VIDEO USB DISP. HDMI LAN DISP. 1, 2 Power-on button is pressed. During the warm-up process, 1. Turn on the device connected to the projector first. images may appear dark and no commands are 2. -
Page 18: Direct Power Off
Basic operation (continued) 6. Adjust the image size by turning the zoom ring. Direct Power OFF 7. Adjust the vertical position of the displayed image You can turn off this projector just by unplugging the by turning the LENS SHIFT dial. power cord without pressing the POWER button. -
Page 19: Setting The Aspect Ratio
Basic operation (continued) Setting the aspect ratio Watching 3D content You can change the aspect ratio of the input video You can enjoy 3D content with this projector. signal (or the ratio of width to height of the image). In order to watch 3D content, you need to have the Change the setting according to the type of the input following items: video signal. - Page 20 Basic operation (continued) 3D contents on the projector. shake or many dynamic pictures, if you feel uncomfortable, please look at another place. image because setting such as fluorescent lighting may occur loss of synchronism of glasses. rotation, or horizontal or vertical oscillation, you may feel as if you are actually moving.
-
Page 21: Menu Operation
Menu operation You can make various settings using the displayed menus. Picture Image Auto Theater Presentation Standard Black Board White Board Brilliant Color™ User Gamma Dynamic, Natural, Detail Brightness Contrast R Contrast Contrast G Color Temp. Contrast B Brightness R High Brightness G User... -
Page 22: How To Set The Menus
Menu operation (continued) 5. Set the selected item by pressing the or button. How to set the menus 1. Press the MENU button. Installation Efficient Mode The item being selected is displayed in red letters Menu Position Lower Right on a blue background. -
Page 23: Menu Items
Menu operation (continued) Menu items Set the following items provided in the respective menus. Picture menu Picture Auto Image Brightness Contrast Color Temp. Color Management Aspect Ratio Normal Input Level Auto 3D Sync Invert Adjust Exit MENU Select ITEM SETTING FUNCTION Image Auto... -
Page 24: Video Image Menu
Menu operation (continued) Video Image menu Video Image Color Sharpness Tint Adjust MENU Exit Select ITEM SETTING FUNCTION Color Adjusts the color tone of projected images. (See page 31.) You cannot select this setting when the Computer1, Computer2, or HDMI is selected as the input source. -
Page 25: Signal Menu
Menu operation (continued) Signal menu Signal User H. Position Clamp Position V. Position Clamp Width Fine sync Tracking Shutter(U) Auto Computer Input Shutter(L) Overscan Shutter(LS) Hold Shutter(RS) User Adjust MENU Exit Adjust MENU Exit Select Select ITEM SETTING FUNCTION H. Position Select this setting to adjust the horizontal position of projected images. -
Page 26: Audio Menu
Menu operation (continued) Audio menu Audio Audio Input Auto Volume Adjust Exit MENU Select ITEM SETTING FUNCTION Audio Input Auto Selects Audio 1 when the input source is Computer1, selects Audio 2 when the input source is Computer2, selects Audio 3 when the input source is Video/S-Video, and selects HDMI when the input source is HDMI. -
Page 27: Installation Menu
Menu operation (continued) Installation menu Installation Efficient Mode Standard Efficient Mode Lamp Mode Menu Position Upper Left Standby Mode Image Reverse Auto Power Off 5Min Auto Power On Adjust MENU Exit Auto Keystone Select Cross Hatch Test Pattern Language English Reset All Adjust MENU... -
Page 28: Option Menu
Menu operation (continued) Option menu Option Password Cinema Mode Auto Video Signal Auto WXGA Auto Set Up Image Capture Splash Screen Original Back Color Blue AV Mute Mode Black Closed Caption Adjust Exit MENU Select ITEM SETTING FUNCTION Password Use this setting to activate or deactivate the password lock. Cinema Mode Auto / Off Select Auto to automatically activate the film mode when the input... - Page 29 Menu operation (continued) Network Config menu Network Config IP Config Wireless Setting Projector Name DHCP SSID IP Address Auto Network Certification Channel Subnet Mask Network Password Encryption Default Gateway IP Config Wireless Setup MAC Address xx-xx-xx-xx-xx-xx Wireless Setting Adjust Exit MENU AMX Device Discovery DHCP Function...
-
Page 30: Information Menu
Menu operation (continued) Information menu Information 2000H Lamp Time Input Computer1 Resolution 1024x768 60.00 kHz H. Frequency 60.00 Hz V. Frequency 3Wire Sync. Type Exit MENU ITEM DESCRIPTION Lamp Time This menu shows a lamp operating time (hour) calculated assuming that Lamp Mode is Low. actual time. -
Page 31: Image Adjustment
Image adjustment To adjust the brightness (Contrast To adjust the tone of white (Color and Brightness): Temp.): You can select a preset color temperature (white tone) You can make adjustments for the brightness of the using the menu. projected image using the menu. (See page 22 for menu setting.) (See page 22 for menu setting.) 1. -
Page 32: Color Management
Image adjustment (continued) Image Color Management You can set user-defined values for the brightness and You can individually adjust the tone of red, green, blue, hue using the menu. (See page 22 for menu setting.) cyan, yellow and magenta using the menu. 1. -
Page 33: How To Adjust The Computer Image
Image adjustment (continued) How to adjust the computer image Simple method to adjust the image This projector automatically and properly projects position video signals being inputted from the computer. To adjust the horizontal position: However, some video signals may not be projected, 1. -
Page 34: Network Settings
Network settings You can set the network of the projector using the Enabling or disabling the network menu. certification You can select whether or not to certify the network Network Config communication using the network password. (See page 22 for menu setting.) Projector Name Network Certification 1. -
Page 35: Ip Address Settings
Network settings (continued) 5. Select OK, and NEW NETWORK PASSWORD IP Config settings screen appears if the entered password is correct. (See page 22 for menu setting.) 1. Display the Network Config menu. CURRENT NETWORK PASSWORD screen 2. Press the or button to select IP Config. appears again. -
Page 36: Default Gateway Settings
Network settings (continued) Subnet Mask settings Start IP Address setting 1. Display the IP Config menu. 1. Display the IP Config menu. 2. Press the or button to select Subnet Mask. 2. Press the or button to select Start IP Address. Subnet Mask Start IP Address 169 - 254 - 0... -
Page 37: Wireless Setting
Network settings (continued) Wireless Setting Channel setting 1. Display the Wireless Setting menu. (See page 22 for menu setting.) 2. Press the or button to select Channel. 1. Display the Network Config menu. 2. Press the or button to select Wireless Setting. Auto Channel Wireless Setting... - Page 38 Network settings (continued) Restart of network function depending on the Encryption setting. (See page 22 for menu setting.) 1. Display the Network Config menu. 2. Press the or button to select Network Restart. Network Restart 3. Press the ENTER button. 4.
-
Page 39: Advanced Display Utilities
Advanced display utilities 2. When the computer is connected to the projector, USB Display the computer image is automatically displayed on You can project the computer images inputted via a the screen. USB connection. 3. When ending the USB Display projection, unplug You don’t have to install any drivers on your computer the USB cable from the projector. - Page 40 Advanced display utilities (continued) When deleting LAN Display System (Uninstallation) LAN Display Important: You can project the computer images inputted via a When uninstalling LAN Display System, it should wired or wireless LAN. be ended in advance. If the application continues You can also perform the following during the LAN operating, uninstallation cannot be performed Display projection:...
- Page 41 Advanced display utilities (continued) Operating the LAN Display System Projection 3. Click the buttons on the main user interface to Selecting a LAN Display input operate the projection. 1. Press the LAN DISP. button on the remote control or the COMPUTER button on the projector. Freeze button the COMPUTER Menu button...
- Page 42 Advanced display utilities (continued) Important: Installing the virtual display driver Virtual display function is only supported by To project a virtual extended screen, install the Virtual Windows XP. display driver as follows. 1. Double click “Virtual display driver.exe” contained attached Virtual display driver must be in the folder “LAN Display System”, and start up installed.
- Page 43 Advanced display utilities (continued) Installing PtG Converter-Lite PC Less Presentation Before starting installation, be sure to read You can project JPEG images and the PtG contents “ReadMe(En).txt” contained in the CD-ROM. Copy stored in the USB device such as a USB memory “PtG Converter-Lite.exe”...
- Page 44 Advanced display utilities (continued) Important: Conversion of a PPT file to PtG file using the PtG Converter-Lite display can be converted. However, the followings 1. Click the PtG Converter-Lite icon “ ” to execute are not supported. the program. Menu bar PPT conversion button repeat setting a single movement...
- Page 45 Advanced display utilities (continued) Setting up Displaying PtG file 2. Press the or button on the remote control to 5. Press the or button on the remote control to select Setup and press the ENTER button . select Presentation to Go and press the ENTER The Setup screen appears.
- Page 46 Advanced display utilities (continued) Displaying with AutoRun function 5. Create an “AUTORUN” folder in the root directory of the USB device using a computer or other. 6. Save a PtG file or JPEG files in the AUTORUN folder. Important: The AutoRun function supports single PtG file only.
-
Page 47: Advanced Features
Advanced features Displaying a user-defined image Freeze during startup or muting To stop the motion in the image temporarily (or to You can display your desired image as the startup display a still image): screen (or splash screen). Using the menu, you can Press the FREEZE button on the remote control. - Page 48 Advanced features (continued) Password lock To enable or disable password lock: This projector provides the password lock function (See page 22 for menu setting.) that is intended to prevent wrong operations by 1. Display the Option menu. children and set controlled access for specified users. 2.
-
Page 49: Supervising And Controlling By Computer
Advanced features (continued) Supervising and controlling by computer About PJLink™ You can supervise and control the projector’s application software is required. operation using a personal computer via a LAN network. properly according to the setting of the network Major functions application to be used. - Page 50 The projector name set on the Network Config menu or the Crestron RoomView Setup window is returned. Inquiry about the manufacturer name “MITSUBISHI” is returned. Inquiry about the model name Inquiry about other information No other information is available. No parameter is returned.
-
Page 51: Lamp Replacement
Lamp replacement This projector is equipped with a lamp to project 3. Loosen the two screws (d) of the lamp unit, and images. This lamp is a consumable. It may burn out then pull out the lamp unit (f) by the handle (e). or its brightness may decrease during use. - Page 52 Lamp replacement (continued) 3. Assemble the lamp replacement attachment by Reset of the lamp operation time folding two taping portions (g) and two cutout Plug in the power cord, and reset the lamp operation time by keep pressing the , , and POWER buttons portions (h) along the folding line as the figure.
-
Page 53: Troubleshooting
Troubleshooting Before asking for repair of the projector, check the following. If the symptom persists, stop using the projector, be sure to unplug the power plug, and then contact your dealer. No image appears on the screen. Problem Solution Power can not be turned on. - Page 54 Troubleshooting (continued) No image appears on the screen. (continued) Problem Solution The screen for Enter the password or contact the person in charge of management of the entering the password appears. projector. (See page 48.) “No signal” is displayed. wrong with the connected device.
- Page 55 Troubleshooting (continued) Images are not displayed correctly. (continued) Problem Solution Projected images become wavy. correctly because of the type of input signal. This isn’t a product malfunction. In this case, readjust the keystone so that the amount of keystone correction is as small as possible.
-
Page 56: Kensington Lock
Troubleshooting (continued) Others (continued) Problem Solution The fans sound during standby. LAN, Speaker Out, or Monitor Out, the fans rotate at very low speed during standby after plugging the power cord (with 5 second high speed rotation at the beginning) and after turning off the lamp. -
Page 57: Indicators
Indicators This projector has two indicators, each of which shows the operation condition of the projector. The following offer solutions to possible problems. If these problem persist, turn the projector off and consult your dealer. STATUS indicator POWER indicator Normal condition POWER STATUS CONDITION... -
Page 58: Specifications
Specifications Type DLP™ projector Model Rated power supply Power consumption 4.1 A Display Technology Device (DMD) Device (DMD) Colors Projection lens Light source lamp Picture size PC compatibility Sync on Green available Sync on Green available Video compatibility Speaker S-video input Video input Audio input Analog RGB input... - Page 59 Specifications (continued) Connectors COMPUTER/COMPONENT VIDEO IN, MONITOR OUT (mini D-SUB 15-pin) HDMI (HDMI 19-pin) COMPUTER/COMPONENT MONITOR OUT VIDEO IN Pin No. Spec. Pin No. Spec. R (RED)/C Pin No. Spec. G (GREEN)/Y TMDS Data 2 Shield R (RED)/C B (BLUE)/C TMDS Data 2 - G (GREEN)/Y B (BLUE)/C...
- Page 60 Specifications (continued) Specification of RGB signals in each computer mode of the projector Horizontal Vertical Resolution Signal mode frequency frequency (H x V) (H x V) (H x V) (kHz) (Hz) 15.73 59.94 *2 *4 15.63 33.75 *2 *3 28.13 *2 *3 31.47 59.94...
- Page 61 1 Zusho Baba, Nagaokakyo-City, Kyoto Japan...