Zoom H2next Operation Manual
Handy recorder
Hide thumbs
Also See for H2next:
- Operation manual (48 pages) ,
- Quick manual (2 pages) ,
- Quick manual (21 pages)

Related Manuals for Zoom H2next


Summary of Contents for Zoom H2next
- Page 1 Operation manual ©ZOOM Corporation Reproduction or duplication of this manual without permission, in whole or in part, is prohibited.
-
Page 2: Usage And Safety Precautions
Operating environment power OFF and disconnect other cables. Contact Always disconnect all connection cables and the store where you bought the unit or ZOOM Do not use in extremely high or low tempera- the AC adapter before moving the unit. -
Page 3: Introduction
Handy Recorder Introduction Thank you very much for purchasing a ZOOM Handy Recorder. • Use as an SD card reader and computer audio interface The features of the include the following. The built-in USB 2.0 high-speed port allows direct connection with a computer. -
Page 4: Table Of Contents
Changing automatic recording settings ... 74 Selecting the fi le to playback from a list ..32 Setting how fi les are named ©ZOOM Corporation Changing the playback speed ......33 (Stereo fi les only) ..........76 Reproduction or duplication of this manual without permission, in whole or in part, is prohibited. -
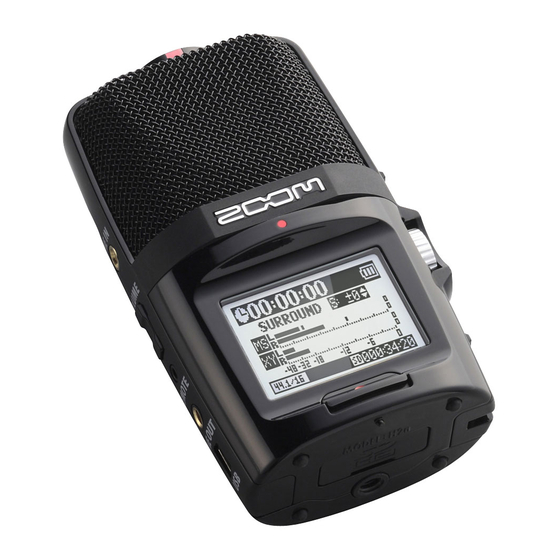
Page 5: Part Names
Handy Recorder Part names Left side Front Right side MS mic indicator XY stereo mic Lights when the MS mic (rear) is ON. MS stereo mic MENU button Flashes when the input signal is distorting. PLAY control LINE IN jack for Recording mode Press to play/pause mic/line input... -
Page 6: Display
Handy Recorder Display Home (recording) screen Playback screen Recording mode AUTO GAIN/AUTO REC indicator (File name shown during recording) (When AUTO REC enabled) Recording time Playback time Remaining battery level indicator Full Playing File name LINE IN jack in use indicator (Playback paused) Clipping Recording format... -
Page 7: Powering The Recorder
Handy Recorder Powering the recorder Installing an SD card Using batteries After turning the power OFF , open the SD card slot cover. Turn the power OFF , and then remove the battery cover. Insert the card into the slot. Insert batteries. -
Page 8: Turning The Power On And Off
Handy Recorder Turning the power ON and OFF Turning the power ON Using the hold function • In order to prevent accidental operation during recording, the has a hold Slide down. function that disables the use of controls other than the MIC GAIN. Enabling the hold function NOTE •... -
Page 9: Connecting An External Mic
Handy Recorder Connecting an external mic Setting the date and time The date and time is added to recording fi les automatically, so set it correctly Connect an external mic (sold separately) to the LINE IN jack. whenever the batteries are replaced. NOTE Press ∙... -
Page 10: Setting The Battery Type
Handy Recorder Setting the battery type Set the battery type in order to show the remaining battery charge accurately. Press to select SYSTEM, and then press to select BATTERY TYPE, and then press to select the battery type, and then press... -
Page 11: Recording Mode Overview
Handy Recorder Recording mode overview has four recording modes that can be selected according to your 2ch and 4ch surround modes purposes. Sound can be captured in all directions using Mid-side (MS) stereo mode both MS and XY mics. Side (adjustable) This mode uses a mid mic to capture the sound You can select 2ch, which mixes the signals... -
Page 12: Selecting The Recording Mode
Handy Recorder Selecting the recording mode Using MS-RAW mode (WAV format only) Turn so that the triangle points to the desired mode. If you want to adjust the stereo width after recording, record using MS-RAW NOTE mode. ∙ The 4ch surround mode can only be used •... -
Page 13: Recording Manually
Handy Recorder Recording manually HINT ∙ Adjust the MIC GAIN so that the peak level stays around -12 dB. ∙ If an input signal is too strong, the MS/XY indicator on the top will flash immediately. ∙ The recorder can also adjust mic gain automatically. (➝ P .70) ∙... -
Page 14: Recording Automatically
Handy Recorder Recording automatically The mic can be set to start and stop recording automatically in response to to select ON, and then press changes in the input level. NOTE Press Other settings can also be made for automatic recording. (➝ P .74) to select REC, and then press After the home screen reopens, press to put the recorder in standby. -
Page 15: Pre-Recording
Handy Recorder Counting in before recording Pre-recording When pre-recording is on, this recorder can continuously capture two seconds of The built-in metronome can play a count-in sound before recording starts. This sound before recording is started manually. When is pressed, these two pre-count sound is output through the /LINE OUT jack. -
Page 16: Playing Back Recordings
Handy Recorder Playing back recordings You can play fi les in the current folder. Change the folder to play fi les in a different folder. Press to jump between marks and fi les Hold to search forward or backward Press to pause and restart playback to adjust the volume HINT... -
Page 17: Selecting The Fi Le To Playback From A List
Handy Recorder Selecting the fi le to playback from a list Changing the playback speed You can select a fi le in the current folder for playback. Change the folder to select You can change the playback speed to between 50% and 150% of normal fi les from a different folder. -
Page 18: Loop Playback Of A Set Interval (Ab Repeat)
Handy Recorder Loop playback of a set interval (AB REPEAT) You can loop playback between two set points. Select the fi le that you want to NOTE play back fi rst. ∙ Use to search for the stopping point quickly. When the playback screen is open, press ∙... -
Page 19: Changing The Play Mode
Handy Recorder Changing the play mode When the playback screen is open, press Press to start playback in the selected mode. to select PLAY MODE, and then press to set the mode, and then press NOTE PLAY ALL: Play all the fi les in the current folder once. -
Page 20: Adjusting The Playback Pitch (Key Control)
Handy Recorder Adjusting the playback pitch (KEY CONTROL) Changing the S level MS-RAW only You can change the pitch without changing the playback speed. The S level (stereo width) of fi les recorded using MS-RAW mode can be changed. Select a fi le that has been recorded in MS-RAW mode fi rst. When the playback screen is open, press HINT When the playback screen is open,... -
Page 21: Mixing A 4Ch Surround Fi Le
Handy Recorder Mixing a 4ch surround fi le You can adjust the levels and panning of the MS and XY recordings made for 4ch Parameter setting ranges Explanation surround fi les. MS LEVEL MUTE, –48 ~ +12 dB Adjusts volume XY LEVEL (0.5 dB increments) MS PAN... -
Page 22: Checking Fi Le Information
Handy Recorder Checking fi le information Checking track marks WAV fi les only You can check various types of information about the current fi le. You can view a list of the marks in a WAV fi le. Press Press to select FILE, and then press to select FILE, and then press Select the fi... -
Page 23: Changing Fi Le Names (Stereo Fi Les Only)
Handy Recorder Changing fi le names Stereo fi les only to move the cursor and change characters Press Push to select a character to change and to confi rm a change to select FILE, and then press to select OK, and then press NOTE to select the fi... -
Page 24: Convert Wav Fi Les Into Mp3 Fi Les (Stereo Fi Les Only)
Handy Recorder Convert WAV fi les into MP3 fi les Stereo fi les only WAV fi les (other than MS-RAW) that have been recorded in any mode other than to select the bit rate, and then 4ch surround can be converted to MP3 fi les. Press press to select FILE, and then press... -
Page 25: Normalizing Wav Fi Les
Handy Recorder Normalizing WAV fi les If the volume of a recording is lower than desired, you can raise the level of the to select YES, and then press recording as a whole. to start normalization. Press NOTE Normalization increases the overall level of the to select FILE, and then press recording so that the maximum level in the file is 0 to select the fi... -
Page 26: Dividing Fi Les (Stereo Fi Les Only)
Handy Recorder Dividing fi les Stereo fi les only You can divide a fi le into two at any point. Set the dividing point. Press to move the point Press to play and pause the fi le Press to confi rm the dividing point to select FILE, and then press HINT The longer you hold the PLAY control the faster it will... -
Page 27: Deleting Fi Les
Handy Recorder Deleting fi les Deleting all fi les in a folder You can delete unwanted fi les. You can delete all the fi les in the current folder at once. Press Press to select FILE, and then press to select FILE, and then press to select the fi... -
Page 28: Converting Ms-Raw Fi Les Into Stereo Fi Les
Handy Recorder Converting MS-RAW fi les into stereo fi les You can convert an MS-RAW fi le into a stereo fi le. S level (stereo width) to adjust the S level, and then adjustments will affect stereo fi les. Press press NOTE to select FILE, and then press... -
Page 29: Converting 4Ch Surround Fi Les Into Stereo Fi Les
Handy Recorder Converting 4ch surround fi les into stereo fi les Press to select ENABLE or DISABLE, and then press to select FILE, and then press NOTE For an explanation about how to mix, see P .40. to select STORE IN, and to select the fi... -
Page 30: Using Usb
Handy Recorder Exchanging fi les with a computer (Card reader) You can connect the recorder to a computer to check and copy data on the SD to select SD CARD READER, and card. After turning the power on, connect the to a computer by a then press USB cable. -
Page 31: Audio Interface Use (Ms/Xy Stereo And 2Ch Surround Modes Only)
Handy Recorder Audio interface use MS/XY stereo and 2ch surround modes only to select CONNECT, and then You can record the signal from the directly to a computer, and output the playback signal from a computer through the press Follow steps 1–3 in “Exchanging fi les with a computer” on P .58. NOTE ∙... -
Page 32: Using The Tuner
Handy Recorder Using the tuner The built-in tuner can help you tune instruments by detecting the pitches of input signals. to select the tuner type, and then Press press to select TOOL, and then press Tune the instrument. The available tuner types work as follows. ■... -
Page 33: Using The Metronome
Handy Recorder Using the metronome You can use the metronome to count in before recording and to provide a guide tempo. ■ Setting the PRE COUNT (➝P .29) Press ■ Setting the TEMPO to adjust the metronome tempo to select TOOL, and then press (BPM), and then press ■... -
Page 34: Reducing Noise (Lo Cut)
Handy Recorder Reducing noise (LO CUT) Monitoring the input signal The recorder can be set to reduce the sound of wind, vocal pops and other You can listen to the input signal level through headphones. noise. Press Press to select INPUT, and then press to select INPUT, and then press... -
Page 35: Compressing/Limiting The Input Signal
Handy Recorder Compressing/limiting the input signal The recorder can be set to automatically increase the level of input signals that Setting Explanation are too weak and decrease the level of input signals that are too strong for each Compressor/limiter disabled COMP1(GENERAL) Standard compressor Compressors decrease... -
Page 36: Automatically Adjusting The Input Gain
Handy Recorder Automatically adjusting the input gain Monitoring MS-RAW signals MS stereo mode only The recorder can automatically adjust the amount of gain used on signals input When recording in MS-RAW mode, you can monitor the MID input signal on the through the built-in microphones and the LINE IN input in order to avoid distortion. -
Page 37: Setting The Recording Format
Handy Recorder Setting the recording format You can set the recording format according to your sound quality and fi le size needs. Sound quality File size Press High Large WAV96kHz/24bit WAV96kHz/16bit to select REC, and then press WAV48kHz/24bit Only these formats WAV44.1kHz/24bit can be selected when using 4ch... -
Page 38: Changing Automatic Recording Settings
Handy Recorder Changing automatic recording settings You can change settings related to the input level threshold that causes recording to start If you want to set the recording stop and stop automatically, as well as the amount of delay before automatic stopping. Press threshold, use to select REC STOP... -
Page 39: Setting How Fi Les Are Named (Stereo Fi Les Only)
Handy Recorder Setting how fi les are named Pausing recording when adding marks Stereo fi les only WAV format only You can change how stereo fi les are automatically named. You can set the unit to pause when you add a mark during recording. Press Press to select REC, and then press... -
Page 40: Changing The Display Backlight Time
Handy Recorder Changing the display backlight time Adjusting the display contrast You can set the amount of time that the display backlight stays lit. Press Press to select SYSTEM, and then to select SYSTEM, and then press press to select BACK LIGHT, and then to select DISPLAY CONTRAST, and press then press... -
Page 41: Checking The Software Versions
Handy Recorder Checking the software versions Restoring the unit to its factory settings You can view the versions of the system and other software used by the You can restore the recorder to the settings it had when it was shipped from the factory. -
Page 42: Checking The Open Capacity Of The Sd Card
Handy Recorder Checking the open capacity of the SD card Formatting an SD card You can format an SD card for use with the Press Press to select SD CARD, and then to select SD CARD, and then press press to select FORMAT, and then to select REMAIN, and then press press... -
Page 43: Updating The System Software
Copy the updater fi le to the root directory of the SD card. With the SD card inserted, turn the power ON. NOTE Download the latest system software at the ZOOM website (http://www.zoom.co.jp). to select YES, and then press With the SD card in the... - Page 44 Handy Recorder Using a remote control Troubleshooting By using a remote control (sold separately) you can operate the from a If you think that the is not operating properly, please check the following fi rst. distance. • Connect the remote control to the REMOTE jack on the Recording/playback trouble ◆...
- Page 45 Handy Recorder Specifi cations Recording media 16MB–2GB SD cards, 4GB–32GB SDHC cards Features KEY CONTROL Playback pitch adjustable ±6 semitones (cannot be used with (Cards that can be used with this recorder are to be verifi ed individually) 96kHz fi les) Built-in memory Can be used to record up to 1 minute in 96 kbps MP3 format (recording to this memory AB REPEAT...
- Page 46 FCC regulation warning (for U.S.A.) This equipment has been tested and found to comply with the limits for a Class B digital device, pursuant to Part 15 of the FCC Rules. These limits are designed to provide reasonable protection against harmful interference in a residential installation. This equipment generates, uses, and can radiate radio frequency energy and, if not installed and used in accordance with the instructions, may cause harmful interference to radio communications.
- Page 47 Zoom Corporation 4-4-3 Kanda-Surugadai, Chiyoda-ku, Tokyo 101-0062 Japan http://www.zoom.co.jp H2n-5000-1...
- Page 48 Handy Recorder Installing WAVELAB LE7 In WaveLab LE, you can perform various edits such as recording audio, adjusting the volume of the recorded files, and cutting unwanted sections. Windows Insert the supplied WAVELAB LE7 CD-ROM into the CD drive [Minimum System of your computer.