
Related Manuals for Zoom Handy Recorder H4


Summary of Contents for Zoom Handy Recorder H4
- Page 1 Operation Manual © ZOOM Corporation Reproduction of this manual, in whole or in part, by any means, is prohibited.
-
Page 2: Safety Precautions / Usage Precautions
Do not use the H4 at a loud volume for a long time Caution (Zoom AD-0006). The use of an adapter other than the since this can cause hearing impairment. specified type may damage the unit and pose a safety hazard. -
Page 3: Table Of Contents
Selecting the recording track ....50 track ............. 21 Using the monitor function ....51 Adjusting the input sensitivity/recording 4-track mixing (volume/panning) ... 51 level ............. 22 Linking two tracks (stereo link) ....53 Selecting an effect patch ....... 24 Recording/Playback ....... 25 ZOOM H4... - Page 4 The names are used only to Checking available space on the SD illustrate sonic characteristics and do not card ............83 indicate any affiliation with ZOOM Initializing an SD card ......84 CORPORATION. About the software version ....84 ZOOM H4...
-
Page 5: Overview
Overview Thank you for selecting the ZOOM Handy Recorder H4 (subsequently referred to simply as the "H4"). The H4 is an attractive product with the following features. ● All-in-one type handy recorder In a compact package weighing a mere 190 grams, the H4 offers a high-performance stereo condenser mic, SD card recorder, mixer, effect section, metronome, and more. -
Page 6: Introducing The H4
R/RW discs or for processing with DAW SD card Files recorded in software. Project 1 folder 4-track mode for project 2 are saved here Files recorded in Project 2 folder SD card stereo mode are saved here Dedicated stereo mode folder Project 3 folder ZOOM H4... -
Page 7: Mixer Functions
Stereo mode Recorder Input 1 L stereo track Effect section R stereo track Input 2 Recorder 4-track mode Track 1 Input 1 Track 2 Input Effect mixer section Track 3 Input 2 Track 4 ZOOM H4... -
Page 8: Parts Of The H4
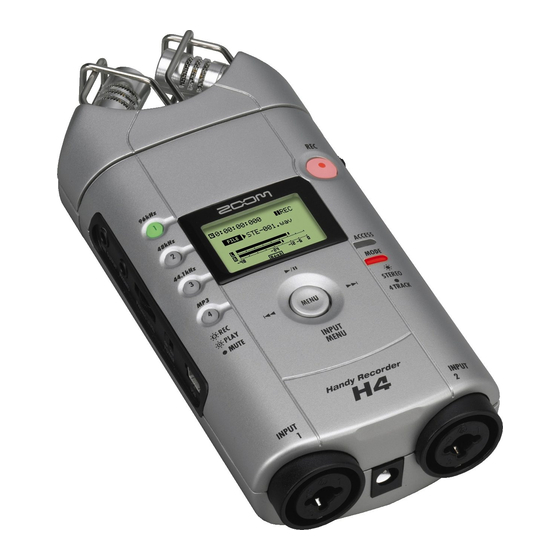
Built-in stereo mic [LINE OUTPUT] jack [REC] key Display [PHONES] jack [PHONES LEVEL] knob TRACK [1] – [4] keys [POWER] switch [USB] port [MENU] key [MODE] indicator [ACCESS] indicator Rear panel [INPUT 1] jack [INPUT 2] jack [DC IN] jack ZOOM H4... -
Page 9: Front Panel
Opening the battery compartment cover Battery compartment cover Jog dial [MIC GAIN] switch [INPUT 2 GAIN] [SD CARD] slot switch [INPUT 1 GAIN] switch Battery Battery Front panel Right side panel ZOOM H4... -
Page 10: Getting Connected
[LINE OUTPUT] jack. To operate the H4 on AC power, be Headphones sure to use only the supplied AC adapter (ZOOM AD-0006). Using a Computer different adapter can lead to damage. AC adapter H4 rear panel... -
Page 11: Operation On Battery Power
• In particular, do not plug in or unplug the AC Turn power to other equipment on adapter while the [ACCESS] indicator is lit. Otherwise data can be destroyed. in the order connected instruments ZOOM H4... -
Page 12: Recording
This is the top screen for the stereo mode. If another screen is shown, repeatedly press the center of the [MENU] key until the above screen If the H4 is placed directly on the floor, it may appears. ZOOM H4... - Page 13 Input level To obtain optimum volume levels, set the [MIC GAIN] switch so that the meter indication on the display stays The recorded content is played back via the just below 0. [LINE OUTPUT] jack and [PHONES] jack. ZOOM H4...
-
Page 14: Quick Guide 1
It works differently shown above. depending on whether the top, bottom, left, right, or center portion of the key is pressed (see illustration on next page). When you press the bottom (INPUT MENU) of ZOOM H4... - Page 15 Press the center of the [MENU] key P u s h i n g t h e j o g d i a l to return to the stereo mode top inwards accepts a selected screen. item or a changed setting. ZOOM H4...
-
Page 16: Using Effects
The limiter which attenuates high-level effects. This section describes how to use the signals that exceed a certain threshold is effect section to adjust the input signal level and active. ZOOM H4... -
Page 17: Recording
The names are used only to addition to the COMP/LIMIT module. This illustrate sonic characteristics and do not module simulates the characteristics of various indicate any affiliation with ZOOM well-known microphone models. CORPORATION. Recording To record in stereo mode, proceed as follows. -
Page 18: Selecting A File For Playback
To select a file from this folder for playback, The file selected in step 3 is played back. proceed as follows. To stop playback, press the top (@) Verify that the display shows the of the [MENU] key once more. stereo mode top screen. ZOOM H4... -
Page 19: Quick Guide 2
“4TRACK RECORDER”. The main menu for making various settings appears. Press the jog dial. The H4 switches to 4-track mode and the [MODE] indicator goes out. The display automatically changes to the 4-track mode top screen. ZOOM H4... -
Page 20: Creating A New Project
When you call up the PROJECT menu, the current The main menu for making various settings project is saved automatically. appears. Move the jog dial up/down to bring Move the jog dial up/down to bring the cursor to “NEW PROJECT”. Then ZOOM H4... -
Page 21: Step 2: Recording The First Track
To try out the metronome and check the tempo, related settings appears. you can press the top (@) of the [MENU] key. Move the jog dial up/down to bring the cursor to “LEVEL”. Then press the jog dial. ZOOM H4... -
Page 22: Adjusting The Input Sensitivity/Recording Level
[MIC GAIN] screen. switch, [INPUT 1 GAIN] switch, or [INPUT 2 GAIN] switch. To select the recording track, use the TRACK [1] – [4] keys and press the When recording with the built-in stereo mic, use ZOOM H4... - Page 23 The screen for adjusting the recording level possible, without exceeding the 0 (dB) indication appears. on the meter. The setting range is 0 – 127. When ZOOM H4...
-
Page 24: Selecting An Effect Patch
To select the patch while monitoring the sound, the [MENU] key. press the TRACK key for the track you want to The INPUT menu appears. monitor so that the key is lit up in red and is set ZOOM H4... -
Page 25: Recording/Playback
Press left part (U) of [MENU] key Return counter to zero. Press bottom (INPUT MENU) of [MENU] Press center of [MENU] key Display INPUT menu for making various input Display main menu for various settings related settings. (or return to immediately preceding screen). ZOOM H4... -
Page 26: Step 3: Add More Tracks
The [REC] key goes out and recording ends. Select the input source and recording track as described in the Tap the left part (U) of the [MENU] section “Selecting the input source/ key. recording track” (→ p. 21) of “Step 2: ZOOM H4... -
Page 27: Step 4: Mixing And Bounce
You can press the top (@) of the [MENU] key At the 4-track mode top screen, and adjust the level while the recorder performs playback. move the jog dial up/down to bring the cursor to the MIXER button. ZOOM H4... -
Page 28: Bounce
If the signal level reaches 0 dB, adjust the track volume level once more. BOUNCE button When the level check is complete, Press the jog dial. press the top (@) of the [MENU] key The BOUNCE screen for controlling the bounce to stop the recorder. function appears. ZOOM H4... - Page 29 “Card Full!” appears on the display, and the operation is canceled. Press the jog dial to close the window and delete files that are no longer needed. Then perform the bounce operation once more. ZOOM H4...
-
Page 30: Stereo Mode
The items shown on the main menu are different Recording/playback level meter for stereo mode and 4-track mode. Move the jog dial up/down to bring the cursor to “MODE” and then press the jog dial. The MODE SELECT screen appears. ZOOM H4... -
Page 31: Recording In Stereo Mode
The INPUT menu for making various input GAIN]/[INPUT 2 GAIN] switches (for related settings appears. the [INPUT 1]/[INPUT 2] jacks) to adjust the input sensitivity. Move the jog dial up/down to bring the cursor to “SOURCE”, then press the jog dial. ZOOM H4... - Page 32 0 (dB) indication The INPUT LEVEL screen for adjusting the on the meter. The setting range is 0 – 127. When recording level appears. the recording level is too high, the sound will be distorted. ZOOM H4...
-
Page 33: Automatic Adjustment Of Recording Level (Auto Gain Function)
In stereo mode, a function for automatically The indication “REC LEVEL SCANNING...” adjusting the recording level (auto gain function) appears on the display. The unit detects the level is available. This is convenient to start recording of the currently selected input source and adjusts ZOOM H4... -
Page 34: Select Recording Format
Move the jog dial up/down to bring the cursor to “RECORDING (1) Move the jog dial up/down to bring the cursor to the item to be set. FORMAT”. Then press the jog dial. It is recommended to first select the recording ZOOM H4... -
Page 35: Record
(@) of the [MENU] key in this condition, you WAV (96 kHz) can play back the recording from the beginning. TRACK [2] key WAV (48 kHz) TRACK [3] key WAV (44.1 kHz) TRACK [4] key MP3 (44.1 kHz) ZOOM H4... -
Page 36: Using The Monitor Function
Move the jog dial up/down to bring the cursor to the desired file name. Then press the jog dial. The file name is shown in reverse, and file selection is possible. Move the jog dial up/down to select a ZOOM H4... -
Page 37: Locating A Point In A Recording (Locate)
Move the jog dial up/down to change the counter indication, and then press the jog dial. The change is accepted and the recorder moves to the specified point. If necessary, bring the cursor to other digits and repeat the procedure. ZOOM H4... -
Page 38: Playing A Specified Section Repeatedly (A-B Repeat)
Locate the end point for the range to The button indication returns to the original be repeated. Bring the cursor to the condition, and the settings for points A and B are A↔B button and press the jog dial. lost. ZOOM H4... -
Page 39: 4-Track Mode
The main menu for making various settings managed in units called "projects" ( p. 54). → appears. • The recording format in 4-track mode is fixed to WAV (44.1 kHz/16 bit). The top screen of the 4-track mode is shown below. ZOOM H4... -
Page 40: Selecting The Recording Mode
● Overwrite mode (default) Other files can later be In this mode, you record on a track that selected for playback already has material on it, and you overwrite the existing material. This mode allows ZOOM H4... -
Page 41: Selecting The Recording Mode
To return to the 4-track mode top To start recording, press the [REC] screen, press the center of the key so that the key lights up (unit is in [MENU] key. recording standby condition), and then press the [REC] key once more. ZOOM H4... -
Page 42: Recorder
• For stereo files covering two tracks recorded For mono tracks, only monaural files can be with stereo link enabled, the track number "x" is selected. For tracks where stereo link is enabled, always the sequence "12" or "34". ZOOM H4... -
Page 43: Using The Locate Function And A-B Repeat Function In 4-Track Mode
• If Always New mode is selected in 4-track mode, the A-B repeat function is not available is shown in reverse. during recording (as in stereo mode). ZOOM H4... - Page 44 • To redo the punch-in/out point setting, bring The display shows the number of the selected the cursor to the A-PUNCH button and press the jog dial to return the button indication to the track. original condition. Then repeat steps 3 – 5. ZOOM H4...
-
Page 45: Combining Multiple Tracks On One File (Bounce Function)
Track 2 HINT Bounce Track 3 During the mute interval, the TRACK key(s) will Stereo file change from flashing to constantly lit. During Track 4 recording, the TRACK key(s) and [REC] key both change from flashing to constantly lit. ZOOM H4... - Page 46 ) of the [MENU] key to stop the recorder. file name. Move the jog dial up/down to bring the cursor to the BOUNCE button. Then press the jog dial. The BOUNCE screen for controlling the bounce Underline function appears. ZOOM H4...
-
Page 47: Mixer
The track mixer adjusts the volume and panning/ project. To check the bounce result, assign the balance of each signal recorded on the four file to a track (→ p. 42). tracks and produces a stereo output signal. ZOOM H4... -
Page 48: Selecting The Input Source
[INPUT 2 GAIN] switch, as Move the jog dial up/down to select required. the input source. There are three settings for the input sensitivity: The following selections are available. L (Low) → M (Medium) → H (High). For ZOOM H4... - Page 49 • While this screen is being shown, the input signal can be monitored via the [LINE OUTPUT] The recording level is set. The fader icon jack and [PHONES] jack. disappears, and the cursor appears again. If IN1&2 has been selected, repeat steps 5 – 8 for ZOOM H4...
-
Page 50: Selecting The Recording Track
To select two mono tracks, the combination of only one track. tracks 1 and 2 or 3 and 4 can be used. ● When there is one input source ZOOM H4... -
Page 51: Using The Monitor Function
→ enable stereo link ( p. 53). When recording on a bouncing function, it is important to get the stereo track, a stereo file is created. mixing balance between the 4 tracks right and to establish proper positioning. ZOOM H4... - Page 52 • For tracks with stereo link enabled, the pan Press the top (@) of the [MENU] key setting adjusts the level balance between the to start playback, and check the two tracks. output level as indicated by the meter. Press the jog dial. ZOOM H4...
-
Page 53: Linking Two Tracks (Stereo Link)
Move the jog dial up/down to bring repeat the procedure. the cursor to “STEREO LINK”. Then press the jog dial. To return to the 4-track mode top The STEREO LINK screen appears. screen, repeatedly press the center of the [MENU] key. ZOOM H4... -
Page 54: Projects
SD card. Verify that the recorder is stopped ● DELETE and press the center of the [MENU] Lets you delete any project from the SD card. key at the top screen. The main menu for making various settings appears. ZOOM H4... -
Page 55: Creating A New Project
“SELECT”. Then press the jog dial. move the jog dial up/down to bring A list with the names and numbers of projects the cursor to the project name, and that can be loaded appears. then press the jog dial. ZOOM H4... -
Page 56: Changing A Project Name
Project number Project name To return to the PROJECT menu, repeatedly press the center of the [MENU] key. Move the jog dial up/down to bring the cursor to the project you want to rename. Then press the jog dial. ZOOM H4... -
Page 57: Copying A Project
Project name To change the name of the copy target project, move the jog dial up/ down to bring the cursor to the project name. Then press the jog dial. The cursor disappears and the first character is ZOOM H4... -
Page 58: Write-Protecting A Project
When a project is write-protected, the following HINT actions are not possible. When you have completed a song, we recommend to enable write-protect for the project, to prevent unintended changes. • Recording • Deleting the project • Deleting the file(s) ZOOM H4... -
Page 59: Tuner
[MENU] key. The INPUT menu for making various input related settings appears. Pitch is flat Correct pitch Move the jog dial up/down to bring the cursor to “TUNER”. Then press ZOOM H4... -
Page 60: Using Other Tuner Types
When you have finished using the then press the jog dial. tuner function, press the center of The TUNER MODE screen for selecting the the [MENU] key repeatedly to return tuner mode appears. to the 4-track mode top screen. ZOOM H4... - Page 61 STRING: x (where x is a number from 1 to 7). The note corresponding to that string is shown in Tuner type GUITAR BASS OPEN A OPEN D OPEN E OPEN G DADGAD String number/ Note name ZOOM H4...
-
Page 62: Effects
NOTE • In stereo mode, the MIC MODEL module is only When the H4 is in the default condition, the used when the built-in stereo mic is selected as ZOOM H4... - Page 63 COMP (Compressor). • LIMIT To return to the stereo mode top The COMP/LIMIT module is enabled, and screen, repeatedly press the center the effect type is set to LIMIT (Limiter). of the [MENU] key. ZOOM H4...
-
Page 64: Using Effects In 4-Track Mode
The names are used only to At the 4-track mode top screen, illustrate sonic characteristics and do not press the bottom of the [MENU] key. indicate any affiliation with ZOOM CORPORATION. The INPUT menu appears. Using effects in 4-track... -
Page 65: Editing A Patch
This screen not only shows the module indication, it also allows adjusting the patch level (overall the [MENU] key. volume of the patch) (see step 10), changing the The INPUT menu appears. patch name ( p. 68), and saving the patch ( → → 67). ZOOM H4... - Page 66 Repeat steps 5 – 8 as necessary to edit the other module. To adjust the effect parameters, proceed as follows. To adjust the patch level, proceed as follows. ZOOM H4...
-
Page 67: Saving A Patch
EFFECT menu appears again. If you select another patch in this condition, the changes will be lost. You can also select the CANCEL button to close the message and cancel the store process. You can then continue editing. ZOOM H4... -
Page 68: Assigning A Name To A Patch
• You can import a patch from another project The character can now be changed. into the currently selected project ( → p. 69). Move the jog dial up/down to select the desired character, and then press the jog dial to accept the ZOOM H4... -
Page 69: Importing A Patch
When you execute the import process, existing patches in the current project will be overwritten. Take care not to accidentally erase patches that you want to keep. At the 4-track mode top screen, press the bottom (INPUT MENU) of ZOOM H4... - Page 70 To return to the 4-track mode top screen, repeatedly press the center of the [MENU] key. (1) Bring the cursor to the patch number/ patch name and press the jog dial. (2) Move the jog dial up/down to select the ZOOM H4...
-
Page 71: Managing Recorded Files
Save location for SD card files created in stereo mode Project 1 folder Save location for files created as part of project Dedicated 2 in 4-track mode stereo mode Project 2 folder folder Project 3 folder ZOOM H4... -
Page 72: Renaming A File
To return to the 4-track mode top When the underline appears, change the file screen, repeatedly press the center name as described on page 47. of the [MENU] key. For information on available characters, see page ZOOM H4... -
Page 73: Deleting A File
A list of files stored in the folder for the current as follows. project or in the stereo mode folder appears. Refer to steps 1 – 3 of “Basic file operations” and bring the cursor to ZOOM H4... -
Page 74: Importing A File (4-Track Mode Only)
OK button, and then press the jog dial. Folder where file to be imported is stored The display returns to the condition of step 1, with the copied file added. ZOOM H4... - Page 75 (3) When the file name is as intended, move the jog dial up/down to select the OK button, and then press the jog dial. ZOOM H4...
-
Page 76: Checking The File Size
The name, size (in kilobytes), and recording time (in hours, minutes, seconds, milliseconds) of the file are shown. To return the FILE menu, press the center of the [MENU] key twice. ZOOM H4... -
Page 77: Miscellaneous Settings
The setting for the selected item can now be • CLICK adjusted. Determines the conditions under which the metronome click sound is heard. Available settings are R (playback only), O (recording Move the jog dial up/down to adjust ZOOM H4... -
Page 78: Controlling The Display Contrast/Backlight
To return to the top screen of the currently selected mode, press the center of the [MENU] key. Move the jog dial up/down to bring the cursor to “DISPLAY”, and then press the jog dial. The DISPLAY setting screen appears. ZOOM H4... -
Page 79: Turning The Phantom Power Supply On/Off
• 24V keypresses will be disregarded. This allows you The [INPUT 1]/[INPUT 2] jacks provide a to maintain the current operating condition of the +24 V phantom power supply. unit. • 48V The [INPUT 1]/[INPUT 2] jacks provide a ZOOM H4... -
Page 80: Using The Usb Function
Connect the [USB] port of the H4 to a computer the computer, using a USB cable. This section explains how to use the H4 as an audio interface for a computer. Verify that the recorder is stopped. Then press the center of the [MENU] ZOOM H4... - Page 81 Adjusts the input level for the computer. The setting method is the same as when setting the recording level in 4-track mode. • EFFECT From this screen, you can cause the H4 to be Sets the effect section operation for the audio ZOOM H4...
-
Page 82: Using The H4 As An Sd Card Reader
If you select the CANCEL button, the message disappears and the connection is maintained. If power to the H4 is being supplied via the USB link with the [POWER] switch set to off, this operation has no effect. ZOOM H4... -
Page 83: Sd Card Operations
USB power. remaining recording time (hours/minutes/ • When you press the center of the [MENU] key seconds) converted to one track. to terminate the connection to the computer and return to the top screen, the unit will restart ZOOM H4... -
Page 84: Initializing An Sd Card
Move the jog dial up/down to bring Download the latest system software the cursor to “CARD”, and then press from the web site of ZOOM the jog dial. Corporation. The CARD menu screen for various SD card operations appears. - Page 85 • The current system software version of the H4 is shown at startup on the display. • The latest version is always available at the ZOOM Corporation web site: http://www.zoom.co.jp/ Copy the downloaded system software to the SD card via a USB connection.
-
Page 86: Specifications
48kHz, 96kHz (Stereo mode) Format MP3 (Stereo mode) <Recording> Bit rate 48,56,64,80,96,112,128,160, 192,224,256,320 kbps,VBR Sampling frequency 44.1 kHz <Playback> Bit rate 32,40,48,56,64,80,96,112,128, 160,192,224,256,320 kbps,VBR Sampling frequency 44.1 kHz, 48 kHz Display 128 x 64 dots Full-dot LCD (with backlight) ZOOM H4... - Page 87 USB 2.0 Full Speed Mass Storage Class operation, Audio Interface operation USB functions can be operated by USB bus power Power requirements 9 V DC, 300mA from AC adapter (ZOOM AD-0006) Batteries IEC R6 (size AA) x 2 Continuous recording time...
-
Page 88: Troubleshooting
• To have the H4 recognized by the computer, USB mode must first be ◆ Cannot record on a track selected at the H4 (→ p. 81). • Verify that [REC] key and key for ZOOM H4... -
Page 89: Effect Types And Parameters
1 – 100 Adjusts the level of the signal after passing the Adjusts boost/cut in the high range. PREAMP module. (7) ZNR (ZOOM Noise OFF, 1 – 16 Reduction) Adjusts the sensitivity of the noise reduction circuit developed by ZOOM. - Page 90 * Manufacturer names and product names mentioned in this table are trademarks or registered trademarks of their respective owners. The names are used only to illustrate sonic characteristics and do not indicate any affiliation with ZOOM CORPORATION. ● Mic preamp effect types VO MICPRE Preamp with characteristics optimized for vocals.
-
Page 91: Efx Module
Effect Types and Parameters (8) ZNR (ZOOM Noise (7) LEVEL 1 – 100 OFF, 1 – 16 Reduction) Adjusts the level of the signal after passing the Adjusts the sensitivity of the noise reduction circuit PREAMP module. developed by ZOOM. - Page 92 Adjusts the level of effect sound mixed to the original Adjusts the tone. sound. FLANGER This effect produces a resonating and strongly undulating sound. 0 – 50, (1) DEPTH (2) RATE 0 – 100 (See Table on page 93) Adjusts the modulation depth. Adjusts the modulation rate. ZOOM H4...
- Page 93 In such a case, the value will automatically be Half triplet note set to 1/2. If this would still exceed the Dotted eighth note Quarter note x 20 range, the value is set to 1/4. ZOOM H4...
- Page 94 Adjusts the delay between the original sound and the Adjusts the reverb duration. start of the reverb sound. (3)TONE (4) MIX 0 – 10 0 – 100 Adjusts the level of effect sound mixed to the original Adjusts the tone. sound. ZOOM H4...
-
Page 95: Effect Types In Stereo Mode
* Manufacturer names and product names mentioned in this table are trademarks or registered trademarks of their respective owners. The names are used only to illustrate sonic characteristics and do not indicate any affiliation with ZOOM CORPORATION. ZOOM H4... -
Page 96: H4 Patch List
Well-known jet sound makes chords more Jet Flanger SD+MS_STK FLANGER expressive. Heavy wah sound combining distortion and auto Wah Lead SD+MS_STK AUTO WAH wah, suitable for lead play. Bass Tight sound modeled on the Hartke HA3500. Hartke HARTKE ZOOM H4... -
Page 97: Contents Of Sd Card
* Manufacturer names and product names mentioned in this patch list are trademarks or registered trademarks of their respective owners and do not indicate any affiliation with ZOOM CORPORATION. All product and artist names are intended only to illustrate sonic characteristics that were used as reference in the development of this product. -
Page 98: Index
[INPUT 1 GAIN]/[INPUT 2 GAIN] switches ..........23, 32 [MIC GAIN] switch ....... 13, 32 Input source selection (4-track mode) ....48 Chromatic tuner ........... 59 Input/output COMP/LIMIT module........63, 95 Effects............64 Connections ............10 Setup ..............12 ZOOM H4... - Page 99 Use as audio interface ........80 Copying a project..........57 Use as SD card reader ........82 Creating a new project ......20, 55 Deleting a project..........57 Protecting a project ........58 Selecting a project.........55 WAV ..............34 Punch-in/out (4-track mode) ........43 Write-protect ............58 ZOOM H4...
- Page 100 • Connect the equipment into an outlet on a circuit different from that to which the receiver is connected. • Consult the dealer or an experienced radio/TV technician for help. ZOOM CORPORATION ITOHPIA Iwamotocho 2chome Bldg. 2F, 2-11-2, Iwamoto-cho, Chiyoda-ku, Tokyo 101-0032, Japan Web Site: http://www.zoom.co.jp H4 - 5000-2...