Sony Handycam DCR-SX40 Operating Manual
Digital video camera recorder
Hide thumbs
Also See for Handycam DCR-SX40:
- Operating manual (108 pages) ,
- Specifications (2 pages) ,
- Guide pratique (107 pages)

Related Manuals for Sony Handycam DCR-SX40


Summary of Contents for Sony Handycam DCR-SX40
- Page 1 DCR-SX40/SX41/SX60 Digital Video Camera Recorder Operating Guide Guia de operaciones M£MO_Y 5TI[K S_I_S © 2009 Sony Corporation...
- Page 2 Owner'sRecord The model and serial numbers are located on the bottom. Record the serial number in the space provided below. Refbr to these numbers whenew, r you call upon your Sony dealer regarding this product. Model No. DCR- Serial No.
- Page 3 SAVE THESE INSTRUCTIONS. DANGER - TO REDUCE THE RISK OF FIRE OR ELECTRIC SHOCK, CAREFULLY FOLLOW THESE INSTRUCTIONS. • Read these instructions. • Keep these instructions. • Heed all warnings. • Follow all instructions. • Do not use this apparatus near water. •...
- Page 4 Representative plug of power supply cord of countries/regions around the world. A l_T,e B 'I_T,e BF l_T,e B3 'I?q_e C Type SE "I?q_e O "I_T,e (American (British Type) (British Type) (British'I?_pe) ((EE'I_,pe) (CEE'I_pe) (Ocean 'I_,pe) 133,e) The representatiw, supply voltage and plug type are described in this chart. Depend on an area, Diffbrent type of plug and supply voltage are used.
- Page 5 Countries/regions Voltage Frequency (Hz) Plugtype VietllalIl Oceania Countries/regions Voltage Frequency (Hz) Plugtype Australia New Zealand 230/240 North America Countries/regions Voltage Frequency (Hz) Plugtype Canada Central America Countries/regions Voltage Frequency (Hz) Plugtype Bahamas 120/240 Costa Rica Cuba 110/220 Dominican (rep) El Salvador Guatemala Honduras Jamaica...
-
Page 6: Read This First
Lithium-Ion batteries. • Be sure to charge the battery pack using a genuine Sony battery charger or a device that Battery pack can charge the battery pack. • Keep the battery pack out of the reach of small... - Page 7 - Reorient or relocate the receiving antenna. - Increase the separation between the Declaration of Conformity equipment and receiver. Trade Name: SONY - Connect the equipment into an outlet on a circuit different f¥om that to which the Model No.: DCR-SX40, DCR-SX41, receiver is connected.
- Page 8 • TV color systems di*_-i.,r d epending on the country/region. To view your recordings on a T'v; you need an NTSC system based T'vl Using the camcorder • Television programs, fihns, video tapes, • The camcorder is not dustproofi.,d, dripproo_bd and other materials may be copyrighted.
-
Page 9: Operation Flow
Operation flow Recording movies and photos (p. 16) • In the default settings, movies and photos are recorded on the internal memor): • You can change the recording media (p. 37). Playing movies and photos (p. 20) Playing movies and photos on your camcorder (p. 20) Playing movies and photos on a connected TV (p. -
Page 10: Table Of Contents
Table of contents IMPORTANT SAFETYINSTRUCTIONS ............Read this first ..................Operation flow .................._ Getting started Step 1: Charging the battery pack ............. Charging the battery pack abroad ............ Step 2:Turning the power on, and setting the date and time ......Changing the language setting ............ - Page 11 Making good use of your camcorder Deleting movies and photos ..............Coping with shooting conditions .............. Changing the recording media ..............To check the recording media settings ..........Dubbing or copying movies and photos from the internal memory "Memory Stick PRO Duo"media ............
-
Page 12: Step 1: Charging The Battery Pack
Step 1" Charging the battery pack CHGlamp-- DC plug DC IN jack "Ibthe wall outl_'t AC Adaptor (wall socket) Battery pack Power cord (Mains lead) You can charge the "InIoLITHIUM" battery pack (H series) after attaching it to your camcorder. •... - Page 13 • When )Tourcamcorder is on, you can check the approximate amount of remaining batter), power with the remaining batter), indicator at the upper left on the LCD screen. To remove battery pack (;lose the LCD screen. Slide the BATT (batter},) release lever @ and remove the batter}, pack...
- Page 14 Step 2:Turning the power on, and setting date and time Open the LCD screen of your camcorder. Your camcorder is turned on. • To turn on your camcorder when the LCD screen is open, pressPOWER. POWERbutton (Movie): To record movies O (Photo): To record photos...
-
Page 15: Changing The Language Setting
To turn off the power Close the LCD screen. The H (Movie) lamp flashes for a tbw seconds and the power is turned of£ POWER button • 5%u can turn off your camcorder also by pressing POWER. • When [POWER ON BY LCD] (p. 42) is set to [OFF], turn offyour camcorder by pressing POWER. changing the language setting You Can Change the on screen displays to Show messages... -
Page 16: Recording
Recording In the default setting, movies are recorded on the internal memory (p. 37). Fasten the grip belt..Open the lens cover. Open the LCD screen of your camcorder. Your camcorder is turned on. • To tuna on )Tour c amcorder when the LCD screen is alreadyopen, press POWER(p. 14). - Page 17 Press START/STOP to start recording. Power zoom lever START/STOP button 0:00:14 [30mi_ _oomin [STBY] ---+ [REC] To stop recording, press START/STOP again. • Ybu can magnify images with the power zoom lever. Move the power zoom lever slightly for a slower zoom.
- Page 18 In the default setting, photos are recorded on the internal memory (p. 37). Open the lens cover. Open the LCD screen of your camcorder. Your camcorder is turned on. • To tuna on )Tour c amcorder when the LCD screen is alreadyopen, press POWER(p. 14). Press MODE to turn on the 0 (Photo) lamp.
-
Page 19: Recording And Playing Movies And Photos Easily (Easy Handycam Operation)
Press PHOTO lightly to adjust the focus, then press it fully. Power zoom lever When IIIIIIII d isappears, the photo is recorded. • Move the power zoom lever slightly for a slower zoom. Move it i_.*rtherfbr a f_ster zoom. • 5_u can check the recordable number of photos on the LCD screen (p. 52). •... -
Page 20: Playbackon The Camcorder
Playbackon the camcorder In the default setting, movies and photos on the internal memory are played (p. 37). Open the LCD screen of your camcorder. Your camcorder is turned • To tuna on ):our camcorder when the LCD screen is already open, press POWER (p. 14). Touch [] (VIEW IMAGES). - Page 21 Your camcorder starts playing the selected movie. Vnlume ro fast-fnrward To fast-reverse ro pause/play • When playback f)com the selected movie reaches the last movie, the screen returns to the VISUAL INDEX screen. • Touch _[_ during pause to play back movies slowly. •...
- Page 22 Your camcorder displays the selected photo. Previous To start/stop slide show Next To the VISUAL OPTION MENU INDEX screen • 5_u can zoom in the photo by moving the power zoom lever while viewing photos (PB ZOOM). If you touch a point in the PB ZOOM t_mme, the point comes to the center in the fi'ame. •...
-
Page 23: Playing Images On A Tv
Playing images on a TV Connect your camcorder to the input jack ofa TV or VCR using the A/V connecting cable or an A/V connecting cable with S VIDE() Connect your camcorder to the wall outlet (wall socket) using the supplied AC Adaptor for this operation (p. -
Page 24: Preparing A Computer (Windows)
Unrewritable To process photos using a Macintosh - DVD- RW/DVD+ RW: computer connected to your camcorder, Rewritable see the following website. http:h guide.d-imaging.sony.co.jp/mac lllS! Microsoft \,'_indows XP SP3/\,'_ indows Vista Spu -3 Install "PMB" before connecting your Intel Pentium... - Page 25 • See page 44 on the " Handycam Handbook2 Confirm that your camcorder not connected to the computer. The [USB SELECT] screen appears on Turn on the computer. the camcorder screen automatically. • Log on as an Administrator installation. • Close all applications running on the Touch [I_IUSB CONNECT] on the computer belbre installing the software.
- Page 26 Creating a disc with one touch (OneTouch Disc Burn) When the installation is completed, following icons will appear. You can saw' movies and photos on a disc Remow, the CD-ROM from your by simply pressing "*_)(DISC BURN) computer. on your camcorder. Movies and photos recorded...
-
Page 27: Importing Movies And Photos To A Computer (Easy Pc Back-Up)
Importing movies and photos to a computer (Easy PC Back-up) Follow the instructions on the Movies and photos recorded on your computer screen. camcorder that haw, not yet been saw,d with Easy PC Back-up can be imported to a computer automaticall'_: Turn on the computer beforehand. - Page 28 Starting (Picture Motion Browser) Double-click the "PMB" short-cut icon on On the computer screen, click the computer screen. [Easy PC Back-up] -_, [Import]. • If the icon is not displayed on the computer screen, click [Start] _ [All Programs] [So W Picture Utility] _ [PMB] to start "PMB2 You can view, edit, or create discs of movies...
-
Page 29: Creating A Disc
See "Video Disc start'PMB." Copier" help on the operation. • 5_u may start "PMB" also hy clicking [Start] _ [All Programs] _ [Sony Picture Utility] _ [PMB]. Editing movies You can cut out only necessary parts Click... -
Page 30: Creating A Disc With The Dedicated Dvd Writer, Dvdirect Express
Creating a disc with the dedicated The [DIS(; BURN] screen appears on writer, DVDirect the camcorder screen. Express Operating by the camcorder screen, you can saw, movies to a disc when using a dedicated DVD writer, DVDirect Express (sold separately). You can also play back these images on the created disc. - Page 31 To create a disc with the selected To play backa disc on the DVD writer images To dub a desired the disc or to image onto create many of the same discs, perfi_rm this operation. @Touch [DISC BURNOPTION[ in step 3 above. @Turn on your camcorder, and connect the DVD writer to the _' (USB) jack of your camcorder with the USB cable of the DVD writer.
- Page 32 • Ifthe t otal memory size of m ovies tobe burnt by the D ISC BURN operation exceeds that of the d isc, disc creation stops when the l imit is reached. The last movie on the d isc may be cut offi •...
-
Page 33: Creating A Disc With A Dvd Writer, Etc., Other Than Dvdirect Express
You can save movies on a disc by device. connecting your camcorder to disc creation • For details, ref_:rto the instruction devices, such as a Sony DVD writer other manuals supplied with the device to be than DVDirect Express, with the USB connected. -
Page 34: Creating A Disc With A Recorder, Etc
You can dub images played back on your Connector camcorder to a disc or video cassette, by connecting your camcorder to a disc recorder, a Sony DVD writer other than DVDirect Express, ect., with the A/V connecting cable. Connect the device... - Page 35 A/V connecting cable to the video input jack, and the white (left channel) or the red (right channel) plug to the audio input jack on the device. • Sony DUD writer may not be available in some countries/regions.
-
Page 36: Deleting Movies And Photos
Deleting movies and photos You can free media space by deleting Formatting deletes all the movies movies and photos from recording media. photos to recow, r recordable free space. Select the recording medium that contains • Connect your camcorder to the wall outlet (wall the movies and photos you want to delete socket) using the AC Adaptor supplied for this before starting the operation... -
Page 37: Coping With Shooting Conditions
Coping with shooting Changing conditions recording media A wide variety of settings and adjustment You can select the internal memory or options are available on the menu (p. 40). "Memory Stick PRO Dud' media as the recording, playback, or editing medium on your camcorder. -
Page 38: To Check The Recording Media Settings
Types of"Memory Stick" media you can use with your camcorder • For recording movies, it is recommended that you use "Memory Stick PRO Duo" media of Touch @ (HOME) --_ 512MBor largermarked with: (MANAGE MEDIA) --_ [PHOTO - MEMORY STICK PRODUO ("Memory Stick MEDIA SET]. - Page 39 Touch [YES]. • To record only photos on "Memory Stick PRO Duo" media, touch [NO]. • If ]Failed to create a new Image Database File. It may be possible that there is not enough fl'ee space.] is displayed in step 2, lbrmat the "Memory Stick PRO Dud' media (p.
-
Page 40: Customizing Your Camcorder With Menus
Customizing your camcorder with menus • Menu items are described in more details with color pbotos in the "Hand>,cam Handbook" Using th e HELP function (p. 44). To see th e descriptions on the HOME MENU, touch [] (HEL P) on the HOM E MENU screen: (The bottom of_ turns ........... - Page 41 (CAMERA) category MOVIE ......... p. 16 PHOTO ........p. 18 (VIEW IMAGES) category VISUAL INDEX......p. 20 _FILM ROLL......p. 20 []FACE ........p. 20 PLAYLIST ........D isplays and plays a movie playlist. (OTHERS) category DELETE _l! DELETE ......p. 36 []DELETE ......
- Page 42 MEDIA FORMAT ....... p. 36 REPAIR IMG.DB F...... p. 46 (SETTINGS) category MOVIE SETTINGS REC MODE ......Sets the mode to record movies. When recording fhst moving subjects, high image quality, such as [HQ], is recommended. WIDE SELECT ....Sets the horizontal to vertical ratio when recording...
- Page 43 The t ollowing items are available on the OPTION MENU only. I1_tab SPOT MTR/FCS ....Adjusts the b rightness and focus for t he s eleted subject simultaneousl)_ SPOT METER ....Adjusts the b rightness ofimages toasubiect you t ouch on the s creen. SPOT FOCUS ....
-
Page 44: Getting Detailed Information From The"Handycam Handbook
Getting detailed information from the"Handycam To view the "Handycam Handbook;' Handbook" double-click the short-cut icon on the computer screen. The "Handycam Handbook" is a user guide designed to be read on a computer screen. The functions of your camcorder are described, some of them with color photos. - Page 45 If the problem operation. This is not a malfunction. persists, disconnect the power source contact your Sony dealer. The power abruptly turns off. Notesbeforesendingyourcamcorder for repair • Use the AC Adaptor (p. 13). • 5_ur camcorder maybe required to initialize •...
- Page 46 (p. 36), or format the haw, tried to fix a couple of times, contact "Memory Stick PRO Duo" media (p. 36) after your Sony dealer or local authorized storing the images on other media. service facility. • The hnage Database File is damaged. Check...
-
Page 47: Precautions
},our camcorder and have it dirty, it is reconuuended that you use a soft checked by a Sony dealer befbre operating it cloth to clean it. When you use the LCD any further. Cleaning Kit (sold separately), do not apply the •... - Page 48 - Using chemicals such as thinner, benzine, Note on disposal/transfer of the camcorder alcohol, chemical cloths, repellent, insecticide and sunscreen Even if you peribrm [MEDIA FORMAT] (p. 36) - Handling the camcorder with above or formatting, some data might not be entirely substances on your hands deleted f)com the internal memor}c - Leaving the casing in contact with rubber or...
-
Page 49: Specifications
Specifications LCD screen System Signal fbrmat: NTSC color, EIA standards Picture: 6.7 cm (2.7 type, aspect ratio 16:9) Movie recording lbrmat Total number of pixels: 123 200 (560 x 220) Video: MPEG2 PS General Audio: Dolby Digital 2ch Power requirements: D("... - Page 50 • Recording condition: Recording mode [SP] • Typical recording time shows the time when • A Sony "Memory Stick PRO Duo" media is used. you repeat recording start/stop, switching the MODE lamp, and zooming. • The recording time will vary depending on the recording conditions and the type of "Memory...
- Page 51 On trademarks • "Handycam" and _r'Jy_ln registered trademarks of Sony Corporation. • "Memory Stick)' %_, ..;' "Memory Stick Duo;' "_EMORY5TIERrluo;' "Memory Stick PRO Duo;' "MEMORY 5TICKPRO DUO""Memory Stick PRO HG Duo;' "MEM[IRYSTI[I(PR[I-HG B UD ;' "Memory Stick Micro;' "MagicGate;' "Mz_G IC{_'_TE;' "MagicGate Memory...
-
Page 52: Screen Indicators
Screen indicators Upper left Center Upper right 9999 O" _ Approximate number 9999 O-12_ recordable photos and recording media Playback fblder Current playing movie or -c:::=::::!c::::::z. 100/112 photo/Number of total recorded movies or photos Bottom Bottom Upper left HOME button Face Index _ -"... -
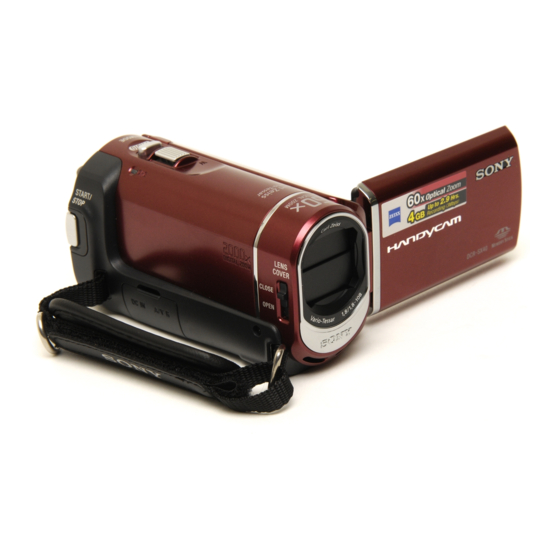
Page 53: Parts And Controls
Parts and controls Figures in ( ) are refk,rence pages. _]Grip belt (16) _] Hook for a shoulder belt [_] DC IN jack (12) [_] A/V Remote Connector (23, 34) [_ LCD screen/Touch panel (14) Lens (Carl Zeiss lens) If you rotate the LCD panel 180 degrees, you LENS COVER switch (16, 18) can close the LCD panel with the LCD screen... -
Page 54: Index
Index Macintosh ........24 USB......... 24, 30 A/V connecting cable...23, 34 Maintenance ........ 47 Using a wall outlet (wall socket) as a power source ......13 "Memory Stick" media ....38 Backlight ........37 "Memory Stick PRO HG Duo" Battery .......... 12 media .......... - Page 55 • No la incinere ni la arroje al fuego. • No manipule baterias de iones de litio dafiadas o que presenten fugas. • Asegfiresede cargar la bateria con on cargador de baterias original de Sony o con un dispositivo que pueda cargarla.
- Page 56 Si graba o elimina imrigenes repetidamente durante mucho tiempo, los datos del soporte de grabacidn se fimgmentarrin. Las imrigenes no se Los ndmeros entre ( ) indican la cantidad pueden guardar ni grabar. En tal caso, guarde suministrada. primero las imrigenes en algdn tipo de soporte [] Adaptador de alimentaci6n de ca (1)
- Page 57 Acerca del cambio del ajuste de idioma • Para ilustrar los procedimientos operativos se utilizan indicaciones en pantalla en cada idioma local. Si es necesario, cambie el idioma de la pantalla antes de utilizar la videocrimara (prig. 11). Acerca de este manual •...
- Page 58 Flujo de funcionamiento Grabaci6n de peliculas y fotografias (p_g. 12) • En la configuracidn predeterminada, las peliculas y las fotografias se graban ell la memoria interna. • Es posible cambiar el soporte de grabaci6n (Dig. 34). Reproducci6n de peliculas y fotografias (p_g.
- Page 59 Tabla de contenido Lea este apartado en primer lugar ............... Flujo de funcionamiento ................_ Procedimientos iniciales Paso 1: Carga de la bateria ................ Carga de la bateria en el extranjero ............. Paso 2: Encendido y ajuste de la fecha y la hora ..........
- Page 60 Utilizaci6n correcta de la videoc_mara Eliminaci6n de peliculas y fotografias ............Copia con condiciones de filmaci6n ............Cambio del soporte de grabaci6n ............. Para comprobar los ajustes del soporte de grabaci6n ......Copia de peliculas y fotografias de la memoria interna en un "Memory...
- Page 61 Paso I" Carga de la bateria Indicador CHG -- Clavija de cc Toma DC IN AI tomacorriente de Adaptador de alimentaci6n de ca pared gateria Cable de alimentacidn Puede cargar la bateria "InIbLITHIUM" (serie H) despu{,s de instalarla en la videoc_imara. •...
-
Page 62: Paso 1: Carga De La Bateria
Para extraer la bateria Cierre la pantalla de cristal liquido. Deslice la palanca de desbloqueo BATT (bateria) (_) y extraiga la bateria @. Para utilizar un tomacorriente de pared como fuente de alimentaci6n Realice las mismas conexiones que se indican en el apartado "Paso 1: Carga de la bateria". Notas sobre la bateria y el adaptador de alimentaci6n de ca... - Page 63 Paso 2: Encendido y ajuste de la fecha y la hora Abra la pantalla de cristal liquido de la videoc_mara. La videoc_imara se enciende. • Para encender la videoc_'mlaracuando la pantalla de cristal llquido est_iabierta, presione POWER. Bot6n POWER (pelicula): para grabar pellculas O (fbtografia): para grabar fbtografias...
- Page 64 Para apagar la videockmara Cierre la pantalla de cristal liquido. E1 indicador ]_ (pelicula) parpadea durante unos segundos y la videoc_mara se apaga. Bot6n POWER • Tambi&l puede apagar la videocrimara al presionar POWER. • Si ajusta [ENCEND.CON LCD] (prig. 40) en [I-)ESACTIX(], presione POWER para apagar la videocfimara.
-
Page 65: Grabaci6N
GrabaciOn En el ajuste predeterminado, las peliculas se graban en la memoria interna (Dig. 34). Ajuste la correa de sujeci6n. Abra la tapa del objetivo. Abra la pantalla de cristal liquido de la videoc_imara. La videoc_imara se enciende. • Para encender la videocamara cuando la pantalla de cristal liquido ya esta abierta, presione POWER (Dig. - Page 66 Presione START/STOP para iniciar la grabaci6n. Palanca del Bot6n START/STOP zoom motorizado Gran Tde0bjetiv0 angular 60rain Z'FO;OO:14 [30mi_ [ESPERA] [GRAB.] Para detener la grabacidn, presione de nuevo START/STOP. • Es posible ampliar im_igenes mediante la palanca del zoom motorizado. Mueva la palanca del zoom motorizado levemente para obtener tm zoom mils lento.
- Page 67 En el ajuste predeterminado, las fbtografias se graban ell la memoria interna (Dig. 34). Abra la tapa del objetivo. Abra la pantalla de cristal liquido de la videoc_mara. La videoctimara se enciende. • Para encender la videoc_'mlaracuando la pantalla de cristal llquido ya est_'_ a bierta, presione POWER (Dig.
-
Page 68: Grabaci6N Y Reproducci6N Sencilla De Peliculas Y Fotografias (Funcionamiento En Modo Easy Handycam)
Presione PHOTO levemente para ajustar el enfoque y luego presidnelo completamente. Palanca del zoom motorizado Gran Teleobjetivo .._ angular Parpadea --+ Se enciende Cuando IIIIIIII desaparece, se graba la fbtografia. • Mueva la palanca del zoom motorizado levemente para obtener tm zoom mils lento. Mu&mla rmls para obtener un zoom rmls r_ipido. -
Page 69: Reproducci6N
Reprod ucci6n En el ajuste predeterminado, se reproducen las peliculas y fotografias ahnacenadas en la memoria interna (prig. 34). Abra la pantalla de cristal liquido de la videoc_mara. La videocthnara se enciende. • Para encender la videoc_imaracuando la pantalla de cristal liquido ya est_iabierta, presione POWER (Dig. - Page 70 La videoc_hnara comenzar_i a reproducir la pelicula seleccionada. Avance rfipido Rebobinado rfipido Pausa/reproduccidn • Cuando la reproducci6n desde la pellcula seleccionada llega a la filtima pelicula, vuelve a mostrarse la pantalla VISUAL INDEX. • Toque [_/[_ durante la pausa para reproducir la pellcula en ctlmara lenta. •...
- Page 71 La videoc_imara muestra la fotografia seleccionada. Permite iniciar o detener una presentacidn Anterior diapositivas Siguiente Permite visualizar la - OPTION MENU pantalla VISUAL INDEX • Para acercar una fotografia, mueva la palanca del zoom motorizado mientras visualiza fotografias (PB ZOOM). Si toca un punto en el marco de PB ZOOM, el punto aparece en el centro del marco. •...
-
Page 72: En Un Televisor
Reproducci6n de im genes en un televisor Conecte la videocthnara a la toma de entrada de un televisor o una videograbadora mediante el cable de conexi6n de A/V [] o un cable de conexi6n de A/V con S VIDE() [_. Conecte la videocthnara al tomacorriente de pared con el adaptador de alimentaci6n... - Page 73 Reproduzca peliculas y fotografias en la videoc_mara (p_g. 16). • Para ajustar el fbrmato segt'mel televisor conectado (panor_imico/4:3)toque t_ (HOME) _--- (AJUSTES)--' [AIUSTESSALIDA]--* [TIPO TV] --' [16:91o [4:31--' [_ --* [_ --* [N_.
-
Page 74: Preparaci6N De Una Computadora (Windows)
..Microsoft Windows XP SP3_2/Windows Vista siguiente sitio Web. SPI-×3 http://guide.d-imaging.sony.co.jp/mac/ ,< n'IslesJ Intel Pentium III: 1 GHz o m_is veloz DirectX 9.0c o posterior (este producto basa en la tecnologla DirectX. Es necesario tenet DirectX instalado). - Page 75 Haga clicen [Instalar]. Instale "PMB" antes de conectar H_ldycam Apl_ication Soflwa_e ..: videoc_imara a la computadora. • Si ya tiene instalada una versi6n de "PMB" suministrada con otro dispositivo, revise la versi6n. (El nfmero de versi6n aparece al hacer clic en [Ayuda] - [Acerca de PMB]). Compare el nfmero de versi6n del CD ROM suministrado con el del software "PMB"...
- Page 76 Para desconectar la videockmara de la Haga clic en [Continuar] en la computadora pantalla de la computadora. Haga clic en el icono _ que se Lea con atenci6n los t6rminos encuentra en la parte inferior del acuerdo de licencia. Si est_ de derecha del escritorio de la acuerdo...
-
Page 77: Creaci6N De Un Disco Con Un Solo Toque (One Louch Disc Burn)
Creaci6n de un disco con un solo toque (OneTouch Disc Burn) Presione *_)(DISC BURN). Puede guardar peliculas y fotografias en un disco con solo presionar el botdn "_ (DISC BURN) de la videoohnara. Las peliculas y fotografias grabadas en la videoohnara que to&via no se hayan guardado... -
Page 78: Importaci6N De Peliculas Y Fotografias A Una Computadora (Easy Pc Back-Up)
Importaci6n peliculas y fotografias a una computadora En la pantalla de la computadora, (Easy PC Back-up) haga clic en [Easy PC Back-up] --_ Las peliculas y fbtografias grabadas [Importar]. ell la videoc_imara que todavia no se hayan guardado con Easy PC Back-up se pueden importar a una computadora autom_iticamente. -
Page 79: Inicio De Pmb (Picture Motion Browser)
[Inicio] _ [Todos • Si algt'm programa de software que no sea los programas] [Sony Picture Utility] "PMB" se inicia autom_iticamente, ci_rrelo. [PMB] para iniciar "PMB'_ Puede w'r, editar o crear discos... -
Page 80: Copia Deun Disco
Es posible copiar un d isco grabad ° en otto disc9 mediante :'Video D>c Copier!'. Haga clic en [Inicio] _ [Todos los programas] [Sony Picture Utility] [Video Disc Copier] para iniciar software: Constflte la ayuda de i!Vide0 Disc Copier'! par a 0btene r acerca del funcionamiento. -
Page 81: Creaci6N De Un Disco Con La Grabadora De Dvd Especifica Dvdirect Express
• E1dispositivo no es compatible con discos de done capa. Presione *_) (DISC BURN) en la • Es posible que la grabadora de DVD de Sony grabadora de DVD. no se encuentre disponible en algunos palses Las peliculas grabadas ell la memoria o regiones. - Page 82 • Si toca la fecha, podr_i buscar las im_igenes Cuando finalice la operacidn, por fbcha. @Toque [_ [SI] en la pantalla de la toque --_ [FIN] en la pantalla videoc_imara. de la videoc_mara. La bandeja de discos de la grabadora de DVD se abre despu&...
- Page 83 (p_ig. 9 ). que la copia se realiz6 correctamente antes de • Es posible que la grabadora de DVD de Sony eliminar las peliculas de la videocfimara. no se encuentre disponible en algunos paises • Si aparece [Se produjo un error.] o [Error al...
-
Page 84: Creaci6N De Un Disco Con Una Grabadora, Etc
Creaci6n de un disco con una grabadora, etc. En la pantalla de la videoc_mara, Es posible copiar im_igenes reproducidas toque [I_CONEXION USB] si la videoc_hnara en un disco o videocasete graba las pelfculas en la memoria si conecta la videoc_hnara auna grabadora interna,... - Page 85 A/V con SVlDEO audio del dispositivo. (se vende separado). • Es posible que la grabadora de DVD de Sony • Conecte la videoc_imara a las tomas de no se encuentre disponible en algunos palses entrada del dispositivo de grabacidn.
-
Page 86: Eliminaci6N De Peliculas Y Fotografias
Eliminaci6n peliculas y fotografias Puede liberar espacio en el soporte grabacidn si borra peliculas y fotografias E1 formateo borra todas las peliculas ahnacenadas en {,1. fotografias para recuperar espacio libre Seleccione el soporte de grabaci6n grabable. que contiene las peliculas y fotografias •... -
Page 87: Copia Con Condiciones De Filmaci6N
Copia con condiciones Cambio del soporte de filmaci6n grabaci6n Puede seleccionar la memoria interna o el En el mend existe una amplia variedad de opciones de ajustes y configuracidn "Memory Stick PRO Duo" como soporte (pig. 36). de grabaci6n, reproducci6n o edici6n en la videoc_imara. -
Page 88: Para Comprobar Los Ajustes Del Soporte De Grabaci6N
Tipos de"Memory Stick"que pueden utilizarse con la videockmara • Para grabar peliculas, se recomienda utilizar un "Memory StickPRO Duo" de 512 MB o Toque tlt (HOME) --_ de capacidad superior con una de las marcas (GESTIONAR SOPORTE) --_ siguientes: [AJ.SOPORTE FOTO]. - MEMORY STICK PRO Duo ("Memory Stick PRO Duo") _... -
Page 89: Copia De Peliculas Y Fotografias De La Memoria Interna En Un
Personalizaci6n de la videoc mara mediante los menOs Toque [S[]. • Los elementos de men6 se describen con mils • Para grabar solamente iotos en un detalles y ibtografias en color en la "Gula "Memory Stick PRO Duo,; toque [NO]. pr_ictica de Han@cam"... -
Page 90: Uso De La Funci6N Help
Toque la ficha deseada --_ el Cuando finalice el ajuste, toque gg]. elemento cuyo ajuste desea cambiar. • Si el elemento no aparece en la pantalla, toque _/D, Elemento de mend • Para volver a la pantalla anterior, toque Cg_l. •... - Page 91 Categoria (TOMA DE IMP, GENES) PELfCULA........prig. 12 FOTO..........p fig. 14 Categoria (VISUALIZAR IMP, GENES) VISUAL INDEX......prig. 16 _ROLLO PELiC....... prig. 16 I_ICARA ........prig. 16 PLAYLIST ........P ermite visualizar y reproducir una playlist de pellculas. Categoria {_ (OTROS) BORRAR _I_ BORRAR ......
- Page 92 Categoria (GESTIONAR SOPORTE) AJ.SOPORTEPEL ..... p rig. 34 AJ.SOPORTEFOTO....prig. 35 INFO SOPORTE ......Permite visualizar infbrmacidn sobre el soporte de grabacidn como, por ejemplo, el espacio libre. FORMAT.SOPORTE ....prig. 33 RERARCH.BD.IM...... prig. 43 Categoria (AJUSTES) AJUSTESPEL.CAM MODO GRAB....Permite ajustar el modo de grabacidn de pellculas.
- Page 93 AJ.REL./IDIOM. r_ AJUS.RELOJ ...... prig. 10 AJUS.ZONA ...... prig. 10 HORA VERANO ....prig. 10 AJUSTE IDIOMA_ ..p rig. 11 AJUST.GENERALES MODO DEMO ....P ermite establecer si debe mostrarse la demostraci6n. CALIBRACION ....Permite calibrar el panel trictil. APAGADO AUTO....Permite cambiar el ajuste de [APAGADO AUTO] (prig. 9). ENCEND.CON LCD..Permite establecer si la videocrimara se encenderri y apagarri al abrir y cerrar la pantalla de cristal llquido.
-
Page 94: De Handycam
Obtenci6n informaci6n detallada en la"Guia pr ctica Haga clic en [Exit] --_ [Exit] y, a Handycam" continuaci6n, extraiga La "Guia prtictica de Handycam" es una CD-ROM de la computadora. guia de usuario diseflada para leerse en la pantalla de una computadora. En ella se describen las funciones... -
Page 95: Soluci6N De Problemas
AI presionar START/STOP o PHOTO no se problema. Sin embargo, el distribuidor de Sony graban las im_genes. no copiarri ni conservarri sus datos. • Presione MODE para encender el indicador •... - Page 96 (prig. 35). • La videocrimara requiere una reparacidn. P6ngase en contacto con su distribuidor o---n Sony o con el centro de servicio t_cnico local • Se restringi6 el acceso al "Memory Stick autorizado de Son?_ Indiquele el c6digo de 5 digitos que comienza pot la letra "E".
-
Page 97: Precauciones
• Si dentro de la videoctlmara entra algfln objeto o llquido, descon4ctela y haga que la revise un distribuidor de Sony antes de volver a utilizarla. • Evite manipular, desmontar o modificar la videocfimara bruscamente y exponerla a... - Page 98 • Cuando no utilice la videocfimara, mantenga Para limpiar la pantalla de cristal liquido pantalla de cristal llquido cerrada. • Si la pantalla de cristal liquido se ensucia de •No utilice lavideoctlmara envuelta huellas dactilares o polvo, se recomienda el uso una toalla, por ejemplo.
-
Page 99: Especificaciones
Especificaciones de pared a trav{,s del adaptador de alimentacidn Sistema de ca o cuando tiene la bateria insertada. Formato de la serial: color NTSC, estfindares EIA bateria recargable se descargar_i completamente Formato de grabacidn de peliculas Video: MPEG2 PS transcurridos aproximadamente 3 meses si no utiliza la videoctlmara... - Page 100 E1disefio y las especificaciones de la videoc_imara Pantalla de cristal liquido Imagen: 6,7 cm (tipo 2,7, lorlnato 16:9) y los accesorios estfin sujetos a modificaciones previo aviso. Ntimero total de pixeles: 123 200 (560 × 220) • Fabricado bajo licencia de Dolby Laboratories. Generales Requisitos de alimentacidn: cc de 6,8 V/...
- Page 101 • "InibLITHIUM" es una marca comercial de [LP] 715 (460) Sony Corporation. • "DVDirect" es una marca comercial de Sony • Los ndmeros entre par('ntesis ( ) indican el Corporation. tiempo minimo de grabacidn. • Dolby y el simbolo de double D son marcas comerciales de Dolby hboratories.
-
Page 102: Indicadores De La Pantalla
Indicadores de la pantalla Parte superior Parte superior ilti_;_ii_ _i_ _ !i_i_i_i_i_i_i_i_i_i_i_i_i_i_i_i_i_i_i_i_i_i_i_i_i_i_i_i_i_i_i_i_ ¸i_!i _!_ii _!_ _ ____][]][]][]][]][]][]][]][]][]][]][]][]][]][ izquierda Parte central derecha FUNO FUNO SLANCO .Eo_o DESVANECEDOR Ntlmero aproximado 9999 I_1-{_ fbtograflas que se pueden 9999 I_1-[_ grabar y soporte grabacion Carpeta de reproduccion Pellcula o imagen... -
Page 103: Piezas Y Controles
Piezas y controles Los nthneros entre ( ) corresponden alas [] Bot6n START/STOP (I 3) p_iginas de refk, rencia. [] Correa de sujeci6n (I 2) [] Gancho para la bandolera []Toma DC IN (8) [] Conector remoto de A/V (I 9, 32) [] Pantalla de cristal liquido/panel t_ctil (I 0) [_ Objetivo... - Page 104 Indice Tipo TV ........20 Tripode ......... 34 HOME MENU ...... 36, 38 Ajuste de la *)cha y la hora ..10 Unidad o carpeta de destino ..25 Bateria ..........8 Idioma .......... 11 USB.........21, 28 BORRAR ........33 Indicadores de advertencia ..43 Indicadores de la pantalla ..49 Instalaci6n ........
- Page 105 Web de atencidn al cliente. htt p://www.sony.net/ using VOC (Volatile Organic Compound)- rinted on 70% or more recycled paper free vegetable oil based ink. Impreso en papel reciclado en un 70% o mils utilizando tinta hecha con aceite...