
Related Manuals for Soleus Air KY-28U


Summary of Contents for Soleus Air KY-28U
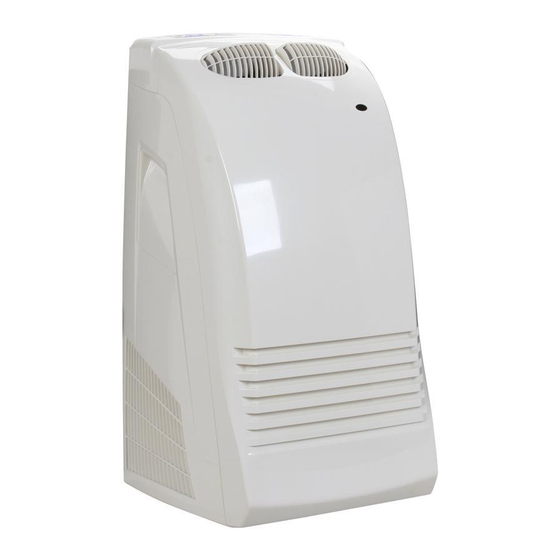
- Page 1 KY-28U Portable Air Conditioner Cooling Heating Dehumidifying Please read this owner's Manual carefully before operating the unit.
-
Page 2: Table Of Contents
TABLE OF CONTENTS INTRODUCTION ............................IMPORTANT SAFEGUARDS ........................PACKAGE CONTAINS: ..........................NAMES OF PARTS ............................INSTALLATION BEFORE USE ........................CONTROL PANEL AND LCD DISPLAY ...................... CONTROL PANEL FUNCTIONS ......................... OPERATION USING CONTROL PANEL ..................... OPERATION USING REMOTE CONTROLLER ..................CONDENSATE WATER DRAINAGE ...................... -
Page 3: Introduction
INTRODUCTION Thank you for purchasing the Soleus Air KY28U portable air-conditioner. This unit is designed for improving living and working comfort by providing cooling, dehumidifying and fan functions only with a minimum installation required. With its whisper quite operation and attractive... -
Page 4: Names Of Parts
NAMES OF PARTS Front View control panel upper air outlet handle lower air inlet grille Back View Exhaust Duct Terminal upper air iMet grill with filter _OW_r COIr_ continuous hot air exhaust drainage outlet lower _tir inlet grille water tank... -
Page 5: Installation Before Use
Exhaust Duct Exhaust Duct Unit Terminal Window Kits INSTALLATION BEFORE Condensate Water Tank Float Lid You must install the water tank float lid before first use of the portable air conditioner following these procedures: Hold the water tank and draw it out slowly. Remove water tank float lid and packing material from the water tank. - Page 6 The water tank float lid should be able to move up and down freely after correct installment. Insert the complete water tank back to the air conditioner unit. F_g. 1 c) Exhaust Duct When you use the unit as an air conditioner, the hot exhaust air must be directed out of the room.
-
Page 7: Control Panel And Lcd Display
Mount the window kit extension of the exhaust host onto the window kit. Use screws on the window kit extension if necessary. NOTE: When using the window kit on a window or sliding door it will cause the window or sliding door not to be properly closed and locked. Additional security measurements should be taken. -
Page 8: Control Panel Functions
Control Panel Functions Power On/Off Control Starts or Stops the Unit Mode Control Select the functions of the unit for: Fan Mode Air Conditioning Mode Heating Mode Dehumidifying Mode Auto Mode Fan Speed Control Select the fan speed for: High Medium Slow Temperature... -
Page 9: Operation Using Control Panel
OPERATION USING CONTROL PANEL Cooling Operation Be sure that the drain tank is properly placed in the unit. Install the exhaust duct properly. Plug the Power Cord to the power outlet. Turn on the unit by pressing the On/Off Button on the control panel. For Manual Mode: Press the Mode Button until the snowflakes and "Cool"... -
Page 10: Operation Using Remote Controller
NOTE: Do not use the exhaust duct when the unit is running at dehumidifying model. You must remove the exhaust duct from the unit. When the unit is running at dehumidifying mode, the fan speed cannot be adjusted. Keep the windows and the doors closed to aid the effectiveness of the unit in removing moisture from the room. - Page 11 NOTE: The information displayed on the LCD of the remote controller will only be tmnslnitted to the air conditioner when the On/Off, Transmit, Sleep or Auto buttons (transmitting buttons) are pressed. Any changes made to the LCD display will be reversed to the previous setting if none of the transmitting buttons is pressed within 15 seconds after the changes are made.
- Page 12 REMOTE CONTROLLER T_I_ ¸ N_!_ ' Set Clock Press I/O key to turn offthe remote controller. Only time will appear on the LCD display of the remote controller. Set time by repeating pressing Hour and Minute keys until the LCD displays the correct time.
- Page 13 Press the Fan Speed key until the LCD displays the desired fan speed. Press the Transmit key. Dehumidifying Operation Press the I/O key to turn on the remote controller Press Dehumidifying key. "DEHUMIDIFYING SYMBOL" will appear on the LCD display. Press the Transmit key.
-
Page 14: Condensate Water Drainage
Press the Fan Speed key until the LCD displays the desired fan speed. Press the Transmit key. Timer Press the I/O key to turn on the remote controller Press the Timer key. "TIMER" will appear on the LCD display. Repeat pressing the Hour key until the LCD displays the desired number of hours for the operation. - Page 15 shutsoff. When the water tank is full, take out the entire water tank slowly and discard the water inside the tank, place it back to its original position. You will then be able to turn on the unit again. If you want to take out the internal tank before it is full of water, please stop the unit first. Wait for 3 minutes before taking out the water tank to prevent the condensate water from discharging...
-
Page 16: Maintenance
NOTE: Be very careful when using an external water tank. The unit will not shut off automatically when an external water tank is full. Spill water can cause substantial damages to carpet, furniture and other valuables. Do not use lengthy drainage robing without a condensate water pump. -
Page 17: Troubleshooting
a. Keep the unit from being exposed directly to the sun for possible color fading. b. Clean the surface with a damp cloth. Dry it with a soft towel. Storing the Unit for an Extended Period of Time Ensure that the water tank is empty. Unplug the unit. -
Page 18: Technical Specifications
The unit will defrost In dehumidifying mode, no There is frost on the evaporator cool air coming out automatically and will return to operation afterwards LCD window shows "E4" The water tank is full Empty the water tank The water tank is not installed Completely insert the water tank... -
Page 19: Disclaimer
DISCLAIMER ALL INFORMATION THE TECHNICAL SPECIFICATIONS PRESENTED IN THIS USER'S MANUAL THE PRESENTATION OF THE MANUFACTURER. SOLEUS INTERNATIONAL HAS NOT CONDUCTED INDEPENDENT TEST TO THE INFORMATION THE SPECIFICATIONS PRESENTED HEREWITHI3€: CONTACT INFORMATION Contact For Optional and Spare Parts Technical Support Warranty Claim Customer Service... -
Page 20: Warranty
WARRANTY ONE YEAR HMITED WARRANTY Soleus International Inc. warrants the accompanying Soleus Air KY-28U Mobile Air Conditioner to be free of defects in material and workmanship for the applications specified in its operation instruction for a period of ONE (1) year from the date of original retail purchase in the United States or Canada.