Table of Contents
Troubleshooting

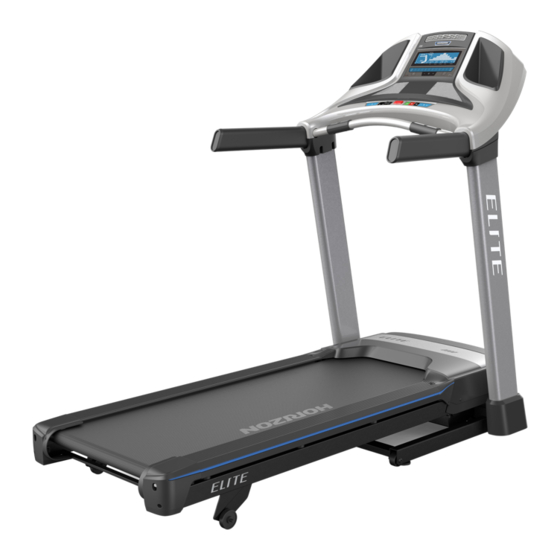
Related Manuals for Horizon Fitness Elite T5


Summary of Contents for Horizon Fitness Elite T5
-
Page 1: Service Manual
SM-TM-AF- Issue date 2017-5-31 Edition Doc No. Johnson Revision 2017-8-31 Page date Johnson Industries (Shanghai) Co.,Ltd Elite T5(TM723) /T7-02(TM475C) T9-02(TM724) Service Manual Approval Review Editor Kyle Schweitzer Alex Tang... - Page 2 Production Browse Elite T5 (TM723)
- Page 3 Production Browse Elite T7-02 (TM475C)
- Page 4 Production Browse Elite T9-02 (TM724)
-
Page 5: Table Of Contents
Contents Chapter 1: Serial Number Location……………………………………………………………………………….7 Chapter 2: Console Instruction 2.1 T5&T7-02&T9-02 Console Operation……………………………………………………….……………..8 2.2 Display Instruction…………………………………………………………………………………………..11 Chapter 3; Engineering mode………………………………………………………………………………….. 15 Chapter 4: Machine maintain 4.1.LOCATION OF THE TREADMILL ……………………………………………………………………….17 4.2 .FOLDING TREADMILLS………………………………………………………………………………….18 4.3. PROPER USAGE …………………………………………………………………………………………17 4.4. COMMON PRODUCT QUESTIONS ……………………………………………………………………18 4.5. - Page 6 Contents 5.3 Motor Replacement………………………………………………………………………………………….50 5.4 MCB Replacement…………………………………………………………………………………………..51 5.5 Incline Motor Replacement………………………………………………………………………..………...52 5.6 Side Rail Replacement………………………………………………………………………………… ..53 5.7 Running Belt Replacement…………………………………………………………………………………..54 5.8 Air shock Replacement………………………………………………………………………………………55...
-
Page 7: Chapter 1: Serial Number Location
CHAPTER 1: Serial Number Location Serial Number Location-T5 & T7-02 & T9-02... -
Page 8: Chapter 2: Console Instruction
CHAPTER 2: Console Instruction 2.1 Console Operation : T5 Note: There is a thin protective sheet of clear plastic on the overlay of the console that should be re- moved before use. A) LCD DISPLAY WINDOW: time, distance, speed, calories, incline, laps, and heart rate. B) (START/PAUSE KEY): press to start workout and pause workout. - Page 9 CHAPTER 2: Console Instruction 2.1. Console Operation : T5 I) SET INCLINE KEY: press to change incline to level entered into keypad. J) SET SPEED KEY: press to change resistance to level entered into keypad. K) FAN: personal workout fan. L) SPEAKERS: plays music through speakers when connected to your media player.
- Page 10 CHAPTER 2: Console Instruction 2.1. Console Operation : T7-02 Note: There is a thin protective sheet of clear plastic on the overlay of the console that should be re- moved before use. A) LCD DISPLAY WINDOW: time, distance, speed, calories, incline, laps, and heart rate. B) (START/PAUSE KEY): press to start workout and pause workout.
- Page 11 CHAPTER 2: Console Instruction 2.1. Console Operation : T9-02 Note: There is a thin protective sheet of clear plastic on the overlay of the console that should be re- moved before use. A) LCD DISPLAY WINDOW: time, distance, speed, calories, incline, laps, and heart rate. B) (START/PAUSE KEY): press to start workout and pause workout.
- Page 12 CHAPTER 2: Console Instruction 2.1. Console Operation : T9-02 L) SPEAKERS: plays music through speakers when connected to your media player. M) READING RACK: holds reading material. N) SAFETY KEY: enables treadmill when safety key is inserted. O) WI-FI CONNECT & SYNC: press to reset and connect your wireless internet connection. See Page 12 for more info.
- Page 13 CHAPTER 2: Console Instruction 2.1. Console Operation : Display Function-T5 & T7-02 & T9-02 TIME: Shown as minutes : seconds. View the time remaining or the time elapsed in your workout. SPEED: Shown as MPH. Indicates how fast the foot pads is moving. CALORIES: Total calories burned or remaining for your workout.
- Page 14 CHAPTER 2: Console Instruction 2.1. Console Operation : Display Function– T5 & T7-02 & T9-02 SET UP XID ACCOUNT FOR VIA FIT CONNECTIVITY 4) Enter your phone number or another easy-to-remember 10-14 digit number. This will be your account number. 5) Fill in your profile information to finish the xID account set up process.
-
Page 15: Chapter 3; Engineering Mode
CHAPTER 3 : Engineering mode 3.0 Engineering mode instruction. - Page 16 CHAPTER 3 : Engineering mode 3.0. Engineering mode instruction.
-
Page 17: Chapter 4: Machine Maintain
CHAPTER 4 Basic Machine Maintain 4.1LOCATION OF THE TREADMILL Place the treadmill on a level and stable surface. There should be one foot of clearance in front of the treadmill for the power cord. Please leave a clear zone behind the treadmill that is at least the width of the treadmill and at least 79”... -
Page 18: Proper Usage
CHAPTER 4 Basic Machine Maintain MOVING: FOLDING 4 WHEELS The 2 wheel locks must be released before moving. To unlock wheels, push down on the TOP LEVER (1) of the rear wheel locks located on the rear corners of the base frame. Then firmly grasp the handlebars, and slowly move the treadmill (3). -
Page 19: Common Product Questions
CHAPTER 4 Basic Machine Maintain Your treadmill should be level for optimum use. Once you have placed your treadmill where you intend to use it, raise or lower one or both of the adjustable levelers located on the bottom of the treadmill frame. A carpenter’s level is recommended. If your treadmill is not level, the running belt may not track properly. - Page 20 CHAPTER 4 Basic Machine Maintain If no: Verify that the outlet the machine is plugged into is functional. Double-check that the breaker has not tripped, it is on a dedicated 20-amp circuit, it is not on a GFCI-equipped outlet, and it is not plugged into a power strip/surge protector or extension cord.
- Page 21 CHAPTER 4 Basic Machine Maintain 5. PROBLEM: The incline does not move, won’t go down or does not seem to be at the right level. SOLUTION: Verify the following: Make sure you are following the recommendations and power guidelines on pages 17. this TREAD- ▓...
-
Page 22: Maintenance Schedule
CHAPTER 4 Basic Machine Maintain 10.PROBLEM: At higher incline levels, a message reading “Speed Range Error – Ending Workout” ap- pears. SOLUTION: ▓ This is a safety feature that automatically cuts power to the drive motor when the speed is out of range due to the combination of the load on the belt and high degree of incline . - Page 23 CHAPTER 4 Basic Machine Maintain 4.6 MAINTENANCE MAINTENANCE SCHEDULE ACTION FREQUENCY Clean underneath the treadmill: Turn off the treadmill with the ON/OFF switch, then unplug the power cord at the ▓ wall outlet. Fold the treadmill into the upright position, making sure that the lock latch is secure. ▓...
-
Page 24: Lubricating The Running Belt
CHAPTER 4 Basic Machine Maintain 4.7 LUBRICATING THE RUNNING BELT EVERY 3 MONTHS OR 300 MILES It is necessary to lubricate your treadmill running deck eve- ry three months or 300 miles to maintain optimal perfor- mance. Once the treadmill records 300 miles it will display the message “LUBE”... -
Page 25: Tensioning The Running Belt
CHAPTER 4 Basic Machine Maintain 4.8 TENSIONING THE RUNNING BELT Running belt should NOT be moving during tensioning. Over tightening the running belt can cause ex- cessive wear on the treadmill as well as its components. Never over-tighten the belt. If you can feel a slipping sensation when running on the treadmill, the running belt must be tightened. -
Page 26: Chapter 5: Troubleshooting
CHAPTER 5: Troubleshooting 5.1 Electric Diagram– Elite T5&T7-02&T9-02 MCB... - Page 27 CHAPTER 5: Troubleshooting 5.1 Electric Diagram– Elite T5&T7-02 &T9-02 UCB...
-
Page 28: Ucb Instruction
CHAPTER 5: Troubleshooting 5.2 UCB Instructions 5.2.1 Elite T5 UCB Instructions Heart Rate L/R Speaker LCD display connector Safety Key Left /Right Quick Key Console Connector Polar Receiver connector Membrane Keypad Left Audio in/USB CN10 Membrane Keypad Right WIFI WIFI module... - Page 29 CHAPTER 5: Troubleshooting 5.2 UCB Instructions 5.2.2 Elite T7-02 UCB Instructions Heart Rate L/R Speaker LCD display connector Safety Key Left /Right Quick Key Console Connector Polar Receiver connector Membrane Keypad Left Audio in/USB CN10 Membrane Keypad Right WIFI WIFI module CN11...
- Page 30 CHAPTER 5: Troubleshooting 5.2 UCB Instructions 5.2.2 Elite T9-02 UCB Instructions Heart Rate L/R Speaker LCD display connector Safety Key Left /Right Quick Key Console Connector Polar Receiver connector Membrane Keypad Left Audio in/USB CN10 Membrane Keypad Right WIFI WIFI module CN11...
-
Page 31: Mcb Instruction
CHAPTER 5: Troubleshooting 5.3 MCB Instructions 5.3.1 Elite T5 MCB Instructions... - Page 32 CHAPTER 5: Troubleshooting 5.3 MCB Instructions 5.3.1 Elite T5 MCB Instructions...
- Page 33 CHAPTER 5: Troubleshooting 5.3 MCB Instructions 5.3.2 Elite T7-02 & T9-02 MCB Instructions...
-
Page 34: No Function For Safety Key
CHAPTER 5: Troubleshooting 5.4 Troubleshooting-No Function For Safety Key SOLUTION: a. Check if the safety key is totally inserted into the console. - If not, remove and insert again. b. Check if the safety key is oxidized or damaged - If yes, try cleaning it or replace it. c. -
Page 35: Incline Motor Issues
CHAPTER 5: Troubleshooting 5.5 Troubleshooting-No Response For Machine When Pressing Start 3. T7-02& T9-02 series windings test - Disconnect power from the unit. Remove the motor cover. Remove the motor connection from the MCB. With an Ohm meter test the resistance level between the motors three phases;... -
Page 36: Noise Issues
CHAPTER 5: Troubleshooting 5.7 Troubleshooting-Noise Issues SOLUTION: a. Thumping noise twice per rotation on new machine. This noise is from the roller or running belt. - If this is a new unit, some noise is normal as the running belt forms around the rollers. - Check that the belt is centered and tensioned correctly. - Page 37 CHAPTER 5: Troubleshooting 5.8 Troubleshooting-Hear Rate (GRIP-PULSE ONLY) TROUBLESHOOTING HEART RATE (GRIP-PULSE ONLY) a. Check your exercise environment for sources of interference such as fluorescent lights, computers, underground fencing, home security systems or appliances containing large motors. These items may cause erratic heart rate readouts.
- Page 38 CHAPTER 5: Troubleshooting 5.9 Troubleshooting-Keypad SOLUTION: a. Enter Engineering Mode, and scroll to ENG 1 (Hardware Test). When press any key , if screen display related key .The UCB is ok. If not, proceed below check : 1. Console keypad: (Fig1) 1.1 Open the console back cover .
-
Page 39: Via Fit Issue
CHAPTER 5: Troubleshooting 5.10 Via Fit Issue GENERAL For every support case, always record the following: 1. Customer xID 2. Customer Passcode 3. Customer Email Address 4. Via Fit equipment Model Name 5. Via Fit equipment Date of Purchase 6. Has the Via Fit equipment ever successfully connected to the internet? Yes or No. For every support case, always begin the support process with the following steps: 1. - Page 40 CHAPTER 5: Troubleshooting 1.2 Shows "DHCP was unable to obtain an IP Address..."...
- Page 41 CHAPTER 5: Troubleshooting 1.3 Registered new xID, but shows "The xID or Passcode you entered is incorrect"...
- Page 42 CHAPTER 5: Troubleshooting 1.4 Shows "Unable to Connect to Via Fit at this time"...
- Page 43 CHAPTER 5: Troubleshooting 1.5 Machine previously connected to Via Fit, but now connection fails...
- Page 44 CHAPTER 5: Troubleshooting 2. Track Issues 2.1 - Workouts from Via Fit equipment do not post to Via Fit Workout Tracking...
- Page 45 CHAPTER 5: Troubleshooting 3. Share Issues 3.1 - Workouts from linked third party sites do not post to Via Fit Workout Tracking...
- Page 46 CHAPTER 5: Troubleshooting 3.2 - Workouts from Via Fit equipment do not post to...
-
Page 47: Wifi Issue
CHAPTER 5: Troubleshooting 5.11. TROUBLESHOOTING –WIFI Issue 1. General diagnose : 1. Use mobile phone or portable device search router SSID and connect to desire SSID (Fig1) 2. Use speed test App. measure upload/download speed . It normal up 64K or higher depend on local ISP (internet service provider) but 0K mean fail to connection. -
Page 48: Chapter 6: Part Replacement
CHAPTER 6: Parts Replacement 6.1 Console Replacement : 1.Loosen the bolts on console masts, three sets on each .(Fig1) 2.Disconnect the console wire .(Fig2) 3.Reverse steps to replace a new console set and assemble. Fig2 Fig1... -
Page 49: Console Mast Replacement
CHAPTER 6: Parts Replacement 6.2 Console Mast Replacement 1.Remove console set as section 6.1. 2.Loosen 8 sets bolts on both console masts 3.Disconnect the console wire. 4.Reverse steps to replace and assemble console mast.(Fig1)&(Fig2)&(Fig3) Fig1 Fig2 Fig3 Fig4... -
Page 50: Motor Replacement
CHAPTER 6: Parts Replacement 6.3 Motor Replacement 1.Disconnect power cord 2.Loosen four screws to remove motor cover. (Fig1) 3.Remove the drive belt by spinning the belt wheel, and walking off the drive belt towards the outer edge of the treadmill. 4.Unplug the motor connector from LCB. -
Page 51: Mcb Replacement
CHAPTER 6: Parts Replacement 6.4 MCB Replacement 1.Turn off the power . 2.Remove the motor cover as section 6.3. 3.Disconnect the wires.(Fig1) 4.Remove the two screws as (Fig2) 5.Reverse steps to install new MCB. Fig2 Fig1... -
Page 52: Incline Motor Replacement
CHAPTER 6: Parts Replacement 6.5 Incline Motor Replacement 1.To fold treadmill in upright folded and locked position. 2.Remove the motor cover as section 6.3. 3.Use torque wrench to loose screw, torque should be 200kgf.cm(Fig1) 4.Loosen the bolt set(Fig2) 5.Remove the incline motor and replace with new(Fig3) Fig2 Fig1 Fig3... -
Page 53: Side Rail Replacement
CHAPTER 6: Parts Replacement 6.6 Side Rail Replacement 1.Loosen four screws with torque of 60kgf.cm (Fig1) 2.Remove the rear end caps(Fig2) 3.Each front end cap has four screws, loosen them and remove the front end caps(Fig2) 4.Pull the side rail as the arrow orientation(Fig3) 5.Reverse steps to install new. -
Page 54: Running Belt Replacement
CHAPTER 6: Parts Replacement 6.7 Running Belt Replacement 1.Remove motor cover as section 6.3. 2.Remove the side rail as section 6.6. 3.Loosen the drive belt. (Fig1&Fig2) 4.Disconnect wire 5.Remove the four fixed screws 6.Take 8 screws from the running deck. (Fig-3) 6.Replace running belt. - Page 55 CHAPTER 6: Parts Replacement 6.7 Running Belt Replacement-Cont. How to adjust the running belt: After placing the treadmill in position it will be used, the belt must be checked the proper tension and cen- tering. The belt may need to adjusted after 2hrs of use. Temperature and humidity will cause the belt to stretch at different rates.
-
Page 56: Air Shock Replacement
CHAPTER 6: Parts Replacement 6.8 Air shock Replacement 1.To fold treadmill in upright folded and locked position. 2.Disconnect bolts 3.Reverse steps to install a new air shock with bolts (Fig1&Fig 2& Fig3) Fig1 Fig2 Fig3...