Table of Contents
Advertisement
Quick Links
SEARS Owner's
Manual
Manual de Instrucciones
Manuel d'lnstructions
SEWING MACHINE
Models
MAQUINA DE COSER
Modelos _385" 17624
MACHINE A COUDRE
ModUles j385"
17620
CAUTION:
Before usingsewing machine,
read this manual and follow
all itsSafety Rules and
Operating Instructions.
•
Safety Instructions
•
Warranty
•
Specifications
•
Operation
•
Care and Maintenance
• Troubleshooting
Sears Canada Inc., Toronto, Ont., M5B 2B8
Advertisement
Table of Contents

Related Manuals for Kenmore 385.17624


Summary of Contents for Kenmore 385.17624
- Page 1 SEARS Owner's Manual Manual de Instrucciones Manuel d'lnstructions SEWING MACHINE Models MAQUINA DE COSER Modelos _385" 17624 MACHINE A COUDRE ModUles j385" 17620 CAUTION: • Safety Instructions • Warranty Before usingsewing machine, • Specifications read this manual and follow • Operation all itsSafety Rules and •...
- Page 2 IMPORTANT SAFETY INSTRUCTIONS Your sewing machine is designed and constructed only for HOUSEHOLD use. Read all instructions before using this sewing machine. DAN G ER To reduce the risk of electric shock: A sewing machine should never be left unattended when plugged in.
- Page 3 INSTRUCCIONES DE SEGURIDAD IMPORTANTES Su m&quina de coser esta diseSada y construida s61o para uso dom6stico. Lea todas las instrucciones antes de usar esta m&quina de coser. PELIGRO Para reducir el riesgo de descarga el_ctrica: La m&quina nunca se debe desatender cuando se ha conectado.
- Page 4 IMPORTANTES CONSIGNES DE SI=CURITI Votre machine & coudre n'est con£ue et construite que pour I'usage menager. Lisez toutes ces consignes avant d'utiliser cette machine & coudre. DANGER- Comment reduire le risque de choc electrique: Une machine ne devrait jamais etre laissee sans surveillance Iorsqu'elle est branchee.
- Page 5 ,_ln*_ ,,IN _ .l_n, _qb_ .LIn_ _ ,n_, _qb. ,_tl, _ ,_11, _ ,nil. -.qb- .nit,. _ ._11, _ ._1,_ ,ll_, _ ,Iq_,_ IIn, _ '_11,-<b- 411,_ "lln, _ '_k, -'qb. ,01b.qb..._ .<b. ,_..4J..11_ .qb. ,n_ _ ',11, _ nl_ _ "LIh _ql.
- Page 6 Machine Specifications Item Specification Sewing speed (Maximum): Over 730 s.p.m. Stitch length: 4 mm (Maximum) Stitch width: 6.5 mm (Maximum) Stitch package (Built-in): 24 (Model 17624), 20 (Model 17620) Buttonhole: 4 step built-in buttonhole & snap-in automatic BH (2 styles) Machine dimensions: W 16.6"(422 mm )x D 6.8"(172 mm) x H 11.7"(297 mm )
-
Page 7: Table Of Contents
TABLE OF CONTENTS I _V:1_VJl:[,.l[o)=1 I_.,I =]uu_ Topstitching ..........Quilting ............Portable Case or Cabinet ....... Zipper Sewing ........42 - 44 Names of Parts ..........To Raise or Drop the Feed Dogs ....Available Accessories and Attachments ..4 Darning ............ - Page 8 INDICE Acolchado ............Costura de cremalleras ....... 43 - 45 Gabinete o estuche port&til ........Como bajar/subir los dientes del transporte ..47 Nombre de las partes ........... Zurcido .............. Accesorios y refacciones disponibles ....5 Puntada de zig-zag ..........Puntada en satin ..........
- Page 9 TABLE DES MATIERES Matelassage ............La couture des fermetures & glissi_re ..... 43-45 Comment monter et descendre les griffes Mallette de transport ou meuble ......3 d'entraTnement ............. Identification des pi_ces ......... Reprisage .............. Accessoires disponibles ......... _,(._|:1_:_| .'.'.'.'_IIv{I]![,.')':![I(0]I] m]_l_| Branchez la machine ..........
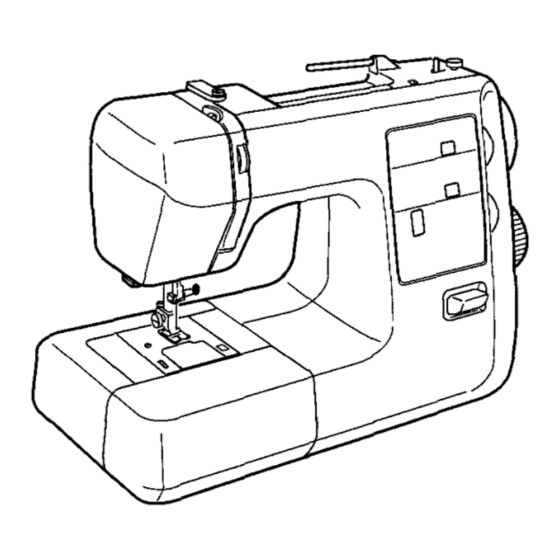
- Page 10 I_ r±_ _v_ i_"Io_l I_ Portable Case or Cabinet A full line of sewing machine cabinets and carrying cases is available through the RSOS catalog at your nearest Sears retail store. Names of Parts (_) Reverse stitch control Sewing guide display Stitch selector Stitch length...
-
Page 11: Gabinete O Estuche Port&Til
Gabinete o estuche portdtil Mallette de transport ou meuble Usted encontrard una Ifnea completa de gabinetes y Vous trouverez dans les magasins Sears, ainsi que dans estuches portdtiles para su mdquina de coser en el notre catalogue RSOS une gamme complete de meubles catalogo RSOS que estd a la venta en las tiendas Sears. -
Page 12: Available Accessories And Attachments
Available Accessories and Attachments "1 All parts listed may be ordered from any Sears store or service center. WHEN ORDERING REPAIR PARTS, ALWAYS GIVE THE FOLLOWING INFORMATION: 1. PART NUMBER 2. PART DESCRIPTION 3. MODEL NUMBER 4. NAME OF ITEM (SEWING MACHINE) If the parts you need are not stocked locally, your order will be electronically transmitted... -
Page 13: Accesorios Y Refacciones Disponibles
Accesorios y refacciones disponibles Accessoires disponibles Todas las partes listadas se pueden ordenar de cualquier Toutes ces pieces peuvent etre commandees dans un tienda de Sears o centro de servicio de Sears. magasin ou un centre de reparation Sears. JOIGNF__Z TOUJOURS ,ik VOTRE COMMANDE LES CUANDO ORDENE REPUESTOS, SIEMPRE SUMINISTRE RENSEIGNEMENTS SUIVANTS: LA SIGUIENTE INFORMACION:... -
Page 14: Connecting Machine To Power Supply
Connecting Machine to Power Supply Power switch O Power supply plug _) Machine socket Outlet (_ Light bulb Machine plug Before connecting the power cord, make sure the voltage and frequency shown on the machine conform to your electrical power. 1. -
Page 15: Conexi6N De La M&Quina A La Red El6Ctdca
[]]j] :: el lilIl _5, Branchez la machine au secteur, Conexi6n de la mbquina a la red el_ctrica Prise 61ectrique Interrupteur secteur Clavija de toma de corriente Interruptor de corriente Prise de courant Prise de la machine Red el6ctrica _) Enchufe de la m&quina Fiche de raccord electrique Ampoule d'_clairage... -
Page 16: Pressure Adjusting
Pressure Adjusting Lever Pressure adjusting lever The pressure adjusting lever should be set at "3" for ". regular sewing. Reduce pressure to "2" for applique, cut work, draw work and basting. Set pressure at "1" when sewing chiffon, lace, organdy and other fine fabrics. -
Page 17: Ajuste De La Presi6N Del Prensatelas
Ajuste de la presibn del prensatelas Levier de r_glage de la pression Palanca del ajuste de la presi6n Levierde r_glage de la pression La paianca del ajuste de la presi6n debe ser situada en el Le levier de r_glage de la pression devrait _tre r6gl_ sur la "3"... -
Page 18: Changing Needle
Changing Needle (_ Needle clamp screw (_ Pin (_) Needle clamp Turn off the power switch. Raise the needle to its highest position by turning the handwheel counterclockwise and lower the presser foot. Loosen the needle clamp screw (_ by turning counterclockwise. -
Page 19: C6Mo Cambiar La Aguja
C6mo cambiar la aguja Changer I'aiguille (_) Tornillo de sujeci6n de la aguja (_) Vis de fixation de I'aiguilte (_) Broche (_ Tope superior (_ Alojamiento de la aguja (_ Support de I'aiguille [] Apague la m&quina con interruptor de corriente. [] I_teignez la machine. -
Page 20: Presser Foot Types
Presser Foot Types • Zigzag Foot ( Foot A ) Use this foot for both straight and zigzag stitching. For: Basic zigzag (page 48) Bar tacking (page 52) Button sewing (page 54) Overcasting stitch (page 54) Blind hem stitch (page 56) Lace work (page58) Multiple zigzag stitch (page 58) -
Page 21: Tipos De Pie Prensatelas
Les diff_rents pieds presseurs Tipos de pie prensatelas • Pied zig-zag { Pied A ) • Pie para zig-zag ( Pie A ) Ce pied convient pour lee points zig-zag et les points droits. Utilice este pie para puntada recta y punteda de zig-zag. Pour: Zig-zag simple (page 49) Paza:... -
Page 22: Quilter
• Automatic Buttonhole Foot Use this foot when making buttonholes with the Buttonhole foot automatic buttonhole attachment. Pie para ojdles For: Automatic buttonhole (page 80) Pied & point boutonnieres • Quilter This attachment turns your zigzag foot into a quilting foot. Quilter For: Straight stitching (page 38, 40). -
Page 23: Pie Para Ojal Automdtico
• Pied & boutonniere automatique • Pie para ojal autombtico Utilisez ce pied pour realiser des boutonnieres avec Utilice este pie cuando haga ojales con acoesorio de ojal I'accessoire pour les boutonni6res. autom&tico. Pour: Boutonniere automatique (page 81) Para: Ojal autom&tico (p&gina 81) •... -
Page 24: Selecting Needle And Thread
Selecting Needle and Thread For general sewing use needle size 11 or 14. A fine thread and needle should be used for sewing lightweight fabrics so the fabric will not be marred. Heavy fabrics require a needle large enough to pierce the fabric without fraying the needle thread. -
Page 25: Selecci6N De Aguja E Hilo
Seleccibn de aguja e hilo Para el cosido general se utilizan agujas del tamafio 11 o 14. Los hilos y agujas delgados deber_n utilizarse para coser tejidos ligeros evitando asf que estos se puedan echar a perder. Cosa tejidos gruesos con una aguja Io suficientemente gruesa come para que pueda penetrar el tejido sin que el hilo de la aguja se deshilache. - Page 26 Choix de I'aiguille et du fil Pour les coutures normales, utilisez une aiguille n°l 1 ou 14. On devrait utiliser du fil fin et une aiguille fine avec les tissus 16gers pour ne pas les endommager. Les tissus Iourds n_cessitent une aiguille assez grosse pour percer le tissu sans effilocher le fil de I'aiguille.
- Page 27 (blankpage) (p_ginablanca) (pageblanche)
-
Page 28: Horizontal Spool Pin
Bobbin Winding • Horizontal Spool Pin (_) Spool pin Large spool holder (_ Small spool holder Lift up the spool pin O. Place a spool of thread the spool pin with the thread coming off the spool shown. Attach the large spool holder _, and press it firmly against the spool of thread. -
Page 29: Bobinado De La Canilla
Bobinado de la canilla Remplir la canette • Portaoarretes horizontal • Porte-bobine horizontal (_ Portacarretes O Porte-bobine (_ Tapa-carretesgrande (_ Grande rondellede blocage de bobine (_ Tapa-carretespequeno Petite rondellede blocagede bobine Levante el portacarretes O y coloque un carrete de hilo Soulevez le porte-bobine (_. -
Page 30: Bobbin Winding
• Bobbin Winding @ For horizontal spool pin ® ® For additional spool pin C) Pull the handwheel out to the right. (_) Draw thread from the spool. ® Guide the thread around the thread guide. _) Thread through the hole in the bobbin from the inside to the outside. -
Page 31: Bobinado De La Canilla
• Bobinado de la canilla • Remptir la canette @ Pour porte-bobine horizontal @ Para el portacarretes horizontal _) Para el portacarretes adicional ® Pour porte-bobine suppl_mentaire (_) Tirez le volant vers la droite. (_ Hale la volante manual a la derecha. (_) Tirez sur le fil de la bobine. -
Page 32: Inserting The Bobbin
• Removing the Hook Cover Plate (_ Hook cover plate release button Hook cover plate Slide the hook cover plate release button (_ to the right, and remove the cover plate _). • Inserting the Bobbin End of thread Notch Notch Threading chart Place a bobbin... -
Page 33: Csmo Sacar La Canilla
• Retrait de la couvercle de canette • C6mo sacar la tapa de acceso a canilla (_ Boutonde ddgagementdu couverclede navette Pulsadorde aperkurade la tapa de acceso a canilla (_ Couverclede navet_e _) Tapa de acceso a canilla Deslice el pulsador (_ hacia la derecha y quite la tapa (_. Coulissez le bouton de d_gagement du couvercle _ vers la droite, et retirez le couvercle _. -
Page 34: Threading The Machine
Threading the Machine I- l • Threading the Machine * Raise the thread take-up lever to its highest position by turning the handwheel counterclockwise. * Raise the presser foot lifter. * Place a spool on the spool pin, with thread coming off as shown. -
Page 35: Enhebrado Del Hilo Superior
Enhebrado del hilo de la aguja Enfilage de la machine • Enhebrado del hilo de la aguja • Enfilage de la machine Suba el tirahilos hasta su posici6n mAs alta girando el '_ Faites monter le releveur tencleur de fil le plus haut possible en tournant le volant &... -
Page 36: Correct Tension
Adjust the Needle Thread Tension for Straight Stitch • Correct tension (_) Needle thread (Top thread) (_ Bobbin thread (Bottom thread) (_ To loosen (_) To tighten The ideal straight stitch has threads locked between two layers of fabric, as illustrated (magnified to show detail). -
Page 37: Ajuste De La Tensi6N Del Hilo Superior Para Puntada Recta
Ajuste de la tensibn del hilo de la agujaparepuntada Rdglage de la tension du fil de I'aiguille pour le point recta droit • Tension correcte • Tensi6n correeta O Filde raiguille (Fil sup6deur) Hilo de la aguja (Hilo superior) _) Filde la canette (Fil inf_rieur) (_ Hilo de la canilla (Hilo inferior) Pour ret_cher la tension _) Para aflojar... -
Page 38: Tension Is Too Tight
Adjust the Needle Thread Tension for Zigzag Stitch For an ideal zigzag stitch, bobbin thread does not show on right side of fabric and needle thread shows slightly on wrong side. See the illustrations for correct appearance. To match this appearance, adjust the needle tension. -
Page 39: Tensi6N Correcta
R_glage de la tension du fil de I'aiguille avec le point Ajuste de la tensi6n del hilo de la aguja para zig-zag puntada zig-zag Lorsqu'un point zig-zag est effectu6 correctement, le fil En la puntada zigzag ideal, el hiio de la canilta no de la canette ne parait jamais sur le cSte endroit du tissu aparecer&... -
Page 40: Stitch Selector
Stitch Selector (how to select stitches) Raise the needle to the highest position, and select a pattern by turning the stitch selector. The red mark will be shown on the selected stitch. (Set the stitch length control at S.S. when using the stretch stitch.) -
Page 41: Selector De Puntada
Sdlecteur de point (comment choisir des points) Selector de puntada (cbmo seleccionar puntadas) Remontez I'aiguille le plus haut possible, et s6lectionnez des points en toumant le s61ecteur de point. Levante la aguja hasta la posici6n rods alta, y seleccLone de puntadas girando el selector de puntada. Le rep6re rouge indique le point choisi. -
Page 42: Stitch Width Control
Stitch Width control (how to adjust the stitch width) Turn the stitch width control until the desired number is shown at the indicating mark. The larger the number, the greater the stitch width. •_ mark shows the adjustment range when using the twin needle. -
Page 43: Control De La Anchura De Puntada
Control de la anchura de puntada (cbmo ajustar R6glage de la largeur du point (comment rdgler la largeur du point) la anchura de las puntadas) Tournez le r_glage de la largeur du point jusqu'& ce que le Gire el control de la anchura hasta que el nt_mem deseado se yea en la mama indicativa. -
Page 44: Adjusting Stretch Stitch Balance
Adjusting Stretch Stitch Balance If stretch stitch patterns are uneven when you sew on a particular fabric, adjust them with the feed balancing dial. To adjust distorted patterns If patterns are drawn out, correct by turning the dial in the direction of "-". -
Page 45: Equilibrio De Los Patrones Distorsionados
Equilibrio de los patrones distorsionados Pour corriger un motif d_form6 Si observa alguna distorsi6n ai coser patrones de Comment r6gler 1'6quilibre d'un motif extensible: puntada el_stica en una tela especffica, ajestelos con el Si les motifs extensibles sont irr6guliers Iorsque vous eje equilibrador de puntada. -
Page 46: Straight Stitch
Straight Stitch (_) Stitch width: WIDTH _) Stitch length: Red zone (_ Needle thread tension: 2 to 6 (_) Presser foot A: Zigzag foot LENGTH (_ _) Presser foot H: Straight stitch foot ® • Starting to Sew Raise the presser foot and position the fabric next to a seam guide line on the needle plate (5/8"... -
Page 47: Puntada Recta
Puntada recta Point droit (_) Control de la anchura: _) Largeur du point (_ Control de la Iongitud: Zona roja (_) Longueur du point Zone rouge (_ Tensibn del hilo de la aguja: 2 a 6 (_ Tension du fil d'aiguille 2 &... - Page 48 Topstitching WIDTH _1 Stitch width: (_ Stitch length: Red zone (_) Needle thread tension: 2 to 6 (_) Presser foot A: Zigzag foot LENGTH (_ Presser foot H: Straight stitch foot ® ® Topstitching emphasizes lines of garments keeps seams and edges flat and crisp.
-
Page 49: Costura A Ta Vista
SurpiqOre Costura a la vista Largeur du point O Control de la anchura: Longueur du point Zone rouge (_ Control de la Iongitud: Zona roja (_ Tension du fil de I'aiguille 2 & 6 _) Tensi6n de1hilo de la aguja: 2 a 6 Pied presseur A: Pied zig-zag (_ Pie prensatelas... - Page 50 Zipper Sewing WIDTH !_) (_) Stitch width: (_ Stitch length: Needle thread tension: 2 to 6 LENGTH [_) (_) Presser foot E: Zipper foot • To Snap on the Zipper Foot ® ® Fit the pin on the zipper foot into the groove on the foot holder.
-
Page 51: Costura De Cremalleras
La couture des fermetures & glissi_re Costura de cremalleras (_ Largeur du point O Controt de la anchura: Longueur du point (_ Control de la Iongitud: _) Tension du fil de I'aiguille 2 a 6 Tensi6n del hilo de la aguja: 2 a 6 (_) Pied presseur E: Pied _.fermeture &... - Page 52 Zipper Sewing (Continued) _ Wrong side of fabric Slider 2" (5cm) Stop just before the zipper foot reaches the slider on the zipper tape about 2" (5 cm) from the top of the zipper. Lower the needle slightly into the fabric, raise the ®...
-
Page 53: Costura De Cremalleras
La couture des fermetures & glissi_re (Suite) Costura de cremalleras (continuacibn) [] _ C6te envers du tissu [] (_ Parte de abajo de Latela _) Curseur _) Deslizador _) 2" (5cm) 2" (5cm) Arr_tez vous juste avant que te pied atteigne le Pare justo antes de que el pie llegue al deslizador de curseur sur le ruban de la fermeture environ 2"... - Page 54 To Raise or Drop the Feed Dogs The drop feed dogs lever is located underneath free arm bed on the back side of the machine. (_ To drop the feed dogs, push the lever in the direction of the arrow as illustrated. (_ To raise the feed dogs, push the lever in the direction of the arrow as illustrated...
-
Page 55: Como Bajar/Subir Los Dientes Del Transporte
Comment monter ou descendre les griffes C6mo bajar / subir los dientes del transporte d'entratnement La palanca de mando para los dientes del transporte esta Le levier des griffes d'entrafnement est situe sous le debajo del brazo libre colocado en la parte del rev_s de berceau du bras libre &... -
Page 56: Satin Stitch
Basic Zigzag WIDTH C) Stitch width: 1 to 6.5 O Stitch length: Red zone (_ Needle thread tension: 3 to 8 LENGTH _) Presser foot A: Zigzag foot ® The zigzag stitch is one of the most common versatile stitches. It can be a utility stitch for button sewing, buttonhole... -
Page 57: Puntada De Zig-Zag
Zig-zag simple Puntada de zig-zag Largeur du point 1 & 6.5 (_ Control de la anchura: 1 a 6.5 (_) Longueur du point Zone rouge (_ Control de la Iongitud: Zona roja (_ Tension du fil de I'aiguille 3 & 8 Tensi6n del hilo de la aguja: 3 a 8 Pied presseur A:... -
Page 58: Applique
Monogramming (_) Stitch width: 5 to 6.5 WIDTH (_ Stitch length: 0.5 to 1 (_ Needle thread tension: 2 to 6 LENGTH (_ Presser foot F: Satin stitch foot (_ Pressure adjusting lever: 1 or 2 Attach a piece of stabilizer on wrong side of fabric. -
Page 59: Monogramas
Monogrammes Monogramas 5a6.5 Largeur du point 5 & 6.5 (D Control de la anchura: 0.581 (_ Longueur du point 0.5 & 1 (_ Control de lalongitud: (_ Tensi6n de[ hilo de la aguja: (_) Tension du fil de raiguille 2 & 6 (_ Pie prensatelas Pie para punteda (_ Pied presseur A:... -
Page 60: Embroidery
Bar Tacking WIDTH Stitch width: 2 to 6.5 Stitch length: 0.5 to 1 Needle thread tension: 2 to 6 LENGTH (_ Presser foot A: Zigzag foot ® This is similar to a very short satin stitch and is used to reinforce points of strain such as corners, pockets... -
Page 61: Puntada De Refuerzo
Brides de renfort Puntada de refuerzo Largeur du point 2 & 6.5 Q Control de la anchura: 2 a 6.5 (_ Longueur du point 0.5 & 1 Control de la Iongitud: 0.5 a 1 Tension du fil de I'aiguille 2 & 6 (_ TensiSn del hilo de la aguja: 2 a 6 _) Pied presseur A:... -
Page 62: Button
Button Sewing _WIDTH O Stitch width: 2 to 6.5 (_ Stitch length: (_) Needle thread tension: 2 to 6 ® LENGTH (_) Presser foot A: Zigzag foot _) Feed dogs: Dropped Drop the feed dogs. Match the holes on a button with the horizontal slot on the presser foot [A]. -
Page 63: Cosido De Botones
Pose des boutons Cosido de botones Largeur du point 2 & 6.5 Anchura de la puntada: 2 a 6.5 (_) Longueur du point Toute (_ Longitud de la puntada: Cualquier n,',mero (_ Tension du fil de I'aiguille 2 & 6 (_ Tensi6n del hiio de la aguja: 2 a 6 _) Pied presseur A:... - Page 64 Blind Hem Stitch (_ Stitch width: 2 to 3 WIDTH (_ Stitch length: Red zone (_) Needle thread tension: 2 to 6 LENGTH _ (_ Presser foot G: Blind hem foot On heavy weight fabrics that ravel, the raw edge should be overcast first.
-
Page 65: Dobladillo Invisible
DobladUlo invisible Ourlet invisible O Anchura de la puntada: 2 a 3 (!) Largeur du point 2 & 3 (_) Longitud de la puntada: Zona roja O Longueur du point Zone rouge (_ Tensibn del hilo de la aguja: 2 a 6 Tension du fil de I'aiguille 2 &... - Page 66 LaceWork WIDTH (_ Stitch width: 2 to 3 Stitch length: ® _) Neeedle thread tension: 2 to 6 LENGTH Presser foot A: Zigzag foot ® Lace adds a fanciful, feminine touch to blouses lingerie. Table linens and pillows become more elegant when trimmed with lace.
-
Page 67: Trabajos Con Lazos
Dentelle Trabajos con lazos O Largeur du point 2 & 3 O Anchura de la puntada: 2 a 3 (_ Longueur du point _) Longitud de la puntada: _) Tension du fil de I'aigui[le 2 & 6 (_ Tensi6n del hilo de la aguja: 2 a 6 (_ Pied presseur A: Pied zig-zag... -
Page 68: Box Stitch
Shell Stitch WIDTH C) Stitch width: 3 to 6.5 (_ Stitch length: Red zone LENGTH(_) (_) Needle thread tension: 4 to 9 (_ Presser foot F: Satin stitch foot ® Use a lightweight fabric such as tricot. Fold the fabric and stitch on the bias. -
Page 69: Puntada En Forma De Concha
Point coquille Puntada en forma de concha Largeur du point 3 & 6.5 Anchura de la puntada: 3 a 6.5 Longueur du point Zone rouge Longitud de la puntada: Zona roja (_ Tension du fil de I'aiguille 4 & 9 Tensi6n del hilo de la aguja: 4 a 9 Pied presseur F:... - Page 70 Fagoting Stitch WIDTH (_ Stitch width: 5 to 6.5 (_ Stitch length: 0.5 to 2 LENGTH (_) _) Needle thread tension: 3 to 8 (_) Presser foot A: Zigzag foot ® (_) Paper or tear-away backing (_) 1/8"(0.3 cm) Use this stitch to join two pieces of fabric to create an open work appearance and add design interest.
-
Page 71: Puntada Para Deshilachados
Couture ajour6e Puntada para deshilachados (_) Largeur du point 5 & 6.5 (_) Anchura de la puntada: 5 a 6.5 (_ Longueur du point 0.5 a 2 (_) Longitud de la puntada: 0.5 a 2 (_) Tension du fil de raiguille 3 &... - Page 72 Overedge Stitch (_ Stitch width: 3 to 6.5 WIDTH (_ Stitch length: 1 to 3 ® (_) Needle thread tension: 3 to 8 [-_2 ]LENGT H _) Presser foot A: Zigzag foot ® This stitch is often used as a seam finish to prevent fraying.
-
Page 73: Puntada Para Rebordados
Point de bordure Puntada para rebordados Q Anchura de la puntada: 3 a 6.5 Largeur du point 3 & 6.5 (_ Longitud de la puntada: 1 a 3 _) Longueur du point 1 a 3 (_ Tensi6n det hilo de la aguja: 3 a 8 Tension du fil de I'aiguille 3 a 8... -
Page 74: Rick-Rack
Straight Stretch WIDTH Stitch width: _) Stitch length: Gold stretch stitch position (_ Needle thread tension: 2to6 LENGTH _) (_ Presser foot A: Zigzag foot (_ Presser foot H: Straight foot This strong, durable stitch is recommended where both elasticity and strength are necessary to insure... -
Page 75: Extensi6N Recta
Extensibn recta Point droit extensible (_ Anchura de la puntada: Largeur du point (_ Longitud de la puntada: Posici6n oro de puntada (_ Longueur du point Position dor6e point extensible el&stica (_) Tension du fil de I'aiguille 2 & 6 (_ Tensi6n del hilo de la aguja: 2 a 6 (_) Pied presseur A: Pied zig-zag. -
Page 76: Smocking
Overcast Stretch Stitching WIDTH 3 to 6.5 (_ Stitch width: (_) Stitch length: Gold stretch stitch position ® 2to6 (_ Needle thread tension: LENGTH (_) Presser foot A: Zigzag foot ® This stitch is for sewing a seam with an overcast finish. -
Page 77: Puntada El&Stica De Remate O Sobrehilado
Puntada elbstica de remate o sobrehilado Surfilage extensible (_ Anchura de la puntada: 3 a 6.5 Largeur du point 3 b 6.5 (_ Longitud de la puntada: Posici6n oro de puntada Longueur clu point Position dor_e point extensible el&stica Tension du fil de I'aiguille 2 b 6 (_ Tensi6n del hilo de la aguja: 2 a 6 Pied presseur A:... - Page 78 Serging WIDTH (_ Stitch width: 3 to 6.5 Stitch length: Gold stretch stitch position ® _) Needle thread tension: 3 to6 LENGTH Presser foot A: Zigzag foot ® This stitch is ideal for 1/4" (0.6 cm) seams on knits or on medium to heavyweight woven...
-
Page 79: Elastic
Puntada de dobladillo Point de surjet (_ Anchura de la puntada: 3a6.5 C) Largeur du point 3 & 6.5 (_ Longitud de la puntada: Posici6n oro de puntada Longueur du point Position dor6e point extensible el&stica (_ Tension du fil de I'aiguille 3 &... -
Page 80: Decorative
Herringbone Stretch 3 to 6.5 (_ Stitch width: (_ Stitch length: Gold stretch stitch position DTH O 2to 6 (_ Needle thread tension: IFNGTH Presser foot A: Zigzag foot Use this stitch as a hemming stitch for blankets, tablecloths and draperies. Place fabric the right side up, and sew 3/8"... -
Page 81: Puntada De Espiga Eldstica
Puntada de espiga eldstica Point d'6pine extensible Largeur du point 3 & 6.5 _) Anchura de la puntada: 3 a 6.5 (_ Longitud de la puntada: Posici6n oro de puntada _) Longueur du point Position dor_e point extensible el&stica (_ Tension du fil de I'aiguille 2 8.6 (_ Tensi6n der hilo de la aguja: 2 a 6... - Page 82 [_l_oT_l'€[o] l _ r..,Y _IB]|ivlVJl_l _ lqqHl= F.'_il [a4:1:_'t Manual Buttonhole WIDTH (_ 3 to 6.5 O Stitch width: Blue zone (_ Stitch length: 2to6 LENGTH ® (_ Needle thread tension: (_ Presser foot J: Sliding buttonhole foot ® • To Sew: Carefully mark the buttonhole length...
-
Page 83: Ojal Manual
Boutonniere manuelle Ojal manual Anchura de la puntada: 3 a 6,5 Largeur du point 3 & 6.5 _) Longitud de la puntada: Zona Azul Longueur du point Zone bieue TensiSn del hilo de la aguja: 2 a 6 Tension du fil de I'aiguilJe 2 &... -
Page 84: Manual
Manual Buttonhole (Continued) Set the stitch selector at _, Sew four (4) to six (6) stitches. Stop sewing at a right stitch. Set the stitch selector at [_. Sew until you reach the back marking of the buttonhole. Stop sewing at a right stitch. -
Page 85: S_Lecteur De Point
Ojal manual (continuaci6n) Boutonni&re manuelle (suite) Ajuste el selector de puntada a _ . Cosa de cuatro (4) a Rdglez le sdlecteur de point sur _ . Cousez quatre (4) seis (6) puntadas. Termine cosiendo con una puntada six (6) points. Arr_tez la couture avec {'aiguille a droite. derecha. - Page 86 How to Adjust Buttonhole Stitch Balance Use the stitch length control O to adjust stitch density. Turn the dial in direction @ for a coarser density (_). Turn the dial in direction (_ for a tighter density NGTH If the sides of the buttonhole are not balanced, the following;...
- Page 87 C6mo equilibrar las puntadas de los ojales Comment dcluilibrerles points pour les boutonni_res Use el control de Iongitud de puntadas (_) para ajustar la Utilisez le r_glage de la Iongueur de point (_ pour r6gler la densidad. densite du point. Gire el dial en direcci6n (_ para hacerlas menos densas (_.
- Page 88 Automatic Buttonhole For more varied and accurate buttonholes, use the buttonhole attachment and templates. The buttonhole attachment consists of the illustrated parts: (_) Guide slot _) Measure marking Catch _) Buttonhole guide plate (_ Buttonhole templates (_) Guide block (_ Two pins (A) (_ Hook (_ Lever ®...
-
Page 89: Ojal Automdtico
Boutonniere automatique Ojal automdtico Utilisez le guide pour les boutonnieres avec les gabarits Para mayor variedad y ojales m&s precisos, use el pour realiser des boutonnieres varides et plus pr6cises. accesorio para ojales, el cual consiste de las partes ilustradas. Le guide pour les boutonnieres est constitu_ des pi_ces ddcdtes ci-dessous:... -
Page 90: Automatic
Automatic Buttonhole (Continued) WIDTH • To Sew (_) Stitch width: ® LENGTH (_) Stitch length: 3 to 4 _) Needle thread tension: 2 to 6 ® (_ Presser foot: Buttonhole foot NOTE: Best results are obtained by using #60 or #80 lightweight thread for bobbin... - Page 91 Ojal automdtico (continuacibn) Boutonniere automatique (suite) • Para coser • Pour coudre O Anchura de la puntada: (_) Largeur du point _) Longueur du point 3 & 4 (_) Longitud de la puntada: 3 a 4 Tensi6n del hilo de la aguja: 2 a 6 (_) Tension du fil de I'aiguille 2 &...
- Page 92 Automatic Buttonhole (Continued) (_) Guide slot (_ Guide block _) Buttonhole guide plate (_ Buttonhole temptate (_ Catch (_) Setting mark (_ Gear (_) Base plate After you select a template (_ with the style and size of buttonhole, slide the template into the guide plate Pull the catch (_) toward...
- Page 93 Ojal automdtico (continuaci6n) Boutonniere automatique (suite) Fente de guidage Ranura gu[a _) Doigt de guidage Bloque gufa Plaque guide de boutonniere (_ Placa guia para ojales Gabarit Plantilla de ojales _) Enganche _) Cliquet _) Marca de posici6n Marque de rep_re (_ Dentada Q Pignon Placa base...
-
Page 94: Buttonhole
Automatic Buttonhole (Continued) (_) Marked buttonhole on fabric (_) Center marking on buttonhole foot (_ Measure marking on the guide plate (_ Fabric Mark the buttonhole position carefully on the fabric. Placing the fabric behind the machine, insert the fabric between the guide plate and the buttonhole foot as illustrated. -
Page 95: Ojal Automdtico
Boutonnibre automatique (suite) Ojal automdtico (continuacibn) (_ Trac_ de la boutonniere sur le tissu Ojal marcado en la tela (_ Rep_re central sur le pied & boutonniSre _) Marca central en el pie para ojales (_ Marca de medida en la placa gufa (_ RepUte de dimension sur la plaque guide (_ Tissu... -
Page 96: Twin Needle Stitches
Twin Needle Stitches (Optional Item) O Stitch width: Stitch length: Gold stretch stitch position WIDTH (_ 17624 or green zone 3to 7 _) Needle thread tension: (_ Presser foot A: Zigzag foot LENGTH _) Satin stitch foot _) Presser foot F: 17620 _) Needle: Twin needle (optional item) -
Page 97: Puntadas De Doble Aguja (Articulos De Opcional)
Aiguilles jumel6es (en option) Puntadas de doble aguja (Art|culo opcional) Largeur du point Anchura de la puntada Position dor_e point Posicibnoro de puntada (_ Longueur du point Longitud de la puntada extensible ou zone verte eldsticao zone verde 3&7 (_) Tension du fil de I'aiguille (_ Tensi6nde hilo de la aguja Pied zig-zag _) Pied presseur A:... - Page 98 NOTE: Unplug the machine. Do not dismantle the machine other than as explained in this section. * Do not store the machine in a high-humidity area, near a heat radiator or in direct sunlight. Clean the outside of the machine with a soft cloth and mild soap.
-
Page 99: Cambiando La Bombilla
i roT4 I liiLvff±1 _| | = _lhV_ll_ _ I Ko] H _ R L_lLvff±[ol|J I_ r'-I REMARQUE: NOTA: D6branchez la machine. * Desenchufe la m&quina. * Ne ddmontez rien d'autre que ce qui est d6crit dans No desmonte la m&quina de ninguna otra forma que la ce chapitre. -
Page 100: The Hook Race And Feed Dogs
Cleaning the Hook Race and Feed Dogs Unplug the machine and remove the presser foot and needle. Remove the screw on the left side of the needle plate with a screwdriver. Remove needle plate (_ and take out the bobbin. Q Needle plate Lift up the bobbin holder (_) and remove... -
Page 101: Limpieza Del Garfio Y Los Dientes Del Transporte
Limpieza del garfio y los dientes del transporte Nettoyage de la piste du crochet et des griffes d'entrainement Desenchufe la m&quina y quite el pie prensatelas y la aguja. Destornille el tornillo que sujeta la placa de aguja D6branchez la machine et retirez I'aiguille et le pied con un destornillador. -
Page 102: Troubleshooting
Troubleshooting Condition Cause Reference The needle thread Page 26 1. The needle thread is not threaded properly. breaks. Pages28,30 2. The needle thread tension is too tight. 3. The needle is bent or blunt. Page10 Page10 4. The needle is incorrectly inserted. 5. -
Page 103: Soluciones De Problemas De Funcionamiento
Oluciones de problemas de funcionamiento CONDICION CAUSA PROBABLE REFERENCIA P_gina 27 Se rompe el hilo de la 1. El hilo de la aguja no se ha enhebrado correctamente. Pdginas 29, 31 2. La tensi6n del hilo de la aguja es excesiva. aguja. - Page 104 En cas de problbme Probl_.me Cause Page de r_f6rence Page 27 Le fil d'aiguille n'est pas passd correctement. Le fil d'aiguille se Pages 29,31 La tension du fil d'aiguille est trop forte. cesse, Page 11 L'aiguille est tordue ou _mouss&e. Page11 L'aiguille est mat install6e, Le fil d'aiguille et celui de la canette ne sont pas passes...
- Page 105 Sears Repair Parts Distribution Center for handling. SU MAQUINA DE COSER Ahora que usted ha comprado su M_quina de Coser Kenmore, si se presenta la necesidad repuestos o servicio, simplemente contacte su Centro de Servicios Sears mas cercano. Asegerese...