Table of Contents
Advertisement
Quick Links
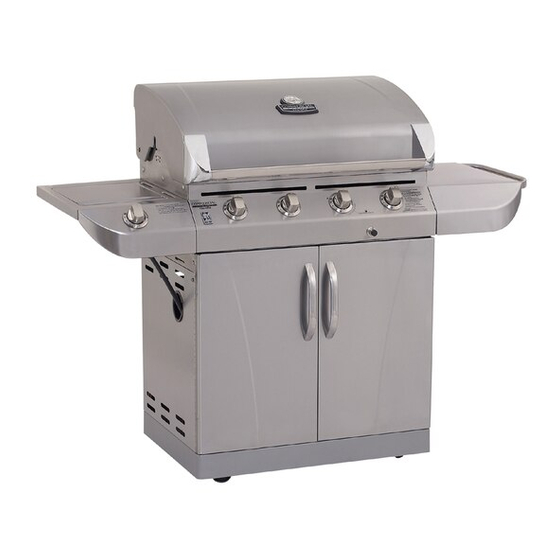
MODEL
463268107
• PRODUCT
GUIDE
Find out how to purchase your (NG)
n;_tural
gas conversion
kit
GO to
www.charbroiLcom
/_ CAUTION:
Read and follow all safety statements, assembly
instructions, and use and care directions before
attempting to assemble and cook.
INSTALLER/ASSEMBLER:
Leave this manual with consumer.
CONSUMER:
Keep this manual for future reference.
z_ WARNING:
Failure to follow all manufacturer's instructions could
result in serious personal injury and/or property
damage.
\
CAUTION:
Some parts may contain sharp edges - especially as
noted in the manual! Wear protective gloves if
necessary.
463268107 • 80006542.12-20-06
Advertisement
Table of Contents

Related Manuals for Char-Broil 463268107


Summary of Contents for Char-Broil 463268107
- Page 1 MODEL 463268107 • PRODUCT GUIDE Find out how to purchase your (NG) n;_tural gas conversion GO to www.charbroiLcom /_ CAUTION: z_ WARNING: Failure to follow all manufacturer's instructions could Read and follow all safety statements, assembly instructions, and use and care directions before result in serious personal injury and/or property attempting to assemble and cook.
- Page 2 CALIFORNIA PROPOSITION 65 if you smell gas: Combustion by-products produced when using this product contain chemicals known to the State of 1. Shut off gas to the appliance. California to cause cancer, birth defects, and other reproductive harm. 2. Extinguish any open flame. 3.
- Page 3 For Your Safety ........Grill Service Center ........Product Record Information ......Installation Safety Precautions ......Safety Symbols ........Use and Care ........4-11 Parts List .......... Parts Diagram ........Assembly ........14-23 Do not attempt to repair or alter the hose/valve/regulatorfor any "assumed"...
- Page 4 , A disconnected LP cylinder in LPCylinder Valve_-,,_ storage or being transported /' (,__,_ _,,,,_ '_ must have a safety cap installed (as shown). _,,_'_ _-"_ Do not store an LP cylinder in enclosed spaces such as a carport, garage, porch, covered patio or other building.
- Page 5 LP Cylinder Exchange Connecting Regulator to the LP Cylinder • Many retailers that sell grills offer you the option of replacing 1. LP cylinder must be properly secured onto grill. (Refer to your empty LP cylinder through an exchange service. Use only assembly section.) those reputable exchange companies that inspect, precision fill, 2.
- Page 6 Leak Testing Valves, Hose and Regulator 1. Turn all grill control knobs to OFF. 2. Be sure regulator is tightly connected to LP cylinder. 3. Completely open LP cylinder valve by turning hand wheel counterclockwise. If you hear a rushing sound, turn gas off immediately.
- Page 7 Safety Tips A Before opening LP cylinder valve, check the coupling nut for tightness. A When grill is not in use, turn off all control knobs and LP For Safe Use of Your Grill and to Avoid Serious cylinder valve. injury: ,A.
- Page 8 Burner Flame Check , Remove cooking grates and flame tamers. Light burners, rotate knobs from HIGH _) to LOW (_. You should see a smaller flame in LOW position than seen on HIGH. Perform burner Turn controls and gas source or tank OFF when not flame check on sidebumer, also.
- Page 9 Cleaning the Burner Assembly CAUTION Follow these instructions to clean and/or replace parts of burner assembly or if you have trouble igniting grill. Turn gas off at control knobs and LP cylinder, SPIDER ALERT! Remove cooking grates and flame tamers. Remove screws and carryover tubes from rear of burners.
- Page 10 indirect Cooking Food Safety Poultry and large cuts of meat cook slowly to perfection on Food safety is a very important part of enjoying the outdoor the grill by indirect heat. The heat from selected burners cooking experience. To keep food safe from harmful bacteria, circulates gently throughout the grill, cooking meat or poultry follow these four basic steps: without the touch of a direct flame.
- Page 11 The methods below are suggestionsfor cleaning stainless steel surfaces. Choose a cleaning method appropriate for your needs. It is recommended that you use a Char-Broil@grill cover to help prolong the life and prevent discoloration of your grill.
- Page 12 Description Part # Description Part # Bottom Shelf..... 80006494 Temperature Gauge ....80006666 Lid Assembly Hardware Pack..80004371 Locking Caster ....80000268 Fixed Caster ..... 80004093 Left Door Assembly ....80006742 Door Handle ..... 80006598 Left Side Panel, Firebox .... 80006577 Right Door Assembly ....
- Page 13 _..-Q ¢C 463268107 • 13...
- Page 14 Attach the two locking casters at the rear of the bottom shelf and the two fixed casters at the front. Use the provided caster wrench to fully tighten casters. Lockingcaster-__ 80000268 Attach side panels to bottom shelf using three 1/4-20x112"screws, 7ram lock washers, and 114.20x112"...
- Page 15 Place lower back panel between side panels at rear of bottom shelf. Make sure the slots are positioned as shown (A). Secure lower back panel to side panels using two 1/4-20x112"screws, 7mm lock washers, and 7mm flat washers on each side. 1/4-20x1/2"screw 7ramlockwasher 7mm fiat washer...
- Page 16 Insert front brace under control panel and between cart side panels. Make sure door hinge pins are on the top side and facing the front. Secure using two 1t4-20xlt/2 ' screws, 7ram lock washers, and 7ram flat washers on each side. NOTE: MAKE SURE THAT THE FRONT BRACE IS MOUNTED IN THE MOST DOWNWARD POSITION WHEN ASSEMBLED TO CART.
- Page 17 inserttabs on right side shelf into rectangular slots in side of firebox. Attach rear of shelf using one 114o20x314" s crew, 7ram lock washer, and 7ram flat washer in upper hole. Use one l14.20xlY2" screw, 7ram lock washer, and 7ram flat washer in lower hole. Attach front of shelf and fascia using three 1/4-20x3/4"...
- Page 18 First, remove the two screws and lock washers factory attached to the sideburner valve bracket. Position sideburner valve bracket beneath sideburner shelf fascia so that valve stem comes through larger center hole in fascia. Align the holes on valve bracket with left and right holes on fascia. Secure using lock washers and screws that were removed from bracket. Next, place sideburner bezel over valve stem on front side of fascia.
- Page 19 Under sideburner shelf, attach sideburner ignitor wire to electrode (A). Place sideburner wind diverter over sideburner (8). Align notch in diverter to fit around electrode. Place burner cap onto sidebumer. Attach sideburner cap clip (C). Place sideburner cooking grate onto sideburner shelf, aligning grate legs with holes in shelf.
- Page 20 Insert end of tank wire (without hole) into back of lower back panel. Attach other end to bottom of front brace with a #8x3/8" self-tapping screw, 80008188 Insertwire ends into lower back panel (A). Attach front right side of wire shelf to the right side panel with one #8-32x3/8" screw, 4ram flat washer and 4ram lock washer (B).
- Page 21 Attach both doors using four #8-32x3/8" flat head screws. ightdoor 80006750 Install flame tamers by sliding one end of each flame tamer into slots at front of firebox and resting opposite end on pins in back of firebox. Flametamer 80003332 463268107 •...
- Page 22 Place cooking grates onto the firebox as shown. Insert the three wire ends at rear of warming rack into holes in back of firebox. Front wires of warming rack rest on sides of firebox. Warmingrack Cooking grate 80006599 Assembled warming rack LP CYLINDER kSSOLD SEPARATELY.
- Page 23 I !/cAu'no. On back of grill, slide grease tray into opening in upper back panel. Failure to install grease tray will cause hot grease to drip from bottom of grill with risk of fire or property damage. Grease tray 80008970 nscrew electronic ignition button on front of control panel.
- Page 24 EMERGENCIES: if a gas leak cannot be stopped, or a fire occurs due to gas leakage, call the fire department. Gas leakingfrom , Damagedhose. , Turnoff gas at LP cylinderor at sourceon naturalgas systems.If cracked/cut/burned anythingbut burned,replacevalve/hose/regulator. If burned. hose. discontinueuseof productuntila plumberhasinvestigated cause and correctionsare made.
- Page 25 Troubleshooting (continued) ELECTRONIC iGNiTiON: Burner(s)will not light usingignitor. , Nospark,no ignitionnoise. , See SectionI of ElectronicIgnition System. (SeeElectronicIgnition Troubleshooting also) , Nospark,some ignitionnoise. , See SectionII of ElectronicIgnitionSystem. , Sparks,butnot at electrodeor at full , See SectionIII of ElectronicIgnitionSystem. strength. PIEZOPUSH-BUTTON AND ROTARY: o Push-button sticksat bottom.
- Page 26 Troubleshooting - Electronic Ignition SECTIONI Nosparksappearat , Batterynotinstalled , Checkbatteryorientation. o Installbattery(makesure that "+"and "-" any electrodeswhen properly. connectorsareorientedcorrectly,with "+"end up ignitionbuttonis and "-" enddown.) pushed;no noisecan be heardfrom spark , Deadbattery. , Hasbatterybeenused , Replacebatterywith newAA-sizealkalinebattery. module. previously? , Checkto insurethreadsare , Buttonassemblynot , Unscrewbuttoncap assemblyand reinstall,making installedproperly.
- Page 27 page blank intentionally 463268107 • 27...
- Page 28 I n addition,in thestateof Californiaonly,you may takethe productto the retailestablishment sellingthis productin orderto obtainperformanceunderthis limitedwarranty. If you wish to obtain performanceof any obligation under this limitedwarranty, you shouldwrite to: Char-Broil Consumer Relations P.O. Box 1240 Columbus, GA 31902-1240 Consumerreturnswill notbe acceptedunlessa validReturnAuthorizationis firstacquiredby calling1-800-241--7548 and thenclearlymarked on the outsideof the packageandthe packageis shippedfreight/postage pre-paidto the addressabove.
- Page 29 page blank intentionally 463268107 . 29...
- Page 30 Please your productonline at: register (if you register online, you do not need to send in this registration card.) PLEASE FILL OUT THIS CARD AND RETURN IT WITHIN 10 DAYS OF PURCHASE, FAILURE TO RETURN MAYAFFECT YOUR WARRANTY COVERAGE. FOR WARRANTY SERVICE PROOF OF PURCHASE WILL BE REQUIRED, PLEASE KEEP YOUR SALES RECEIPT THIS WARRANTY IS NON-TRANSFERABLE, LLENE ESTA TARJETA Y DEVUELVALA DENTRO DE LOS 10 DIAS DE LA COMPRA Sl NO LA DEVUELVE, PUEDE VERSEAFECTADA...
- Page 31 page blank intentionally 463268107 • 31...
- Page 32 Check tubes for spider webs. Ensure valves are correctly installed in burner tubes. Always ensure control knobs are in OFF position and regulator is attached to tank BEFORE opening tank valve to avoid low flames. Perform leak test regularly. Thank You for Your Purchase! Char-Broil,LLC. Columbus,GA31902, Printedin China...