Canon PowerShot A520 User Manual
Hide thumbs
Also See for PowerShot A520:
- Quick start manual (329 pages) ,
- Manual (130 pages) ,
- Software starter manual (106 pages)
Table of Contents

Related Manuals for Canon PowerShot A520


Summary of Contents for Canon PowerShot A520
- Page 1 ill tlrllllrllllltl C&'H@H CDI-E175 __erShot A _w_Shot A510 DIGITAL CAMERA Camera User Guide oi_,c Pktlhidge D IRECT PRI[',;f e Please read the Read This First section (p. 4). e Please also see the Software Starter Guide and the Direct Print User Guide.,...
- Page 2 This product is designed to achieve excellent performance when used with genuine Canon accessories. Canon shall not be liable for any damage to this product and/or accidents such as fire, etc., caused by the malfunction of non- genuine Canon accessories (e.g, a leakage and/...
- Page 3 Ftowcha_ Reference Guides Symbots Used Icons under title bars show the available shooting modes. As in the example below, the shooting mode dial should be set to _:_, P, Tv, Av, M, ii_ ¸¸¸¸¸¸¸¸¸¸7 ¸hi ¸;m_r;_en° ¸i¸e;ad_; ¸i¸i _°¸¸_ai ¸¸¸¸¸i° ¸p ¸...
-
Page 4: Table Of Contents
Items marked with -kare lists orcharts that Slow Shutter ........summarize camera functions orprocedures. Changing the Resolution and Compression..Using the Flash ......... Macro Mode ..........Please Read ............Self-timer ............Safety Precautions ..........Digital Zoom ............ Preventing Malfunctions ........Continuous Shooting ........ - Page 5 Table of Contents Tv Setting the Shutter Speed ....77 Av Setting the Aperture ......Manually S etting theShutter Speed andAperture..80 Switching between Focusing Modes ....81 Switching between Metering Modes ....82 Using the Power Kits (Sold Separately) ..129 Adjusting the Exposure ........
-
Page 6: Please Read
Warning Against Copyright Infringement Please note that Canon digital cameras are intended for personal use and should never be used in a manner that infringes upon or contravenes international or domestic copyright laws and regulations. Please be advised that in certain cases the copying of images from performances,... - Page 7 Read This First I If your camera is used for prolonged periods, the camera body may become warm. Please be aware of this and take care when operating the camera for an extended period. The LCD monitor is produced with extremely high-precision manufacturing techniques.
-
Page 8: Safety Precautions
[Read This First li:ii! Safety Precautions ® Before using the camera, please ensure that you read and understand the safety precautions described below. Always ensure that the camera is operated correctly. ® The safety precautions noted on the followin 9 pages are intended to instruct you in the safe and correct operation of the camera and its accessories to prevent injuries or damage to yourself, other persons and equipment. - Page 9 Immediately turn the camera's power off, remove the camera batteries or unplug the power cord from the power outlet. Confirm that smoke or fume emissions have ceased. Please consult your camera distributor or the closest Canon Customer Support Help Desk. ® Stop operating...
- Page 10 Read This First ® Remove the power cord on a regular periodic basis and wipe away the dust and dirt that collects on the plug, the exterior of the power outlet and the surrounding area. nndusty, humid or greasy environments, the dust that collects around the plug over long periods of time may become saturated with humidity and short-circuit, leading to fire.
- Page 11 Use of batteries not expressly recommended this equipment may cause explosions or leaks, resulting in fire, injury and damage to the surroundings. ® If using AA-size NiMH batteries, use only Canon AA-size NiMH batteries and the charger recommended for use with these batteries.
- Page 12 Read This First CAUTIONS ® Avoid using, placing or storing the equipment in places subject to strong sunlight or high temperatures, such as the dashboard or trunk (boot) of a car. Exposure to intense sunlight and heat may cause the batteries to leak, overheat or explode, resulting in fire, burns or other injuries= High temperatures may also cause deformation of the casing= Ensure that there is good ventilation when using the battery charger to charge the batteries=...
- Page 13 Read Th,s F,rst Jiiii! ' Never place the camera in close proximity to electric motors or other equipment generating strong electromagnetic fields= Exposure to strong magnetic fields may cause malfunctions or corrupt image data= Av_i_ C_e_sat_ _eiate_ Pro_le_s Moving the equipment rapidly between hot and cold temperatures may cause condensation (water droplets) to form on its external and internal surfaces.
- Page 14 Bubble Jet printer user guide. - PictBrfdge Compliant Printers: interface Cabb IFC-400PCU (supplbd with the camera). • PictBridge Compliant Non-Canon Printers: interface Cabb IFC-400PCU (supplbd with the camera). Please refer to the System Map or the Direct Print...
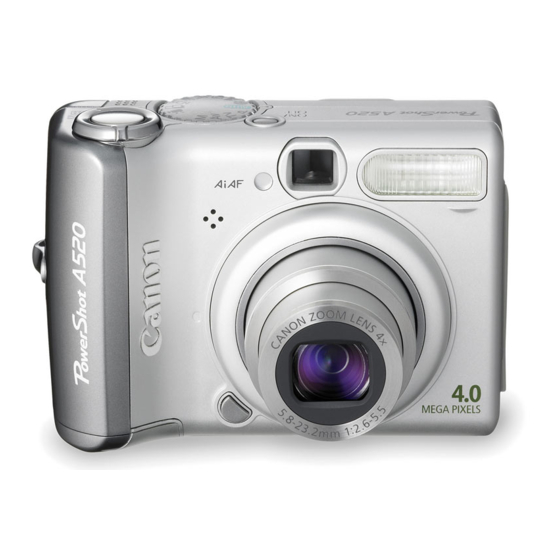
- Page 15 Components Guide I Button (Flash)i ¢_ Button (p. 42) Strap Mount Attaching Mode Switch (p. 32) -- wrist strap .1 Viewfinder (p. 35) _=j_._ indicators (p. 14) ¢O 4= Button __"_/ €_ Button © _(Macro)t MF (Manual Focus)t _A,_(PdntiShare)Button _ v _ _ 4_ Button (p.
- Page 16 Components Guide |ndicators Sheeting Merle DiaJ Use the shooting mode The indicators light or blink when the Power button Creative j.,,__/ dial to switch between or the shutter button is pressed. the Shooting modes. Upper _ndieator Zon_ Green: Ready to shoot ®_: Auto (p, 33) Blinking...
- Page 17 Installing Batteries Insert two AA-size alkaline batteries (supplied with the camera) or separately sold nickel metal hydride (NiMH) batteries. Be sure that the camera power is off. Kit ACK800 iS recommended to power the ,2 Slide the battery camera during long usage sessions (p.131).
- Page 18 Proper 8artery Handling positive (+) and negative (-) ends in the right ® Use AA-size alkaline or Canon AA-size NiMH direction. batteries (sold separately) only. For information o Never mix batteries of different types or from on handling the AA-size rechargeable...
- Page 19 Preparing the Camera Battery Status iadicat_eas _WARNING The LCD monitor displays an icon or message to Never use damaged batteries or batteries whose let you know when batteries are low or depleted. outer seal is completely or partially missing or peeled off, as there is risk that such batteries may Batteries are beginning to run low.
- Page 20 Preparing the Camera To remove the memory card Push the memory card until it clicks and then release it. 4 C_ose the memory card s_ot cover securely. 3 _nsert the memory card. ® Push the memory card in until it clicks into place.
- Page 21 Preparing the Camera Fermatting Meme_ Cards You should always format a new memory card or one from which you wish to erase all images and other data. Turn the power on (p. 30}. 2 Press the _ENU button and select the [[_(Set up)] ©...
- Page 22 Preparing the Camera 3 Select _(Format) using the 4_ or button and press the SET button. card may solve the problem. o When a non-Canon brand memory card is malfunctioning, reformatting it may solve the problem. 4 Select [OK] using...
- Page 23 Preparing the Camera Meme_, Card Handling Precautiens different temperature zone and allow it to adjust slowly to the new temperature. ® Memory cards are high-precision electronic ® If condensation forms on the memory card, store devices. Do not bend them, apply force to them, it at room temperature until the water droplets or subject them to shocks or vibration.
-
Page 24: Setting The Date/Time
Preparing the Camera 4 Set the date and Setting Date/Time time..The Set Date/Time menu will appear the first time ® Press the 4' or ,_ button the camera power is turned on, or whenever the to select the item you lithium date battery charge is low. - Page 25 Preparing the Camera Setting Language Select a _anguage using the 4F, @, 4, Use this feature to select the language for the LCD or €_ button monitor display. press the SET "1 Turn the power on (p. 30). button. ® The Set up menu will ,2 Press the MENU reappear without changing the language button and select...
-
Page 26: Using The Lcd Monitor
Preparing the Camera Using Monitor The LCD monitor can be used to compose images while shooting, adjust menu settings and play back recorded images. Pressing the DJSP. button switches the LCD monitor display mode. Shooting Merle D_SP. Button ....Standard Detailed (No Unformation (information... - Page 27 Preparing the Camera |tens DispUayed in $hootin 9 Mede Shooting Mode p. 38, 76 Exposure =2'" Compensation p. 83 _'.- it _ _ _ _% White Balance p. 84 *_:Each mode of the SCN mode icon appears (p. 51). Drive Mode p.
- Page 28 Preparing the Camera ®A slow shutter speed has likely been selected because of insufficient lighting if the upper indicator blinks orange after the metering preparations are complete and the camera shake icon (_) displays in the LCD monitor. Set the flash to U or _, or affix the camera to a tripod to shoot.
- Page 29 Preparing the Camera Standard File Number Button Histogram ¢0 No Display © Displayed image Total number number of images Aperture Value Shutter Speed © D_SP. Button Movie Length * Detailed Display is not available iCompression p. 40 "} in Index Playback (9 images).
- Page 30 Preparing the Camera |cons Displayed in Playback Mode The following information may also appear with some images. (Detailed DispUay) J_9 IAn audio fib other than a WAVE file, or a file [_ _ _ Q _:] _ Shooting Mode p. 38, 76 "...
- Page 31 Preparing the Camera O Please note that image information recorded by this camera may not dispBay correctly on other cameras and image information recorded by other cameras not display correctly on this camera. About the Histogram e The histogram is a graph that allows you to (£3 judge the brightness...
-
Page 32: Turning The Power On/Off
Turning Power On/Off Turning the Camera Turning the Camera Press the Power button again to turn the power off. Press the Power button until the power lamp lights green (p. 14). start up image when the power is turned on. o You will hear a start-up sound and see the... - Page 33 Basic Functions o Disptay Off (only in shooting mode) Power Saving Function The LCD monitor automatically shuts off This camera is equipped with a power saving approximately ! minute* after the last time a function. Depending on the power saving setting, camera control is accessed.
-
Page 34: Switching Between Shooting And Playback
Basic Functions $witch_ng between Shooting Shooting Mede ® Slide the mode switch to _= Pmayback PJayback Mode You can quickly switch between Shooting ® Slide the mode switch to [_[]= mode and Ptayback mode. This is convenient • When a printer (sold separately) is connected when you wish to shoot again after checking images can be printed (see the Direct Print... -
Page 35: Auto Mode
4 Use the zoom _ever to achieve the desired composition (relative (p. 159) atthe end of this manual to find out which ISee settings can be changed in which Shooting subject size in the viewfinder). F unctions Available in Each Shooting Mode modes. - Page 36 Shooting - The Basics Pressing Halfway Pressing halfway changed in this mode. o See page 159 for settings that can be automatically sets the :_?_ o Wkh the Review function, you can change exposure and focus. the length of time images show on the LCD ®...
- Page 37 Shooting - The Basics Shooting with the Viewfinder .......... This camera empBoys AiAF (artificial You can save power by turning the LCD monitor bout the Autofocus Function intelligence autofocus) technology, which (p. 24) and using the viewfinder to shoot= uses a broad metering field to caBculate the Compose the image so that the...
-
Page 38: Reviewing An Image Right After Shooting
[Shoot,o0- heOos,co Reviewin 9 an |mage Right: after AF-assist Beam $h@@tin9 o The AF-assist beam will sometimes emit when the shutter button is pressed halfway to assist focusing in certain conditions, i.e. dark conditions. Right after a shot is taken, the image displays o The AF-assist beam can be turned off on the LCD monitor for approximately... - Page 39 Shooting - The Basics ® Another shot can be taken by pressing the Changing |mage Display shutter button even while an image is Duration displayed. The image review time can be set to [Off], any time in the range of 3 to 10 seconds, or [Hold]. Press the MENU button.
-
Page 40: Using The Mode Dial (Image Zone)
Shooting - The Basics Using €he Merle Dial (image Zene) Settings fitting the shooting conditions of your subject can easily be set using the shooting mode dial. : (p.55). speed is slow, so both the person and as river rapids. the background can be beautifully shot. -
Page 41: Landscape
Shooting - The Basics Turn the shooting Landscape Mode mode dial and set • The _ icon (camera shake warning) the icon of the appear on the LCD monitor since slower shutter speeds are frequently used in this mode you wish to mode. -
Page 42: Changing The Resolution And Compression
Shooting - The Basics Changing Reselutien or ,#_ o The resolution is set to M1 (1600 x 1200) and the (Postcard compression is set to _(Fine). Print Mode)l® See page 54 forPostcard Pr!nt mode information. * Paper sizes vary according to region. - Page 43 Shooting - The Basics 5' Select the 2 Select JL* using the _ or _ button. compression wish to set using * The current setting displayed, the _, or €_ button. ® You can shoot the image right after selecting settings by pressing the shutter button.
-
Page 44: Using The Flash
Shooting - The Basics Using Flash ® You can switch between settings by pressing the _ button. When the red-eye reduction function is on Use the flash according to the guidelines below. The flash fires automatically as When the red-eye reduction function is off Auto with... - Page 45 Shooting - The Basics o The flash setting is saved when the camera O When shooting in any mode other than M is turned off in the P, Tv, Av and M mode, the flash fires with automatic adjustments. Shooting modes.
-
Page 46: Macro Mode
Shooting - The Basics Maere Merle For this mode to be effective, the subject e Red-eye Reduction must be looking right at the red-eye reduction lamp. Try asking them to look 1" Macro mode is not available in _ and _. directly at the lamp. -
Page 47: Self-Timer
Shooting - The Basics Self-timer ® The lower indicator will light yellow when the shutter button is pressed halfway, ® Shooting procedures are the same as for the Mode (p. 33). [* The _J cannot be set in _ and _ modes. - Page 48 Shooting - The Basics ® When _ is selected, pressing the SET button When the self-timer is set between 2 to 10 will allow you to set the start time (0 to 10 sec., the self-timer will sound 2 seconds before the shutter activates.
-
Page 49: Digital Zoom
Shooting - The Basics 1 4 Press the zoom _ever toward E_3. Oigita__oo_ ® The lens will zoom to the maximum optical telephoto setting and stop. Press the zoom lever toward F_ again to further zoom the Images can be zoomed with the combined image digitally, optical... -
Page 50: Continuous Shooting
The flash can be used, but the interval * Large/Fine mode with LCD monitor off (These figures between shots will lengthen reflect Canon's testing standard. The figures will vary depending on the subject and shooting conditions.) accommodate the flash recharge time= Press the FUNC. -
Page 51: E_ Shooting Panoramic Images (Stitch Assist)
Shooting - The Basics _;_ Shooting Panoramic l_ages Framing a Subject i,,i _$titch Assist} The PhotoStitch program detects the overlapping portions of adjoining images merges them. When shooting, try to include a distinctive item Stitch Assist can be used to shoot (landmark) in the overlapping portions. - Page 52 Shooting - The Basics ® You can also press the shutter button directly O To shoot Bandscapes, swivel (pan) the to shoot without pressing the SET button, camera around its own vertical axis. ® To shoot close-ups, sRide the camera over 3 Shoot the first image.
-
Page 53: Sen Special Scene Mode
Shooting- The Basics Jiiii SCN Special $ceae Merle By simply selecting one of the following 8 modes, you can shoot the image with the most appropriate settings for the scene. Appropriate for shooting images with Foliage :lowers, leaves or trees to enhance 301or, _ppropriate for shooting... - Page 54 Shooting - The Basics ® For the shooting procedures of _, see the Prevents camera shake and Waterproof Case User Guide included with the maintains the subject's true color Waterproof Case WP-DC60 (sold separately). Indoor when shooting under fluorescent tungsten lighting.
- Page 55 Shooting - The Basics _Snow _Beach Foliage _Fireworks Night Snapshot _ Kids & Pets indoor _ Underwater .._iiiiii _..........iiiiii,_ ..® When shooting images underwater, always turn the power off before inserting the camera into the Waterproof Case WP-DC60 (soBd separately).
-
Page 56: Postcard Print Mode
Shooting - The Basics Postcard Print Mode You can shoot the image right after selecting settings by pressing the shutter button. The menu displays again after the shot, allowing you to change the settings easily. You can shoot images with the optimal 4 Press the FUNC. - Page 57 Shooting - The Basics ® See Setting the Date!Time (p. 22). Embedding Date in the |mage Data ® If you do not want to embed the date on image data, select [Off]. You can embed the date on image data when 4 Press the MENU button.
-
Page 58: Movie Mode
Shooting - The Basics '_ Movie Mode The maximum length of individual movie clips may vary with the subject and shooting conditions. Recording will automatically stop when the maximum is reached or when the memory cards Use this mode to shoot movies. - Page 59 (File type: AVli Compression method: Motion JPEG) on a computer. (QuickTime (for Windows) bundled on the supplied Canon Digital Camera Solution Disk. On the Macintosh pBatform, QuickTime 3.0 or later is generally bundled with Mac OS 8.5 or later operating system.)
- Page 60 Displaying I_ages individually ($ingte i_age Playback} You can view the recorded images on the displayed image (p. 65). LCD monitor. S_ide the mode switch to [_. ® The last recorded image appears (single image playback). ,2 Move between images using the 4, or €_ button.
-
Page 61: O_ Magnifying Images
Playback - The Basics O, Magaify_ag Images Canceling Magnified Disptay Images can be magnified up to approximately Press the zoom lever toward _--,_. 10 times in single image playback. ® Pressing the MENU button cancels Slide the mode switch to [_. magnification immediately. - Page 62 Playback - The Basics 4 Press the zoom lever toward O_. Viewing images in Sets ef Nine {index Playback) ® Index playback cancels and the display reverts to single image playback= Up to 9 images can be viewed at once in index playback.
-
Page 63: Jumping Between Images
Playback - The Basics Jumping between images Viewing/Editing Mevies The display can be advanced or set back 9 Viewing Merges images in index playback, You can playback the movies shot in _,_, mode. Press the zoom _ever toward S_ide the mode switch to FC]. while in index p_ayback (p. - Page 64 Playback - The Basics ® When a movie has finished playing, it will display the last frame. If the SET button is pressed in this state, the camera will revert to the movie playback panel. If the SET button is pressed again, the movie will start playing from the first frame.
- Page 65 P,oybock- The Basics J!ii!i ! Select _(Save) Select an editing Movie Editing using using the 4_ or @ Pane[ method or _ button. button and press the SET button. ® _ (Cut Beginning): Deletes frames from the ® When _ is selected, beginning of the movie.
- Page 66 Playback - The Basics more can be edited in l_frame units.
-
Page 67: Erasing Images Individually
Erasing Aim images in the [_=](Play)] menu, select /_ Erasing images individually @(Erase all) and press the SET button. S_ide the mode switch to _. ® A confirmation screen 2 Select the image appears= you wish to erase 2 Setect [OK] using the _, or ,_ using the <, or ,_ button and press the SET button. -
Page 68: Selecting Menus And Settings
SJide the mode switch to sins. 2 Press the FUNC. button. 3 Use the _ or _ button to select a FUNC. menu item. 4 Use the _ or _ button to Items in ( ) show default settings. select the setting contents. - Page 69 Shooting - Advanced Functions Selecting Settings with MENU Button Press the MENU button. 2 Use the 4, or ÷ button to switch between menus, ® You can also switch between menus using the zoom lever. ,3 Use the 4_ or @ button to select a menu item. 4 Use the 4, or ¢_ button to select the setting Shooting Mode...
- Page 70 Shooting - Advanced Functions selection according to the Shooting mode ® Some menu items may not be available (p. 159). o You can apply a desired image and sound to _ and _ in the My Camera menu. details, see the Registering My Camera Settings (p.
-
Page 71: Menu Settings And Default Settings
Shooting- Advanced Function Jiiii Menu Settings and Default Settings Reco Menu Reference Menu item Setting Content Page Sets the camera so that it will either automatically select the AF frame and AiAF shoot, or shoot with the AF frame fixed in the center. •... - Page 72 Shooting - Advanced Functions PJay Menu Menu item Setting Content Reference Page Protect Protects images from accidental erasure_ Rotate Rotates images 90 or 270 degrees clockwise in the display. Sound Memo Adds sound memos to images. Erase Erases all images from a memory card (excluding protected images).
- Page 73 Shooting - Advanced Functions Menu Item Reference Setting Content Page Adjusts the volume of the start-up sound, operation sound, self-timer sound, shutter sound, or playback sound after pressing the SET button. The volume cannot be adjusted if [Mute] is set to [On]. °...
- Page 74 Shooting - Advanced Functions Menu item Auto Power Down Sets whether or not the camera automa%ally powers down after a specified period of time elapses without camera operation. On*/Off Power Saving Display Specifies a period of time before the LCD monitor turns off when camera operation is performed,...
- Page 75 Shooting - Advanced Functions Reference Menu item Setting Content Page Sets the language used in the menus and messages on the LCD monitor, English* (English) PyccK_ (Russian) Deutsch (German) Portugu6s (Portuguese) Frangais (French) EAArlviKd (Greek) Nederlands (Dutch) Polski (Polish) Dansk (Danish) Ce@tina (Czech) Suomi (Finnish) Magyar...
- Page 76 Shooting - Advanced Functions Customizing the Camera (My Camera Settings} it t,}i i[,,,,,,,,,,,,,,,,,,,,,,,,,,,, i,,,,,, }i[:,,,,,,,,,,,,,,,,,, [ You can seJect the theme, start-up image and sound, operation sound, seJf4imer sound and shutter sound used on this camera. These are called My Camera settings.
-
Page 77: Resetting The Settings To Default
Shooting - Advanced Functions Resetting €he Settings te Default You can reset the menu and button operation settings to default. Turn the power on. ® Can be performed from Shooting or Playback mode. ,2 Press the MENU button for _onger than 5 seconds. -
Page 78: Using The Mode Dial (Creative Zone)
Shooting - Advanced Functions ® If the LCD monitor is on, Using the Merle Dial (Creative the shutter speed and Zene) aperture value appear automatically. You can freely select camera settings such ® The camera operates in as the shutter speed and aperture value to... -
Page 79: P Programae
Shooting - Advanced Functions P Progra_ Setting Shutter Speed Use the program AE mode to have the camera When you set the shutter speed in the shutter- automatically set the shutter speed and aperture speed priority AE mode, the camera automatically value to match the brightness of the scene. - Page 80 Shooting - Advanced Functions Shutter Speed Display The numbers in the tame below indicate factor at slow shutter speeds, ff the camera e Please note that camera shake becomes shutter speed in seconds. 1/160 indicates shake warning appears on the LCD 160 second.
-
Page 81: Av Setting The Aperture
Shooting - Advanced Functions Av Setting the Ape_ure factor with Barger aperture values that sBow The aperture adjusts the amount of light that o Please note that camera shake becomes down shutter speeds. If _(camera shake passes through the lens. When you set the warning) - Page 82 Shooting - Advanced Functions M Manually Setting the Shutter Speed and Ape_ure changed in this mode. o See page 159 for settings that can be o Ufyou wish to change the exposure, select You can manually set the shutter speed the shutter speed or the aperture with the...
-
Page 83: Switching Between Focusing Modes
Shooting - Advanced Functions $witch_ng between Focusing 2 Select [On] or [Off] Medes using _, or ¢_ button. ® After selecting an option, you can immediately You can change the autofocus flame (AF shoot the image frame) selection method. The AF frame wilt pressing the shutter button. -
Page 84: Switching Between Metering Modes
Shooting - Advanced Functions "1 Select $witch_ng between Metering Modes _*(Evaluative) the FUNC. menu. ® See Selecting Menus Settings (p. 66). Appropriate for standard shooting * The current setting conditions, [ncludhg backlk displayed. scenes. The camera divides images into severah zones for Select a metering light metering, it evaluates... -
Page 85: Adjusting The Exposure
Shooting - Advanced Functions Adjusting Exposure ® You can check the results of the compensation by viewing the image on the LCD monitor when it is on. ® You can shoot the image right after selecting Adjust the exposure compensation setting settings by pressing the shutter button. -
Page 86: Adjusting The Tone (White Balance)
Shooting - Advanced Functions Adjusting Tone {White For recording under daylight fluorescent, or daylight m IHu°rescentH fluorescent-type 3-wavelength fluorescent lighting For recording with the optimal When the white balance is set to match the white balance data memorized tight source, the camera reproduces coJors in the camera from a white- more accurately. - Page 87 Shooting - Advanced Functions 3 Press the FUNC. button. Select D*(Auto} in the FUNC. menu. ® See Selecting Menus and Settings (p_ 66)_ the photo effect is set to _ (Sepia) or _(B/ The white balance cannot be adjusted when W)(p.88).
- Page 88 Shooting - Advanced Functions o In _ mode, white balance data cannot read. Use a different shooting mode to read baBance when shooting in the following ou are recommended to set the white the white balance data beforehand. conditions. o The custom white balance setting is not...
-
Page 89: Changing The Iso Speed
Shooting - Advanced Functions Changing Speed By raising the ISO speed, you can shoot bright images even in poor lighting conditions. This function is convenient when you want to prevent camera shake, shoot without the flash or shoot with a faster shutter speed in dark conditions. -
Page 90: Changing The Photo Effect
Shooting - Advanced Functions ,2 Select the photo effect using the Changing Photo Effect 4, or ¢, button. ® if the LCD monitor is on, you can check You can shoot with different saturation and photo effect by viewing the image on the LCD monitor. -
Page 91: Adjusting The Flash Output
Shooting - Advanced Functions Adjusting Flash Output In N mode, the flash output can be controlled in three steps when shooting. Select _(F[ash Output} in the FUNC. menu. :> ® See Selecting Menus < Settings (p. 66). © ,2 Adjust the flash output using the _' or @ button. -
Page 92: Shooting Hard-To-Focus Subjects
Shooting - Advanced Functions Sheeting HardoteoFecus Subjects Shooting with Focus Lock Aim the AF frame at an object at a The autofocus may not work welt on the similar distance to the subject you following types of subjects. wish to shoot. ®... - Page 93 Shooting - Advanced Functions Shooting in Manua! Focus Merle ® The focus will stay looked even if the shutter button and the MF button are released. The focus can be manually set. ® Pressing the MF button again cancels the AF lock setting.
-
Page 94: Setting The Auto Rotate Function
Shooting - Advanced Functions ,2 Focus using the _, or ¢, button Setting Aute Retate Funetien and shoot the image. This camera is equipped with an Intelligent ® Adjust the focus using _, or @ button until Orientation sensor that detects the the image appears focused... - Page 95 Shooting - Advanced Functions <: the Untelligent Orientation sensor judges hen the camera is held vertically to shoot, upper end to be "up" and the lower end to be © "down". Utthen regulates the optimaB white baBance and exposure for vertical photography.
-
Page 96: Rotating Images In The Display
Rotating i_ages in the Display ® The display will return to the Play menu, Pressing the MENU button again returns to the You can rotate an image by 90 ° or 270 ° playback screen. clockwise in the LCD monitor. (Original) 90 °... -
Page 97: Attaching Sound Memos To Image
Playback - Advanced Functions 1 3 Select [_](Record) using the _ or Attaching 8eund Memes €_ button and press the SET image button in Playback mode (including s+ngle image ® Recording starts and the elapsed recording playback and index playback), you can attach time and remaining recording time is displayed. -
Page 98: Auto Play
Playback- Advanced Functions Auto Piny Use this feature to automatically play back aH of the images in the memory card (Auto Play). The LCD monitor displays each image for approximately 3 seconds. in the [[](Ptay)] menu, select _(Auto Play) and press the SET button. -
Page 99: Protecting Images
Playback - Advanced Functions ® To release the protection, press the SET button again. images. ® You can make the selection of images easier o The display interval may vary for some ® Movies play for the length of time that they by toggling between single image playback were recorded. -
Page 100: About Printing
(memory card) to a photo developing service. *_ As this camera complies with the industry standard PictBndge, you can print images using Canon Compact Photo printers (SELPHY CP series), Card Photo printers, Bubble Jet Printers (PIXMA sedes/SELPHY DS series), in addition to non-Canon PictBridge compliant printers. - Page 101 (DPOF Image Transmission Settings Print settings (DPOF Transfer Order) (p. 104) Direct Print Compatible Printers (Canon) .-e For details, see the Direct Print User Photo Guide. __ Direct Print Compatible Printing .-e Also, refer to your printer's manual. Compact Card Photo...
-
Page 102: Dpof Print Settings
Various Functions DPOF Print Settings In the [_(Play)] menu, select You can select images on a memory card for printing and specify the number of print _(Print Order] and press the SET copies in advance using the camera. This is button. - Page 103 Various Functions ® Select an image using index playback (p. 60) Number of Copies the _. or ¢' button and ® Select an image using the @, @, _', or @ specify the number of button and press the SET button to select or copies (up to 99) to be deselect it.
- Page 104 Various Functions ,2 Select [Mark alt] using the ,_, @, ÷ newest by the shooting date. o Images are printed in order from oldest to or €_ button and o A maximum of 998 images can be set. press the SET o When [Pdnt Type] is set to [Both], the number of copies...
- Page 105 Various Functions Select [Set up] Setting Print Style using the _, @, _, Set the print style after selecting the image to prinL or €, button and The following print settings can be selected. press the SET Prints one image per Standard button.
-
Page 106: Imagetransmission Settings(Dpoftransferorder)
Various Functions Press the MENU button, image Transmissien Settings ® Returns to the Print Order menu. Pressing the (DPOF Transfer Order) MENU button again returns to the Play menu. Press it again to go back to the Playback You can use the camera to specify settings screen. - Page 107 Various Functions ® You can switch to index playback (9 image display) by pressing the zoom lever toward _n the [_-q(P_ay}] menu, select and select images using the same procedures. L_-_(Transfer Order] and press the 4 Press the MENU button. SET button.
-
Page 108: Downloading Images To A Computer
Various Functions 3 Select [OK] using Dewameading images to a the _, or ¢, button and press the SET The following methods can be used to button. download images recorded by the camera ® The display returns to the a computer. Some methods are not... -
Page 109: Computer System Requirements
With this method, you download images using Windows 2000/Windows XP: 256 MB or more computer commands without installing any Interface software. e Canon Utilities See Connecting the Camera to a ZoomBrowser 250 MB or more Computer (p. 107) (software installation... - Page 110 You are recommended to use new AA size batteries, fully charged AA size NiMH Interface batteries (sold separately) or AC Adapter o Canon Utilities Kit ACK800 (soBd separately) to power the Free Hard UmageBrowser: 200 MB or more camera when...
- Page 111 Various Functions Install the driver and the software DIGITAL Terminal applications bundled on the Canon 1. Open the terminal cover Digital Camera Solution Disk (first with your finger nail. time only). 2. Hold the USB connector with ® Please see the Software...
- Page 112 Windows -->Proceed to step 5, Macintosh -->Refer to the Software Starter Guide and download images, ® The following window appears, 5' Select [Canon CameraWindow] the event dialog that appears on the computer and dick [OK] (first time on_y)+ i:i,ii;_ }...
- Page 113 Various Functions Transfers and saves to the computer computer only the images with IDPOF Trans. amages: tJmages DPOF Transfer Order settings -->See the Software Starter Guide, (p= !04)= Using the Camera to Downtoad images (Direct Transfers and saves single iSelect & Transfer Function): images to the computer as you IUsing the software...
- Page 114 Various Functions ® The _ button will blink blue while downloading is in progress. ,2 Use the _ or '_ 4 Press the MENU button. button to select ® The display will return to the Direct Transfer or _ menu. press the _%_ button.
- Page 115 Refer to your card adapter's or card reader's Canon Digital Camera Solution Disk. This is useful manual for information regarding the for downloading images to a computer in which the connection between the computer and card software is not installed.
-
Page 116: Viewing Images On A Tv Set
Various Functions Viewing i_ages en a TV Set 3 P_ug the other ends of the AV cable to the VIDEO iN and You can use a video=compatibletelevision as AUDIO kN jacks on the TV. a monitor to shoot or play back images when it is connected to the camera with the Yellow Plug to the VUDEO UNJack... - Page 117 Various Functions Resetting the FHe Namber when the camera is connected to a TV The images you shoot are automatically O image will appear on the LCD monitor monitor. assigned file numbers. You can select how o The video output signaB can be switched the file number is assigned.
- Page 118 Various Functions FoBder FiJe Capacity Each folder usually contains up to 100 images. However, since images shot in continuous shooting and Stitch Assist mode About FHe and FoBder Numbers are always saved into the same folder, Hmages are assigned file number from 0001 to folder may contain...
-
Page 119: Customizing The Camera (My Camera Settings)
Various Functions Select the [_(My Custemizing Camera Camera)] menu Camera Settiags) pressing the €, My Camera allows you to customize the button twice and select a menu start=up image and start=up, operation, setf= item using the _- or '_ button. timer and shutter sounds. -
Page 120: Registering My Camera Settings
Various Functions Registering My Camera Settings Registering Memery Card |mages and Seunds Images recorded onto the memory card and newly recorded sounds can be added to the Slide the mode switch to DE]. camera as My Camera settings. You can also ®... - Page 121 Various Functions 5' Press the DISP. button. 7' Select _(Register Sound) using the 4- or ¢, button and press the ® An image appears. SET button. ® Select _ (Exit) to return to the My Camera menu without registering, 6 Select the image ®...
- Page 122 Various Functions Data that be Registered • Recording Time Camera Settings 11.025 kHz 8.000 kHz My Camera settings should conform to the below Start-up 1.0 sec. or less 1.3 sec. or less Sound data types. However, memory card images shot with this camera can be registered as My Camera Operation 0.3 sec.
- Page 123 Replace both batteries at the same Change the batteries time with new AA-size alkaline batteries (p. 15) or fully recharged Canon NiMH batteries. No image No images recorded on memory card. You attempted to play back an image...
- Page 124 List of Messages You attempted to play back a RAW image. You attempted to play back an image that was recorded in a spedal data type Unidentified Image (proprietary data type used by the camera of another manufacturer, etc.) or a movie recorded by another camera.
- Page 125 ®Use anAC Adapter Kit A CK800 (sold separately). Batteries are not t he right type. ®Use only u nused AA-size alkaline batteries Canon AA-size NiMH b atteries. (For information about alkaline batteries, Proper Battery Handling (p. ! 6). ) Poor contact between camera and ®...
- Page 126 Memory Cards (p. 19).) ® If reformatting does not work, the memory card logic circuits may be damaged. Contact the nearest Canon Customer Help Desk. The SD card (sold separately) ® Slide the write protect tab of the SD card write-protected, upward.
- Page 127 Batteries consumed Batteries are not the right type. ® Use only unused AA-size alkaline batteries or quickly Canon AA-size NiMH batteries. (For information about alkaline batteries, see Proper Battery Handling (p. ! 6). ) Battery capacity drops due to low ®...
- Page 128 Troubleshooting Sounds come from The camera's vertical and horizontal ® The mechanism for detecting the camera's the camera interior orientation has changed, orientation is functioning. This is not a malfunction. Image is blurred or ;amera moved ® Hold the camera steady while pressing the out of focus shutter button, Autofocus function hampered by...
- Page 129 Troubleshooting 1 Subject in recorded Insufficient light for shooting. ® Set the flash on. image is too dark Subject is dark in comparison to the ® Set the exposure compensation to a positive background. (+) value or use the spot metering function. Subject is too far for flash to reach.
- Page 130 Troubleshooting White d ots or white Light from the flash has reflected ®This i saphenomenon that o ccurs with digital cameras and does n ot c onstitute asterisks appear on dust particles orinsects inthe air, malfunction. the image This o ccurs more f requently inthe following conditions:...
-
Page 131: Using The Power Kits (Sold Separately)
Using the Power Kits {$oJd $eparately)_ ............_-A_ Battery and Charger Kit CBK4-200, this USing Rechargeab|e Batteries camera requires two batteries. t_ t ..................................................{Battery Charger CBK4o200) This kit includes a battery charger and four rechargeable AA-size NiMH (nickel metal hydride) batteries. - Page 132 Appendix...
- Page 133 Connect the power cord to the o Battery/Charger Kit CBK100 can also be compact power adapter, and then used. Use Canon AA size batteries plug the other end into the power 1AH with the charger included in the CBK 100 kit.
-
Page 134: Using The Lenses (Sold Separately)
Appendix Open the termina_ cover, Usin 9 the Lenses (Sold SeparateJy) connect the compact power The camera supports use of the separately adapter's DC p_ug into the sold Wide Converter WC=DC52, Tele= camera's DC IN terminal. converter TC=DC52A and Close=up Lens 250D (52 mm). - Page 135 Appendix Close-lL,!p Lens 250D ram) This lens makes it easy to take macro shots= With the camera set to Macro mode, you can use this option to shoot subjects that are 4 to 17 cm (1 =6 to 6=7 in=) away from the front of the lens at the wide angle end, and !4 to !7 cm (5=5 to 6=7 in=) at the telephoto end= It is not possibb to attach a lens hood or filter...
- Page 136 Appendix 3 When the _ mark on the camera Conversion Lens Adapter LAoDC52F ............. and the _i/mark on the ring are This separately sold adapter is required for aligned, lift off the ring. attaching the wide converter, tele-converter close-up lens (52 mm thread diameter). Attaching a Lens Be sure that the camera is turned...
- Page 137 Appendix ® To remove the conversion lens adapter, turn the adapter in the opposite direction with holding down the ring release button. 5' Set the lens on the adapter, and attach it securely by turning it in the indicated direction.
-
Page 138: Usingan Externally Mounted Flash(Soldseparately)
Appendix Using an Externally _leunted Flash ($eld Separately} High Power Ftash HF-DCI This is an attachable supplementary flash. Photographic subjects that are too distant for the built-in flash to illuminate may be captured using the High-Power Flash. Affix the High-Power Flash to the camera using the bracket as shown below. -
Page 139: Replacing The Date Battery
Append Ji:ii Replacing the #ate Batterj If the Date/Time menu appears when the camera power is turned on, the date battery charge is low and the date and time settings have been lost. Please purchase a lithium coin battery (CR1220) and replace it as follows. - Page 140 Appendix ,2 Open the terminal cover and use 4 Insert a new battery with the (-} your finger nail to pull out the side facing up. battery holder. 5' Replace the battery holder back and close the terminal cover. 6 When the Date/Time menu appears, set the date and time (p.
- Page 141 Never use synthetic cleansers on the camera body or lens. Ufdirt remains, contact the closest Canon Customer Support Help Desk as listed on the separate Canon Customer Support leaflet.
- Page 142 All data is based on Canon's standard testing methods. Subject to change without notice. PewerShet A52G/PewerShet A510 Camera Effective Pixels PowerShot A520: Approx. 4.0 million PowerShot A510: Approx. 3.2 million PowerShot A520: ll2.5-inch CCD (Total number of pixels: Approx. 4.2 million) Image Sensor PowerShot A510: !t2.5-inch...
- Page 143 Specifications 1 15 - 1t2000 sec. Shutter Speeds ® The shutter speed varies according to the shooting modes. ® Slow shutter speeds of ! .3 sec. or slower operate with noise reduction. Metering System Evaluative, Center-weighted average or Spot (Center) Program AE, Shutter-priority AE, Aperture-priority AE, Manual exposure...
- Page 144 Magnified Playback Modes (approx. 10x (max.) in LCD monitor, advance or reverse through magnified images possible), Auto play, Sound memos (up to 60 sec.) or Movie. Canon Direct Print and Bubble Jet Direct compatible, and PictBridge Direct Print compliant...
- Page 145 Specifications 1 21 languages available for menus and messages (English, German, French, Dutch, Danish, Finnish, Italian, Norwegian, Swedish, Spanish, Simplified Display Languages Chinese, Russian, Portuguese, Greek, Polish, Czech, Hungarian, Turkish, Traditional Chinese, Korean and Japanese) The start-up image, start-up sound, operation sound, self-timer sound and My Camera Settings shutter sound can be customized using the following methods:...
-
Page 146: Battery Performance
Specifications Test Conditions 8atte_ Pe_ermaace Shooting: Normal temperature (23°C ±2°C/73°F ±3.6°F), normal relative humidity (50% ±20%), alternating wide angle end and Number of Shots telephoto end shots at 30 second intervals with the flash fired once every Monitor Playback two shots and the camera power turned Monitor Time off after every tenth shot. -
Page 147: Memory Cards And Estimated Capacities (Recordable Images)
Specificat Jiiii! Me_ery Cards and Estimated Capacities _Recerdabie i_ages) Memory card included with the camera PowerShot A520 PowerShot A510 MMC- SDC- SDC- MMC- SDC= SDC= 128M 512MSH 128M 512MSH L (Large) L (Large) 2272 x 1704 pixels 2048 x 1536 pixels 1041 M1 (Medium (Medium... - Page 148 Specifications _mage Data Size ® Some memory cards are not sold in some Estimatee) regions. ® The maximum movie clip length is _: 30 sec., PowerShot A520: _: 3 min. or _: 3 min.. The times shown are 2002 KB 1116 KB 556 KB 2272 x 1704 pixe_s the maximum continuous recording times.
- Page 149 Specifications Bat:1:ery Charger CB-4AH/CB-4AH_: NiMH Batte_ NS°2AH Supplied with the separately sold NiMH Battery Supplied with the separately sold Battery NB4-200 set and the Battery and Charger Kit Charger Kit CBK4-20O= CBK4-20O. 100 - 240 V AC (50t60 Hz), Rated Input Rechargeable nickel metal...
- Page 150 Specifications SD memery Card Compact Power Adapter CA-PS800 Supplied with the separately sold AC Adapter Kit Interface conforming to SD ACK800. interface memory card standards. 100 - 240 V AC (50/60 Hz), 32.0 x 24.0 x 2.1 mm Rated Input 16 VA (100 V) - 26 VA (240 V) Dimensions .3 x 0.9 x 0.08 in.)
- Page 151 Specifications Close-up Lens 250D 52 _ {Seld Wide Converter WCoDC52 {Sold Separately} Separately) 250 mm Approx. 0.7x (35 mm film Focal Length Magnification equivahent at wide angle end: 4 - 17 cm (1.6 - 6.7 in.) (W) Focusing Range approx. 24.5 mm) 14 - 17 cm (5.5 - 6.7 in.) (T) (from...
- Page 152 Specifications Teleoeonverter TC°DC52A (Sold Conversien Lens Adapter LA-DC52F Separately} (Seld Separately} Approx. 1.75x (35mm film Thread Diameter 52 mm standard filter thread FocaJ Length equivahent at telephoto end: Diameter: 55.6 mm (2.2 in.) approx= 245 mm) Dimensions ILength: 39.1 mm (1.5 in.) Focusing Range Approx.
- Page 153 This s ection offers p hotography tips. ® Advanced Technique for the Macro Mode (p. 44) ® TipforUsing t he Self-timer (p. 4 5) Macro mode can make unique images when Normally, the camera shakes alittle when y ou used with the zoom function. For example, press the shutter button.
- Page 154 Photo Tips and Information Underexposure ® ISO Speed (p° 87) The whole recorded image The ISO speed is the numeric representation is dark, which makes white the camera's sensitivity to light. The higher the elements of the image ISO speed, the higher the sensitivity. A high ISO appear gray.
- Page 155 Continuous Shooting .......... Creative Zone ............ AC Adapter Kit ..........AF Frame ............Aperture Value ........... Date/Time ............Apertu re-priority AE ..........Default Settings .......... 69 - 74 Auto Mode ............DiGiTAL Terminal ........12, 109 Auto Play ............Digital Zoom ............A/V Out Terminal ..........
- Page 156 INDEX Flash ..............Close-Up Lens ........... Conversion Lens Adapter ......Focal Length ......132, 133, 149, 150 Tele-converter ........... Focus Wide Converter .......... ! 33 Lock ............. Manual ............Format ..............Macro Mode ............Magnifying images ..........Maintenance ............ Histogram ............
- Page 157 INDEX Messages ..........12! - !22 Playback Metering Auto Play ............. index Playback ..........Center-Weighted Averaging ......Evaluative ............ Jumping ............Magnifying images ........Spot .............. Movies ............Microphone ............Rotating ............Mode Dial ............. 38, 76 Single image Playback ........
- Page 158 INDEX Resetting the Settings to Default ......75 Start-up Resolution ............image ............Sound ............Ring Release Button .......... Stitch Assist Mode ..........Rotate ..............Strap ..............Self-timer ............Telephoto ............Sound ............Transfer Order Shooting ............33, 66 Selecting images ........
- Page 159 INDEX...
- Page 160 If such changes modifications should be made, you could be required to stop operation of the equipmenL Canon U.S.A. inc. One Canon Plaza, Lake Success, NY 11042, U.S.A. Tel No. (516) 328-5600 Canadian Radio interference Regulations This Class B digital apparatus...
- Page 161 J;ii! Functions Avaimabie in Each Shoot_ng Mode The following chart shows the functions and settings avaitaMe in each Shooting mode. Rafer_ Pages _arge V_edium 1 V_edium 2 Small Resoluo _ion iiiiiii!i_!i!_i!_i!_i!_i!_i!_i! _ostcard Print _ov_e ..Superfine Compreso =ine _ion _orma, _,uto Flash Red-eye...
- Page 162 Refer- Function scNt_I_ %m p ense Pages Single Shot Continuous Shooting Drive Self-timer ¢i_ Mode '10 sec,) Self-timer '2 sec,) Custom AF Frame se(ection(2) !!!!!!!!ii!iiii!i:!i:!i:!ii!i!iiii!!!!!!!!ii!iiii!i:!i:!ii!i!ili)i !!!!!!!!!i_!___i!i_!i_!i_!ii!i!i!!!!!!!!!i_!___i!i_!i_!ii!i!i_i)!!!!!!!!!i_!___i!i AF Lock Marius( Focus Macro Mode DigitalZoom Sxpo_._oComponsat_oo o iii_!_i_:!_i_!ii_i!iiiii_i_iiii_iiiiiiii_!_!i iiiiii!_ii_!ii!ii!!_!_!i!_!ii! Evaluative Metering Center-Weighted System _,veraging ..
- Page 163 Refer- Function _&, _ scNt_I_ ence Pages _soSpeed -_) -_) -_) -_) -_) -_) -_) -_) -_) _IoN ..... A_toRotate The default for the settings changed by the menu and button operations can be restored all at once except for [Date/Time], [Lan- guage] and [Video...
- Page 164 > CaHOH CDI-E175-010 XXXXXX © 2004 CANON INC. PRINTED IN JAPAN...