Monarch 9403 Operator's Handbook Manual
Table top thermal printer
Hide thumbs
Also See for 9403:
- Reference manual (290 pages) ,
- Reference manual (287 pages) ,
- Operator's handbook manual (90 pages)

Related Manuals for Monarch 9403


Summary of Contents for Monarch 9403
- Page 1 Monarch 9403 Printer TC9403OH Rev. B 4/99 ©1997 Monarch Marking Systems, Inc. All rights reserved.
- Page 2 Each product and program carries a respective written warranty, the only warranty on which the customer can rely. Monarch reserves the right to make changes in the product, the programs, and their availability at any time and without notice. Although Monarch has made every effort to provide complete and accurate information in this manual, Monarch shall not be liable for any omissions or inaccuracies.
-
Page 5: Table Of Contents
Ordering Programmer’s Manuals ........1-2 About Monarch® Quick-set Utilities ........1-2 Unpacking the Printer . - Page 6 SETTING SUPPLY OPTIONS ..........4-1 Ribbon .
- Page 7 Entering Symbols........8-11 Using Bar Code 128.
- Page 8 CHARACTER SETS ........... . B-1 Character Sets .
-
Page 9: Getting Started
G E T T I N G S TA R T E D ® The Monarch 9403 printer prints text, graphics, and bar codes on thermal transfer (ribbon) or thermal direct supplies. The 9403 printer prints labels continuously (in one strip). -
Page 10: Audience
A b o u t M o n a r c h ® Q u i c k - s e t U t i l i t i e s ® The Monarch quick-set utilities are available on our Web site and are free to download. -
Page 11: Connecting The Power Cable
C o n n e c t i n g t h e P o w e r C a b l e To connect the power cable: CAUTION The power switch must be off while you connect any cables to the printer. Power Switch Scanner... -
Page 12: Establishing Communications
E s t a b l i s h i n g C o m m u n i c a t i o n s Before the printer can accept print jobs from the host, you must connect the communication cable to the printer and to the host. set the communication values on the printer to match those at the host. -
Page 13: About This Manual
A b o u t T h i s M a n u a l This manual explains how to load supplies and ribbons. set up and begin using the printer. select menu options. enter data. print supplies online or offline. perform general maintenance procedures. -
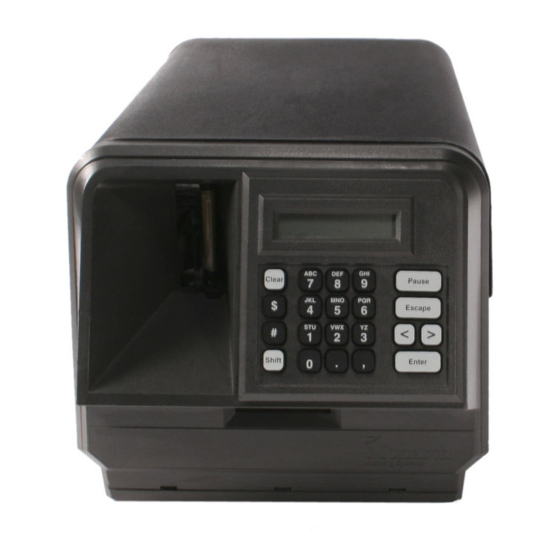
Page 14: Using The Keypad
U s i n g t h e K e y p a d You can control printer operation and enter data offline using the keypad. The printer has 21 keys allowing offline data entry. This keypad includes 7 function keys, 10 numeric keys, and 4 symbol keys. C o n t r o l K e y s Interrupts printing. -
Page 15: Startup
Displays the next menu item. Displays the previous menu item. Selects the displayed menu item. Use the alphanumeric keys to enter batch data. To switch between characters and numbers, press S t a r t u p When you turn the printer on, the printer displays a copyright message. -
Page 16: Selecting A Function
S e l e c t i n g a F u n c t i o n The Main Menu has several functions (operating modes). These functions are shown in the chart below. MAIN MENU CANCEL PRINT BATCH REPEAT SETUP DIAG. -
Page 17: Exiting An Option
E x i t i n g a n O p t i o n To exit an option, press once. You will exit to the next higher menu. When you press , you lose any entries you have made since the last time you pressed S e t t i n g U p t h e P r i n t e r Before you use the 9403 printer, you will need to set up your... - Page 18 8. If you do not have a verifier or scanner, check the bar code visually. A bar code that is in spec will have complete bars and clear spaces. Small alphanumeric characters will look complete. A bar code that is in spec may not look as good as one that is too dark, but it will have the highest scan rate.
-
Page 19: Loading Supplies
L O A D I N G S U P P L I E S This chapter explains how to load supplies for continuous printing. The 9403 printer prints tags or labels in one strip. The 9403 printer uses a standard 3-inch (76.2mm) core supply. Loading Supplies 2-1... -
Page 20: Supply Loading Diagram
S u p p l y L o a d i n g D i a g r a m The illustration below shows the correct routing for supplies and ribbon. Supply Roll Guide the ribbon around the ribbon guide rollers when loading. -
Page 21: Loading Supply
L o a d i n g S u p p l y 1. Remove the cover. 2. Turn the printhead lever counterclockwise to open the printhead. Printhead Lever Supply Guide 3. Remove the old supply roll. Change the ribbon when loading new supplies, if necessary (see Chapter 3, "Loading Ribbon"). -
Page 22: Printing A Test Label
7. Place the roll of supplies on the supply platter so the black marks pass the sensor. 8. Feed the supply through the supply sensor and slightly past the printhead. Printhead Supply Guide Supply Sensor Supply Roll 9. Slide the supply guide down the supply guide roller until it just touches the edge of the supply strip. - Page 23 2. Press . You will see MAIN MENU Print Mode 3. Press until you see MAIN MENU Diagnostics 4. Press . You will see ENTER PASSWORD: _______ The printer has a password of 5. Press three times. 6. Press If you enter the password incorrectly, the printer returns to the Main Menu.
- Page 24 8. Press twice. Then press . You will see Print Quantity [1/999]: +1 9. Press , and a test label prints. If the printer is not printing correctly, contact Technical Support. 2-6 Loading Supplies...
-
Page 25: Loading Ribbon
L O A D I N G R I B B O N This chapter explains how to load a ribbon roll. There are two types of supplies: Thermal Direct specially treated thermal supplies that do not use a ribbon for printing. Thermal Transfer standard supplies that require a ribbon for printing. -
Page 26: Loading A Ribbon Roll
L o a d i n g a R i b b o n R o l l 1. Remove the cover. 2. Turn the printhead lever counterclockwise to open the printhead. Printhead Lever 3. Rewind the supplies back onto the roll. If the printer has a used ribbon, follow steps 4-6. - Page 27 4. Remove the old ribbon by pulling the wire clips as shown. Ribbon Reel Wire Clip Take-up Reel 5. Remove the ribbon cores from the wire clips and discard the old cores. 6. Place the wire clips back on the take-up reel and ribbon reel. 7.
- Page 28 8. Place the full ribbon core on the ribbon reel as shown. The ribbon reel feeds the ribbon in a clockwise direction. The take-up reel winds the ribbon in a counterclockwise direction. 9. Guide the ribbon down between the printhead and the front of the printer and around the rollers as shown.
- Page 29 12. Manually turn the take-up reel as shown until the ribbon is tight. Make sure the ribbon is not wrinkled or bunched. Take-up Reel 13. Slide the supply through the printhead and slightly past the printhead, as described in Chapter 2, "Loading Supplies." 14.
- Page 30 3-6 Loading Ribbon...
-
Page 31: Setting Supply Options
S E T T I N G S U P P L Y O P T I O N S This chapter explains how to set the ribbon, separators, print position, supply position, margin position, and supply type. MAIN MENU CANCEL PRINT BATCH... -
Page 32: Ribbon
R i b b o n You have to tell the printer if your supplies require a ribbon. To change the setting, from the Main Menu select Setup, then Supply. Then, follow these steps: 1. Press until you see SUPPLY Ribbon 2. -
Page 33: Batch Separators
B a t c h S e p a r a t o r s A batch separator is an extra tag printed between batches that has a pinstripe pattern to make it easy to find. Batch Separator To change the setting, from the Main Menu select Setup, then Supply. -
Page 34: Print Position
This function adjusts where data prints vertically on the supply. Adjust the print if it is too close to the top or bottom of the supply, or overtypes the pre-printed area (see the "MONARCH" sample). One dot is 0.0049 inch. -
Page 35: Supply Position
3. Use the arrow keys to change the print position. Pressing increases the value (moves the image up); decreases it (moves the image down). Press the arrow key once to change one number at a time. 4. Press when the number you need appears. Press twice to exit to the Main Menu. -
Page 36: Margin Position
3. Use the arrow keys to change the supply position. Pressing increases the value (feeds more supply); decreases it (feeds less supply). Press the arrow key once to change one number at a time. 4. Press when the number you need appears. Press twice to exit to the Main Menu. - Page 37 To change the setting, from the Main Menu select Setup, then Supply. Then, follow these steps: 1. Press until you see SUPPLY Margin Pos 2. Press . You will see the current setting, for example: Enter margin pos [-99/99]: +0 3.
-
Page 38: Supply Type
S u p p l y Ty p e You can print on black mark or die cut supplies, but you have to tell the printer which supplies you are using. To change the setting, from the Main Menu select Setup, then Supply. -
Page 39: Communication Values
C O M M U N I C AT I O N V A L U E S This chapter tells you how to set the User Communication (User Comm) values. These values provide the link for normal online printing. MAIN MENU CANCEL PRINT... -
Page 40: Baud Rate
B a u d R a t e To change the setting, from the Main Menu select Setup, Port Settings, then User Comm. Then, follow these steps: 1. Press to set the baud rate. You will see the current setting, for example: BAUD RATE 2400 2. -
Page 41: Stopbits
S t o p B i t s To change the setting, from the Main Menu select Setup, Port Settings, then User Comm. Then, follow these steps: 1. Press until you see USER COMM Stopbits 2. Press . You will see the current setting, for example: STOPBITS 3. -
Page 42: Flow Control
F l o w C o n t r o l To change the setting, from the Main Menu select Setup, Port Settings, then User Comm. Then, follow these steps: 1. Press until you see USER COMM Flow Control 2. Press . -
Page 43: Setting Contrast
S E T T I N G C O N T R A S T This chapter explains how to set the contrast, which controls the darkness of the printing on your supply. MAIN MENU CANCEL PRINT BATCH REPEAT SETUP DIAG. - Page 44 Correct contrast setting is important because it affects how well your bar codes scan and how long your printhead lasts. You can use a verifier to check bar codes for contrast. 1. From the Main Menu, press until you see MAIN MENU Setup 2.
-
Page 45: Setting Defaults
S E T T I N G D E F A U LT S This chapter explains how to select the monetary sign, secondary sign, decimal places, slashed zero, power-up mode, and prompt set. MAIN MENU CANCEL PRINT BATCH REPEAT SETUP DIAG. - Page 46 The monetary formatting options are listed in the table below. Option Choices Default Monetary sign None/USA/UK/Japan/ Germany/France/Spain/ Italy/Sweden/Finland/ Austria/India/Russia/ Korea/Thailand/China/ Euro-Dollar Secondary Sign No/Yes Decimal Places 0/1/2/3 Slashed Zero No/Yes Power-up Mode Online/Offline Online Prompt Set English/French/German/ English Spanish The monetary sign, secondary sign, and decimal places options are used in conjunction with option 42.
- Page 47 M o n e t a r y S i g n The monetary signs available for 15 countries are shown in the table below: You can also select None if you do not want a monetary sign to print in price fields. Country Currency Description...
-
Page 48: Monetary Sign
To change the setting, from the Main Menu select Setup, then Defaults. Then, follow these steps: 1. Press . You will see the current setting, for example: MONETARY SIGN 2. Press until you see the country’s monetary sign you want. 3. -
Page 49: Decimal Places
3. Press until you see the option you want. Then press . Press twice to exit to the Main Menu. D e c i m a l P l a c e s You can set the printer for 0, 1, 2, or 3 places after the decimal in a price field. -
Page 50: Slashed Zero
To change the setting, from the Main Menu select Setup, then Defaults. Then, follow these steps: 1. Press until you see DEFAULTS Slashed Zero 2. Press . You will see the current setting, for example: SLASHED ZERO 3. Select the option you want. Then press . -
Page 51: Prompt Set
3. Press until you see the option you want. Then press . Press twice to exit to the Main Menu. P r o m p t S e t Prompt set determines which language displays on the printer’s menu. You can select English, French, German, or Spanish. To change the setting, from the Main Menu select Setup, then Defaults. - Page 52 7-8 Setting Defaults...
-
Page 53: Printing
P R I N T I N G This chapter explains how to print, interrupt, restart, cancel, and repeat a batch. You can send format, batch, and graphic data to the printer from a host. When the printer receives the data, batches begin printing automatically. -
Page 54: Interrupting A Batch
Your printer is ready to receive and print batches when you see PRINT MODE Ready Printing begins as soon as you download the format and batch data from the host. If there are offline batches in the print queue, the offline batches print after the downloaded batches have printed. -
Page 55: Restarting A Batch
You can press to resume printing or press display the Pause Menu options. The following chart shows the Pause Menu options. PAUSE MENU CANCEL CANCEL PRINT RESTART SETUP DIAG. BATCH MODE BATCH R e s t a r t i n g a B a t c h You can reprint a paused batch from the beginning (using the original quantity). -
Page 56: Canceling A Paused Batch
C a n c e l i n g a P a u s e d B a t c h You can cancel a paused batch, delete a format, graphic, or font in memory, or all the batches waiting to print. If password protection has been enabled for formats, graphics, fonts, or flash, you must enter a password before they can be deleted. - Page 57 2. To cancel only the paused batch, press until you see PAUSE MENU Cancel Batch Then press . The batch is deleted and the printer prints any remaining batches. 3. To cancel all the batches (including the paused batch), press until you see PAUSE MENU Cancel All...
- Page 58 If you select "Yes" and password protection in enabled, you will see: Enter Password _ _ _ _ _ _ _ Press to delete all formats. You will Cancel Graphic? Press then press . If password protection is enabled, you must enter the password ( ) before all grahics are deleted.
-
Page 59: Repeating A Batch
To reload the three standard formats and/or service-installed formats: turn the printer off, wait five seconds, and then turn on the printer. You will see: PRINT MODE Ready R e p e a t i n g a B a t c h Before you start printing a new batch, you can reprint the last batch. -
Page 60: Offline Printing
O f f l i n e P r i n t i n g This section explains how to prepare your printer for offline printing and enter data. Offline printing means entering batch data from the keypad and printing batches. There are three standard formats included with your printer. -
Page 61: Entering Letters
Here is an example of how to enter $23.00. 1. Press the $ key. The symbol $ appears. 2. Press the 2 key. The number 2 appears. 3. Press the 3 key. The number 3 appears. 4. Press the . key (below the 2 key). The symbol . appears. 5. - Page 62 Here is an example of how to enter the word Shirt. Not all fonts support lower-case letters. See Appendix B, "Character Sets," for the character set information. 1. Press to switch to character mode. 2. Press the 1 key once. The letter S appears in upper case. 3.
-
Page 63: Entering Symbols
E n t e r i n g S y m b o l s You can use character codes to enter symbols. See Appendix B for a list of symbols and their corresponding character codes. To enter a character code 1. - Page 64 Some fields specifically require numeric or alphabetic data. If you try to enter numeric data for an alpha field, or alphabetic data for a numeric field, the printer does not accept the data. Enter the correct data and press To change data to back up, type the new data over the old data and then press , or...
-
Page 65: Types Of Data Entry
Ty p e s o f D a t a E n t r y Following are samples of the prompts you may see when entering data. E n t e r i n g G e n e r a l D a t a When you see a prompt similar to the one below, you can enter a character for each blank. -
Page 66: Entering A Batch
E n t e r i n g " 2 - F o r " P r i c e D a t a You can use any price field in a "2-for" pricing scheme. When entering data for a price field offline (at the printer), use the # key to separate the 2 and the price data in the "2-for"... - Page 67 4. Press until you see the type of format you want, then press . You will see the last format that was used, for example Select Format: FMT-1 5. Press until you see the name of the format you want, then press 6.
-
Page 68: Using The Standard Formats
10. Press . You will see PRINT MODE nnnn of nnnn The first nnnn counts tags or labels as they print; the second nnnn tells you how many tags or labels are in the batch. When all the batches have printed, you will see PRINT MODE Ready U s i n g t h e S t a n d a r d F o r m a t s... - Page 69 To use the standard formats: 1. From the Main Menu, press until you see MAIN MENU Batch Entry 2. Press . Press until you see the format you want to use. The standard formats are Fmt - 1 Fmt - 2 Fmt - 3 3.
- Page 70 8-18 Printing...
-
Page 71: Cleaning
C L E A N I N G This chapter covers cleaning the printhead and platen roller. CAUTION Do not use sharp objects to clean the printer. This may damage the printer and void your warranty. Cleaning 9-1... -
Page 72: Cleaning The Printhead And Platen Roller
C l e a n i n g t h e P r i n t h e a d a n d P l a t e n R o l l e r The rate and frequency at which you print determines how often you must clean the printer. - Page 73 5. Wind the supplies back onto the supply roll. 6. Remove the ribbon, if one is loaded. See Chapter 2, "Loading a Ribbon." 7. Moisten a cotton swab with isopropyl alcohol. 8. Rub the swab across the printhead and remove any build-up. Printhead Platen Roller...
- Page 74 9-4 Cleaning...
-
Page 75: Diagnostics
D I A G N O S T I C S This chapter explains how to perform simple diagnostic functions such as checking the software version and sensor mark quality, and printing a pattern or test label. This information will be needed if you have to contact Technical Support. -
Page 76: Checking The Software Version
C h e c k i n g t h e S o f t w a r e V e r s i o n 1. From the Main Menu, press until you see MAIN MENU Diagnostics 2. Press . -
Page 77: Printing A Test Pattern
P r i n t i n g a Te s t P a t t e r n 1. From the Diagnostics Menu, press until you see DIAGNOSTICS User Diag. 2. Press . You will see USER DIAG Supply Quantity 3. -
Page 78: Printing A Test Label
P r i n t i n g a Te s t L a b e l See "Printing a Test Label" in Chapter 3 for more information. If you need to call Technical Support, print a test label. 1. From the Diagnostic Menu, press until you see DIAGNOSTICS User Diag... -
Page 79: Checking Sensor Mark Quality
The test label displays printer model number software version number number of inches printed to date user COM port settings a test pattern. This information will help Technical Support diagnose the problem. Refer to the Packet Reference Manual for more information about the test label. -
Page 80: Using Password Protection
If you have printed labels since turning the printer on, you will see Min Max OK 0290 036 188 The Len listing is the length of the supply in dots. The other information describes the sense mark reading on the supply. Press to see other readings. -
Page 81: Service Diagnostics
S e r v i c e D i a g n o s t i c s The Service Diagnostics menu can only be accessed by a Monarch Representative, because it requires a separate password. If you have any problems, print a test label and call Technical Support. - Page 82 10-8 Diagnostics...
-
Page 83: Troubleshooting
T R O U B L E S H O O T I N G This chapter provides explanations of the error messages you may receive while using the 9403 printer. There are two types of error messages: Data Errors Communication Errors Some errors numbered 400-438 and 500-574 are internal software errors. -
Page 84: Start Up And Printing
S t a r t U p a n d P r i n t i n g Problem Action Error message Turn power off. Wait five seconds, then turn appears during power on again. If an error message appears startup. -
Page 85: Data Errors
Problem Action Voids in printing. Clean the printhead. Wrong supply type. Change supply. Ribbon loaded incorrectly. Reload ribbon. Call Technical Support for printer adjustment. "Check ribbon" Load a new ribbon. message appears. Reload ribbon. "Out of Paper" Replace the supply roll. Make sure supplies message appears. - Page 86 Field length exceeds 2710. Row field position is greater than the maximum stock dimension. Column field position is greater than the maximum stock dimension. Font selector is invalid. Character rotation must be 0 (0 degree), 1 (90 degree), 2 (180 degree), or 3 (270 degree). Field rotation must be 0 (0 degree), 1 (90 degree), 2 (180 degree), or 3 (270 degree).
- Page 87 Line thickness must be 0 to 99 dots. Line direction must be 0, 90, 180, or 270. The line segment or box end row is defined outside of printable area. The line segment or box end column is defined outside of printable area.
- Page 88 Source field must be 0 to 999. Copy type must be 1 (Copy after rules) or 2 (Copy before rules). Increment/Decrement selection must be I (increment) or D (decrement). Incrementing start position must be 0 to 2710. Incrementing end position must be 0 to 2710. The incrementing amount must be 0 to 999.
- Page 89 Option is not valid for the field. Bar code Intercharacter gap must be 0 to 99 in printer dots. Power up mode must be 0 (online) or 1 (offline). Language selection must be 0 (English). Batch separator code must be 0 (off) or 1 (on) in the system setup packet.
- Page 90 Word length selection must be 0 (7 bits) or 1 (8 bits). Stop bits selection must be 0 (1 bit) or 1 (2 bits). Parity selection must be 0 (none), 1 (odd), or 2 (even). Flow control selection must be 0 (none), 1 (DTR/DSR), 2 (CTS/RTS), or 3 (XON/XOFF).
-
Page 91: Communication Failures
Check digit algorithm must be D (sum of digits) or P (sum of products). Duplicating direction must be 0 or 1. Amount of row adjustment must be 0 to 999. Duplicate count must be 0 to 999. Bitmap line encoding must be H (Hex) or R (Run length). Font selector must be 1 to 9999. - Page 92 The valid options for printer Port Settings are shown below. The default values are shown in bold. Baud rate 1200, 2400, 4800, 9600, 19200 Word length 7 or 8 Stop bits 1 or 2 Parity Odd, Even, None Flow control None, Xon/Xoff, DTR, CTS Reset Yes or No...
-
Page 93: Data Formatting Errors
D a t a F o r m a t t i n g E r r o r s Errors 571 to 618 are data formatting errors. This type of error happens when a field prints incorrectly. Your System Administrator can correct the format, batch, or graphic packet and send the print job again. -
Page 94: Machine Faults
A bad dot falls on a bar code and the dot cannot be shifted. Call Customer Service to order a new printhead or printhead kit. Magnification must be 1 to 7. M a c h i n e F a u l t s Errors 700 to 765 happen when there is a problem with the printer. - Page 95 Out of ribbon or ribbon jam. Check or load ribbon. Remove any slack in the ribbon by turning the take-up reel clockwise. Printhead is open. Close the printhead. Out of supplies. Load supplies. Reload supplies (supply length mismatch). The supply was not seen or the on-demand sensor is not working correctly.
-
Page 96: Hard Printer Failures
The print motor is not ready. Call Technical Support. The format specified by the application was not found. Reload your application and format and try again. The printer is busy. Wait until the printer is idle (not receiving data or no batch waiting to print) before you send any packets. - Page 97 Printer Description/Action Display POWER DOWN Interrupt test failed. Intr Test Failure POWER DOWN Not enough RAM for system. All formats, Low System RAM batches, graphics, and SETUP data are lost. POWER DOWN Illegal interrupt occurred. Illegal Intr# POWER DOWN Non-maskable interrupt occurred. NMI Received POWER DOWN Not enough RAM for application.
- Page 98 11 - 16 Troubleshooting...
-
Page 99: Specifications
S P E C I F I C AT I O N S P r i n t e r Length: 16.5 inches (419 mm) Width: 10 inches (254 mm) Height: 9 inches (229 mm) Weight: 15.5 lb. (7.05 kg) Shipping Weight: 22 lb. -
Page 100: Supplies
Operating Limits: For Thermal Transfer: 40°F to 95°F (4°C to 35°C) For Thermal Direct: 40°F to 110°F (4°C to 43°C) Ribbon widths: 1.26 inches (32.0 mm) 1.57 inches (39.88 mm) 2.10 inches (53.34 mm) Ribbon length: 308.4 feet (94 meters) Ribbon storage: 41°F to 95°F (5°C to 35°C). -
Page 101: Character Sets
C H A R A C T E R S E T S C h a r a c t e r S e t s The following lists show the characters available in the fonts for the 9403 printer. Standard Font Reduced Font These samples were printed using the Internal Symbol Set. - Page 102 Bold Font OCRA-like Font CG Triumvirate Bold Font CG Triumvirate Font B-2 Character Sets...
-
Page 103: Uppercase Letters
U p p e r c a s e L e t t e r s Use Character Mode to enter the offline code. Char. Online Offline Code Char. Online Offline Code Code Code Character Sets B-3... -
Page 104: Lowercase Letters
L o w e r c a s e L e t t e r s These letters are available only in Standard and Reduced fonts. Char. Online Offline Code Char. Online Offline Code Code Code 7777 55555 77777 555555 777777 6666 8888... -
Page 105: Currency Symbols
C u r r e n c y S y m b o l s You can enter international currency symbols offline by setting the default monetary sign to the desired country setting and pressing the $ key. The $ enters the monetary sign that is currently active. /$ enters the secondary sign (for example, ¢... -
Page 106: Punctuation And Symbols
P u n c t u a t i o n a n d S y m b o l s Char. Online Offline Char. Online Offline Code Code Code Code , , , < < > > .., , , , . - Page 107 Char. Online Offline Char. Online Offline Code Code Code Code Ç ~128 Ö ~153 ü ~129 Ü ~154 é ~130 ¢ ~155 155* â ~131 £ ~156 156* ä ~132 ¥ ~157 157* à ~133 ~158 158* å ~134 ~159 ç...
-
Page 108: Code 128 Function Codes
Char. Online Offline Char. Online Offline Code Code Code Code û ~150 ~199 ù ~151 Ø ~210 ÿ ~152 ø ~214 ~171 ~224 ~172 ß ~225 C o d e 1 2 8 F u n c t i o n C o d e s Code Function Code ~201... - Page 109 G L O S S A R Y batch Group of tags or labels that contain the same data. batch separator Extra tag between batches that shows where one batch ends and the next one begins. character Letter, number, or symbol. continuous Feed mode in which the printer prints all the tags in a batch without stopping.
- Page 110 queue Batches waiting to print (also includes the batch that is printing). supplies Tags or labels used for printing.