Table of Contents
Advertisement
Contents
Preface and general safety instructions
Part 1: class 69 operating instructions
1.
Product description . . . . . . . . . . . . . . . . . . . . . . . . . . . .
2.
Designated use . . . . . . . . . . . . . . . . . . . . . . . . . . . . . .
3.
3.1
Optional extras . . . . . . . . . . . . . . . . . . . . . . . . . . . . . . .
4.
Technical data . . . . . . . . . . . . . . . . . . . . . . . . . . . . . . .
5.
5.1
5.2
Threading the needle thread . . . . . . . . . . . . . . . . . . . . . . . .
5.2.1
Subclass 69-373 . . . . . . . . . . . . . . . . . . . . . . . . . . . . . .
5.2.2
Subclass 69-FA-373 . . . . . . . . . . . . . . . . . . . . . . . . . . . .
5.3
5.4
Opening the needle-thread tensioner . . . . . . . . . . . . . . . . . . .
5.5
Winding on the looper thread . . . . . . . . . . . . . . . . . . . . . . .
5.6
Fitting the looper-thread bobbin . . . . . . . . . . . . . . . . . . . . . .
5.7
Adjusting the looper-thread tension . . . . . . . . . . . . . . . . . . . .
5.8
Fitting and changing the needle . . . . . . . . . . . . . . . . . . . . . .
5.9
Lifting the sewing feet . . . . . . . . . . . . . . . . . . . . . . . . . . .
5.10
Locking the sewing feet in the raised position . . . . . . . . . . . . . .
5.11
5.12
Adjusting the sewing-foot pressure . . . . . . . . . . . . . . . . . . . .
5.13
Adjusting the stitch length . . . . . . . . . . . . . . . . . . . . . . . . . 20
5.14
. . . . . . . . . . . . . . . . . . . . . . . . . . . . . . . . . . .
5.15
Ribbon binder (class 69-373) . . . . . . . . . . . . . . . . . . . . . . .
6.
6.1
General . . . . . . . . . . . . . . . . . . . . . . . . . . . . . . . . . . .
6.2
Efka VD554KV/6F82AV sewing drive . . . . . . . . . . . . . . . . . . .
6.2.1
6.2.2
Altering parameter values . . . . . . . . . . . . . . . . . . . . . . . . .
6.3
Quick QD554/A51K01 sewing drive . . . . . . . . . . . . . . . . . . . .
6.3.1
Operating-panel buttons . . . . . . . . . . . . . . . . . . . . . . . . . .
6.3.2
Altering parameter values . . . . . . . . . . . . . . . . . . . . . . . . .
. . . . . . . . . . . . . . . . . . .
. . . . . . . . . . . . . . . . . . . . .
. . . . . . . . . . . . . . . . . . . . . . . . . . . .
Home
Page:
5
5
6
6
9
10
10
11
13
13
15
15
17
17
19
19
19
20
21
22
23
24
24
26
28
28
30
Advertisement
Table of Contents

Related Manuals for Duerkopp Adler 69


Summary of Contents for Duerkopp Adler 69
-
Page 1: Table Of Contents
Preface and general safety instructions Part 1: class 69 operating instructions Product description ...... - Page 2 Contents Page: Sewing ........Maintenance ....... Cleaning and testing .
-
Page 3: Product Description
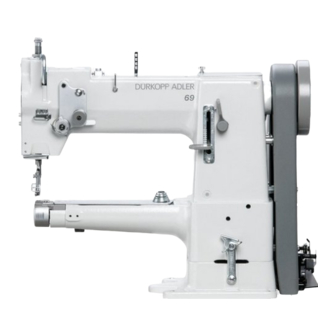
Product description The DÜRKOPP ADLER 69 is an all-purpose special sewing machine. Double-lockstitch free-arm machine with underfeed, needle feed and alternating foot overfeed. Depending on the subclass, a single-needle machine with or without thread clipper beneath the needle plate. Slim free arm with large passage space and large sewing-foot stroke. Maximum passage space beneath raised sewing feet: 12 mm (with sewing-foot-raising knee lever). -
Page 4: Subclasses
Subclasses single-needle double-lockstitch free-arm sewing machine with class 69-373: underfeed, needle feed and alternating-foot overfeed class 69-FA-373: as class 69-373, but with electromagnetic thread clipper beneath the needle plate Optional extras order no. optional extra FLP 14-2 electro-pneumatic sewing-foot-raising mechanism pedal-operated. - Page 5 Needle system: Needle thickness (depending on E no.) [Nm] 110 - 130 Maximum sewing-thread thicknesses: - cotton [NeB] 30/3 - synthetic endless [Nm] 40/3 - covering yarn [Nm] 30/3 stitch rate: - maximum [min 2000 - ex works [min 1700 maximum stitch length: - forwards [mm]...
-
Page 7: Operation
Operation Folding down left-hand half of table plate (MG 56-2 frame only) When the special sewing machine is fitted with the MG 56-2 frame the table plate consists of two parts. The left-hand half 3 can be folded down to permit the unobstructed manipulation of large items round the free arm. -
Page 8: Threading The Needle Thread
Threading the needle thread 5.2.1 Subclass 69-373 Caution: danger of injury Turn off the main switch The needle thread may only be threaded with the sewing machine turned off. -
Page 9: Subclass 69-Fa-373
5.2.2 Subclass 69-FA-373 Caution: danger of injury Turn off the main switch The needle thread may only be threaded with the sewing machine turned off. - Page 10 Fig. a: correct thread loop in the centre of the material Fig. b: needle-thread tension too weak or looper-thread tension too strong Fig. c: needle-thread tension too strong or looper-thread tension too weak...
-
Page 11: Adjusting The Needle-Thread Tension
Adjusting the needle-thread tension Pre-tensioning mechanism (subclass 69-FA-373) On subclass 69-FA-373 the needle thread needs to be under residual tension for the thread cutter to function reliably when the main tensioner 2 is open. This residual tension is created by the pre-tensioning mechanism 1. The pre-tensioning mechanism 1 also determines the length of the needle-thread end after the thread has been clipped. -
Page 13: Winding On The Looper Thread
Winding on the looper thread Caution: danger of injury Turn off the main switch. The looper thread may be threaded for winding on only when the sewing machine is switched off. – When winding on for sewing with no underlay material: arrest the sewing feet in the up position (see chapter 5.10). -
Page 15: Adjusting The Looper-Thread Tension
Adjusting looper-thread tension Caution: danger of injury Turn off the main switch. The looper-thread tension may only be adjusted with the sewing machine switched off. Adjusting brake spring 1 (class 69-FA-373) On subclass 69-FA-373 the brake spring 1 prevents the bobbin from "running on" when the machine halts or if the looper thread is wound off spasmodically. -
Page 17: Lifting The Sewing Feet
Lifting the sewing feet The sewing feet are raised mechanically or electro-pneumatically, depending on which mechanism is fitted to the machine. Mechanical sewing-foot-raising mechanism (with the machine at a halt) – Operate knee lever 1. The sewing feet remain raised as long as pressure is maintained on knee lever 1 []. Electro-pneumatic sewing-foot-raising mechanism (when FLP 14-2 or RAP 14-1 are fitted) –... -
Page 18: Adjusting The Sewing-Foot Pressure
5.12 Adjusting the sewing-foot pressure Sewing-foot pressure is adjusted with screw 1. – to increase sewing-foot pressure: turn screw 1 clockwise – to reduce sewing-foot pressure: turn screw 1 anticlockwise. 5.13 Adjusting the stitch length Caution: danger of injury Turn off the main switch. The stitch length may only be adjusted with the sewing machine switched off. -
Page 19: Welting
5.14 Welting The rapid-adjustment welt-guide mechanism with three positions is used to sew welts between two layers of material. It can be swivelled in or out at the beginning and end of the seam. Four welt guides 2 are available (sewing attachments E20 - E23) with welt grooves from 3 to 6 mm. -
Page 20: Ribbon Binder (Class 69-373)
5.15 Ribbon binder (class 69-373) Two ribbon-binder sets are available for subclass 69-373: sewing attachment E4: for narrow bindings sewing attachment E5: for broad bindings Caution: danger of injury Turn off the main switch. The ribbon band may only be inserted with the sewing machine switched off. -
Page 21: Control Unit And Operating Panel
Control unit and operating panel CAUTION: These operating instructions describe only the functions of the buttons and the change of parameters by the operator. For a detailed description of the control unit please see the current operating instructions of the motor manufacturer (supplied). -
Page 22: Efka Vd554Kv/6F82Av Sewing Drive
Efka VD554KV/6F82AV sewing drive 6.2.1 Control-box buttons In programming mode button function programming mode (start / end) confirm parameter-value change switch to next parameter increase displayed parameter value switch to next parameter increase code no. reduce displayed parameter value switch to last parameter reduce code no. - Page 23 Button functions in sewing mode button function after the thread has been clipped LED display select programming mode starting bar tack - single * - double * - OFF ending bar tack - single * - double * - OFF Automatic sewing-foot-raising mechanism - when stopping in mid-seam - at the end of the seam...
-
Page 24: Altering Parameter Values
6.2.2 Altering parameter values Parameter values are altered at operator level with the five buttons "P", "E", "+", "-" and ">>" on the sewing-drive control box. The parameter list on the next page gives all parameters which can be altered at operator level. - Page 25 "Operator-level" parameter list: Parameter function setting max. min. ex works starting bar-tack stitches forwards starting bar-tack stitches backwards ending bar-tack stitches backwards ending bar-tack stitches forwards light-barrier compensation stitches light-barrier filter stitch rate for knitted yard goods number of light-barrier seams seam stitch rate with stitch count assigning ato the "3"...
-
Page 26: Quick Qd554/A51K01 Sewing Drive
Quick QD554/A51K01 sewing drive 6.3.1 Operating-panel buttons button function in programming mode select programming mode leave programming mode (in conjunction with "-" button) (in conjunction with "-" button) suppress starting / ending bar tack switch to next parameter number single depression: sew 1 stitch increase displayed value held down: sew at n... - Page 27 button function ornamental bar tack normal bar tack starting double bar tack starting single bar tack starting bar tack on starting bar tack off sewing-foot position up before thread clipping sewing-foot position down before thread clipping ending bar tack double ending bar tack single ending bar tack on ending bar tack off...
-
Page 28: Altering Parameter Values
6.3.2 Altering parameter values A operator level parameter values are changed with the four program buttons ("G", "F", "+", "-") on the right-hand side of the operating panel. The parameter list on the next page gives all parameters which can be altered at operator level. - Page 29 "Operator-level" parameter list: parameter function setting min. max. ex works switch between seam programs (the "P" button executes the switch) MAB: MANUAL - SEAM-A - SEAM-B M+A: MANUAL - SEAM-A M+B: MANUAL - SEAM-B A+B: SEAM-A - SEAM-B starting bar tack - stitch rate forwards starting bar tack - stitch rate backwards ending bar tack - stitch rate backwards ending bar tack - stitch rate forwards...
-
Page 30: Sewing
Sewing This description is based on the following assumptions: – the machine in question is a special sewing machine with thread clipper (subclass 69-FA-373) and the following optional extras: - RAP 14-1 electro-pneumatic bar-tack and sewing-foot-raising mechanism, pedal-operated - HP 11-1 pneumatic rapid stroke-adjustment mechanism, operated by a knee lever –... - Page 31 sewing operation operation / explanation In mid-seam interrupt sewing operation - release pedal (neutral position) the machine stops in the needle-down position the sewing feet are lowered - press the "F" button (ending bar-tack suppression) - move pedal briefly backwards the machine assumes the needle-up position resume sewing operation - move pedal forwards...
-
Page 32: Maintenance
Maintenance Caution: danger of injury Turn off the main switch! Maintenance work may only be carried out on the sewing machine when it is switched off. Maintenance work must be carried out no less frequently than at the intervals given in the tables (see "operating hours"... - Page 33 maintenance work explanation operating to be carried out hours Upper part of machine - Remove lint, pieces of Places in special need of cleaning: thread and other debris. - area under the needle plate - feeder - area around the shuttle - bobbin housing - needle-thread tensioner - thread clipper (class 69-FA-373)
- Page 34 5 6 7 8 10 11...
-
Page 35: Lubrication
Lubrication Caution: danger of injury Oil can cause skin eruptions. Avoid protracted contact with the skin. In the event of contact, thoroughly wash the affected area. CAUTION: The handling and disposal of mineral oils is subject to legal regulation. Deliver used oil to an authorised collection point. Protect your environment. -
Page 36: Optional Extras
Optional extras HP 11-1 pneumatic rapid stroke adjuster The HP 11-1 pneumatic rapid stroke adjuster is only available for special sewing machines with the Quick QD554/A51K01 sewing drive. This optional extra allows a larger sewing-foot stroke to be set in mid-seam (e.g.