Table of Contents
Advertisement
Advertisement
Table of Contents

Related Manuals for AEG B 89092-4


Summary of Contents for AEG B 89092-4
- Page 1 B 89092-4 Built-in oven Instruction booklet...
-
Page 2: Important Safety Information
Ensure that all control knobs are in the OFF position when not in use. • Do not leave cookware containing foodstuffs, e.g. fat or oil in or on the oven in case it is inadvertently switched ON. • When using other electrical appliances, ensure the cable does not come into contact with the hot surfaces of the oven. -
Page 3: Guide To Use The Instructions
The symbol on the product or on its packaging indicates that this product may not be treated as household waste. Instead it shall be handed over to the applicable collection point for the recycling of electrical and electronic equipment. By ensuring this product is disposed of correctly, you will help prevent potential negative consequences for the environment and human health, which could otherwise be caused... -
Page 4: Table Of Contents
Control Panel ... 6 The Oven Safety Devices ... 7 When the oven is first installed ... 7 Before the first use of the oven ... 9 Cooking Functions ... 12 Programming the Oven ... 13 Safety and Energy Saving Functions ... 16 The "Recipe Selection"... -
Page 5: Description Of The Appliance
Description of the appliance Control Panel Air Vents for Cooling Fan Grill Element Oven Light Oven Fan Rating Plate Oven accessories Grill trivet Grill/roasting pan Anti-tip shelf (x 2) Removable handles... -
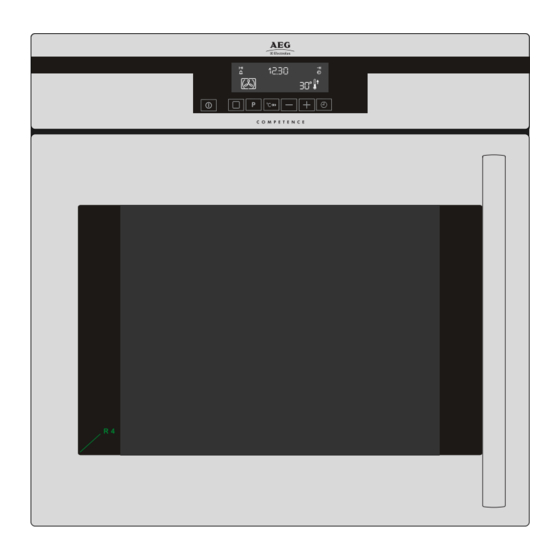
Page 6: Control Panel
Minute Minder Symbol General Features of The Oven Electronic Control The touch controls All the oven functions are controlled by an electronic device. You can select any combination of cooking function, cooking temperature and automatic timing using the touch controls. -
Page 7: The Oven Safety Devices
The cooling fan operates during cooking. Air is expelled through vents between the oven door and the control panel. The cooling fan may run on after the oven is switched off to keep the controls cool. This is quite normal. - Page 8 Then, proceed as described at point 1. To Select the Language You can choose the language to be used in the Oven Electronic Control display. The oven must be OFF when carrying out this operation. 1. Touch the "Cooking Function Control" and the "Recipe Selection Control"...
-
Page 9: Before The First Use Of The Oven
Before the first use of the oven Remove all packaging, both inside and outside the oven, before using it. The oven will work only if the time of day has been set. To switch the oven on and off The oven must be switched on before setting any cooking function or programme. - Page 10 Before cooking for the first time, carefully wash the oven accessories. To select a Cooking Function 1. Switch on the oven by touching the "ON/ OFF" control 2. Touch the "Cooking Functions" control to select the required oven function. Each...
- Page 11 " " goes out and the thermometer symbol means that the current selection has been stored in the Oven Electronic Control memory and that the oven is currently heating > Controls or decrease the time settings while the symbol is flashing near the "Clock"...
-
Page 12: Cooking Functions
Recommended for large quantities. Pre- set temperature: 250°C Bottom – The heat comes from the bottom of the oven only, to allow you to finish your dishes. Pre-set temperature: 250°C Top – The heat comes from the top of the oven only, to allow you to finish your dishes. -
Page 13: Programming The Oven
"0.00". 4. To switch off the acoustic alarm, touch any control. The oven will NOT switch off if in use. The Minute Minder function can also be used when the oven is off. To change the Minute Minder setting Touch the "Time Function"... -
Page 14: To Programme Oven To Switch Off
To programme the Oven to switch off 1. Switch the oven on, place food in the oven, select a cooking function and adjust the cooking temperature, if required. 2. Touch the "Time Function" control symbol flashes near the "Cooking Duration" symbol shows "0.00"... - Page 15 This means that the setting has been stored in the Electronic Control memory and that the countdown started. 5. The oven will switch on and off automatically according to your settings. When cooking is completed, you hear an acoustic alarm while both symbols flash.
-
Page 16: Safety And Energy Saving Functions
Child Safety Function To avoid children switching on the oven, it is possible to lock the oven controls. 1. If the oven is on, switch if off by touching the "ON/OFF" control 2. Press controls time and keep them pressed for about 3 seconds. -
Page 17: Fast Heat Up" Function
If it is necessary to reach the required temperature in a shorter time, the fast heat up function can be used. 1. Switch the oven on by touching the "ON/ OFF" control 2. Set the required cooking function and temperature as described in the previous pages. -
Page 18: Residual Heat Function
All current settings will be displayed until the Cooking Duration time is over. -
Page 19: The "Recipe Selection" Function
"Beep" Mode You can choose to make The Electronic Control beep each time that a control is touched. To enable this function, the oven must be off. 1. Press controls for about 3 seconds. The Electronic Control beeps once (Fig. 22). - Page 20 Electronic Control memory. The thermometer symbol rises slowly indicating the degree to which the oven is currently heated. The upper section of the display will now show the cooking duration at the left hand and the end of cooking time at the right hand (Fig.
-
Page 21: Using The Oven
Do not place cookware directly on the oven base. Attention! - Do not place objects on the oven base and do not cover any part of the oven with aluminium foil while cooking, as this could cause a heat build-up which would affect the baking results and damage the oven enamel. -
Page 22: Hints And Tips
• Baking trays, oven dishes, etc. should not be placed directly against the grid covering the fan at the back of the oven, or placed on the oven base. • Do not use baking trays larger than 30 cm x... - Page 23 B Enamelled cast iron, anodized aluminium, aluminium with non-stick interior and coloured exterior and dark, heavy utensils increase cooking and base browning. To open the oven door, always catch the handle in its central part (Fig. 26). Fig. 26...
-
Page 24: The Conventional Oven
How to Use the Conventional Oven 1. Switch the oven on by touching the "ON/ OFF" control 2. Select the Conventional Oven Function by touching the "Cooking Functions" control until the symbol display. - Page 25 Do not place dishes, tins or baking trays directly on the oven base as it becomes very hot and damage will occur. For faster preheating use the Fast Heat-Up Function.
-
Page 26: The Fan Oven
The Fan Oven The air inside the oven is heated by the element around the fan situated behind the back panel. The fan circulates hot air to maintain an even temperature inside the oven. The advantages of cooking with this function... - Page 27 When the oven is full, you may need to allow a slightly longer cooking time. A shelf may be placed on the floor of the oven.
- Page 28 1500 Tuna fish/Salmon (*) If you need to cook more than one dish at the same time, we recommend you to place them on the levels quoted between brackets. Shelf positions are counted from bottom of the oven. Conventional Fan Cooking...
-
Page 29: Grilling
Ensure that you support the grill pan when removing it from the oven. How to Use the Double Grill 1. Switch the oven on by touching the "ON/OFF control 2. Select the Double Grill function by touching the "Cooking Functions" control the symbol appears in the display. - Page 30 One of the advantages is that larger quantities can be cooked at the same time. 1. Switch the oven on by touching the "ON/OFF" control THERMAL GRILLING PRE-SET TEMPERATURE: 180°C TEMPERATURE SELECTION: 30°C - 250°C...
-
Page 31: Thermal Grilling
2. Select the Thermal Grilling Oven Function by touching the "Cooking Functions" control until the symbol display. 3. If necessary, touch control adjust the temperature setting. 4. Adjust the grid and grill pan runner position to allow for different thicknesses of food and follow the instructions for grilling. -
Page 32: Pizza Oven
To obtain the best results use the lower shelf levels. 1. Switch the oven on by touching the "ON/OFF" control 2. Select the Pizza Oven Function by touching the Cooking Functions Control control until the symbol display. -
Page 33: Defrosting
Defrosting The oven fan operates without heat and circulates the air, at room temperature, inside the oven. This increases the speed of defrosting. However, please note that the temperature of the kitchen will influence the speed of defrosting. This function is particularly suitable for defrosting delicate food which could be damaged by heat, e.g. -
Page 34: Cleaning The Oven
Cleaning materials Before using any cleaning materials on your oven, check that they are suitable and that their use is recommended by the manufacturer. Cleaners that contain bleach should NOT be used as they may dull the surface finishes. Harsh abrasives should also be avoided. -
Page 35: Oven Cavity
The enamelled base of the oven cavity is best cleaned whilst the oven is still warm. Wipe the oven over with a soft cloth soaked in warm soapy water after each use. From time to time it will be necessary to do a more thorough cleaning, using a proprietary oven cleaner. -
Page 36: Care Of Catalytic Liners
220°C. To aid this process it is a good idea to run the oven for an hour or two per week, without food, to ensure continued good performance from the Catalytic liners. - Page 37 Cleaning the oven door The following instructions explain how to disassemble the oven door as it is supplied by the Manufacturer. If your oven door has been reversed, please note that the references to the right or left side have to be switched.
- Page 38 “E” and remove it from its original position also by sliding it upwards. After removing the inner glass, clean the oven door and the glasses. We recommend to clean the oven door using only a wet sponge and dry it after cleaning with a soft cloth.
- Page 39 Never use steel wool, acids or abrasive products as they can damage the oven surface. Clean the oven control panel following the same precautions. The Oven door gasket...
-
Page 40: Troubleshooting
The display shows "12.00". If after all these checks, your oven still does not operate correctly, contact your local AEG-Electrolux Service Force Centre. Please note that it will be necessary to provide proof of purchase for any in-guarantee service calls. -
Page 41: Service And Spare Parts
5. Date of purchase Customer Care For general enquiries concerning your AEG-Electrolux appliance and for further information on AEG-Electrolux products, contact our Customer Care Department by letter or telephone at the address below or visit our website at www.aeg.co.uk Customer Care Department... -
Page 42: Guarantee Conditions
Guarantee Conditions Standard guarantee conditions We, AEG-Electrolux, undertake that if within 12 months of the date of the purchase this AEG-Electrolux appliance or any part thereof is proved to be defective by reason only of faulty workmanship or materials, we... -
Page 43: Installation
Width Depth Dimensions of the oven cavity Height Width Depth Oven capacity Oven thermostat regulation: from 50°C up to 250°C This appliance complies with the following E.E.C. Directives: - 73/23 - 90/683 (Low Voltage Directive); - 89/336 (Electromagnetical Compatibility Directive);... -
Page 44: Electrical Connection
Electrical Connection The oven is designed to be connected to 230 V (50 Hz) electricity supply. The oven has an easily accessible terminal block which is marked as follows: Letter L- Live terminal Letter N Neutral terminal or E Earth terminal... - Page 45 50°C above the ambi- ent temperature. Before the oven is connected, check that the main fuse and the domestic installation can support the load; and that the power supply is properly earthed.
-
Page 46: Building In
Building In The surround or cabinet into which the oven will be built must comply with these specifications: the dimensions must be as shown in the relevant diagrams;... - Page 47 B 89092-4 0,79 kWh 0,78 kWh 53,0 43 min. 41 min. 1130 cm²...
- Page 48 Electrolux plc 2003 From the Electrolux Group. The world’s No.1 choice. The Electrolux Group is the world’s largest producer of powered appliances for kitchen, cleaning and outdoor use. More than 55 million Electrolux Group products (such as refrigerators, cookers, washing machines, vacuum cleaners, chain saws and lawn mowers) are sold each year to a value of approx.