
Related Manuals for AEG COMPETENCE B8924-1


Summary of Contents for AEG COMPETENCE B8924-1
- Page 1 COMPETENCE B8924-1 Fitted Fan/Steam Cooking oven Installation and Operating Instructions...
-
Page 2: Dear Customer
Dear customer, Please read these user information carefully. Pay particular attention to the section “Safety information” on the first few pages. Please retain this user information for later reference. Pass them on to possible new owners of the appliance. The following symbols are used in the text: Safety instructions Warning: Information concerning your personal safety. -
Page 3: Table Of Contents
Contents Operating Instructions ........Safety . - Page 4 Baking ............38 Baking Table .
-
Page 5: Operating Instructions
Operating Instructions 1 Safety Electrical Safety • This appliance must be connected by a specially licensed technician only. • In the event of a fault or damage to the appliance, take out the fuses, or switch off. • For safety reasons, do not clean the appliance with steam jet or high- pressure cleaning equipment. -
Page 6: Disposal
How to avoid damage to the appliance • Do not line the oven with aluminium foil and do not place baking trays, ovenware, etc. on the oven floor, as the heat that builds up will damage the oven enamel. • Fruit juices dripping from the baking tray will leave stains, which you will not be able to remove. -
Page 7: Description Of The Appliance
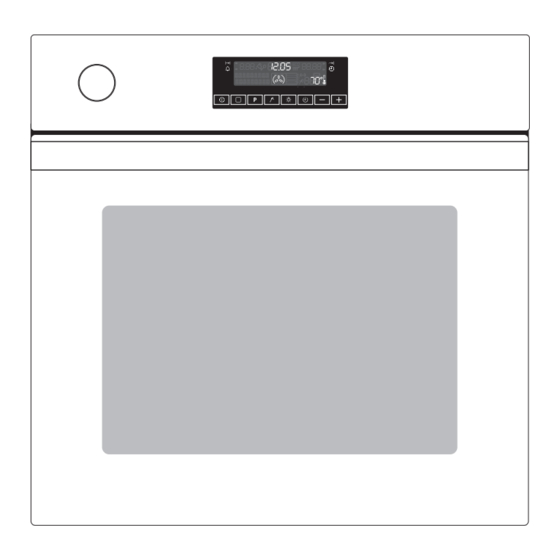
Description of the Appliance General Overview Water Drawer Control Panel Door Han- Full Glass Door... -
Page 8: Control Panel
Control Panel Oven/Time Display Temperature Display Water Drawer Main Power Button Selector Buttons Oven Functions Clock Functions Oven Light Oven Features Top heat and grill elements Oven lighting Shelf positions Meat probe socket Oven lighting Rear wall heating element/Fat filter Side rails, Side rails, removable... -
Page 9: Oven Accessories
Oven accessories Combination shelf For dishes, cake tins, items for roasting and grilling. Baking Tray For cakes and biscuits (not suitable for Vigorous Steam cooking) All-purpose tray For roasting or for collecting meat juices or fat (not suitable for Vigor- ous Steam cooking) Meat probe Used on joints of meat to determine... -
Page 10: Before Using For The First Time
Before Using for the first time Setting the clock The oven only operates when the clock has been set. After electrical connection, or a power failure, the “Set Clock” row flashes. Set the current time by pressing the buttons. 5 Wait for a few seconds. The flashing stops and the clock shows the time you have set. -
Page 11: Setting The Display Language
Setting the display language 1. Switch on the appliance by pressing the main Power button. 2. Press the main Power and the Clock Functions buttons at the same time. 3. Select one of the available languag- es using the buttons. 4. -
Page 12: Set The Display Brightness
Set the display brightness The brightness of the display can be adjusted for better readability on ovens fitted at high positions. 1. Switch on the appliance by pressing the main Power button 2. Press the main Power and the Clock Functions buttons at the same time 3. -
Page 13: Initial Cleaning
Initial Cleaning You should clean the oven thoroughly before using for the first time. Attention: Do not use sharp or abrasive cleaning materials. These could damage the oven surface. For ovens with metal fronts, use normal commercially available clean- ing agents. 1. -
Page 14: Using The Oven
Using the Oven The Electronic Oven Control Temperature Display Display Time Display Oven Functions Cooking Time Display End Time Display Time Functions Time/Countdown Time Functions Selector Buttons Main Power Button Meat Probe Oven Functions Clock Functions Programme Oven Light General Instructions •... -
Page 15: Oven Functions
Oven Functions The oven has the following functions: The functions Pizza Setting, Rotitherm and Conventional (Top/Bottom Heat) have an automatic rapid heating function. This ensures that the selected temperature is reached as quickly as possible. Vigorous Steam Fixed temperature setting: 96°C. For fruit, vegetables, fish, potatoes, rice, pasta and other side dishes. - Page 16 Single Grill Suggested temperature: 230 °C. For grilling flat foods placed in the centre of the grille, for example, steaks, escalopes, fish; or for toasting. The grill heating element is on. Top/Bottom Heat (Conventional) Suggested temperature: 200°C. For baking and frying/roasting on one shelf position. The Top and Bottom Heat heating elements are on.
-
Page 17: Switching The Oven On And Off
Switching the Oven On and Off Setting oven functions 1. Switch on the appliance by pressing the button. 2. Press the Oven Function button as many times as necessary until the desired oven function appears. • The suggested temperature ap- pears on the temperature display. -
Page 18: Changing The Oven Function
Changing the Oven Function Press the Oven Function button as often as necessary, until the de- sired function appears. Switching the Oven Function off To switch off the oven, press the Oven Function button as often as necessary, until no oven function appears. -
Page 19: Inserting The Combination Shelf, Baking Tray And General Purpose Tray
Inserting the combination shelf, baking tray and general purpose tray Inserting the baking tray and general purpose tray: The trays have a little bulge on the left and right edges. These act as an anti-tip device and must always be located towards the rear when in- serting the tray. -
Page 20: Steam Cooking Functions
Steam Cooking Functions Attention: The steam cooking functions must always be set in con- junction with the clock functions Cook Time or End Time (see section Clock Functions Cook Time and End Time). Attention: Only water is to be used as the liquid for the steam cooking function. - Page 21 5. Use the main power switch to stop the signal and switch off the oven. After the oven has cooled down, soak up any remaining water from the steam generator using a sponge and wipe if necessary with a little vin- egar.
-
Page 22: Additional Functions
Additional Functions Programmes For this function, use the recipes supplied in the chapter “Programmed Functions and Recipes”. Selecting programmes 1. Press the Programme button repeatedly until the desired pro- gramme appears. – In the Function Display the sym- bol for the corresponding Oven Function and the recommended oven level appear. -
Page 23: Meat Probe
Meat Probe Ensures that the oven switches itself off as soon as the temperature at the centre of a roast reaches a set temperature. The meat probe is best used together with the Conventional (Top/Bottom heat) and Rotitherm. There are two temperatures to be set: –... - Page 24 • The core temperature is displayed from 30°C. • Should the current core tempera- ture already be being displayed, before the desired core tempera- ture is set, press the meat probe button and carry out the setting process. To set the oven temperature, press the meat probe button twice.
-
Page 25: Clock Functions
Clock Functions Countdown To set a countdown. A signal sounds after the time has elapsed. This function does not affect the functioning of the oven. Cook time To set how long the oven is to be in use. End time To set when the oven is to switch off again. - Page 26 Countdown 1. Press the clock functions button “ ” as often as necessary, till the Countdown arrow flashes. 2. Use the buttons to set the desired length of time (99 min- utes maximum). The time remaining appears after about 5 seconds. The Countdown arrow is lit.
- Page 27 Cook Time 1. Select Oven Function and Tempera- ture. 2. Press the clock functions button “ ” as often as necessary, until the Cook Time arrow flashes. 3. Set the desired cooking time using buttons. The Cook Time arrow is lit. When the set time has elapsed, a signal sounds for 2 minutes.
- Page 28 1. Select an oven function and tem- perature. 2. Press the clock functions button “ ” as often as necessary, until the End arrow appears flashing. 3. Set the desired switch-off time us- ing the buttons. The End arrow is lit. When the set time has elapsed, a signal sounds for 2 minutes.
- Page 29 Combining the Cook Time and End functions The Cook Time and End functions can be used at the same time, to switch the oven on and off at a later time. 1. Select an oven function and tem- perature. 2. Using the Cook Time function, set the time necessary to cook the item concerned.
- Page 30 Adjusting the Clock 1. Press the clock functions button as often as necessary, until the Time Display arrow flashes. 2. Set the current time using the buttons. 3. After about 5 seconds, the arrow stops flashing and the clock shows the set time.
-
Page 31: Other Functions
Other Functions Between 22:00 and 6:00 the brightness of the display is automatically reduced. Switching off the clock display You can save energy by switching off the clock display. 1. Press the main power switch switch off the appliance. 2. Press and hold the meat probe button and the button at the same time until the display goes out... -
Page 32: Child Safety Device
Child Safety Device As soon as the child safety device is engaged, the oven cannot be switched on. Activating the child safety device 1. Switch on the appliance by pressing the main power switch . No Oven Function must be selected. 2. -
Page 33: Oven Safety Cut-Out
Oven Safety Cut-out If not switched off after a certain time, or if the temperature is not modified, the oven switches off automatically. The last temperature set flashes in the temperature display and an au- dible signal sounds. The oven switches off when the oven temperature is: - 120°C after 12.5 hours... -
Page 34: Uses, Tables And Tips
Uses, Tables and Tips Steam Cooking For steam cooking, use either the Vigorous Steam or Interval Steam oven functions. Warning: When cooking with the Vigorous Steam function, do not under any circumstances open the oven door. Attention: Always use water only. Cookware for Steam Cooking •... -
Page 35: Vigorous Steam
Vigorous Steam The Vigorous Steam method of preparation is suitable for all types of food, fresh or frozen. It can be used for cooking, warming, defrosting, poaching or blanching vegetables, meat, fish, pasta, rice, sweet corn, semolina and eggs. A complete menu can be prepared at one time, on the serving dishes, irrespective of quantity or cooking time. -
Page 36: Fan Cooking And Vigorous Steam In Succession
Fan Cooking and Vigorous Steam in succession Fan Cooking and Vigorous Steam can be combined to cook meat, vege- tables and side-dishes in the oven one after the other and then using Vigorous Steam with one another, so that they will be ready to serve at the same time. -
Page 37: Interval Steam
Interval Steam Interval Steam cooking is particularly suitable for roasting large joints of meat and defrosting or re-heating portions of food cooked previous- Interval Steam Cooking Table Cooking on more than one oven level Interval steam (250 ml water) Temperature Time Oven Type of food... -
Page 38: Baking
Baking For baking, use either the Fan Cooking, Pizza setting or Conventional oven functions. When baking, remove the grease filter, as otherwise baking time is prolonged and surfaces are browned unevenly. Baking Tins • For Conventional baking (Top/Bottom heat), use dark metal and non- stick tins. - Page 39 General Instructions • Be careful to count oven levels starting from the bottom. • Insert the baking tray with the bevel at the front! • Always place cakes in tins in the middle of the grill. • With Conventional (top/bottom heat) or Fan-assisted cooking, you can also bake two cakes at the same time in tins placed next to each other on the grill.
-
Page 40: Baking Table
Baking Table Baking on one level Fan Cooking Conventional oven Time for both Tempera- Tempera- Type of baking Oven Oven functions ture ture level level Hours: ºC ºC Mins. Baking in tins Ring cake or 150-170 160-180 0:50-1:10 brioche Madeira cake/ 140-160 150-170 1:10-1:30... - Page 41 Fan Cooking Conventional oven Time for both Tempera- Tempera- Type of baking Oven Oven functions ture ture level level Hours: ºC ºC Mins. Fruit flans made with 150- 170 170-190 0:40-1:20 short pastry Yeast cakes with delicate toppings/fillings 170-190 0:40-1:20 (e.g.
- Page 42 Baking on several shelf positions Fan Cooking Time Type of cake or pastry Hours: Shelf position from bottom Tempera- Mins. ture ºC 2 Levels 3 Levels Cakes and pastries on baking sheets Cream puffs/eclairs 160-180 0:35-0:60 Dry streusel cake 140-160 0:30-0:60 Biscuits Shortcrust biscuits...
-
Page 43: Pizza Setting
Pizza Setting The stated baking times are for guidance only. Pizza Setting Type of baking Temperature Baking time in Oven level in °C minutes Short pastry Covered fruit pie 150-160 45-60 Cheesecake (on tray) 150-160 45-55 Blackcurrant cake, 160-170* to prebake base Blackcurrant cake, 150-160 to finish baking... -
Page 44: Pies And Gratin Table
Frozen foods Pizza setting Temperature in Baking time Type of pastry or cake Shelf position °C in minutes Lay on the grill tray, Follow the manu- insert baking tray be- Follow the man- facturer’s in- low (shelf position in ufacturer’s in- Frozen pizza structions accordance with the... -
Page 45: Frozen Ready Meals Table
Frozen Ready Meals Table Shelf Food to be position from Oven function Temperature Time cooked bottom in accordance in accordance with the mak- Frozen pizza Conventional with the mak- er's instruc- er's instructions tions Chips Rotitherm 200-220 °C 15-25 Mins. (300-600 g) in accordance in accordance... -
Page 46: Roasting
Baking result Possible cause Solution Cake is unevenly Cooking temperature too high Set to a lower temperature browned and cooking time too short and increase cooking time Mixture is spread unevenly Spread mixture evenly on the baking tray Fat filter is still in position Remove fat filter Cooking time too Temperature too low... -
Page 47: Roasting Table
• In general, the Conventional oven function is particularly suitable for very lean meat such as game and fish. For all other types of meat (particularly poultry) we recommend using the Rotitherm oven func- tion. • To prevent meat juices or fat from burning on, we recommend adding a little liquid to the roasting dish. - Page 48 Quantity Conventional Rotitherm Time Oven Oven Tempera- Tempera- Type of Level Level Weight ture ture Hrs. mins. Meat from from ºC ºC Bottom Bottom Veal Roast veal 1 kg 210-220 160-180 1:30-2:00 Knuckles of 1.5-2 kg 210-225 160-180 2:00-2:30 veal Lamb Leg of lamb, 1-1.5 kg...
-
Page 49: Meat Probe Table
Quantity Conventional Rotitherm Time Oven Oven Tempera- Tempera- Type of Level Level Weight ture ture Hrs. mins. Meat from from ºC ºC Bottom Bottom Fish (steamed) Whole fish- 1-1.5 kg 2 / 3 210-220 2 / 3 160-170 0:45-1:15 1) Pre-heat the oven. Information printed in bold indicates the best oven function. -
Page 50: Grill Sizes
Grill Sizes For grilling, use either the Single Grill or Dual Grill oven functions with the 230°C temperature setting. Attention: Always grill with the oven door closed. The empty oven should always be pre-heated for 3 minutes! Ovenware for grilling •... - Page 51 All-pur- Oven Grilling time in Tempe- pose tray shelf minutes Food to be Function rature grilled in°C Oven level side side 1-4 chickenlegs Dual Grill 4-6 chickenlegs Dual Grill Sausages, Single 5-10 up to 6 grill Sausages, Dual Grill 5-10 more than 6 Coiled sausage, Single...
-
Page 52: Drying
Drying For drying, use the Defrost/Dry oven function. Ovenware • Use the oven shelf or baking tray, spread with baking paper. Oven Levels • You can dry food on 2 oven levels at the same time. • Place the shelf or the baking tray in the 1st and 4th levels from the bottom. -
Page 53: Defrosting
Defrosting For defrosting, use the Defrost/Dry oven function with the 30°C tem- perature setting. Cookware for defrosting • Unwrap the food and place it on a plate on the oven shelf. • Do not cover with a plate or bowl, as these can substantially lengthen the defrosting time. -
Page 54: Bio Functions
Bio Functions The low temperatures that can be set with this oven can be used to make yoghurt or to raise yeast dough. Attention: the suggested temperatures have to be changed with all Bio functions! Making Yoghurt For making yoghurt, use the Conventional (Top/Bottom heat) oven function. -
Page 55: Low Temperature Cooking
Low Temperature Cooking With the Low Temperature cooking function, meat becomes beautifully tender and remains particularly succulent. When roasting with low temperatures, up to 20 percent less energy is needed than with normal roasting. Attention: Insert the grease filter when roasting! Ovenware •... -
Page 56: Making Preserves
Making Preserves For making preserves, use the Interval Steam oven function. Preserving Jars • For preserving, use only commercially available preserve jars of the same size. Jars with twist-off or bayonet type lids and metal tins are not suitable. Oven Levels •... -
Page 57: Programmed Functions And Recipes
Programmed Functions and Recipes The appliance has 12 programmed functions and recipes, which can be selected one after the other using the Programme button. Cleaning programme Vegetables Potatoes au gratin White bread Rolls Baked fish fillet Trout Pizza Quiche Lorraine Chicken Saddle of veal Heating food... - Page 58 Recipes 2. Vegetables Ingredients: – 400 g cauliflower, – 200 g carrots, – 200 g kohlrabi, – 200 g yellow and red peppers. Method: Rinse cauliflower and divide into florets. Peel carrots and kohlrabi and cut into bite-sized pieces. Wash peppers and cut into slices. Arrange all ingredients in a stainless steel dish with a colander insert.
- Page 59 3. Potatoes au gratin Ingredients: – 1000 g potatoes, – salt and pepper, 1 teaspoon of each, – 1 clove of garlic, peeled, – 300 g Greyerz or Emmental cheese, grated, – 3 eggs, – 250 ml milk, – 4 tablespoons cream, –...
-
Page 60: White Bread
4. White bread Ingredients: – 1000 g flour, type 405, – 1 cube of fresh yeast or 2 packets of dried yeast, – 600 ml milk, – 15 g salt. Method: Place the flour and the salt in a large bowl. Dissolve the yeast in the milk and add to the flour. - Page 61 5. Rolls (40 g) Ingredients: – 500 g flour, type 405, – 20 g of fresh yeast or 1 packet of dried yeast, – 300 ml water, – 10 g salt. Method: Place the flour and the salt in a large bowl. Dissolve the yeast in the water and add to the flour.
- Page 62 6. Baked fish fillet Ingredients: – 700 g filet of pike-perch or sea trout, cut into cubes, – 100 g Emmental cheese, grated, – 200 ml cream, – 50 g bread crumbs, – salt, pepper, lemon juice, – parsley, chopped, –...
- Page 63 8. Pizza 1 Baking tray Ingredients for the dough: – 300 g flour, type 405, – 180 ml water, – 15 g yeast, – 2 tablespoons olive oil, – 1 teaspoon salt. Method for the dough: Dissolve the yeast in the water and with the other ingredients knead to an elastic dough.
-
Page 64: Quiche Lorraine
9. Quiche Lorraine Ingredients for the pastry: – 250 g flour, type 405, – 125 g butter, – 60 ml water, – 1 teaspoon salt, – a little pepper and nutmeg. Method: Mix together flour, butter and salt, add the water and knead together briefly to form pastry. -
Page 65: Saddle Of Veal
10. Chicken Ingredients: – 1 chicken (1,000 - 1,200 g), – 2 tablespoons oil, – salt, pepper, paprika, curry powder. Method: Wash the chicken and dry it with kitchen paper. Mix the spices with the oil and use the mixture to oil the chicken evenly inside and out. - Page 66 12. Heating food Method: Place the food on a plate. Put it in the oven without a cover. Max. 6 plates (dia. 26 cm). Setting Oven levels Water via water drawer Heating food 1, 3, 5 200 ml...
-
Page 67: Cleaning And Care
Cleaning and Care Warning: For safety reasons cleaning the appliance with a steam jet cleaner or high-pressure water cleaner is not permissible! Exterior of the Appliance • Wipe the front of the appliance with a soft cloth dipped in warm soapy water. -
Page 68: Oven Roof With Catalytic Self-Cleaning Surface
Oven roof with catalytic self-cleaning surface (rough, porous surface) The oven roof has a catalytic self-cleaning surface, from which small food deposits are burnt off at temperatures over 200°C. Please observe the following instructions to ensure the best working of this self-cleaning surface. -
Page 69: Side Rails
Side Rails To clean the sides of the oven, the left and right side rails can be re- moved. Taking out the side rails 1. Loosen the screw. 2. Pull the rails sidewards (1). 3. Lift the rails off the side attach- ments (2). - Page 70 Replace the side rails 1. Set the rails in the rear attachment and press into the griip on the side (1). 2. Insert the screw and tighten (2).
-
Page 71: Steam Generation System
Steam Generation System Attention: Wipe the steam generator dry after each use. Soak up wa- ter with a sponge. Remove any lime residue with water and vinegar. To prevent limescale forming, use decalcified water only, for example, from a water filter. Attention: Chemical de-scaling agents can damage the oven's surface enamel. -
Page 72: Oven Light
Oven Light Danger of electrocution! Before replacing the oven light bulb: • Switch off the oven. • Take the fuses out of the fuse box, or switch off. To protect the oven light bulb and the glass cap, lay a cloth on the bot- tom of the oven. - Page 73 Replacing the oven side light bulb/cleaning the glass cap 1. Take out the side rails. 2. Unscrew the metal frame using a cross-tip screwdriver. 3. Take off the metal frame and seal, and clean. 4. If necessary: replace bulb with a 25 Watt, 230 V, 300 °C heat-resistant oven light bulb.
-
Page 74: Oven Door
Oven Door The door of your appliance may be removed for cleaning. Removing the oven door 1. Open the oven door completely. 2. Completely fold back the clamp- ing levers on both door hinges. 3. Grip the oven door with both hands and close it about 3/4 going past the point of resistance. -
Page 75: What To Do If
What to do if ... Fault Possible cause Remedy The oven does not heat up. The oven has not been Switch the oven on. switched on. The correct time has not Set the correct time. been set. The required settings have Check the settings. -
Page 76: Technical Data
Technical Data Oven Interior Dimensions Height x Width x Depth 31 cm x 41 cm x 41 cm Capacity (usable capacity) 52 l Regulations, Standards, Directives This appliance meets the following standards: • EN 60 335-1 and EN 60 335-2-6 relating to the safety of electrical appliances for household use and similar purposes and •... -
Page 77: Installation Instructions
Installation Instructions Important: Any electrical installation work must be carried out by a qualified electrician/competent person. The oven must be installed according to the instructions supplied. Safety Instructions for the Installer • Protection against access to live parts must be guranteed by the in- stallation. - Page 81 3,5x25...
-
Page 82: Index
Index Accessories ......9 Oven Additional functions ....22 accessories . -
Page 83: Service
Service In the “What to do if …” section a number of malfunctions are listed that you can rectify yourself Look there first if a fault occurs. Is it a technical fault? If so, please contact your customer service centre. (You will find ad- dresses and telephone numbers in the section “Customer Service Cen- tres”.) Always prepare in advance for the discussion. - Page 84 USD 14 billion in more than 150 countries around the world. AEG Hausgeräte GmbH Postfach 1036 D-90327 Nürnberg http://www.aeg.hausgeraete.de © Copyright by AEG 315 6387 03-B-201003-01 Subject to change without notice...