
Related Manuals for Dell Vostro 270


Summary of Contents for Dell Vostro 270
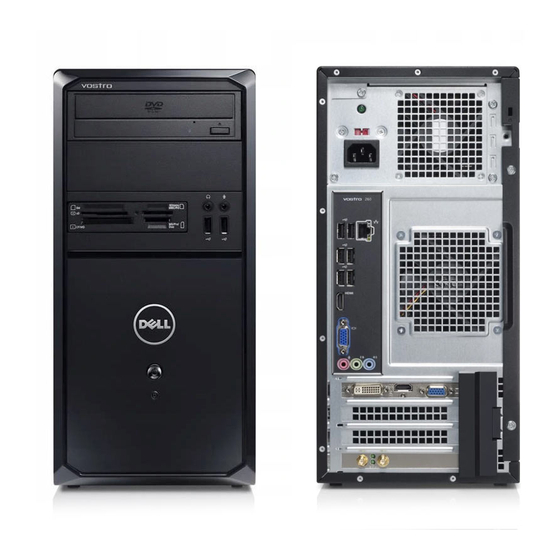
- Page 1 Dell Vostro 270 Owner’s Manual Regulatory Model: D11M Regulatory Type: D11M002...
-
Page 2: Notes, Cautions, And Warnings
Blu-ray Disc Association (BDA) and licensed for use on discs and players. The Bluetooth word mark is a registered ® trademark and owned by the Bluetooth SIG, Inc. and any use of such mark by Dell Inc. is under license. Wi-Fi is a registered ® ®... -
Page 3: Table Of Contents
Contents Notes, Cautions, and Warnings....................2 1 Working on Your Computer.......................5 ........................5 Before Working Inside Your Computer ............................6 Turning Off Your Computer ........................6 After Working Inside Your Computer 2 Removing and Installing Components..................7 ..............................7 Recommended Tools ..............................7 Removing the Cover ..............................8 Installing the Cover ............................8 Removing the Front Bezel... - Page 4 Deleting or Changing an Existing System and/or Setup Password ..........................37 Disabling a System Password 4 Diagnostics..........................39 ................39 Enhanced Pre-Boot System Assessment (ePSA) Diagnostics 5 Troubleshooting.........................41 ..........................41 Diagnostic Power LED Codes ............................42 Diagnostic Beep Codes ............................42 Diagnostic Error Messages ............................46 System Error Messages 6 Technical Specifications......................47 7 Contacting Dell..........................51...
-
Page 5: Working On Your Computer
Damage due to servicing that is not authorized by Dell is not covered by your warranty. Read and follow the safety instructions that came with the product. -
Page 6: Turning Off Your Computer
CAUTION: To connect a network cable, first plug the cable into the network device and then plug it into the computer. Connect any telephone or network cables to your computer. Connect your computer and all attached devices to their electrical outlets. Turn on your computer. If required, verify that the computer works correctly by running the Dell Diagnostics. -
Page 7: Removing And Installing Components
Removing and Installing Components This section provides detailed information on how to remove or install the components from your computer. Recommended Tools The procedures in this document may require the following tools: • Small flat-blade screwdriver • Phillips screwdriver • Small plastic scribe Removing the Cover Before Working Inside Your Computer . -
Page 8: Installing The Cover
Installing the Cover Place the cover on the chassis. Slide the computer cover towards the front of the computer. Replace the screws that secure the cover to the computer. Follow the procedures in After Working Inside Your Computer . Removing the Front Bezel Before Working Inside Your Computer . -
Page 9: Installing The Front Bezel
Installing the Front Bezel Place the hooks on the notches in the computer. Rotate the front bezel towards the computer. Press the front bezel till the tabs snap into place. Replace the cover. After Working Inside Your Computer . Follow the procedures in Removing the Expansion Card Before Working Inside Your Computer . -
Page 10: Installing The Expansion Card
Ease the card up and out of its connector and remove it from the computer. Installing the Expansion Card Place the card into it's socket and press it in till it snaps into place. Secure the expansion card by pushing-in the card-retention latch till it snaps into place. Replace the cover. -
Page 11: Installing The System Fan
Remove the screws that secure the fan to the back of the computer. Remove the fan from the computer. Installing the System Fan Place the fan at it's location on the computer. Replace the screws that secure the fan to the back of the computer. Connect the fan cable to the system board. -
Page 12: Removing The Memory
Removing the Memory Before Working Inside Your Computer . Follow the procedures in Remove the cover. Press down on the memory-retention tabs on each side of the memory module. Lift the memory module out of the connector on the system board. Installing the Memory Press the memory module into it's connector on the system board till it snaps into place. -
Page 13: Installing The Optical Drive
Remove the screws that secure the optical drive to the computer. Slide the optical drive through the front of the computer. Installing the Optical Drive Slide the optical drive through the front of the computer. Replace the screws that secure the optical drive to the computer. Connect the data cable and power cable to the optical drive. -
Page 14: Removing The Hard Drive
Removing the Hard Drive Before Working Inside Your Computer . Follow the procedures in Remove the cover. Disconnect the SATA cable and power cable from the hard drive. Remove the screws that secure the hard drive to the computer. Remove the hard drive from the computer. Remove the screw to release the brackets from the hard drive. -
Page 15: Installing The Hard Drive
Installing the Hard Drive Replace the screws to secure the brackets to the hard drive. Replace the hard drive into the computer. Replace the screws that secure the hard drive to the computer. Connect the SATA cable and power cable to the hard drive. Replace the cover. -
Page 16: Removing The Card Reader
Removing the Card Reader Before Working Inside Your Computer . Follow the procedures in Remove the: a) cover b) front bezel Disconnect the multimedia-card reader cable from the system board. Disengage the cable from the metal clip(s), if present, that secure(s) the cable along the inside of the computer. Remove the screws that secure the multimedia-card reader into the drive cage. -
Page 17: Installing The Card Reader
Installing the Card Reader Slide the multimedia-card reader in through the front of the computer. Replace the screws that secure the multimedia-card reader to the drive cage. Route the cable thorough the metal clip(s), if present, to secure the cable along the inside of the computer. Connect the multimedia-card reader cable to the system board. -
Page 18: Installing The Power Supply Unit (Psu)
Lift the power-supply unit and remove it from the computer. Installing the Power Supply Unit (PSU) Place the power-supply unit at it's location in the computer. Slide the power-supply unit towards the back of the computer till it snaps into place. Replace the screws that secure the power-supply unit to the back of the computer. -
Page 19: Installing The Power Switch
Remove the clip and the tabs holding the power switch/LED assembly from the computer. Installing the Power Switch Push the power switch/LED assembly into the computer till it snaps into place. Connect the power switch and hard drive LED cable to the system board. Replace the cover. - Page 20 Un-thread the cable routing from the metal clips. Remove the screw that secures the I/O panel to the computer. Remove the I/O panel from the computer.
-
Page 21: Installing The I/O Panel
Installing the I/O Panel Place the I/O panel at it's location on the computer. Replace the screw to secure the I/O panel to the computer. Route the cables through the metal clips. Replace the cover. After Working Inside Your Computer . Follow the procedures in Removing the Processor Before Working Inside Your Computer . - Page 22 Lift the heat sink and fan assembly, and remove it from the computer. NOTE: Place the assembly with the fan on a flat surface, facing downward and with the thermal grease facing Press down on the release lever to move it outward to release it from the retention hook. Lift the processor cover.
-
Page 23: Installing The Processor
Lift the processor to remove it from it's socket and place it in an antistatic packaging. Installing the Processor Align the two notches on the processor and insert it into the socket, the processor should slide in and fit into the socket without any force. -
Page 24: Installing The Coin-Cell Battery
Lift the coin-cell battery out of the computer. Installing the Coin-Cell Battery Place the coin-cell battery in it's socket on the system board. Press the coin-cell battery into the socket till it snaps into place. Replace the cover. Follow the procedures in After Working Inside Your Computer . -
Page 25: System Board Layout
Remove the screws that secure the system board to the computer. Slide the system board towards the front of the computer, and then carefully tilt it to a 45–degrees angle. Lift the system board out of the computer chassis and place it in an antistatic packaging. System Board Layout The following image displays the system board layout of the computer. -
Page 26: Installing The System Board
1. SATA connectors (SATA0, SATA1, SATA2, SATA3) 2. front USB connector 3. front USB Connector 4. password reset jumper 5. audio connector 6. PCI Express x1 card slot 7. CMOS (coin-cell) battery 8. PCI Express x16 card slot 9. system fan connector 10. - Page 27 a) memory b) system fan c) WLAN card d) expansion card e) processor f) cover After Working Inside Your Computer . Follow the procedures in...
-
Page 29: System Setup
Boot Sequence allows you to bypass the System Setup‐defined boot device order and boot directly to a specific device (for example: optical drive or hard drive). During the Power-on Self Test (POST), when the Dell logo appears, you can: •... -
Page 30: System Setup Overview
Enter System Setup Turn on (or restart) your computer. When the blue DELL logo is displayed, you must watch for the F2 prompt to appear. Once the F2 prompt appears, press <F2> immediately. NOTE: The F2 prompt indicates that the keyboard has initialized. This prompt can appear very quickly, so you must watch for it to display, and then press <F2>... -
Page 31: System Setup Screens
NOTE: Not all settings listed in the Options Field are changeable. Dell Diagnostics — Appears below the Dell Diagnostics and lists keys and their functions within the active system setup field. Use the following keys to navigate through the System Setup screens: Table 4. - Page 32 Build Date Displays the date the system BIOS was built. System Date Re-sets the date on the computer's internal calendar. System Time Re-sets the time on the computer's internal clock. Service Tag Displays the service tag of your computer. Asset Tag Displays the asset tag of your computer (if available).
-
Page 33: Exit
CPU Configuration USB Controller Enable or disable the USB controller. Default: Enabled USB Storage Boot Function Enable or disable the option to boot Default: Enabled through a USB device Power Management Restore AC Power Loss Specifies how the computer will Default: Power Off behave when AC power is restored after an AC power loss. -
Page 34: Clearing Forgotten Password
Automatically detect my Service Tag for me b) Choose from My Products and Services List c) Choose from a list of all Dell products On the application and drivers screen, under the Operating System drop-down list, select BIOS. Identify the latest BIOS file and click Download File. -
Page 35: Clearing Cmos Passwords
Replace the jumper on the pins 2 and 3. 10. Install the cover. After Working Inside Your Computer . 11. Follow the procedures in 12. Power-on the computer. 13. Go to the system setup, and assign a new system or setup password. Clearing CMOS Passwords Before Working Inside Your Computer . -
Page 36: System And Setup Password
10. Install the cover. After Working Inside Your Computer . 11. Follow the procedures in 12. Power-on the computer. System and Setup Password You can create a system password and a setup password to secure your computer. Password Type Description System password Password that you must enter to log on to your system. -
Page 37: Deleting Or Changing An Existing System And/Or Setup Password
– Only lower case letters are valid, upper case letters are not allowed. – Only the following special characters are allowed: space, (”), (+), (,), (-), (.), (/), (;), ([), (\), (]), (`). Re-enter the system password when prompted. Type the system password that you entered earlier and click OK. Select Setup Password, type your system password and press <Enter>... - Page 38 Power-off the computer and disconnect the power cable from the electrical outlet. Remove the cover. Replace the PSWD jumper on the system board. 10. Install the cover. After Working on Your Computer . 11. Follow the procedures in 12. Power-on the computer. Setting up a System Password .
-
Page 39: Diagnostics
Diagnostics If you experience a problem with your computer, run the ePSA diagnostics before contacting Dell for technical assistance. The purpose of running diagnostics is to test your computer's hardware without requiring additional equipment or risking data loss. If you are unable to fix the problem yourself, service and support personnel can use the diagnostics results to help you solve the problem. -
Page 41: Troubleshooting
Troubleshooting Diagnostic Power LED Codes Power LED Light Status Possible Cause Troubleshooting Steps The computer is either turned off or is • Re-seat the power cable in not receiving power. the power connector on the back of the computer and the electrical outlet. -
Page 42: Diagnostic Beep Codes
CACHE DISABLED DUE TO FAILURE The primary cache internal to the microprocessor has failed. Contact Dell. CD DRIVE CONTROLLER FAILURE The optical drive does not respond to commands from the computer. DATA ERROR The hard drive cannot read the data. - Page 43 Then, shut down the computer, reinstall the hard drive, and restart the computer. Run the Hard Disk Drive tests in the Dell Diagnostics. HARD-DISK DRIVE CONTROLLER FAILURE 0 The hard drive does not respond to commands from the computer.
- Page 44 Then, shut down the computer, reinstall the hard drive, and restart the computer. If the problem persists, try another drive. Run the Hard Disk Drive tests in the Dell Diagnostics. INSERT BOOTABLE MEDIA The operating system is trying to boot to non-bootable media, such as a floppy disk or optical drive.
- Page 45 The time or date stored in the system setup program does PROGRAM not match the system clock. Correct the settings for the Date and Time options. TIMER CHIP COUNTER 2 FAILED A chip on the system board may be malfunctioning. Run the System Set tests in the Dell Diagnostics.
-
Page 46: System Error Messages
S.M.A.R.T error, possible hard disk drive failure reported that a parameter has exceeded its normal operating range. Dell recommends that you back up your data regularly. A parameter out of range may or may not indicate a potential hard drive problem... -
Page 47: Technical Specifications
Technical Specifications NOTE: Offerings may vary by region. The following specifications are only those required by law to ship with your computer. For more information regarding the configuration of your computer, click Start → Help and Support and select the option to view information about your computer. Processor Type •... - Page 48 System Information Chipset Intel B75 BIOS chip (NVRAM) 64 Mb Expansion Bus Bus type • PCI Express 2.0 • SATA 1.0 and 2.0 • USB 2.0 • USB 3.0 • 19-in-1 media card reader (optional) Bus speed: PCI Express • PCI Express x1-slot (includes mini PCI-Express) support speed –...
- Page 49 External Connectors • two USB 2.0 connectors Video • one 15-hole VGA connector • one 19-pin HDMI connector Control Lights And Diagnostic Lights power button light white light — solid white light indicates power-on state. amber light — solid amber light indicates sleep/stand by state of the computer;...
- Page 50 Environmental Relative humidity 20 % to 80 % (noncondensing) Altitude: –16 m to 3048 m (–50 to 10,000 ft) Operating NOTE: For altitudes above 2950 feet, the maximum operating temperature is derated 1ºF/550 ft. Storage –15.20 m to 10,668 m (–50 ft to 35,000 ft) Airborne contaminant level G1 as defined by ISA-S71.04–1985...
-
Page 51: Contacting Dell
Visit support.dell.com. Select your support category. If you are not a U.S. customer, select your country code at the bottom of the support.dell.com page, or select All to see more choices. Select the appropriate service or support link based on your need.