Table of Contents
Advertisement
Quick Links
Advertisement
Table of Contents

Related Manuals for Samsung SP-P410ME


Summary of Contents for Samsung SP-P410ME
- Page 1 SP-P410M LED Pocket Projector Owner’s Instructions...
-
Page 3: Table Of Contents
Specifications ..........6-1 Contact SAMSUNG WORLDWIDE ......6-2... -
Page 5: Major Safety Precautions
Copyright © 2009 Samsung Electronics Co., Ltd. All rights reserved. The copyright of this manual is reserved by Samsung Electronics, Co., Ltd. The contents of this manual may not be partially or in whole reproduced, distributed or used in any form without the written permission of Samsung Electronics, Co., Ltd. -
Page 6: Safety Precautions
Clean the projector using a soft dry cloth. • Avoid cleaning the product with an inflammable substance such as benzene or thinner or with a wet cloth. This may result in a problem with the product. • Avoid scratching the screen with your fingernails or a sharp object. -
Page 7: Safety Precautions
Do not touch. Must be grounded to prevent electric shock. Power Related The following images are for your reference and may differ depending on models and countries. Warning Plug the power plug in firmly. Avoid connecting multiple electric appli- ances to a single wall outlet. •... - Page 8 Installation Related Warning Avoid installing the product in a location Avoid installing the product in a badly-ven- exposed to direct sunlight and installing tilated location such as inside a bookshelf the product near a heat source such as a or closet. fire or heater.
- Page 9 Usage Related Avoid inserting metal objects such as a Do not let children place objects such as chopsticks, coins or hairpins, or inflamma- toys or cookies on the product. ble objects into the product (the vents, • If a child tries to reach for any of these ports, etc).
- Page 10 When cleaning the product, disconnect the When a gas leak occurs, do not touch the power cord and clean the product with a product or the power plug and ventilate soft dry cloth. immediately. • Avoid using chemicals such as wax, •...
- Page 11 Do not place objects vulnerable to heat Be careful to keep your body away from near the projector. the projector lamp. The lamp is hot. (Children and those who have sensitive skin should be more careful.) Major Safety Precautions...
- Page 12 Major Safety Precautions...
-
Page 13: Installation And Connection
Installation and Connection Package Contents •Unpack the product and check if all of the following contents have been included. • Store the packaging box in case you need to move the product at a later stage. Projector CONTENTS Quick Guide Product Warranty User Manual Power Cord... -
Page 14: Leveling With Adjustable Feet
To view the picture when installing the projector behind the screen Install a semi-transparent screen. Select Menu > Setup > Install > Rear-Floor To view the picture when installing the projector in the front of the screen Install the projector at the side where you are watching the screen. -
Page 15: Zoom And Focus Adjustment
2-2-3 Zoom and Focus Adjustment Focus the picture on the screen using the Focus Ring. Focus Ring If your product is installed at a location out of the specified projection distance (refer to Screen Size and Projection Distance), the focus cannot be adjusted correctly. 2-2-4 Screen Size and Projection Distance Install the projector on a flat, even surface and level the projector using the adjustable feet to realize optimal picture quality. -
Page 16: Connecting With A Pc
2-3-1 Connecting with a PC 1. Connect [PC IN] port on the rear side of the projector to the monitor output port of the PC using a PC video cable. 2. When connections are all completed, connect both power cords of the projector and the PC. 3. - Page 17 3. Press the [Advanced] button. Another property window will appear. 4. Click on [Monitor] tab and set the <Screen refresh rate> by referring to <Vertical Frequency> described in the Supported Resolution/Size Modes table. This will set both the vertical and horizontal frequencies. 5.
-
Page 18: Supported Display Modes
2-3-3 Supported Display Modes HORIZONTAL VERTICAL CLOCK RESOLUTION FREQUENCY FREQUENCY FREQUENCY(MH POLARITY (KHZ) (HZ) IBM, 640 x 350 31.469 70.086 25.175 IBM, 640 x 480 31.469 59.940 25.175 IBM, 720 x 400 31.469 70.087 28.322 MAC, 640 x 480 35.000 66.667 30.240 MAC, 832 x 624... -
Page 19: Connecting The Power
2. Connect the power cord to the adapter and connect it to a wall outlet. 3. When the power is connected, the screen turns on automatically. Do not look at the lens while connecting the power. Use only an Samsung authorized adapter. Connecting an A/V device with an audio/video cable 1. -
Page 20: Connecting An A/V Device With A Component/D-Sub Cable
Connecting an A/V device with a Component/D-Sub Cable Connect IN] input port on the rear of the projector to the COMPONENT port of AV equipment using a D-Sub/Component cable(Not supplied). 2. Connect audio cable(Not supplied) to the audio input port on the rear of the projector. Connecting a USB Device 1. - Page 21 Locking the product 1. Insert the locking part of the locking device into the hole of the Kensington lock of the product and turn it in the locking direction. 2. Connect the Kensington Lock cable. 3. Tie the Kensington lock cable to a desk or heavy object. You can purchase the locking device from an electronics store or an online shop.
- Page 22 Installation and Connection...
-
Page 23: Using
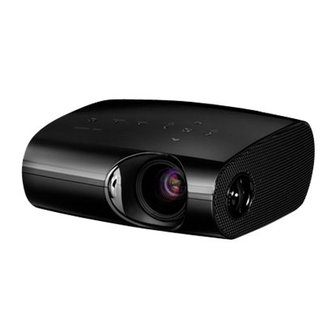
Using Product Features • High Mobility Design • Small Size. • Lightweight. • Play videos, photos, music using a USB device. • Next Generation Backlight Light Source, LED Lamp • Effective energy saving by using low voltage. • Semi-permanent long lifetime guaranteed. Front, Upper Using... - Page 24 NAME DESCRIPTION - TEMP (Red LED) 1.Indicators - STAND BY (Blue LED) Refer to the LED Indications. 2. Lens cover You can adjust the screen position by moving the adjustable feet up and down. 3-1. Adjustable Feet 3-2. Tripod holes 4.
-
Page 25: Remote Control
Remote Control 1. POWER Button ( Use this button for turning the product on and off. 2. SOURCE Button Used to check or select the connection status of external devices. 3. MENU Button ( Used to display Menu Screen. 4. Move ( )/ ( ) Button Used to move to or select each menu item. -
Page 26: Led Indications
Action 1 When the cooling fan system is If the symptom remains even after disconnecting and then reconnecting not in normal operating condi- the power cord and turning the projector on again, contact a Samsung ser- tion. vice center. Action 2... - Page 27 MENU SUB-MENU Source List Edit Name Input Mode Size Position Digital NR Black Level Picture Film Mode Zoom Install V-Keystone Background Test Pattern Factory Default Setup Video Type Language Menu Option Information Option 3-5-1. Input MENU DESCRIPTION Source List You can select a device connected to the projector to display. •...
- Page 28 MENU DESCRIPTION Mode Select a screen state which is customized to your projector or change the screen mode as required. • <Mode> • <Dynamic > : Select this mode for a brighter and sharper picture than Standard Mode. • <Standard> : This is the picture mode optimized to the standard broadcast signal. •...
- Page 29 MENU DESCRIPTION Position Adjust the screen position if it is not aligned. You can only set a position in <PC> mode. Digital NR When a dotted line is displayed or the screen shakes, you can view the picture with better visual qual- ity by enabling Noise Reduction.
- Page 30 MENU DESCRIPTION Install To tailor the picture to the installation location, you can invert the projected images vertically/horizon- tally. • <Front-Floor >: Normal Image • <Front-Ceiling >: Horizontal/Vertical Reversed Image • <Rear-Floor>: Horizontally Reversed Image • <Rear-Ceiling > : Vertically Reversed Image V-Keystone If video scenes are distorted or tilted, you can compensate for this using the vertical Keystone func- tion.
- Page 31 MENU DESCRIPTION Language You can select the language used for the menu screen. The selected language is applied to both main OSD and MEDIA PLAY menus. Menu Option • <Position> : You can move Menu Position up/down/left/right. • <Transparency > : You can set the translucency of menu. •...
- Page 32 Using...
-
Page 33: Media Play Function
Media Play Function Precautions on using a USB storage device •This product does not support multi-card readers. •This product does not work if the USB storage device is connected by USB HUB. •Some products which do not comply with standard USB specifications might not operate normally. •A USB storage device with automatic recognition application or its own driver might not operate normally. -
Page 34: Photo
Photo When selecting thumbnails, You can view image files stored in a USB device. * Press the MEDIA.P button to display the menu for the selected item. MENU DESCRIPTION Play Photo Start Slideshow. Play Mode • <All photos > : Plays all available image files. •... - Page 35 Slideshow You can set several options while playing images. * Press the MEDIA.P button to display the menu for the selected item. MENU DESCRIPTION Slideshow Setting You can set several options while playing images. • <Manual> - <Auto> Transition Sets a pattern for a slide show. •...
-
Page 36: Music
Music Menu displayed when selecting a music list. You can listen to music files stored in a USB device. * Press the MEDIA.P button to display the menu for the selected item. MENU DESCRIPTION Play Music Plays music files. Play Mode •... -
Page 37: Movie
MENU DESCRIPTION Play Mode • <All musics > : Plays all available music files. • <Music in Folder > : Plays all music files in a selected folder. • <Shuffle all musics > : Randomly plays all available music files. •... -
Page 38: Supported Files
Menu displayed when playing a movie You can set several options for playing video with Mediaplay. * Press the MEDIA.P button to display the menu for the selected item. MENU DESCRIPTION Play Mode • <All Movies > : Plays all available video files. •... -
Page 39: Settings
Settings Configuring settings You can configure settings for Media Play. MENU DESCRIPTION Auto Play Automatically plays when you enter the menu. • <Photo > - <Music > - <Movie> Update/Reset • <Firmware Update > : Starts SW Update. • <Reset Settings > : Resets settings. •... -
Page 40: Supported Files
Supported Files FORMAT REMARKS (MAXIMUM RESOLUTION/BIT MEDIA CATEGORY VIDEO AUDIO RATE ETC.) File Exten- .mpg / .dat MPEG-1/2 MPEG Layer 1 / 2 / 3 sion .vob MPEG-1/2 .avi XviD / 3ivX 4CC : XVID / 3IVX/ DivX MPEG layer 1/2/3 ADPCM(MS/Intel DVI / uLaw / MS ISO 4CC:M4S2/MP4S... - Page 41 FORMAT REMARKS (MAXIMUM RESOLUTION/BIT MEDIA CATEGORY VIDEO AUDIO RATE ETC.) Audio Mono / Stereo, Sample Rate: 8K~48KHz MPEG 1/2 Layer 1/2 Mono / Stereo, Sample Rate : 32 / 44.1 / 48KHz, Bit Rate:32K~448Kbps MPEG 1/2 Layer 3 (MP3) Sample Rate : 8K~48KHz, Bit Rate:8K~320Kbps Mono / Stereo, Sample Rate : 8K~48KHz,...
- Page 42 FORMAT REMARKS (MAXIMUM RESOLUTION/BIT MEDIA CATEGORY VIDEO AUDIO RATE ETC.) Subtitle Text File Format Media Play Function...
-
Page 43: Wma Usage Specifications
WMA Usage Specifications BIT RATE (KBPS) SAMPLE RATE CHANNELS 44.1K 44.1K 44.1K 44.1K 44.1K 44.1K 44.1K 44.1K 44.1K 44.1K 48** 22.05K ** : This definition (bit rate/sample rate/channels) might exist in other WMA decoder class as well. In that case, we cannot sup- port it. - Page 44 Media Play Function...
-
Page 45: Troubleshooting
Troubleshooting Before Requesting Service Please check the following before requesting After-Sales service. If the problem continues, please contact your nearest Samsung Electronics Service Center. Symptoms Troubleshooting Installation No Power. Check the power cable connections. and Con- I want to install my projector on the ceiling. - Page 46 Symptoms Troubleshooting Cannot see picture images. Be sure that the power cord of the projector is connected. Screen and External Be sure that the proper input source is selected. Source Check that the connectors are properly connected to the ports at the back of the projector.
-
Page 47: More Information
More Information Specifications MODEL SP-P410M Panel Size 13.97 mm / 0.6 inches Resolution 800 x 600 (SVGA) Light Source Power Power Consumption 53 W Voltage DC 14V 4.5A 147.5 x 66.3 x 145.5 5.8 x 2.6 x 5.7 inches Dimension (Width x Height x Depth) mm / Weight Key Features... - Page 48 The DMD Panel used in DLP Projectors consists of several hundred thousand micro mirrors. As with other visual display elements, the DMD Panel may include a few bad pixels. Samsung and the DMD Panel manufacturer have a rigid, bad pixel identification and limitation procedure in place and products will not exceed the maximum number of bad pixels set by our standards.
-
Page 49: Contact Samsung Worldwide
Contact SAMSUNG WORLDWIDE •If you have any questions or comments relating to Samsung products, please contact the SAMSUNG customer care center. NORTH AMERICA U.S.A 1-800-SAMSUNG(726-7864) http://www.samsung.com/us CANADA 1-800-SAMSUNG(726-7864) http://www.samsung.com/ca MEXICO 01-800-SAMSUNG(726-7864) http://www.samsung.com/mx LATIN AMERICA ARGENTINA 0800-333-3733 http://www.samsung.com/ar BRAZIL 0800-124-421 http://www.samsung.com/br... - Page 50 022 - 607 - 93 - 33 PORTUGAL 808 20 - SAMSUNG (7267864) http://www.samsung.com/pt SLOVAKIA 0800-SAMSUNG(726-7864) http://www.samsung.com/sk SPAIN 902 - 1 - SAMSUNG (902 172 678) http://www.samsung.com/es SWEDEN 075 - SAMSUNG (726 78 64) http://www.samsung.com/se SWITZERLAND 0848-SAMSUNG(7267864, CHF 0.08/min) http://www.samsung.com/ch 0845 SAMSUNG (7267864) http://www.samsung.com/uk...
-
Page 51: Correct Disposal - Europe Only
ASIA PACIFIC SINGAPORE 1800-SAMSUNG(726-7864) http://www.samsung.com/sg THAILAND 1800-29-3232 http://www.samsung.com/th 02-689-3232 TAIWAN 0800-329-999 http://www.samsung.com/tw VIETNAM 1 800 588 889 http://www.samsung.com/vn MIDDLE EAST & AFRICA SOUTH AFRICA 0860-SAMSUNG(726-7864) http://www.samsung.com/za TURKEY 444 77 11 http://www.samsung.com/tr U.A.E 800-SAMSUNG(726-7864) http://www.samsung.com/ae 8000-4726 Correct Disposal - Europe only Correct Disposal of This Product (Waste Electrical &... - Page 52 More Information...