
Related Manuals for Samsung BP59-00092G-03


Summary of Contents for Samsung BP59-00092G-03
- Page 2 To avoid injuries or damage to property, please read the following precautions carefully and use the product accordingly. Failure to follow the instructions marked with this symbol may cause personal injury or even fatality. Failure to follow the instructions marked with this symbol may cause personal injury or damage to the product or property.
- Page 3 To disconnect the apparatus from the mains, the plug must be pulled out from the mains socket, therefore the mains plug shall be readily operable. There is a danger of electric shock or fire. Always unplug the unit by holding the power plug. Pulling the power cable may damage the inside of it.
- Page 4 (rainwater), or in a vehicle. There is a danger of electric shock or fire. Do not install the product in locations with poor ventilation such as a bookshelf, closet, etc. An increase in the internal temperature may cause a fire. Do not install on an unstable location, or on a stand smaller than the product.
- Page 5 Do not insert metal items, such as chopsticks, steel wire, gimlets, or inflammable objects such as matches or paper into the product through the ventilating openings and the PC/Video and power terminals. This may cause electric shock or fire. If water or an alien substance enters the product, turn the product off, disconnect the power cord from a wall outlet and contact a Do not disassemble, or attempt to fix or modify the product.
-
Page 6: Correct Disposal Of This Product (Waste Electrical & Electronic Equipment) - Europe Only
If the power plug pin or jack is exposed to dust, water or alien substances, clean it thoroughly. When cleaning the product, disconnect the power cord and wipe the product using a soft dry cloth. When not using the product for an extended period of time, disconnect the power plug. -
Page 7: Correct Disposal Of Batteries In This Product - Europe Only
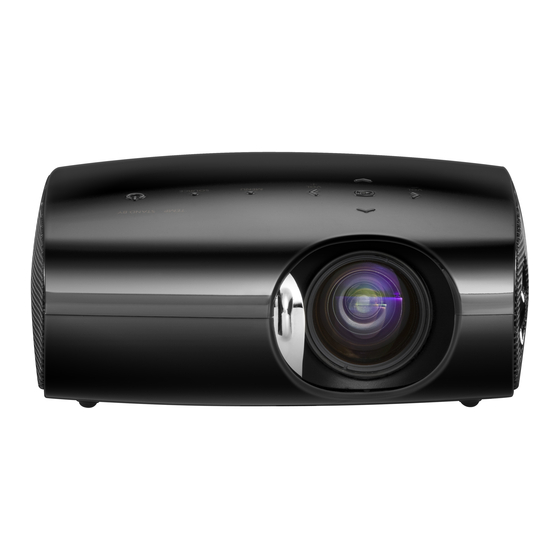
their local government office, for details of where and how they can take this item for environmentally safe recycling. Business users should contact their supplier and check the terms and conditions of the purchase contract. This product should not be mixed with other commercial wastes for disposal. - Page 8 High Mobility Design - Small Size. - Lightweight. Next Generation Backlight Light Source, LED Lamp - Effective energy saving by using low voltage. - Semi-permanent long lifetime guaranteed. Front/Upper Side 1. Indicators Product Features Product Views Remote Control Product Features Product Views Remote Control 6.
- Page 9 When using a tripod, make sure to use one with a screw length of 5.5 mm or less. If the screw length is longer than 5.5 mm, you will not be able to fix the projector to the tripod firmly, which may result in damage to the projector or tripod.
- Page 10 - This state appears when the projector is preparing an operation after the POWER button on the projector or the remote control has been pressed. - The POWER button is pressed to turn off the projector, and the cooling system is in operation to cool off the inside of the projector.
- Page 11 1. VIDEO IN Input port 2. VIDEO/PC AUDIO IN Input ports 3. Remote Control Signal Receiver 4. POWER Input port Product Features Kensington Lock 6. PC IN Input port 7. SERVICE Input port 8. Headphone Input port Product Views Remote Control Product Specifications POWER Button ( SOURCE Button...
- Page 12 Use this when the screen is displayed in a trapezoid shape. INSTALL Button Used to flip or reverse the projected image. STANDARD Button Used to set the projector to the correct mode when the surroundings are somewhat bright. P.SIZE Button Used to adjust the size of picture screen. QUICK Button Use this to quickly select the last menu you used.
- Page 13 The DMD Panel used in DLP Projectors consists of several hundred thousand micro mirrors. As with other visual display elements, the DMD Panel may include a few bad pixels. Samsung and the DMD Panel manufacturer have a rigid, bad pixel identification and limitation procedure in place and products will not exceed the maximum number of bad pixels set by our standards.
- Page 14 MAC, 640 x 480 35.000 MAC, 832 x 624 49.726 VESA, 640 x 350 37.861 VESA, 640 x 400 37.861 VESA, 640 x 480 37.861 VESA, 640 x 480 37.500 VESA, 640 x 480 43.269 VESA, 720 x 400 37.927 VESA, 800 x 600 35.156 VESA, 800 x 600...
- Page 15 Do not install the screen in bright surroundings. If the screen is too bright, the picture on the screen will not be displayed clearly. When installing the screen in bright surroundings, use curtains. You can install the projector in the following locations: Front-Floor / Front-Ceiling / Rear-Floor / Rear-Ceiling. (To view the installation position settings) To view the picture when installing the projector behind the screen, Install a semi-transparent screen.
- Page 16 Screen Size and Projection Distance Install the projector on a flat, even surface and level the projector using the adjustable feet to realize optimal picture quality. If images are not clear, adjust them using the Focus Ring, or move the projector forward and backward.
- Page 17 Setting up the PC Environment - Check the following items before connecting your PC to your projector. 1. Click the right mouse button on the Windows desktop and click on [Properties]. <Display Properties> tab will appear. 2. Click on [Settings] tab and set the <Screen resolution> by referring to <Resolution>...
- Page 18 Projected images may differ from the monitor depending on monitor manufacture or Windows versions. When connecting the projector to a PC, check that PC setup complies to display settings supported by this projector. If not, there may be signal problems.
- Page 19 - Connect [VIDEO IN(yellow)] input port of the projector to the VIDEO (yellow) OUT port of video equipment using the video cable. - Connect the [ ] input port of the projector to the Audio (L), Audio (R) output ports of the external device, such as a DVD, VCR or camcorder using an audio cable.
- Page 20 Connect [PC IN] port on the rear side of the projector to the monitor output port of the PC using a PC video cable. When connections are all completed, connect both power codes of the projector and the PC. Connect the [VIDEO/PC AUDIO IN] input port of the projector to the speaker output ports of the PC using an audio cable.
- Page 21 Kensington Lock The Kensington Lock is a device used to physically fix the system when using it in a public place. The locking device has to be purchased separately. The appearance and locking method may differ from the illustration depending on the manufacturer. Refer to the manual provided with the Kensington Lock for proper use.
- Page 22 Screen Adjustment Source List You can select a device connected to the projector to display. 1) Video Edit Name You can edit the names of devices connected to the projector. 1) VCR 3) Cable STB 5) Satellite STB 7) DVD Receiver...
- Page 23 Screen Adjustment Mode Select a screen state which is customized to your projector or change the screen mode as required. 1) Mode - Dynamic Select this if you want the screen quality to be clearer than standard screen quality. - Standard You can comfortably view the projection screen if the surrounding is somewhat bright.
- Page 24 8) Color Gamut - Wide : Displays the native color gamut of panel device. - Normal : Normal Color Gamut offers flat and natural color tone. - SMPTE_C : Standardized for Video Equipment by the Society of Motion Picture and Television Engineers.
- Page 25 Test Pattern Generated by the projector itself. Utilized as standard to optimize the installation of the projector. 1) Crosshatch : You can check whether the picture is distorted or not.
- Page 26 shaking. If the noise is not removed using Fine Adjustment, adjust the frequency to the maximum and then perform Fine Adjustment again. Only activated in the PC environment. 1) Auto Adjustment : Used to adjust frequency and phase of PC screen automatically.
- Page 27 7) Stay On 4) 60 sec Logo If Logo mode is enabled, the Samsung logo is displayed when the projector is turned on. If disabled, it is not displayed. Blue screen The Blue screen function causes the screen to change to the Blue screen if there is no signal input from the external device connected to your projector.
- Page 28 Check if the remote control battery is empty. Check whether the LED indicator on the top of the projector is turned on. Check if the menu is displayed in gray. A gray-colored menu is unavailable. Troubleshooting Be sure that the power cord of the projector is connected.
- Page 29 Screen appears in black and white or odd color./ screen is too dark or bright. The <Mode not supported. Recommended Mode: 800x600 60Hz> message appears. again. As mentioned above, check the adjustment items such as the Brightness, Contrast and Color in the menu. If you want to restore various settings to their factory defaults, run <Factory Default>from the menu.
- Page 30 Service Center or a distributor. Contact your distributor or a Service Center if dust or other substances are inside the projector. If you have any questions or comments relating to Samsung products, please contact a SAMSUNG customer care center. U.S.A 1-800-SAMSUNG (726-7864)
- Page 31 70 70 19 70 EIRE 0818 717100 ESTONIA 800-7267 FINLAND 030 - 6227 515 FRANCE 01 48 63 00 00 GERMANY 01805 - SAMSUNG (726-7864, € 0,14/Min) HUNGARY 06-80-SAMSUNG (726-7864) ITALIA 800-SAMSUNG (726-7864) KOSOVO +381 0113216899 LATIN AMERICA http://www.samsung.com http://www.samsung.com http://www.samsung.com...
- Page 32 PORTUGAL 80820 - SAMSUNG (726-7864) RUMANIA SERBIA 0700 Samsung (0700 726 7864) SLOVAKIA 0800-SAMSUNG (726-7864) SPAIN 902 - 1 - SAMSUNG (902 172 678) SWEDEN 0771 726 7864 (SAMSUNG) SWITZERLAND 0848-SAMSUNG (7267864, CHF 0.08/min) 0330 SAMSUNG (7267864) ARMENIA 0-800-05-555 AZERBAIJAN...
- Page 33 08000-726786 JORDAN 800-22273 MOROCCO 080 100 2255 OMAN 800-SAMSUNG (726-7864) SAUDI ARABIA 9200-21230 TURKEY 444 77 11 U.A.E 800-SAMSUNG (726-7864) NIGERIA 0800 - SAMSUNG (726-7864) SOUTH AFRICA 0860-SAMSUNG (726-7864) Glossary http://www.samsung.com/hk http://www.samsung.com/hk_en/ http://www.samsung.com http://www.samsung.com http://www.samsung.com http://www.samsung.com http://www.samsung.com http://www.samsung.com http://www.samsung.com http://www.samsung.com http://www.samsung.com...
- Page 34 This correction function is used when vertical distortion of the projected picture occurs. Vertical distortion refers to the distortion of the projected picture when the beam from the projector is not perpendicular to the screen. You can view pictures more comfortably by correcting the distortion using the Vertical Keystone function.
- Page 35 The picture projection capability of a PC with a VCR, Laser disk or CD-ROM drive. Extended Graphics Adapter. A graphics standard developed by IBM. XGA includes VGA standard and provides 1024x768 pixels of resolution. Care and Maintenance Contact SAMSUNG WORLDWIDE Other Authority...
- Page 36 Reproduction in any manner whatsoever without the written permission of Samsung Electronics Co., Ltd. is strictly forbidden. Samsung Electronics Co., Ltd. shall not be liable for errors contained herein or for incidental or consequential damages in connection with the furnishing, performance, or use of this material.