
Related Manuals for Uniden UM415BK


Summary of Contents for Uniden UM415BK
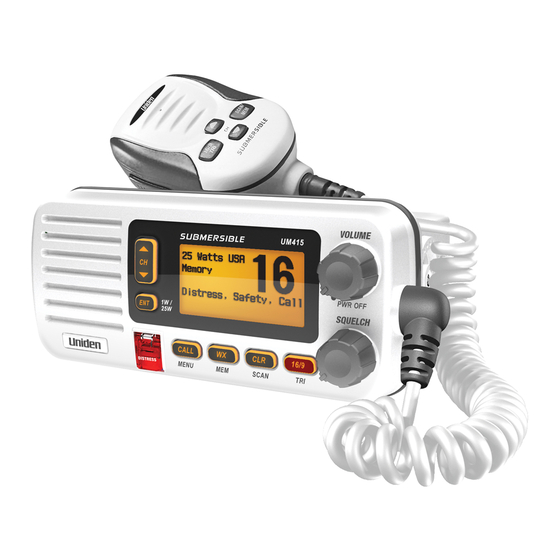
- Page 1 UM415 SUBMERSIBLE DSC MARINE RADIO RADIO MARITIME ASN OWNER’S MANUAL GUIDE D’UTILISATION...
-
Page 2: Making A Voice Distress Call
Making a Distress Call Lift the red cover. Press and hold the button for three seconds. Your radio transmits your boat’s location every few minutes until you DISTRESS receive a response. nOte: if the radio displays Enter User MMSI, cancel the automatic distress call and make a normal voice distress call. -
Page 3: Faire Un Appel De Détresse Vocal
Faire un appel De Détresse Soulevez le couvercle rouge. Maintenez la touche DISTRESS enfoncée pendant trois secondes. Le UM415 transmet la position de votre bateau à intervalles réguliers de quelques minutes, jusqu’à ce que vous receviez une réponse. Soulevez le Soulevez le ... -
Page 4: Cómo Hacer Una Llamada De Apuro
3, descrito arriba. PUSH TO TALK si no recibe una contestacion dentro de 30 segundos, repita su llamada, comenzando con el paso 3, descrito arriba. Visite www.uniden.com para bajar el manual en español de la radio uM415. English... -
Page 5: Table Of Contents
Contents Making DSC Calls ........24 Making a Voice Distress Call ...... 2 Making an automatic distress call .... 26 Faire un appel de détresse vocal ....3 Receiving a DSC call........27 Cómo hacer una llamada de apuro Test Calls ..........28 por voz ............ -
Page 6: Introduction
intrODuCtiOn Submersible Design - Complies with JIS8 water-resistant standards, which means the Features radio can be submerged in 1.5 meter of water for 30 minutes without damage. Large, dot matrix display Advanced DSC Class D functions, including Test Calling ... -
Page 7: Getting Started
getting starteD What’s included Mounting Bracket and Mounting Hardware Microphone Hanger and Knobs Mounting Hardware English... -
Page 8: Parts Of The Radio
parts of the radio VOLUME-PWR VOLUME-PWR ENT- ENT- (power) knob (power) knob 1W/25W 1W/25W (turn clockwise to (turn clockwise to display display CHANNEL UP & CHANNEL UP & button button increase volume) increase volume) CHANNEL DOWN CHANNEL DOWN button button Microphone Microphone cord... -
Page 9: Parts Of The Microphone
Antenna Antenna Accessory Accessory Heat sink Heat sink connector connector cable cable (SO238) (SO238) Red wire Red wire ANTENNA ANTENNA 13.8V DC 13.8V DC Black wire Black wire Power Power Cable Cable Connector/Cable Connects to... For details, see ... External VHF antenna with a male PL259 (SO238) connector and 50 Ω... -
Page 10: Turning On The Radio
Button Press to... Press and hold to... press: Go to Channel 16. Go into Triple Watch or Dual press: Go to Channel 9. 16/9-TRI Watch mode (see page 18). press: Go back to the original channel. Cancel scanning and stay on a channel. Talk on a channel. -
Page 11: How It Works
Your radio has three basic modes of operation: HOW it WOrks Mode What It Does Use It When To Turn it on/off... Normal Monitors a single You want to talk to (default mode) marine radio channel another station on a and lets you talk on specific channel. - Page 12 Weather Alert Weather Alert Channel mode Channel mode Watch on Watch on (USA, CANadian, (USA, CANadian, or INTernational) or INTernational) Transmit power Transmit power (1 W or 25 W) (1 W or 25 W) Status Status 25 Watts USA 25 Watts USA Icons Icons Memory Alert...
-
Page 13: Scan Mode
To turn Weather Alert Watch on or off, press and hold while the radio is idle. Select Setup and then WX Alert Mode. Use CALL-MENU to choose WX Alert Mode setting Monitoring Channel 25 Monitoring Channel 25 CHANNEL UP CHANNEL DOWN If you activate Triple Watch while operating in normal mode, the Normal mode with Triple and Dual Watch radio checks channels 16 and 9 every two seconds;... - Page 14 You cannot transmit while in scan mode. Using the radio in scan mode You must have two or more channels in memory to start a scan. To save a channel into memory, select the channel, then press and hold for two ...
-
Page 15: Weather Mode
In cooperation with the FCC, NOAA also uses the weather channels to alert you of other Weather mode hazards besides weather (child abduction alerts, nuclear, biological, etc.). In weather mode, the radio monitors one of the ten NOAA weather channels. If any type of alert is received for your area, the radio sounds an alert tone and displays the type of alert. -
Page 16: Using Your Radio
To display the radio call menu, press . To display the radio normal menu, press and using YOur raDiO hold . The menu has the following options: CALL-MENU CALL-MENU Press and hold - Press and hold - Setup Setup USA/CAN/INT USA/CAN/INT Dual/TriWatch Dual/TriWatch... -
Page 17: Making A Voice Mayday Call
(see inside front cover) Making a voice MaYDaY call Turn the volume knob clockwise to increase the speaker volume; turn it counter-clockwise to Setting the volume decrease the volume. The squelch feature reduces the level of static on the speaker by filtering out the background Setting the squelch level channel noise. -
Page 18: Boosting The Transmission Power
In most situations, the 1 Watt transmission power is all you need. If you find yourself far Boosting the transmission power away from other stations and have trouble getting a response, you may need to boost the transmission power from 1 Watt to 25 Watts: Select the channel you want to transmit on. -
Page 19: Using Fips Codes For Weather Alerts
The US National Weather Service established 6-digit Federal Information Processing System using Fips codes for weather alerts (FIPS) codes to issue weather alerts in specific areas. You can choose which areas you want to hear alerts for by entering these FIPS codes in your radio. This can prevent you from being bothered by events that are far from where you are boating. -
Page 20: Changing Display And Sound Options
Changing display and sound options Your radio display has 10 levels of contrast. To adjust the contrast, press and hold Contrast while the radio is idle. Select System and then Contrast. Use CALL-MENU change the contrast to your desired level. CHANNEL UP CHANNEL DOWN To restore the default contrast setting, turn the radio off. -
Page 21: Using Digital Selective Calling (Dsc) Features
USING DIGITAl SeleCTIve CAllING (DSC) FeATUReS Digital Selective Calling (DSC) is a standard that allows you to call other stations using their What is DsC? unique identification code (the Maritime Mobile Service Identity or MMSI number), just like you would call a phone number. To call another station, just enter that station’s MMSI number and choose the voice channel you want to talk on. -
Page 22: Entering Mmsi Numbers
You can get more information on MMSI numbers at these resources: The dealer where you purchased the radio Recreational boaters can obtain an MMSI number from the Boat Owner’s Association of the U.S. (http://www.boatus.com/mmsi/ or call 800-536-1536) or Sea Tow Services ... -
Page 23: Using The Directory
You can change the group MMSI number as often as you want. Follow the steps below to Group MMSI number enter a group MMSI number into the radio: Press and hold Press and hold Group MMSI Group MMSI Setup Setup 00_______ 00_______ Group MMSI... -
Page 24: Making Dsc Calls
When the first digit is correct, press . The cursor moves to the next digit. Enter the remaining eight digits of the MMSI number in the same way. If you make a mistake ENT-1W/25W while entering a number, press to erase the wrong number and the cursor is moved to the left digit. - Page 25 Suppose you are coordinating safety for a sailboat race. Before the race starts, you instruct all the racers to enter your group MMSI number into their radios. During the race: Throughout the race, you use group calling to update the ...
-
Page 26: Making An Automatic Distress Call
Group calling calls all the stations that share your group MMSI. You must have a group MMSI Calling a particular group of stations (Group Call) programmed into the radio to make a group call, and the stations (boats) you are calling must have this same group MMSI programmed into their radios. -
Page 27: Receiving A Dsc Call
If no MMSI number has been programmed, the radio prompts you to enter your MMSI number. While the radio is waiting for a response, it gives you the option of canceling the call. To Canceling an automatic distress call cancel the distress call, choose Cancel and press ENT-1W/25W If your radio receives an individual DSC call from another station, it sounds an incoming call receiving a DsC call... -
Page 28: Test Calls
DSC Call Type Receive Log Information Distress Relay MMSI (or name), distress MMSI, position, time, nature code. Acknowledge Geographical MMSI (or name), category code, communication channel number. All Ships MMSI (or name), category code, communication channel number. Group MMSI (or name), category code, communication channel number. Individual MMSI (or name), category code, communication channel number. -
Page 29: Position Request And Reply
If you want to send a test call to a station that is not in your directory, select Manual. The radio prompts you to enter the MMSI number you want to call. Enter the MMSI number the same way you enter directory entries (see page 22). Enter all nine digits and press button. - Page 30 Select DSC Call sub-menu, then select POS Request. The radio displays the names listed in your directory; use to choose the directory entry you want to contact and press . If you want to CHANNEL UP CHANNEL DOWN contact a station that is not in your directory, select Manual. The radio prompts you to ENT-1W/25W enter the MMSI number you want to call.
-
Page 31: Putting The Radio Into Standby
Press to display the call menu. Select Position Send. CALL-MENU The radio displays the names listed in your directory; use to choose the directory entry you want to contact and press . If you want to CHANNEL UP CHANNEL DOWN contact a station that is not in your directory, select Manual. -
Page 32: Renaming Channels
If you discover that a marine radio channel has a different common name in your local area, renaming Channels you can change the name of that channel to make it easier for you to use (see the channel lists beginning on page 40 for the default channel names). To rename a channel, follow the steps below: Display the normal menu and choose the Setup sub-menu. -
Page 33: Connecting The Radio
Install the radio into the mounting bracket. Position the radio into the desired location. Mark the edges of the bracket on the mounting surface. Remove the mounting Step 1: Step 1: bracket drill Slide the radio Slide the radio template from into the mounting into the mounting the back of the... -
Page 34: Connecting To A Gps Receiver
Connect the BLACK wire of the power cable to the NEGATIVE (-) side of your power source. Connect the RED wire of the power cable to the POSITIVE (+) side of your power source. NOTE: To extend the life of the radio, Red wire Red wire use waterproof tape to seal electrical... - Page 35 Connect the BARE wire of the included accessory cable to the GROUND WIRE on your GPS receiver. Connect the GREEN wire of the included accessory cable to the GPS DATA OUTPUT WIRE on your GPS receiver. Below is a table of common GPS receivers and the proper connections: GPS NMEA0183 Ground Wire Color...
-
Page 36: Connecting To A Chartplotter
When the GPS receiver is correctly connected, the display shows GPS Data OK. If there is a problem with the GPS connection, the display shows Check GPS. When the display shows GPS Data OK, press to open the GPS status screen and see detailed GPS data: ENT-1W/25W Time Time... -
Page 37: Connecting To An External Speaker
Connect the YELLOW wire of the accessory cable to the POSITIVE (+) wire of your chartplotter’s NMEA data INPUT Be certain all wire connections are secure and that all open wires are adequately covered. nOte: to extend the life of the radio, use waterproof tape to seal electrical connections. You can use an external speaker to monitor the radio from a different part of your boat or in Connecting to an external Speaker a noisy environment. - Page 38 Problem Things to Try Noise comes out of the speaker Adjust the squelch level; it is probably too low. all the time I can’t hear anything (no Adjust the squelch level; it is probably too high. volume) from the speaker. I can transmit, but no one can Check your UIC channel settings (see Setting the UIC hear me.
-
Page 39: Engine Noise Suppression
Problem Things to Try The radio won’t let me enter my User MMSI. What do I Contact customer service. Interference from the noise generated by the electrical systems of engines is sometimes a engine noise suppression problem with radios. Your radio has been designed to be essentially impervious to ignition noise and alternator noise. -
Page 40: Reference Tables
General Shock and Vibration Meets or exceeds EIA standards, RS152B and RS204C FCC Approvals Type accepted under part 80 of the Rules; meets Great Lakes Agreement and party boat requirements Transmitter Power Output 1 watt or 25 watt (user selectable) Power Requirement 25 watts output: 6A@13.8V DC Modulation... -
Page 41: Us Marine Channels And Frequencies
Channel name/description Used for: DISTRESS SAFETY AND primarily emergency messages and distress calls CALLING INTERSHIP SAFETY safety messages from one ship to another, or from a ship to Coast Guard aircraft NON-COMMERCIAL messages about the needs of the ship, including fishing (recreational or voluntary reports, rendezvous, scheduling repairs and berthing ships only) - Page 42 Ch No. RX Freq TX Freq Status Name on display 156.6500 156.6500 Simplex, 1W Bridge to bridge 156.7000 156.7000 Simplex Vessel traffic system 156.7500 Inhibit Receive Only Environmental 156.8000 156.8000 Simplex Distress, Safety, Calling 156.8500 156.8500 Simplex, 1W Govt maritime control 156.9000 156.9000 Simplex...
-
Page 43: Canadian Marine Channels And Frequencies
Ch No. RX Freq TX Freq Status Name on display 161.8750 157.2750 Duplex Marine operator 161.9250 157.3250 Duplex Marine operator 87** 157.3750 157.3750 Simplex Marine operator *A indicates simplex use of the ship station transmit side of an international duplex channel, 88** 157.4250 157.4250... -
Page 44: International Marine Channels And Frequencies
Ch No. RX Freq TX Freq Status Name on display 160.6250 156.0250 Duplex Marine operator 156.0750 156.0750 Simplex Canadian coast guard 156.1250 156.1250 Simplex Canadian coast guard 156.1750 156.1750 Simplex Port operation 160.8250 156.2250 Duplex Marine operator 156.2250 156.2250 Simplex Port operation 156.2750 156.2750... - Page 45 Ch No. RX Freq TX Freq Status Name on display 160.8000 156.2000 Duplex Marine operator 160.8500 156.2500 Duplex Marine operator 156.3000 156.3000 Simplex Inter-ship safety 160.9500 156.3500 Duplex Marine operator 156.4000 156.4000 Simplex Commercial (ship-ship) 156.4500 156.4500 Simplex Boater calling channel 156.5000 156.5000 Simplex...
-
Page 46: Weather Channels And Frequencies (Us, Can, And Int)
Ch No. RX Freq TX Freq Status Name on display 156.6750 156.6750 Simplex Port operation 156.7250 156.7250 Simplex Port operation 156.7750 156.7750 Simplex, 1W Port operation 156.8250 156.8250 Simplex, 1W Port operation 156.8750 156.8750 Simplex Port operation (ship-ship) 161.5250 156.9250 Duplex Port operation 161.5750... - Page 47 An EMERGENCY is an event that, by itself, would not kill or injure or do property damage, but indirectly may cause other things to happen that result in a hazard. For example, a major power or telephone loss in a large city alone is not a direct hazard, but disruption to other critical services could create a variety of conditions that could directly threaten public safety.
- Page 48 Event SAME Code Type Avalanche Warning Warning Child Abduction Emergency Statement Civil Danger Warning Warning Civil Emergency Message Statement Earthquake Warning Warning Immediate Evacuation Warning Fire Warning Warning Hazardous Material Warning Warning Law Enforcement Warning Warning Local Area Emergency Statement 911 Telephone Outage Emergency Statement Nuclear Power Plant Warning...
-
Page 49: No Response Event Code
Event SAME Code Type Wild Fire Watch Watch Wild Fire Warning Warning Unrecognized Watch Watch Unrecognized Emergency Statement Unrecognized Statement Statement Unrecognized Warning Warning no response event Code Transmitter Backup On Transmitter Carrier On Transmitter Carrier On Transmitter Primary On This radio supports NMEA0183 version 3.01. -
Page 50: Nmea Output
Unauthorized changes or modifications to this equipment may void compliance with the FCC Rules. Any change or modify cation must be approved in writing by Uniden. Any changes or modifications not expressly approved by the party responsible for compli- ance could void the user’s authority to operate this device. -
Page 51: Three Year Limited Warranty
California to cause birth defects or other reproductive harm. Wash hands after handling. Uniden works to reduce lead content in our PVC coated cords in our products and accesso- ries. Your UM415 has been designed to accommodate all of the popular marine VHF antennas. - Page 52 (preferably in its original packaging). Include evidence of original purchase and a note describing the defect that has caused you to return it. The Product should be shipped freight prepaid, by traceable means, or delivered, to warrantor at: Uniden America Corporation Parts and Service Division 4700 Amon Carter Boulevard...
- Page 53 QUESTIONS? Visit our website at www.uniden.com or call 1-800-297-1023. QUESTIONS? Contactez-nous au www.uniden.com ou appelez 1-800-297-1023. Printed in China Imprimé en Chine UTZZ01630ZZ(0)