Table of Contents
Advertisement
No.6218--F
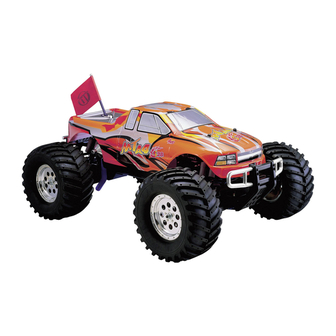
1/8 4WD NITRO MONSTER TRUCK
JD6224
Thunder Tiger Corporation guarantees this model kit to be free from defects in both material and workmanship. The
total monetary value under warranty will in no case exceed the cost of the original kit purchased. This warranty does
not cover any components damaged by use or modification. Part or parts missing from this kit must be reported within
60 days of purchase. No part or parts will be sent under warranty without proof of purchase. To receive part or parts
under warranty, the service center must receive a proof of purchase and/or the defective part or parts. Should you
find a defective or missing part, contact the authorized Thunder Tiger Service/Distributor nearest you. Under no
circumstances can a dealer or distributor accept return of a kit if assembly has started.
Advertisement
Table of Contents

Related Manuals for THUNDER TIGER MTA4


Summary of Contents for THUNDER TIGER MTA4
- Page 1 1/8 4WD NITRO MONSTER TRUCK JD6224 Thunder Tiger Corporation guarantees this model kit to be free from defects in both material and workmanship. The total monetary value under warranty will in no case exceed the cost of the original kit purchased. This warranty does not cover any components damaged by use or modification.
-
Page 2: Items Required For Operation
INTRODUCTION Thank you for purchasing the Thunder Tiger MTA-4 nitro monster truck. Thunder Tiger strives to bring you the highest level of quality and service we can provide. We race and test our products around the world to bring you state-of-the-art items. - Page 3 Also, check your radio for proper operation before operating a mode. 6. Improper operations may cause personal and/or property damage. Thunder Tiger and its distributor have no control over damage resulting from shipping, improper construction, or improper usage.
- Page 4 INSTALLING THE RADIO GEAR Skip if already assembled in RTR version Use a Phillips screwdriver to remove two 3x10mm and two 3x14mm Philip screws on the bottom of chassis, and then take out the radio tray from the car. Install the servos with tap screws. Notice the orientation of the steering, throttle and FWD/REV servo output shafts.
-
Page 5: Installing Steering Servo Linkage
INSTALLING STEERING SERVO LINKAGE Skip if already assembled in RTR version Find the steering linkages in the part bag as shown on the diagram. Install the steering linkage rod onto steering servo saver. Pop the linkage end onto the standoff ball on the steering rack. INSTALLING THROTTLE/BRAKE LINKAGE Skip if already assembled in RTR version Build the throttle/brake linkages as shown on the diagram. -
Page 6: Charging The Glow Plug Igniter
CHARGING THE GLOW PLUG IGNITER Thunder Tiger Optional Part #2165, 1300MAH Glow Starter w/220V Charger. Thunder Tiger Optional Part #2166, 1300MAH Glow Starter w/110V Charger. Thunder Tiger Optional Part #2164, 1300MAH Glow Starter w/240V Charger. Plug the charger into an AC outlet. -
Page 7: Radio Battery Installation
RADIO BATTERY INSTALLATION Install 8 AA-size alkaline batteries into transmitter. Take out the large body clip on the battery box, and remove its top plate. Install 4 AA-size alkaline batteries into battery holder. And then mount the battery holder into the enclosed battery box with the large body clip. RADIO OPERATION When turning radio on, first turn on the transmitter and extend the transmitter antenna. - Page 8 OPERATING RADIO THROTTLE / BRAKE AND REVERSE FUNCTION Check the radio throttle/brake functions. With the radio transmitter and receiver on, pull the trigger/push the stick forward. The carburetor should be fully opened and the brake disengaged. To reverse this function, flip the throttle/brake servo reverse switch. Return the trigger/stick to neutral.
-
Page 9: Adjusting Throttle / Brake Linkage
ADJUSTING THROTTLE / BRAKE LINKAGE 1/16" Gap 1/16" Gap To set the throttle/brake linkage, first the radio should be on and neutral; thus, the servo is at neutral position. With the servo at neutral, turn and adjust plastic brake adjustment nut at the end of the linkage until there is a 1/16"(1.5mm) gap between the spring and the brake lever when the spring is not compressed. -
Page 10: Adjusting Carburetor
ADJUSTING CARBURETOR To set the high speed needle (large needle sticking out from the carburetor body), turn the screw as pictured. Initial high speed needle setting should be 2.5 turns (close the needle completely, then back out 2.5 turns). Clockwise turn will provide leaner setting (lower fuel to air mixture), and counterclockwise turn will provide richer setting (higher fuel to air mixture). -
Page 11: Fuel Selection
(replace with new one). After checking, reinstall the glow plug. The glow plug used for this engine can be: Thunder Tiger 9281, McCoy #9 / #59, Novarossi C4S / C5S / C6S,OS #8 / #A3 / #A5, and Picco P6S / P7S. -
Page 12: Starting The Engine
STARTING THE ENGINE Start the engine using either the pull start or hex start (corddless drill required) When using the dual-start system to start your MTA-4, use both hands to hold the power drill. Check direction of drill before inserting into the dual-start system. -
Page 13: Engine Break-In/Setting
ENGINE BREAK-IN For a new engine (break-in setting), the high speed needle needs to be set as rich as possible. Turn the high speed needle 1/4 turn counterclockwise from initial setting (2.5 turns from fully closed). Repeat step 19b. Keep doing this until the engine stalls at full throttle, then turn the high speed needle 1/4 turn clockwise. -
Page 14: Set Up
SET UP Two-Speed Adjustment Shift Shift Earlier Later Your truck's two-speed shift point is preset from the factory. It should shift into 2nd gear within 12-15 feet on a full- throttle, standing-start acceleration. If you wish to adjust the shift point, first shut down the engine then open the two-speed access cover on the transmission case. -
Page 15: Shock Springs
Shock Springs Stiffer springs will give you better handling and higher cornering speed on smooth surfaces such as asphalt, concrete, and hard pack dirt. Soft springs are better for rougher terrain, rock crawling and jumping. Softer springs will increase the rollover tendency of the truck at higher speeds. Part Number Spring Color Spring Rate... - Page 16 Realistic styled body shell, wheels and tires match the design of full size monster trucks. Easy & quickly body open system. THUNDER TIGER PRO-21BX-R(P) ENGINE Blue Body Red Body THUNDER TIGER CORPORATION www.thundertiger.com.tw...