Table of Contents
Advertisement
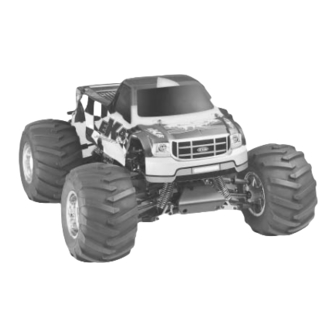
1/8 OFF-ROAD, 4WD MONSTER TRUCK
No.6216
JD1440.V3
Thunder Tiger Corporation guarantees this model kit to be free from defects in both material and workmanship.
The total monetary value under warranty will in no case exceed the cost of the original kit purchased. This warranty
does not cover any components damaged by use or modification. Part or parts missing from this kit must be
reported within 60 days of purchase. No part or parts will be sent under warranty without proof of purchase.
To receive part or parts under warranty, the service center must receive a proof of purchase and/or the defective
part or parts. Should you find a defective or missing part, contact the authorized Thunder Tiger Service/Distributor
nearest you. Under no circumstances can a dealer or distributor accept return of a kit if assembly has started.
Advertisement
Table of Contents

Related Manuals for THUNDER TIGER EK4-S2


Summary of Contents for THUNDER TIGER EK4-S2
- Page 1 No.6216 JD1440.V3 Thunder Tiger Corporation guarantees this model kit to be free from defects in both material and workmanship. The total monetary value under warranty will in no case exceed the cost of the original kit purchased. This warranty does not cover any components damaged by use or modification. Part or parts missing from this kit must be reported within 60 days of purchase.
- Page 3 INSTALLING THE RADIO GEAR Take out the 4 screws on the chassis securing the plastic servo tray. Install the servos with tap screws. Notice the orientation of the steering and throttle servo output shafts. Install the receiver switch onto the rear of the receiver box with its original screws. Properly plug the connectors/wires into the receiver: steering servo connector/wire into channel 1 slot, throttle servo connector/wire into channel 2 slot, and battery switch connector/wire into battery slot.
-
Page 4: Charging The Glow Plug Igniter
Install the servo horn onto throttle sero output shaft. CHARGING THE GLOW PLUG IGNITER Thunder Tiger Optional Part #2165, 1300MAH Glow Starter w/220V Charger. Thunder Tiger Optional Part #2166, 1300MAH Glow Starter w/110V Charger. Plug the charger into an AC outlet. -
Page 5: Preparing The Radio
PREPARING THE RADIO Check the frequency printed on the transmitter crystal. Check the frequency printed on the receiver crystal, and make sure it matches with the transmitter crystal. Make sure no one will operate on the same frequency when you are. When there is a radio glitch, it will most likely be caused by improper crystal, damaged crystal, or people operating on the same frequency. -
Page 6: Operating Radio Steering Function
OPERATING RADIO STEERING FUNCTION Install the wheel Install the tire/ extension wheel as shown. wrench as shown. OPERATING RADIO STEERING FUNCTION Check the radio steering functions. With the radio transmitter and receiver on, turn the steering wheel/stick to the left. The front tires/wheels should turn left accordingly. If not, flip the steering servo reverse switch. -
Page 7: Adjusting Throttle / Brake Linkage
ADJUSTING THROTTLE / BRAKE LINKAGE To set the throttle/brake linkage, first the radio should be on and neutral; thus, the servo is at neutral position. With the servo at neutral, turn and adjust the brake collar to a point where the brake lever almost engages the brake system, but not yet. -
Page 8: Fuel Recommendation
The engine operates best with a platinum coil plug rated at medium to hot temperature. The following is a list of glow plugs suitable for use in this engine: Thunder Tiger 9281, Enya #3/#5, McCoy #9/#59, Novarossi C4S/C5S/C6S, OS A3/A5/#8, and Picco P6S/P7S. -
Page 9: Preparing The Engine
PREPARING THE ENGINE To start an engine, first remove the glow plug. Check the glow plug by plugging it into the glow plug igniter. The glow plug element should light up brightly. If it lights up dimly, then the glow plug igniter is low (and it needs recharging). If it does not light up or the plug element looks distorted, then the glow plug is bad (replace with new one). -
Page 10: Engine Tuning
BREAK-IN or a new engine, a fuel with low nitro rating and high oil content is highly recommended for the first 10 tanks (125cc per tank). Although one can use a fuel with nitro and oil rating combination stated within the recommended guidelines, 5% nitro and 25% oil is best during break-in period. - Page 11 2. Check the carburetor's mid speed needle / spray bar. Set the mid speed needle / spray bar (small screw in the center and on the side of carburetor body) so that its outer most edge sits flush with the carburetor body side.
- Page 12 ERGAL RR plate FR trans ERGAL rear toe-in block, 2 degree ERGAL front knuckle ERGAL engine mount ERGAL heat sink head Carbon battery plate Carbon servo tray Aluminum shock set & mount Center & rear universal THUNDER TIGER CORPORATION www.thundertiger.com.tw...